
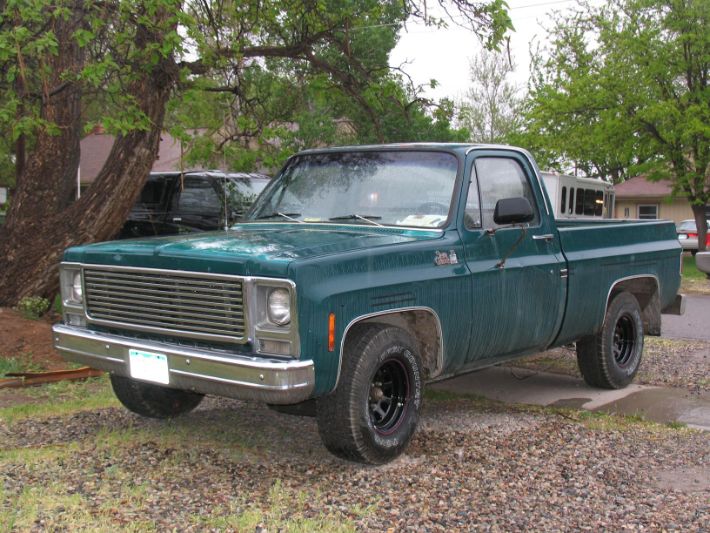
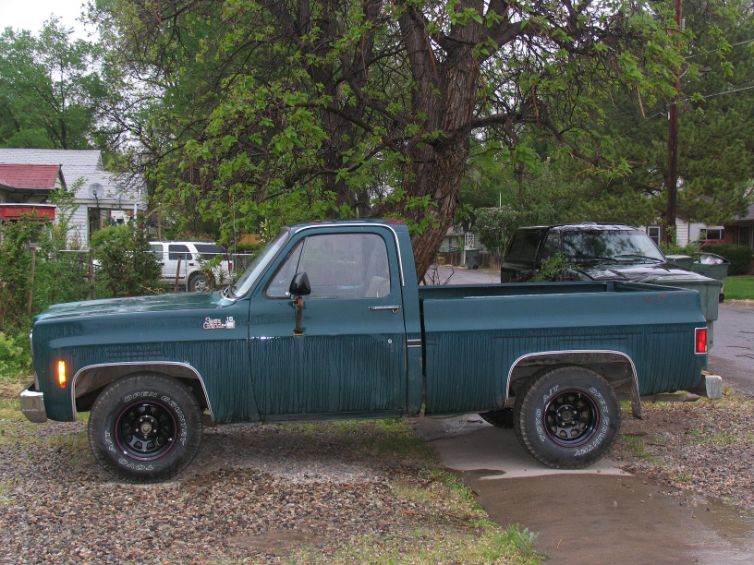
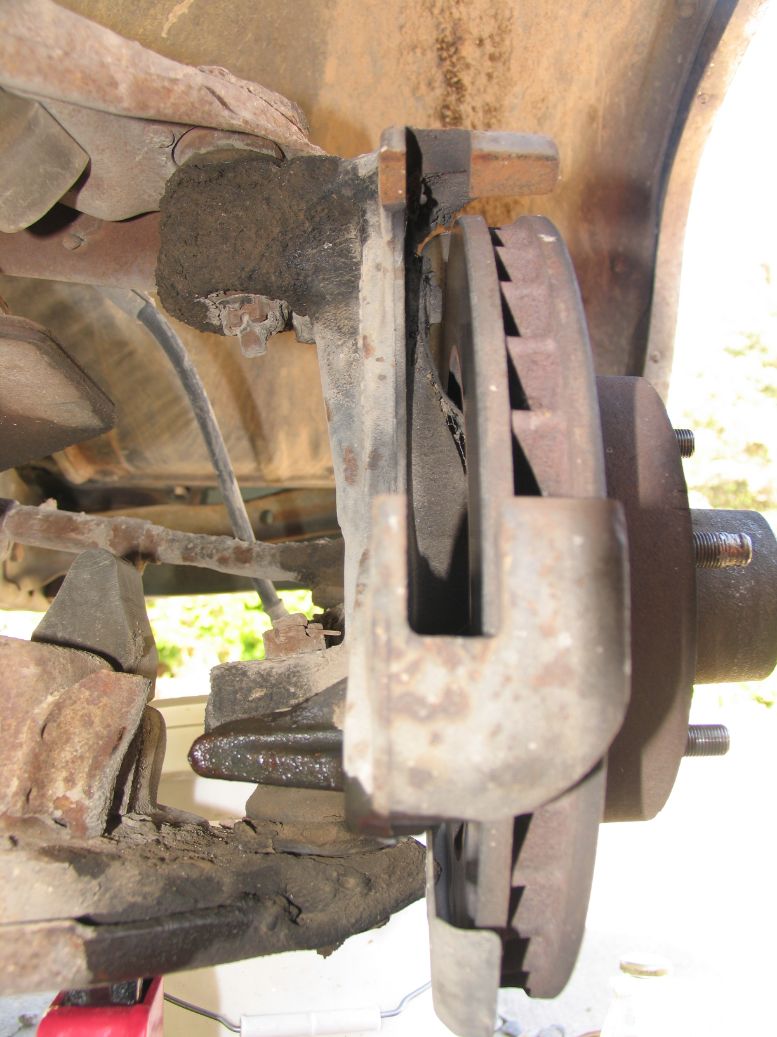
Back in 2006 maybe 07 I bought a 1979 GMC Sierra Grande C15, also known as a heavy half ton, truck from a guy at work for $500. At the time I was remodeling a house and I needed a dump run truck to haul lath and plaster and other construction debris. It was a good deal at $500 but it definitely needed some work. About a week after I bought it the brakes gave out one day and the clutch peddle popped in and out real hard making it impossible to start moving without peeling out. The clutch was a matter of a bolt missing where it attaches under the dash, easy fix, but the brakes? Rather than messing around with trouble shooting I just replaced it all. On a vehicle that old it was likely to go bad eventually anyways and doing that was still cheaper than taking it to someone. I replaced the master cylinder, calipers in front, slave cylinders in back, turned the drums and replaced the rotors, and of course new pads and shoes. I inspected all the brake lines and flushed them out really good and since I’m in Colorado, a relatively rust-free state, I didn’t replace the lines.
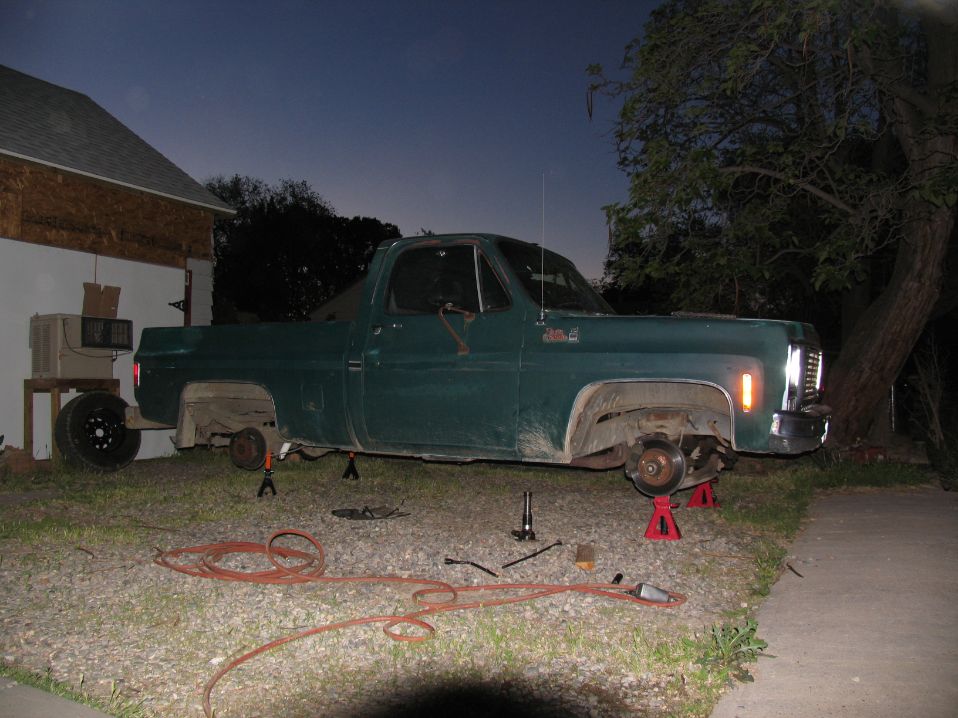
A couple years of using it for dump runs went by and I started to notice a real bad drift in the steering. This thing got like 5 miles to the gal at highway speeds because of the gearing, I didn’t take it on the highway often but when I did it was scary. So, in my usual fashion I decided to go through it all and start replacing everything. I put it up on jack stands and started disassembling it, it was definitely in need of an overhaul. I spent the next 6 months working on it on my time off and at the time I did a build thread on one of the Chevy/GMC forums but found out later that they don’t save posts for very long and the thread is long since gone. I’ve always been a fan of build threads and have learned a lot from reading other peoples and hopefully others have learned from mine. I am by no means a mechanic; I am definitely a parts replacer. I post this up in the hopes it helps another parts replacer make decisions on how they what to do their build. Basically it’s for entertainment purposes only.
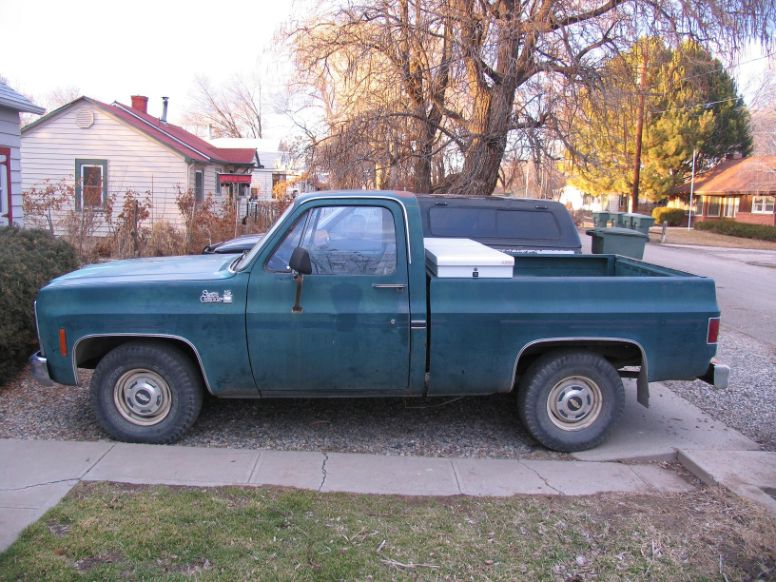
I eventually sold the truck to a buddy of mine and used the money to buy my raft trailer. The guy I sold it too was telling me as he bought it about how he was going to lower the front and tub the back. When he pulled the wheels off to start looking at how he was going to do it he said he stopped and just put the wheels back on, it was too pretty to mess with the job I had done, this was 6 years after. Instead, he sanded it down and repainted it, fixed up the interior, cleaned up a few other things and as far as I know is still driving it today. I haven’t seen him in a couple years.

The Teardown:
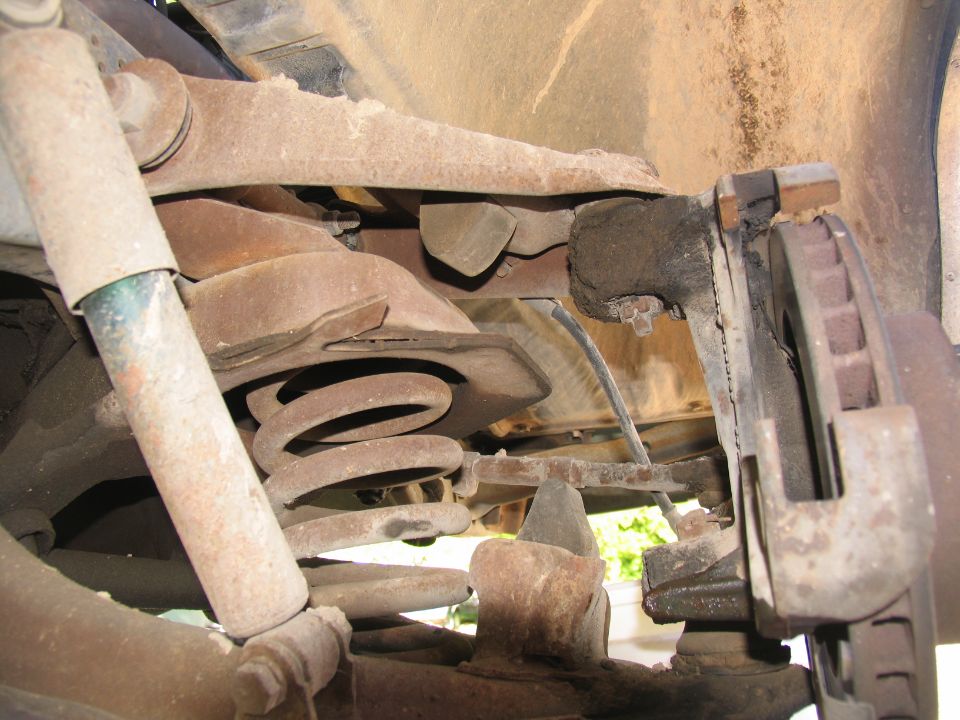
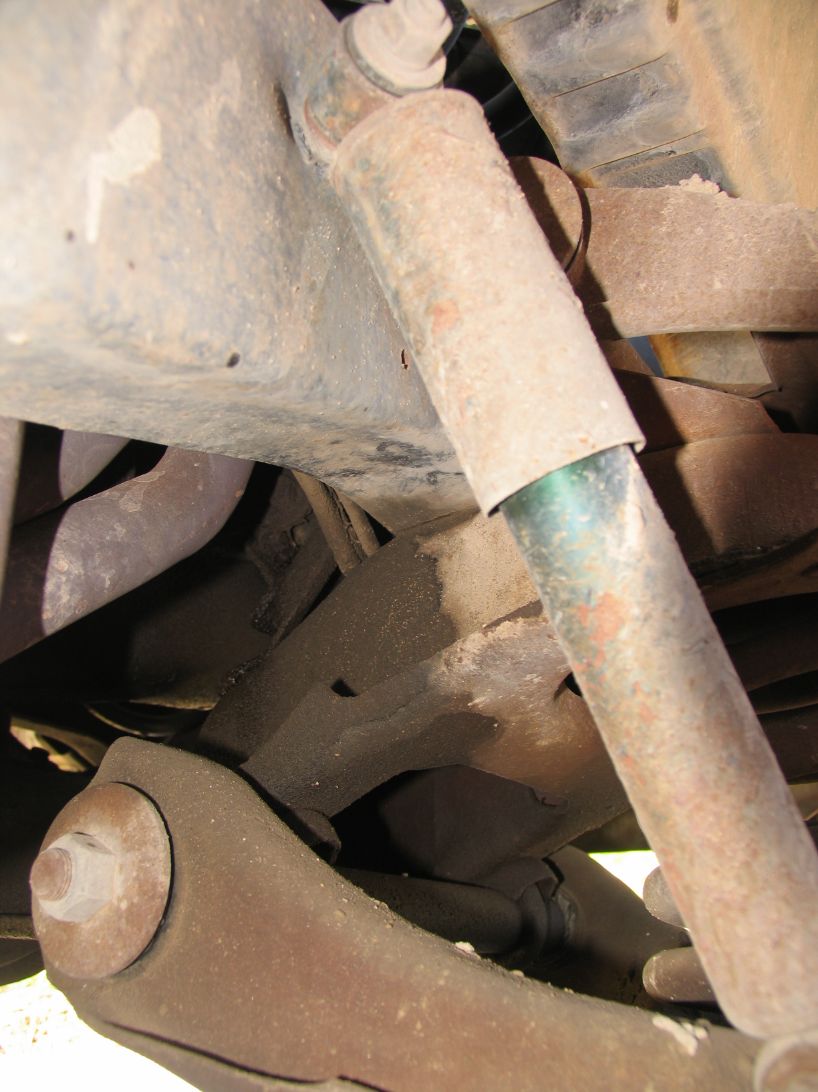
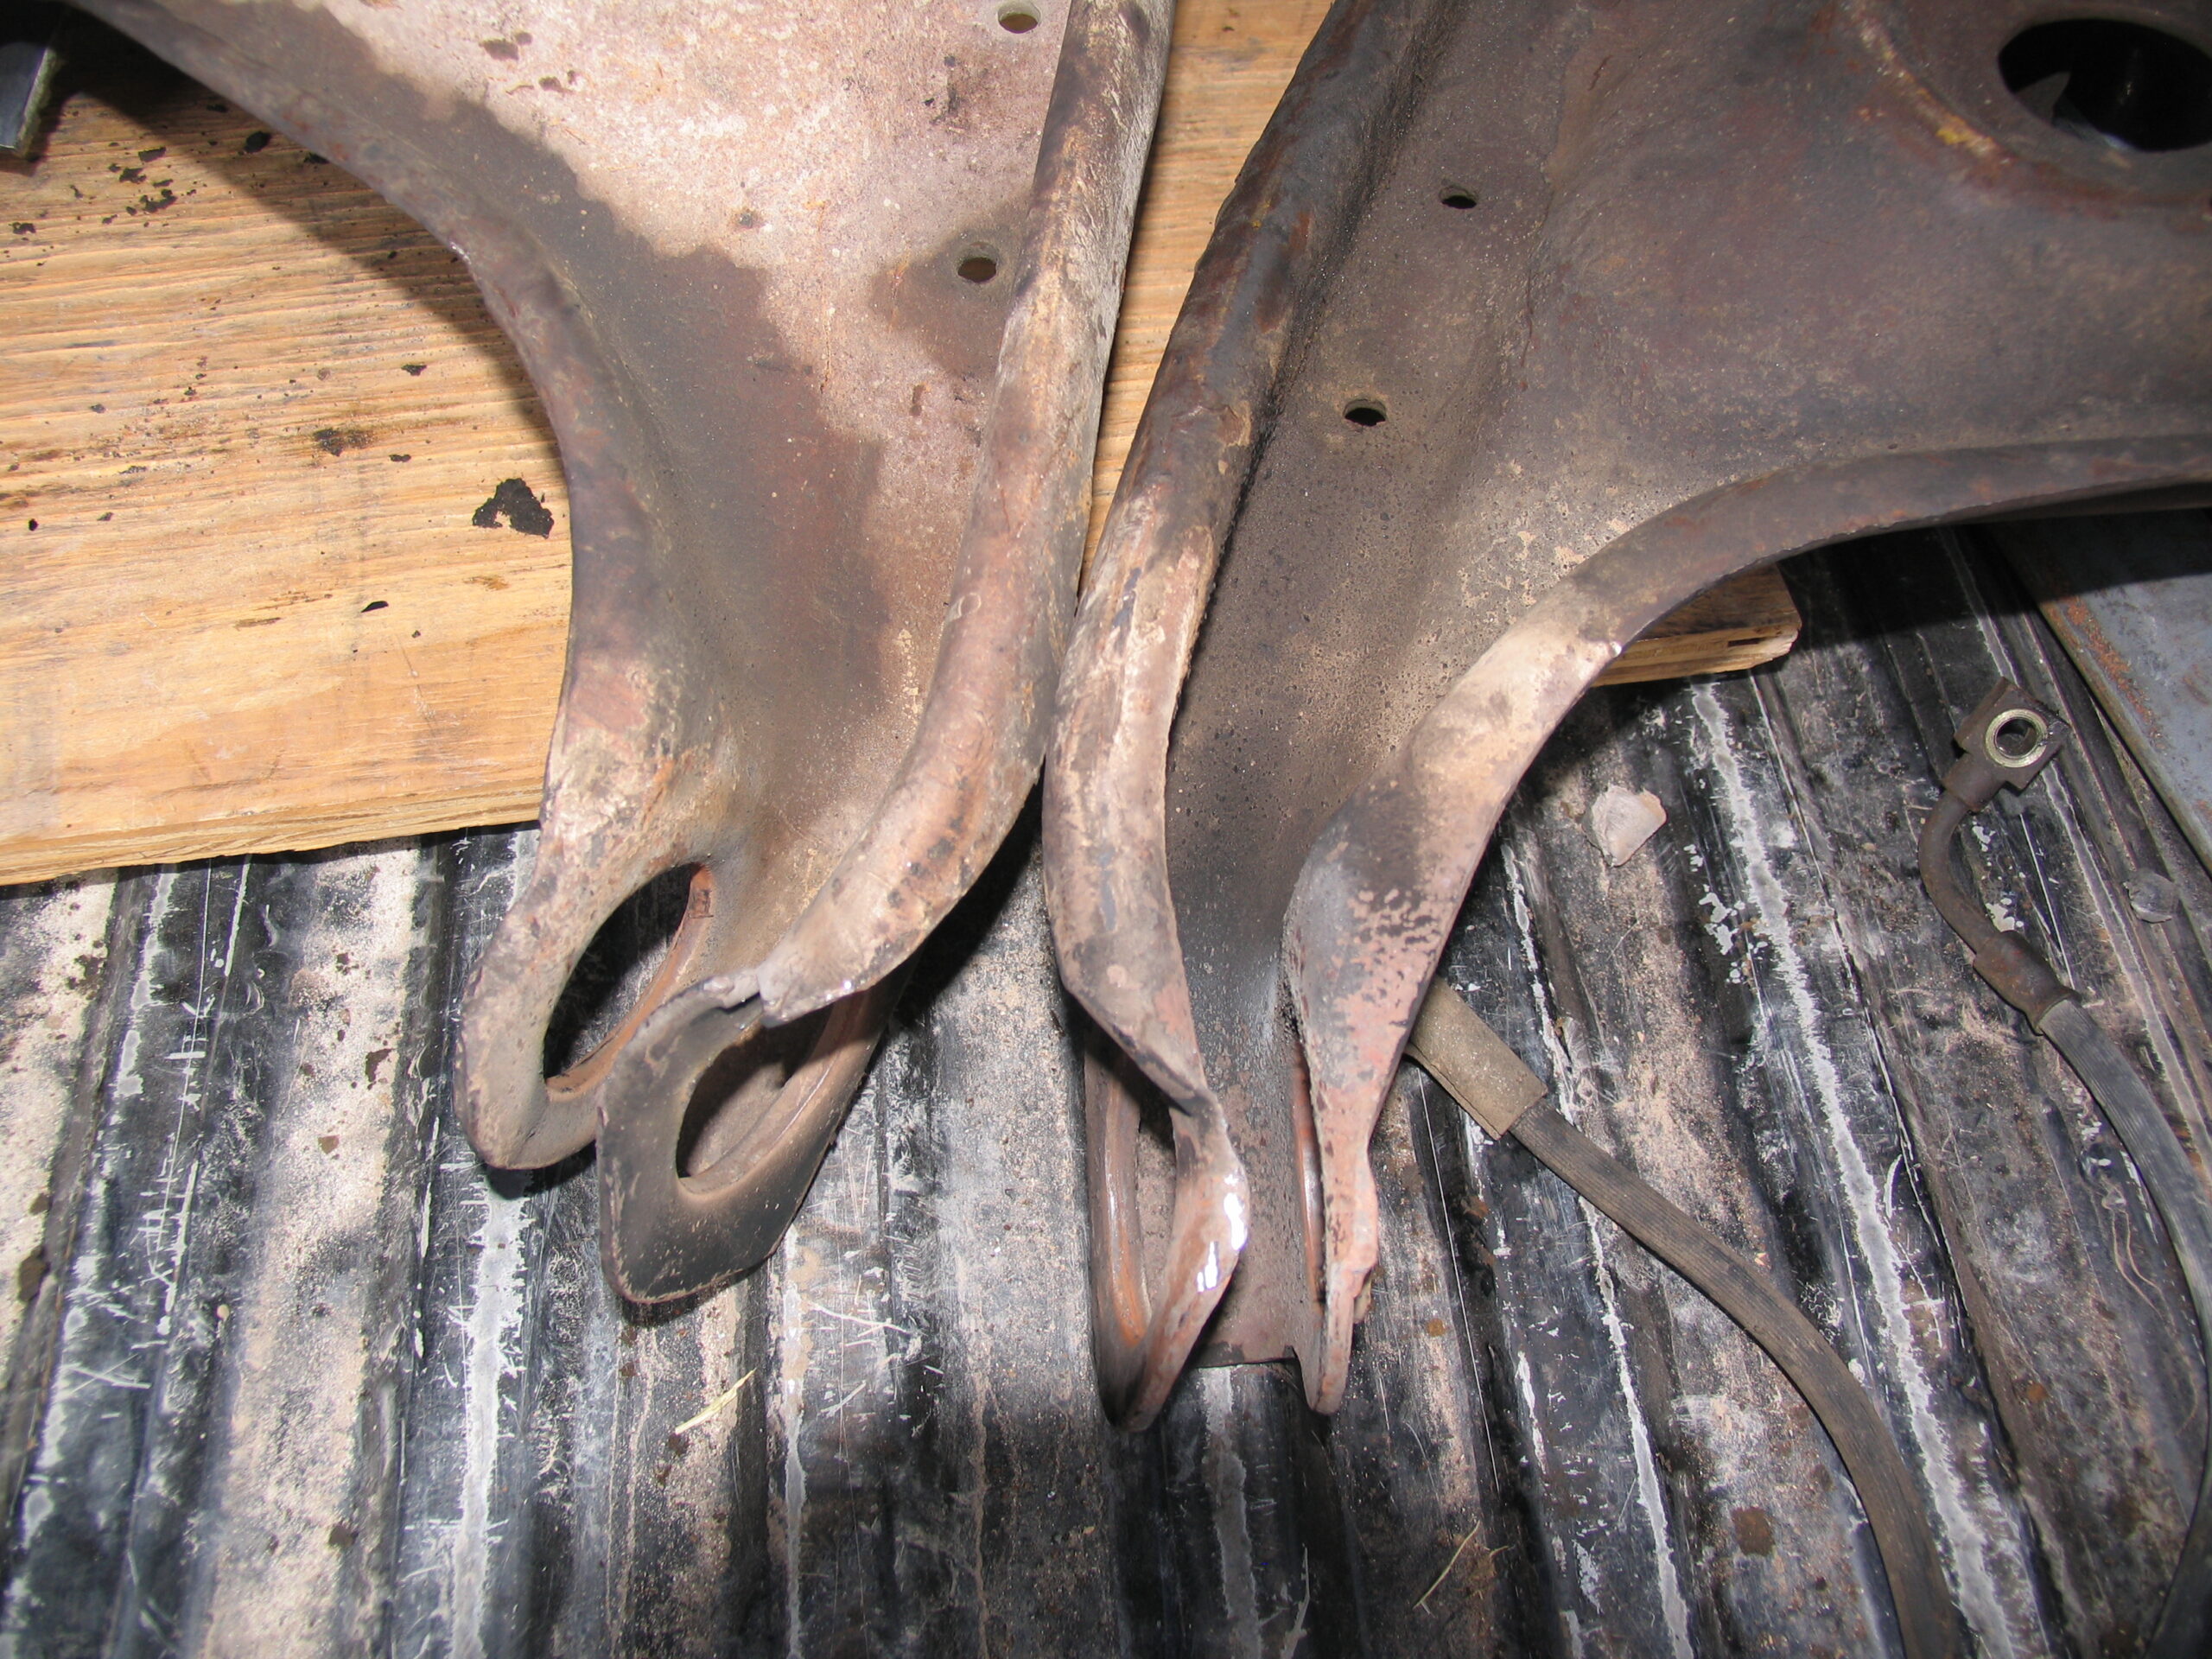
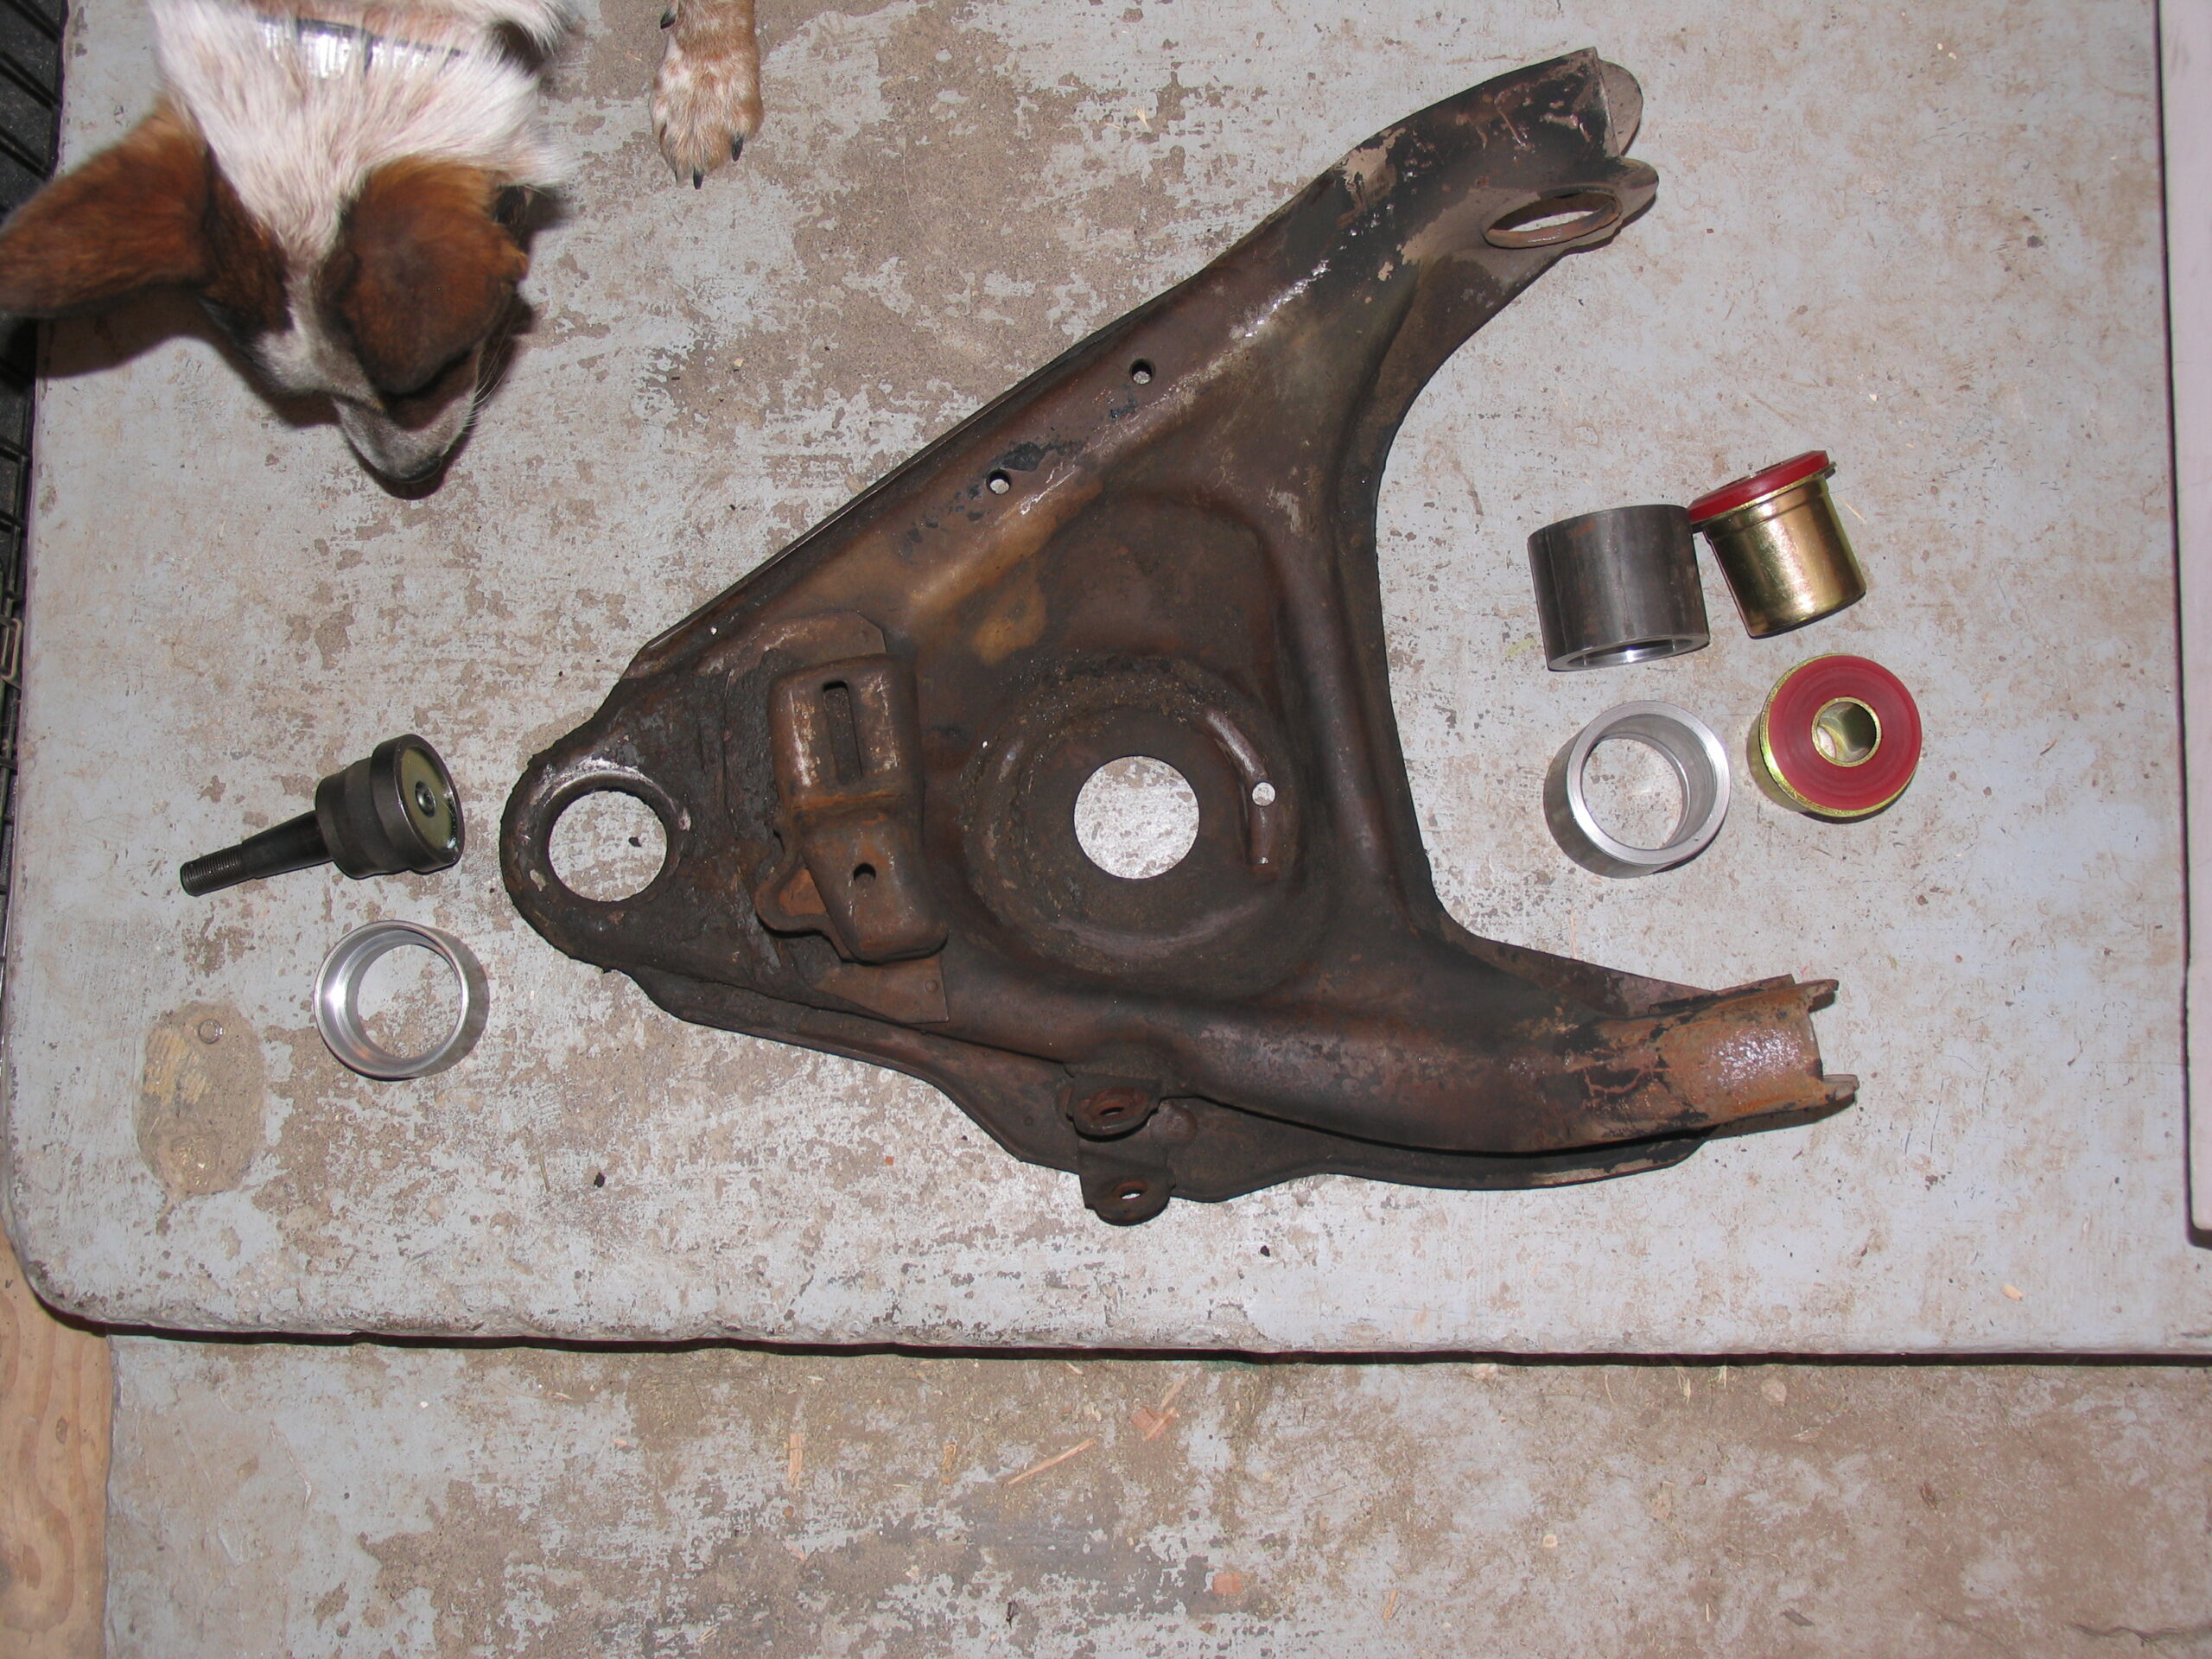
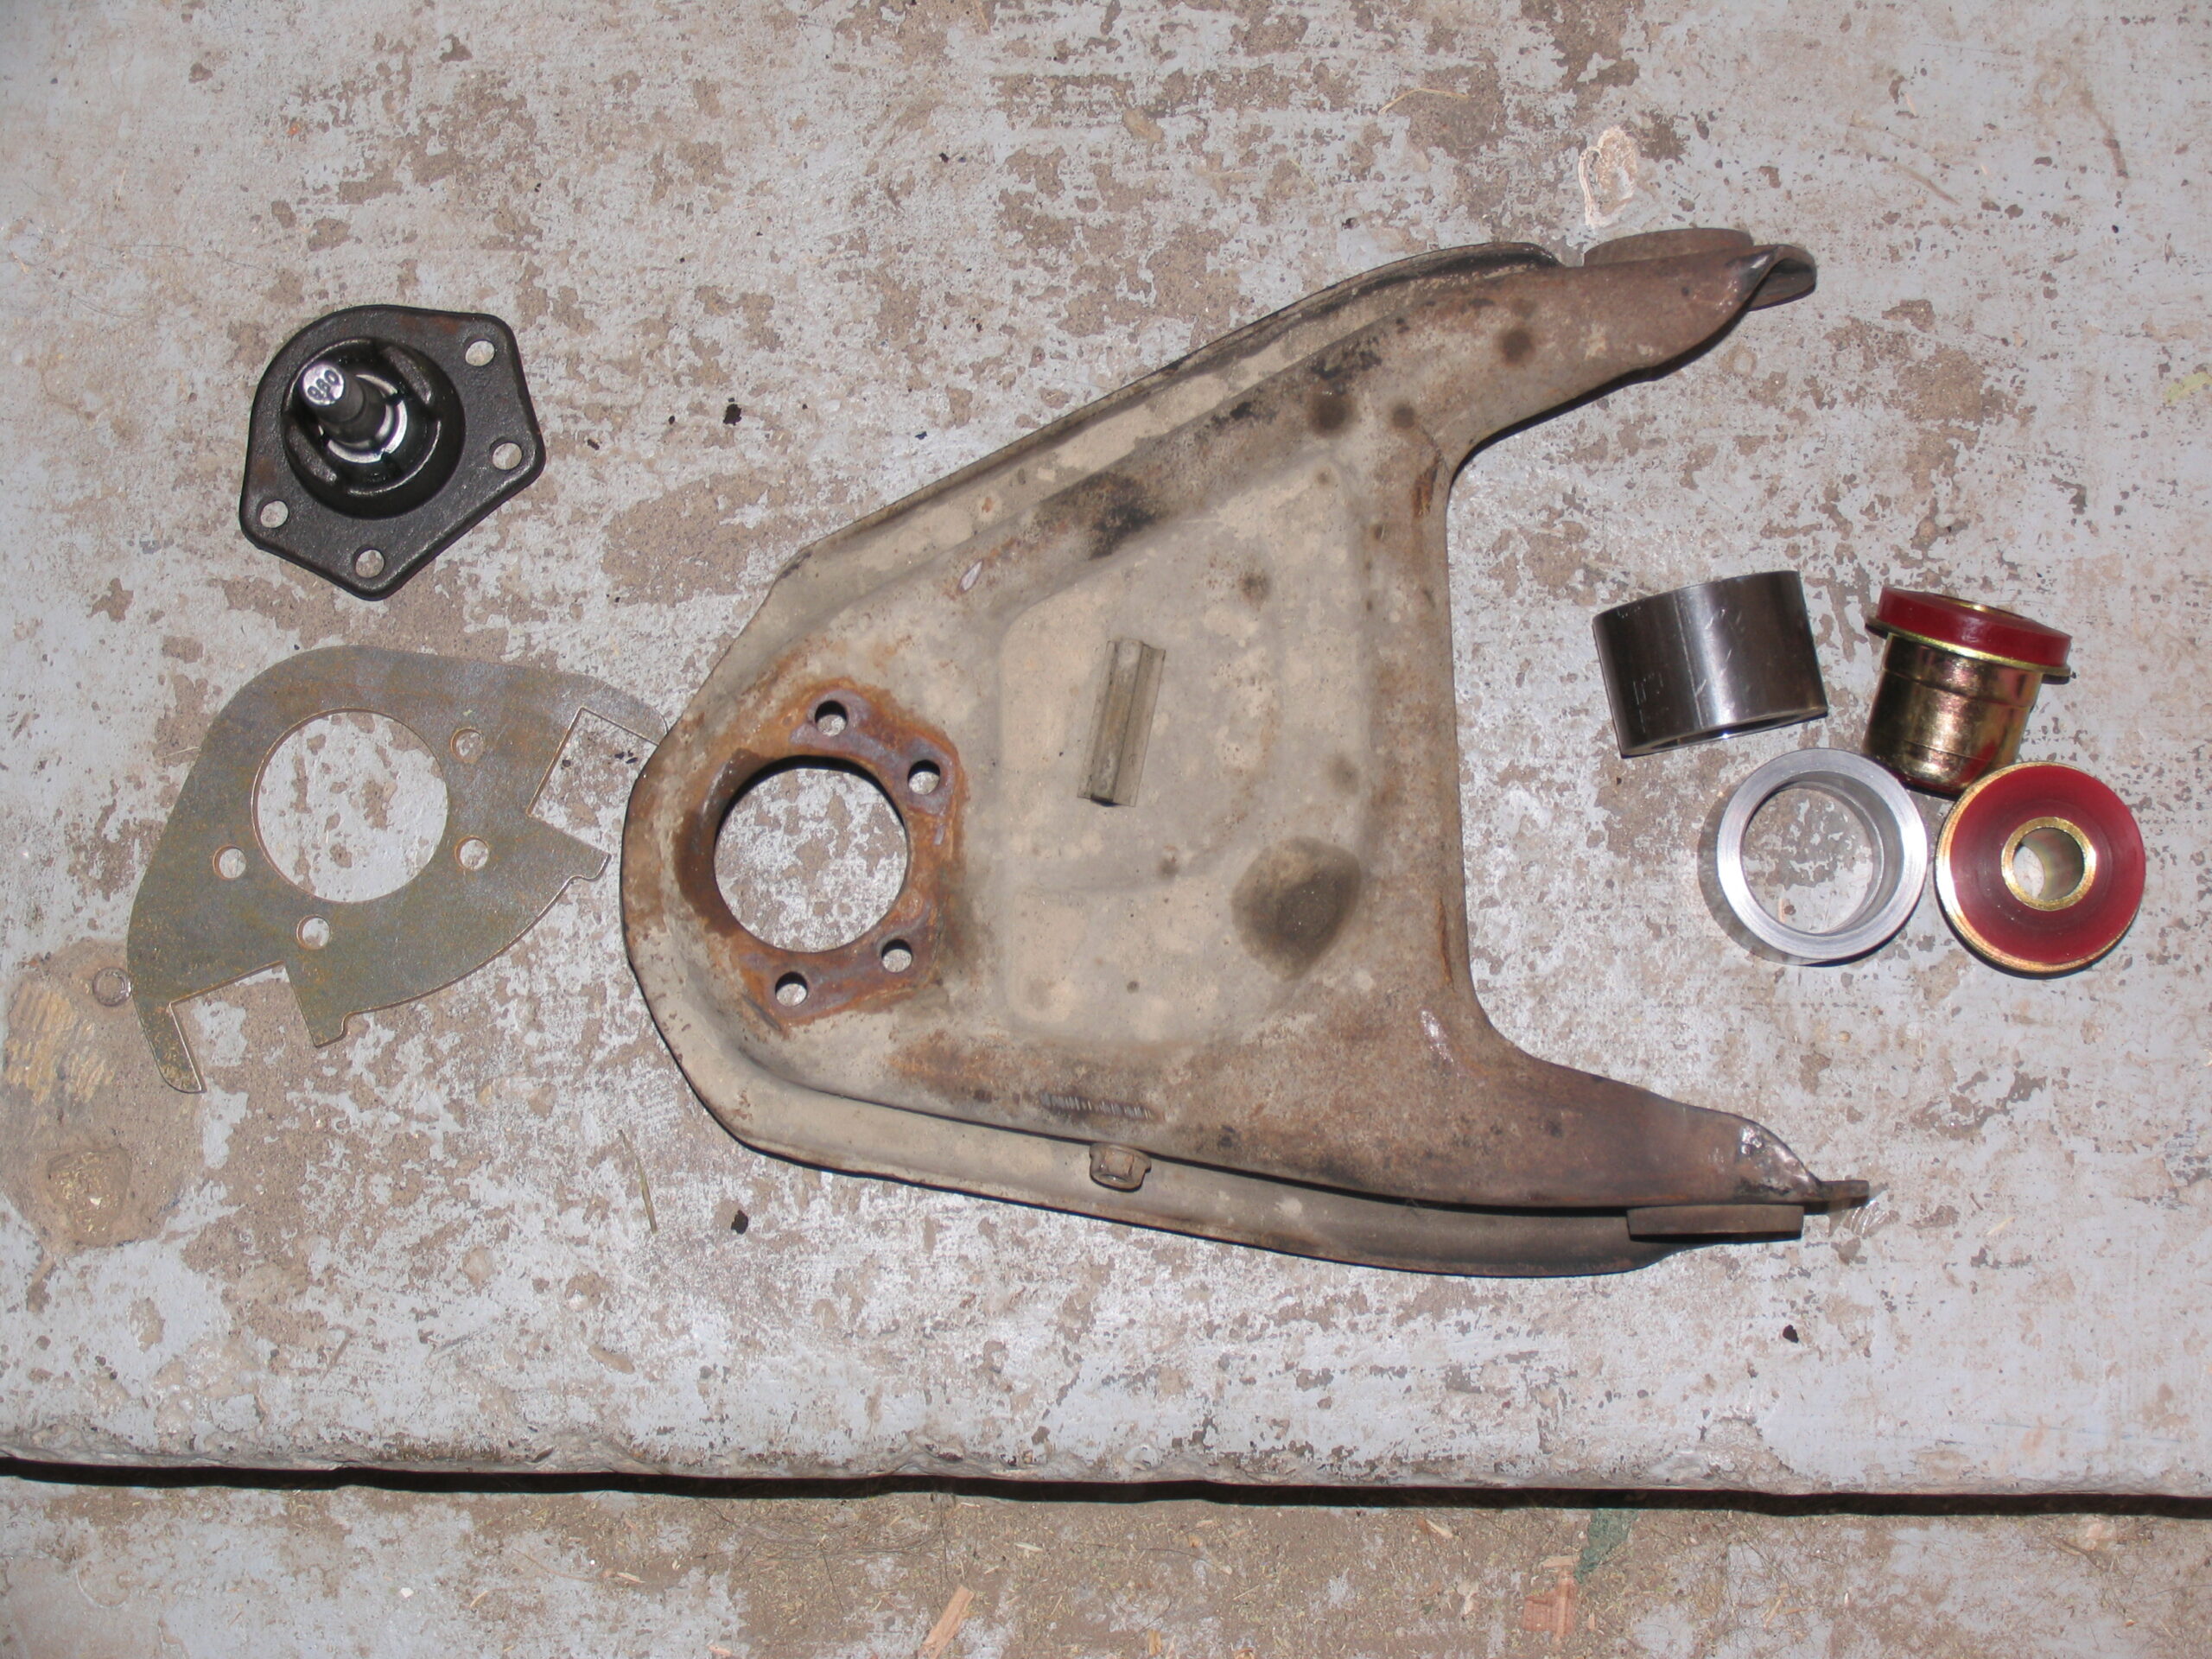
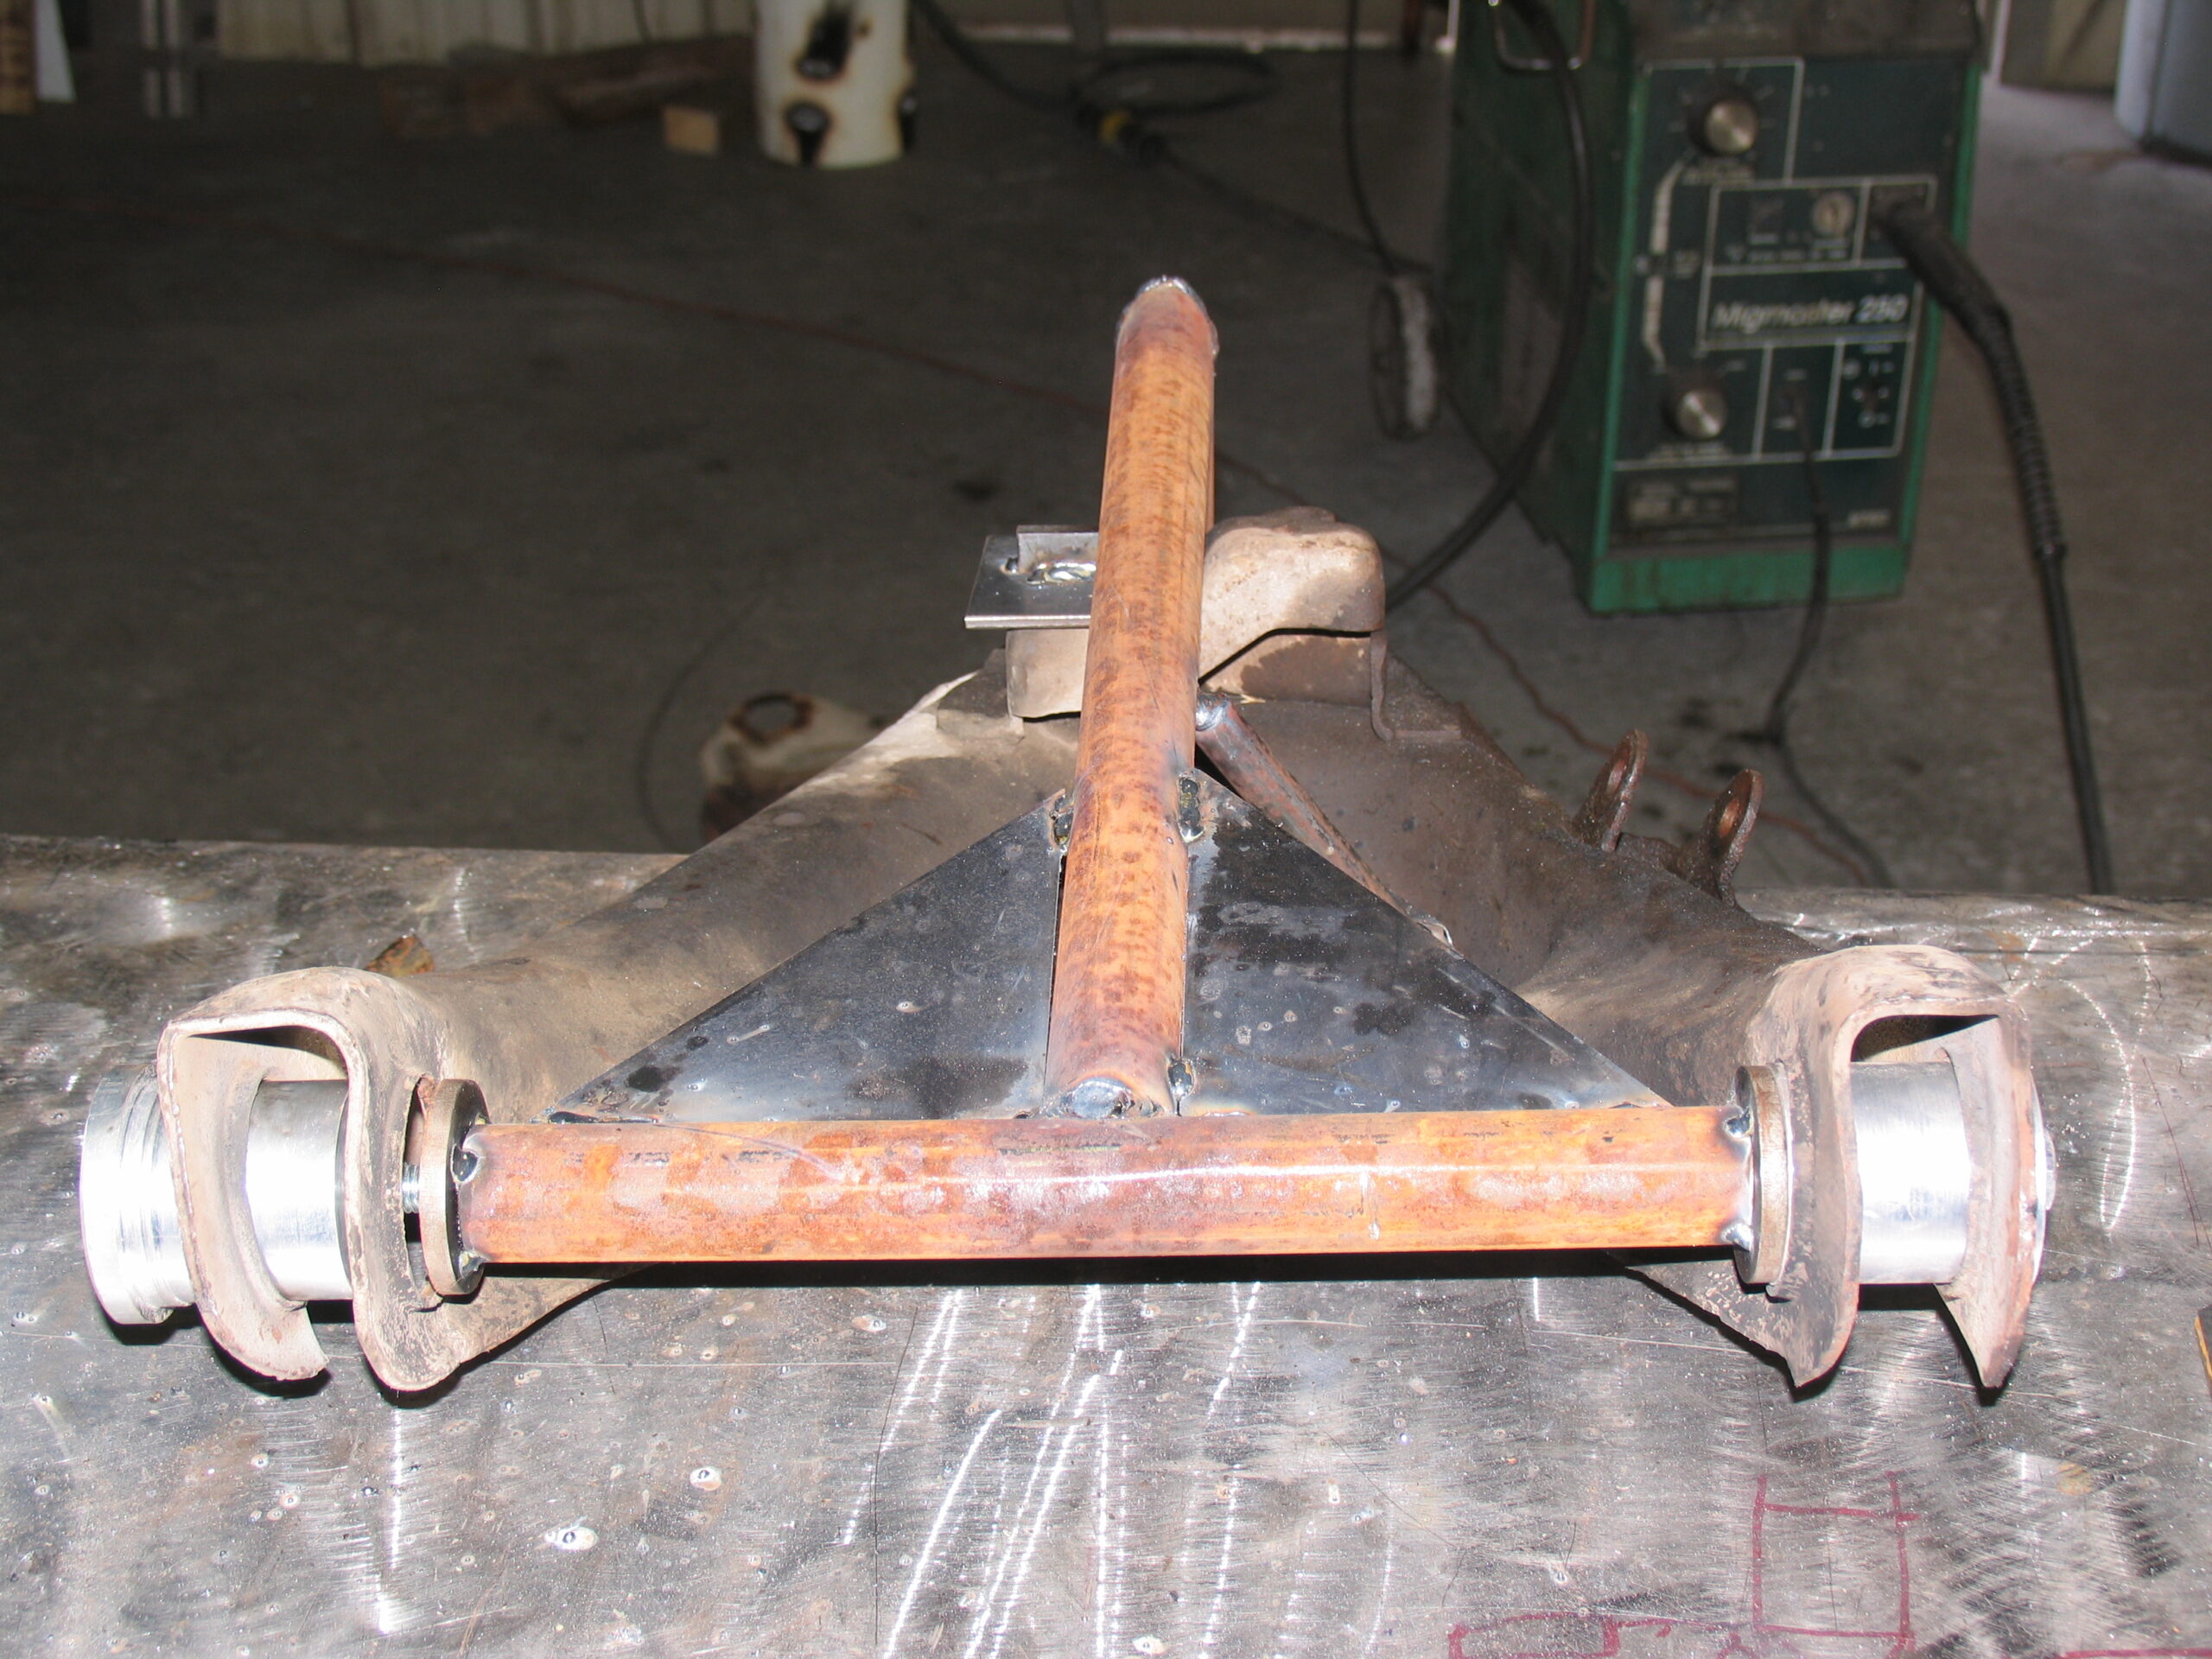
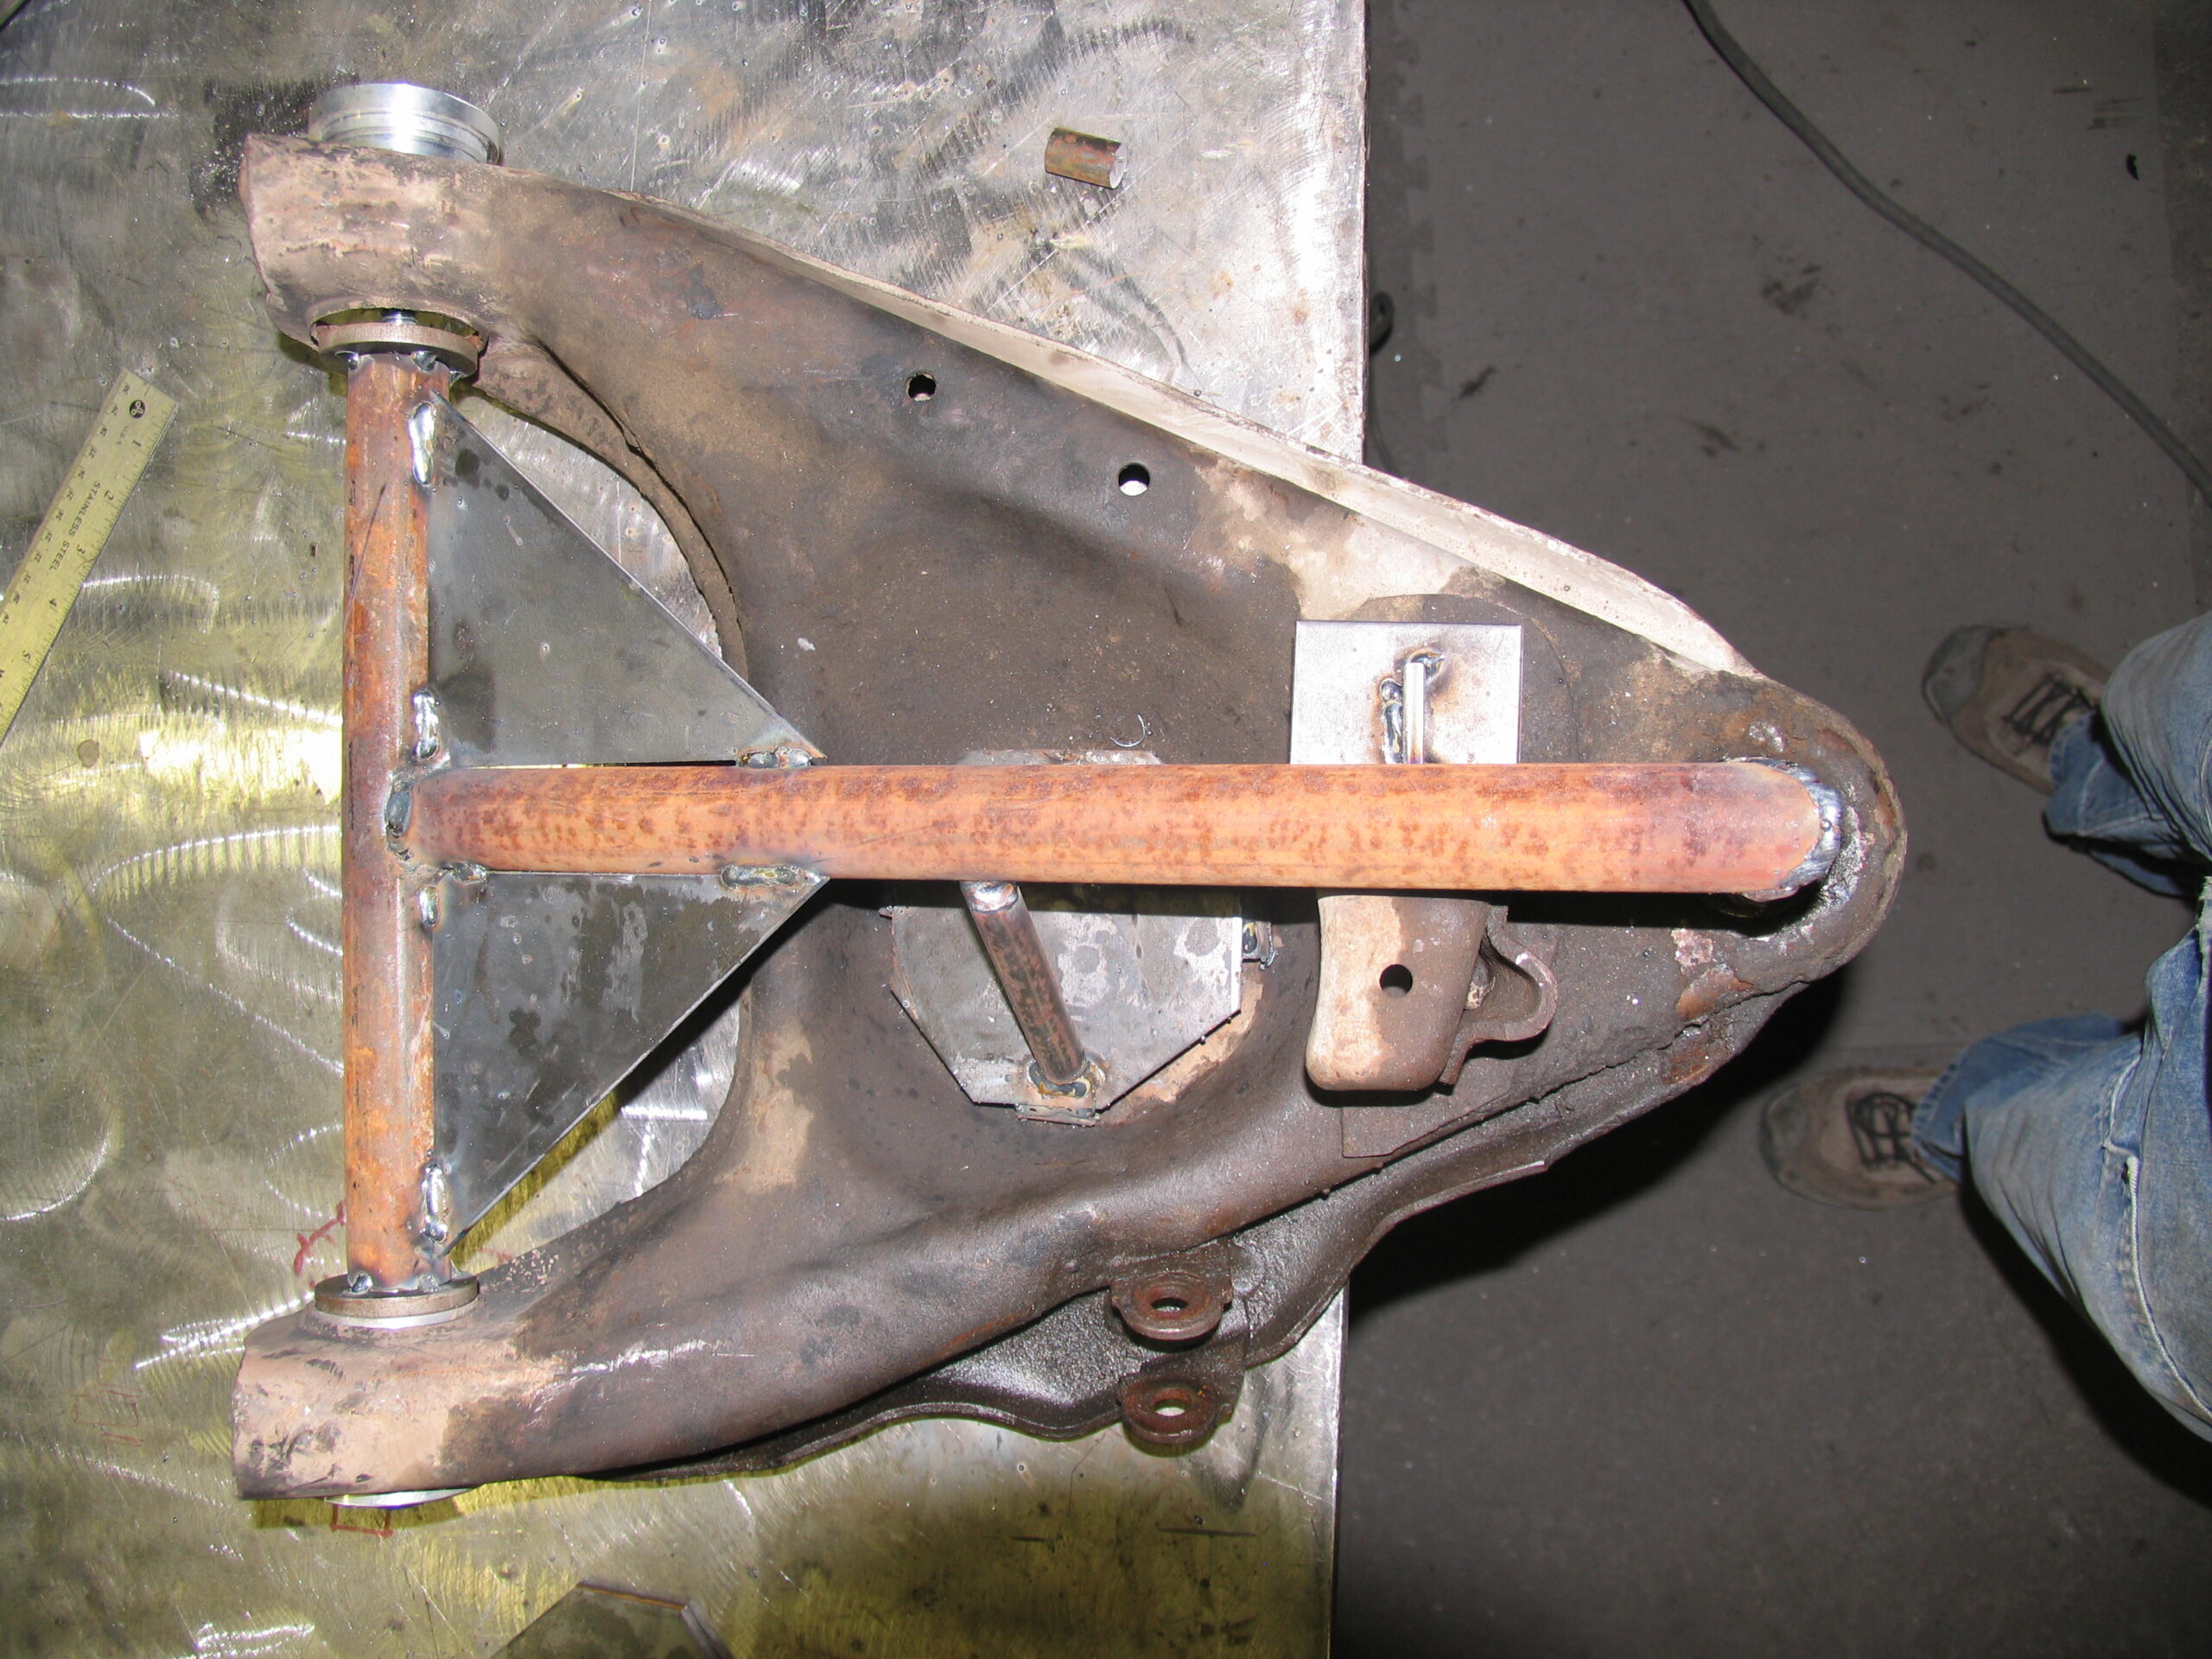
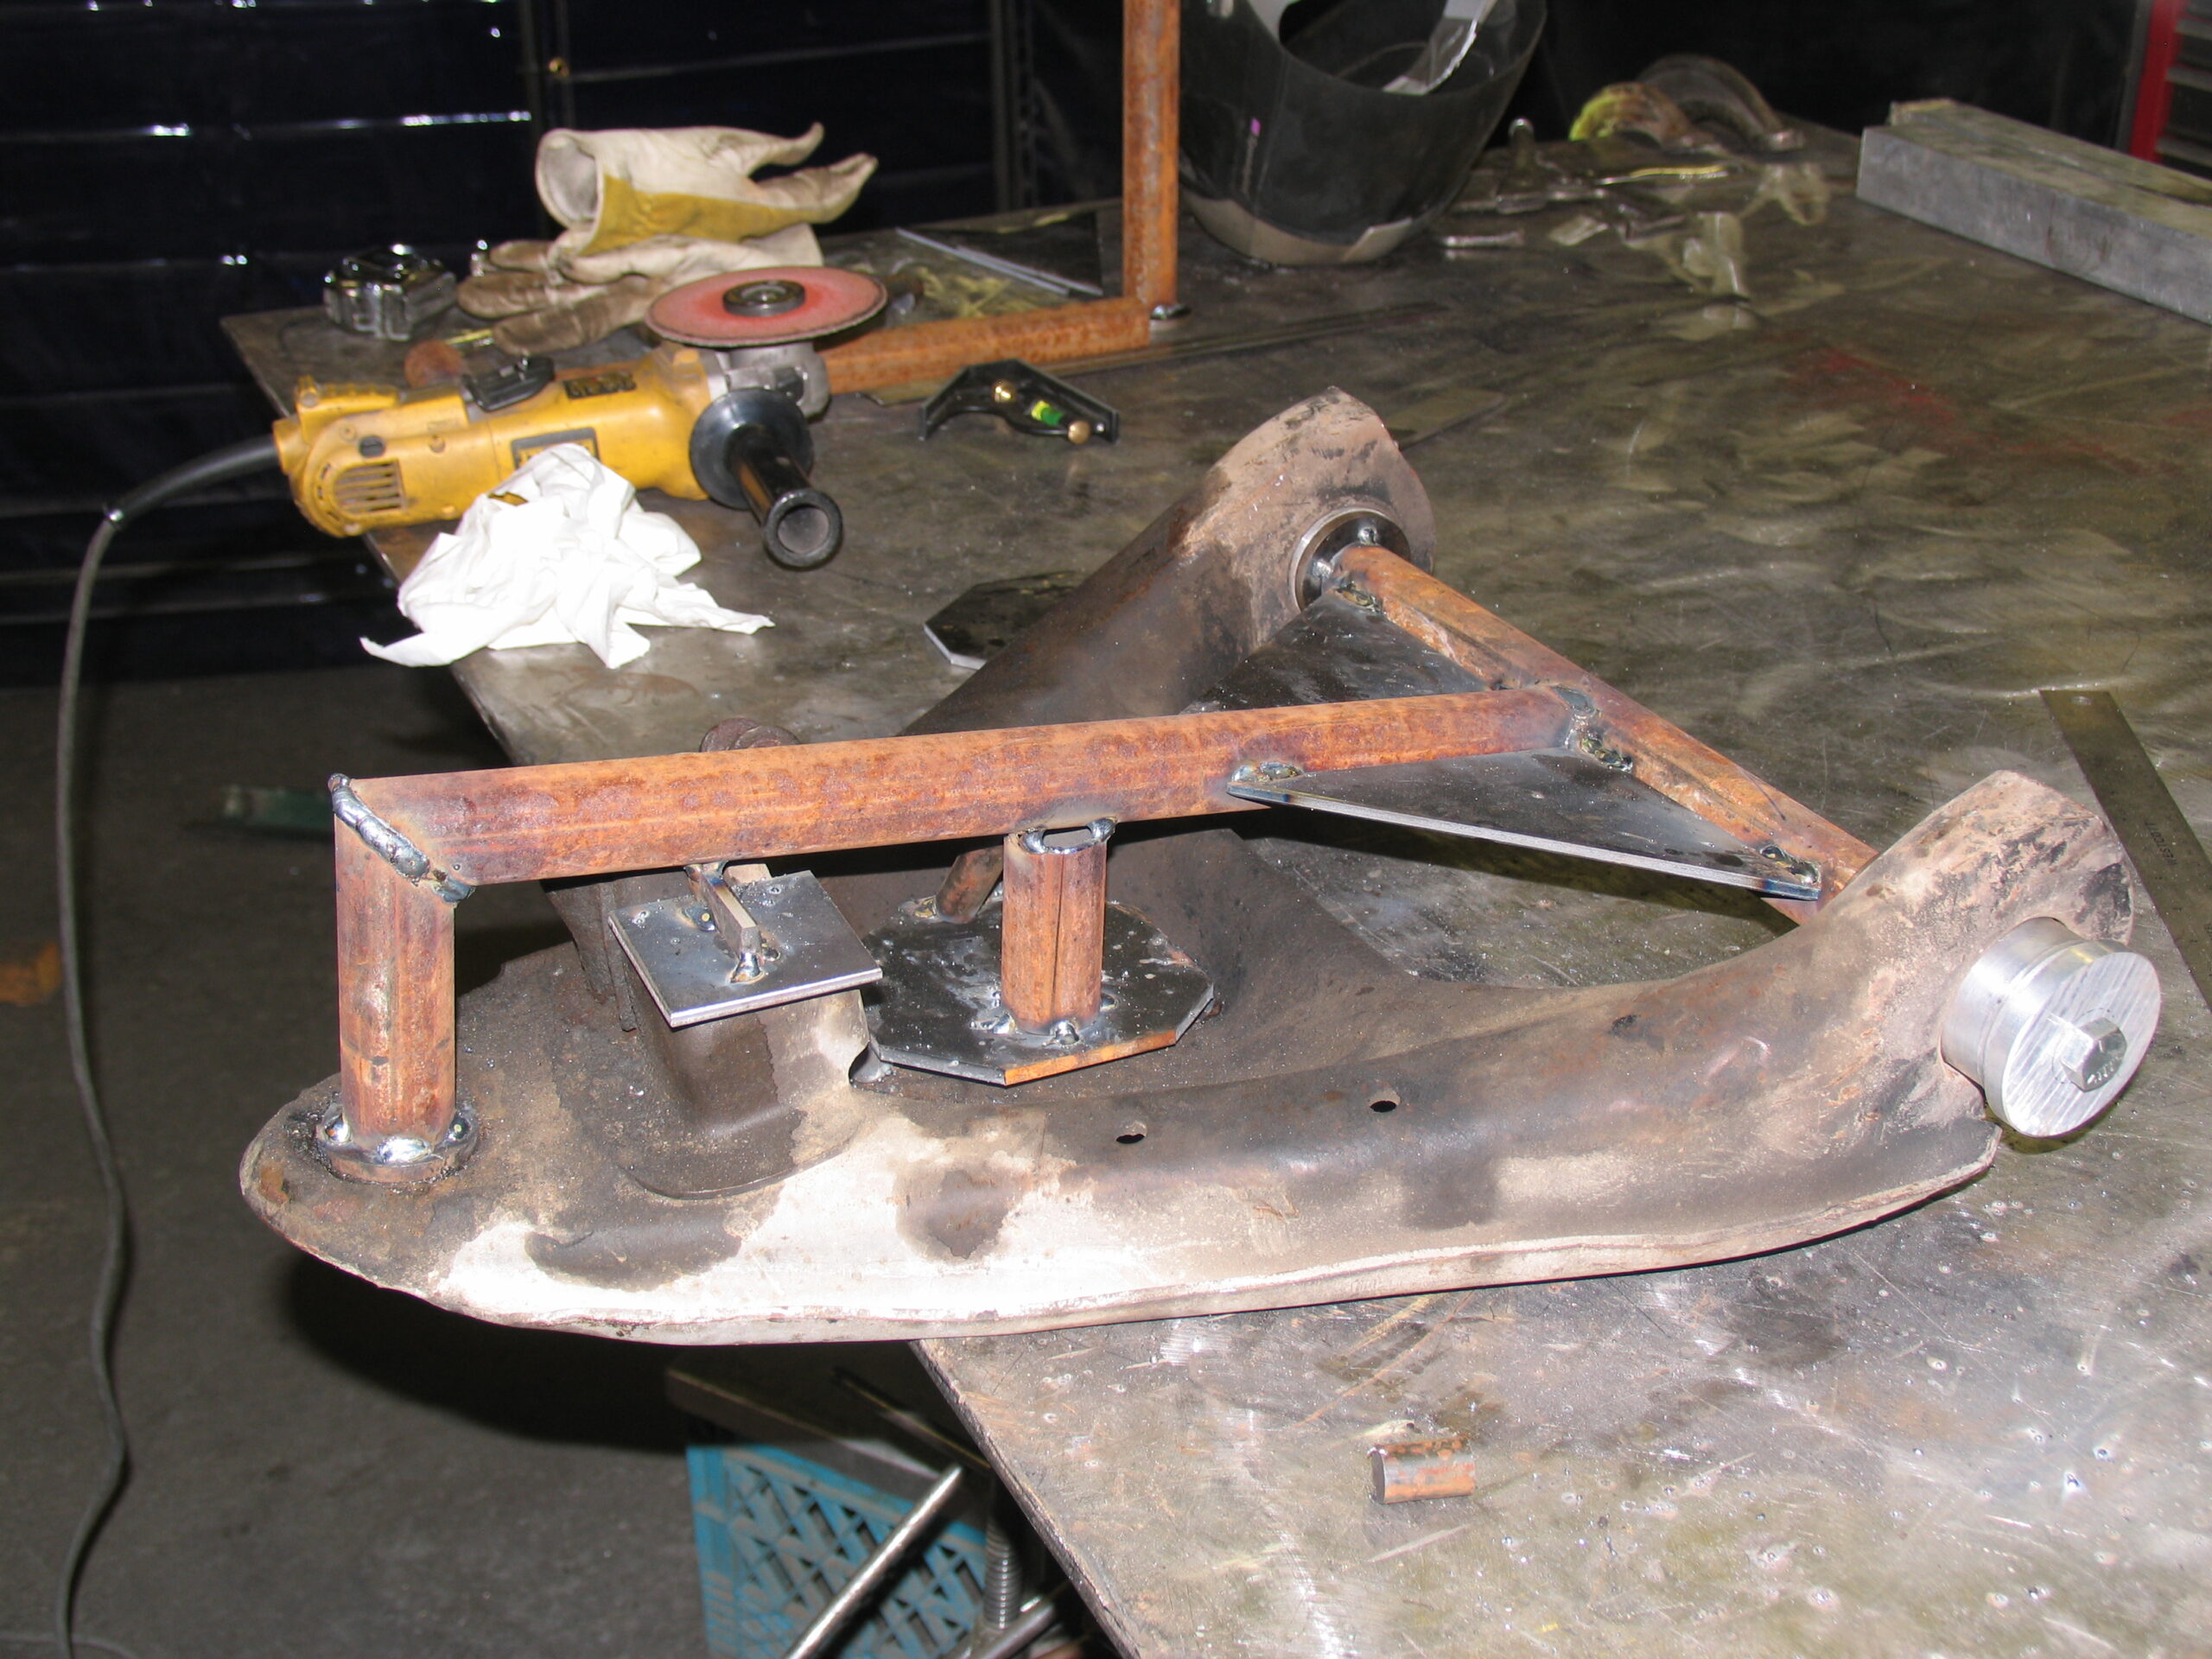
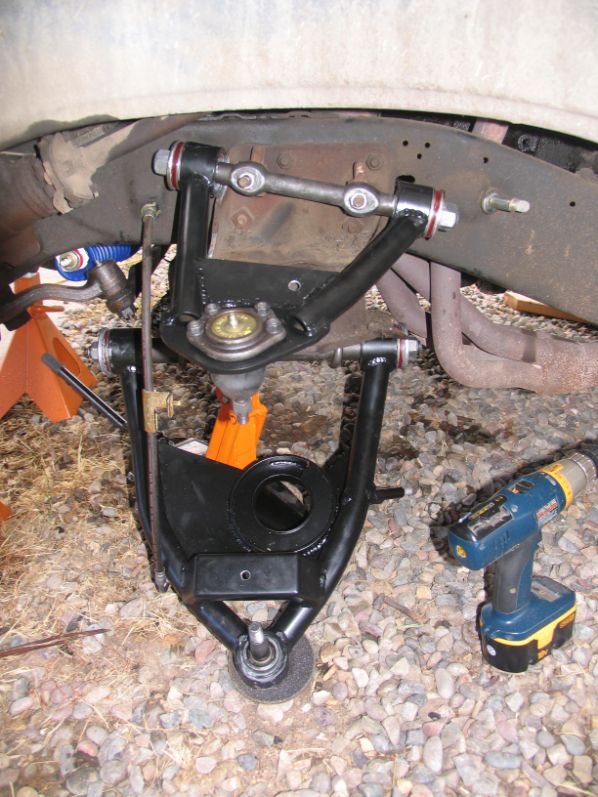
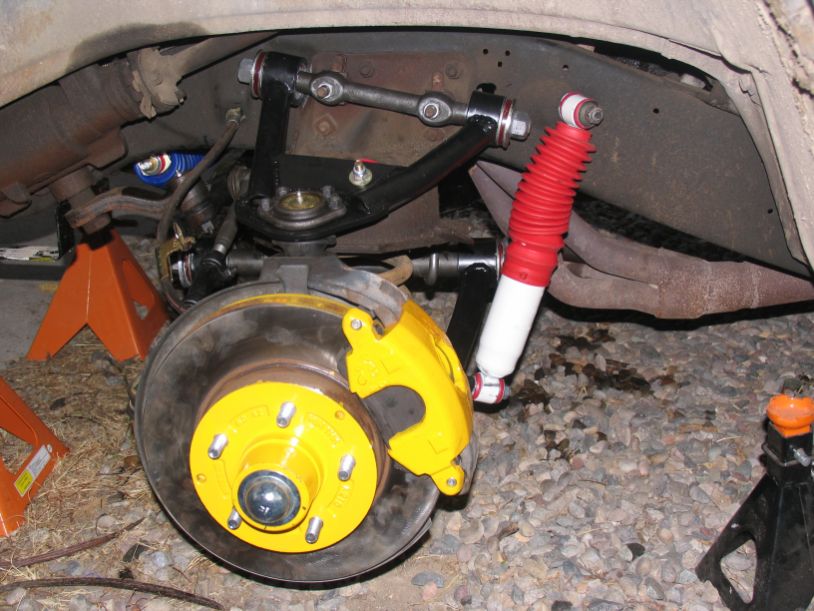
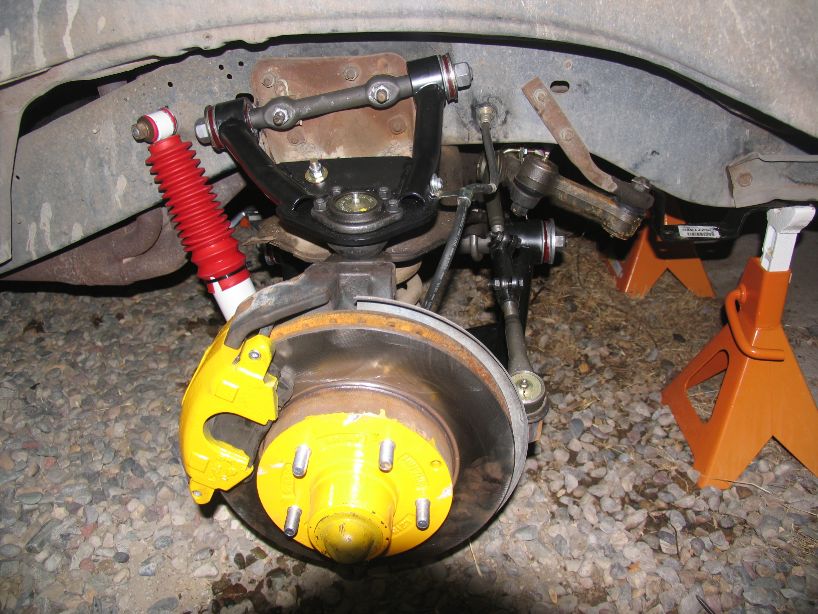
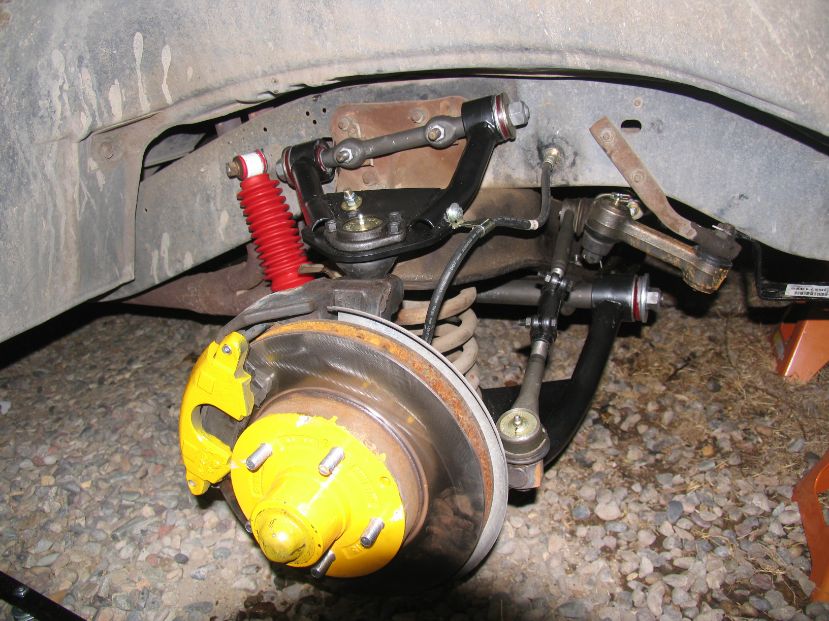
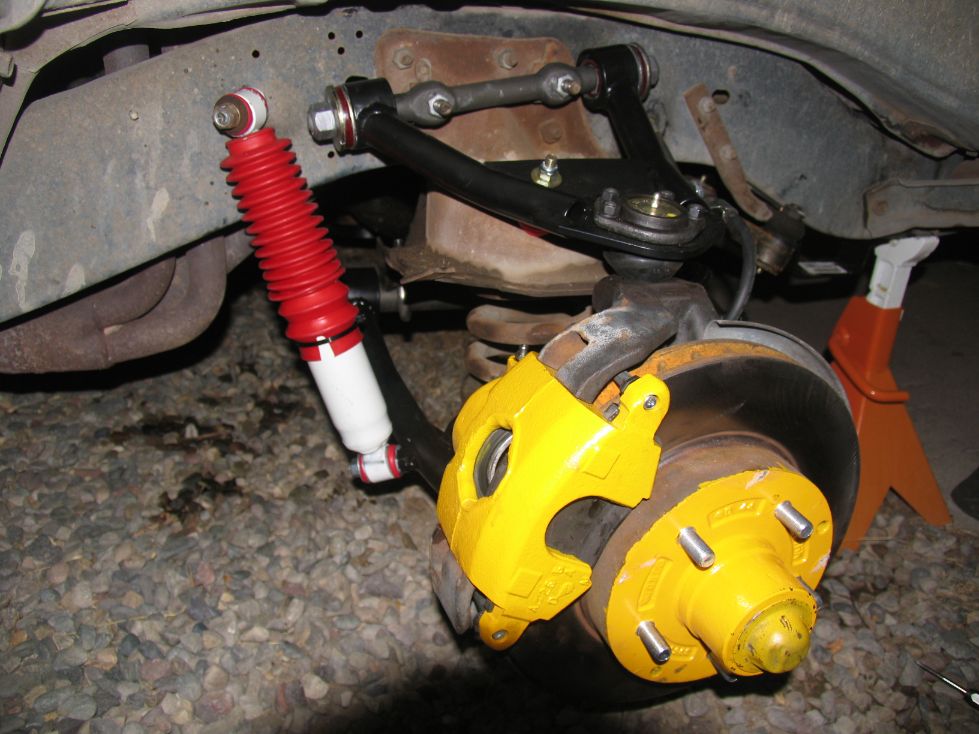
With the entire vehicle up on jack stands I started looking over everything. All of the bushings were rotted, the ball joints and tie rods were loose, there was some surface rust but nothing bad, most of it was slopy as was to be expected from a vehicle that old with god knows how many miles on it. In 1979 they only put 5 digits on the odometer making 99,999 the most miles it would read before it flipped. This was a ranch truck, who knows how many times it flipped. The biggest bummer was in the lower control arms. Someone had hit a curb or something and rolled the lip of both lower arms back at the front bushing, new arms would need to be obtained so I thought, why not build them? I started taking it all apart and got to ordering all the new parts.


Control Arms:
At the time I was working as a welder and the boss was kind enough to let me use the shop for personal projects after work and on the weekends. We had a lot of tools that made this job a lot easier and while I don’t miss the job, I do miss having access to the tools.
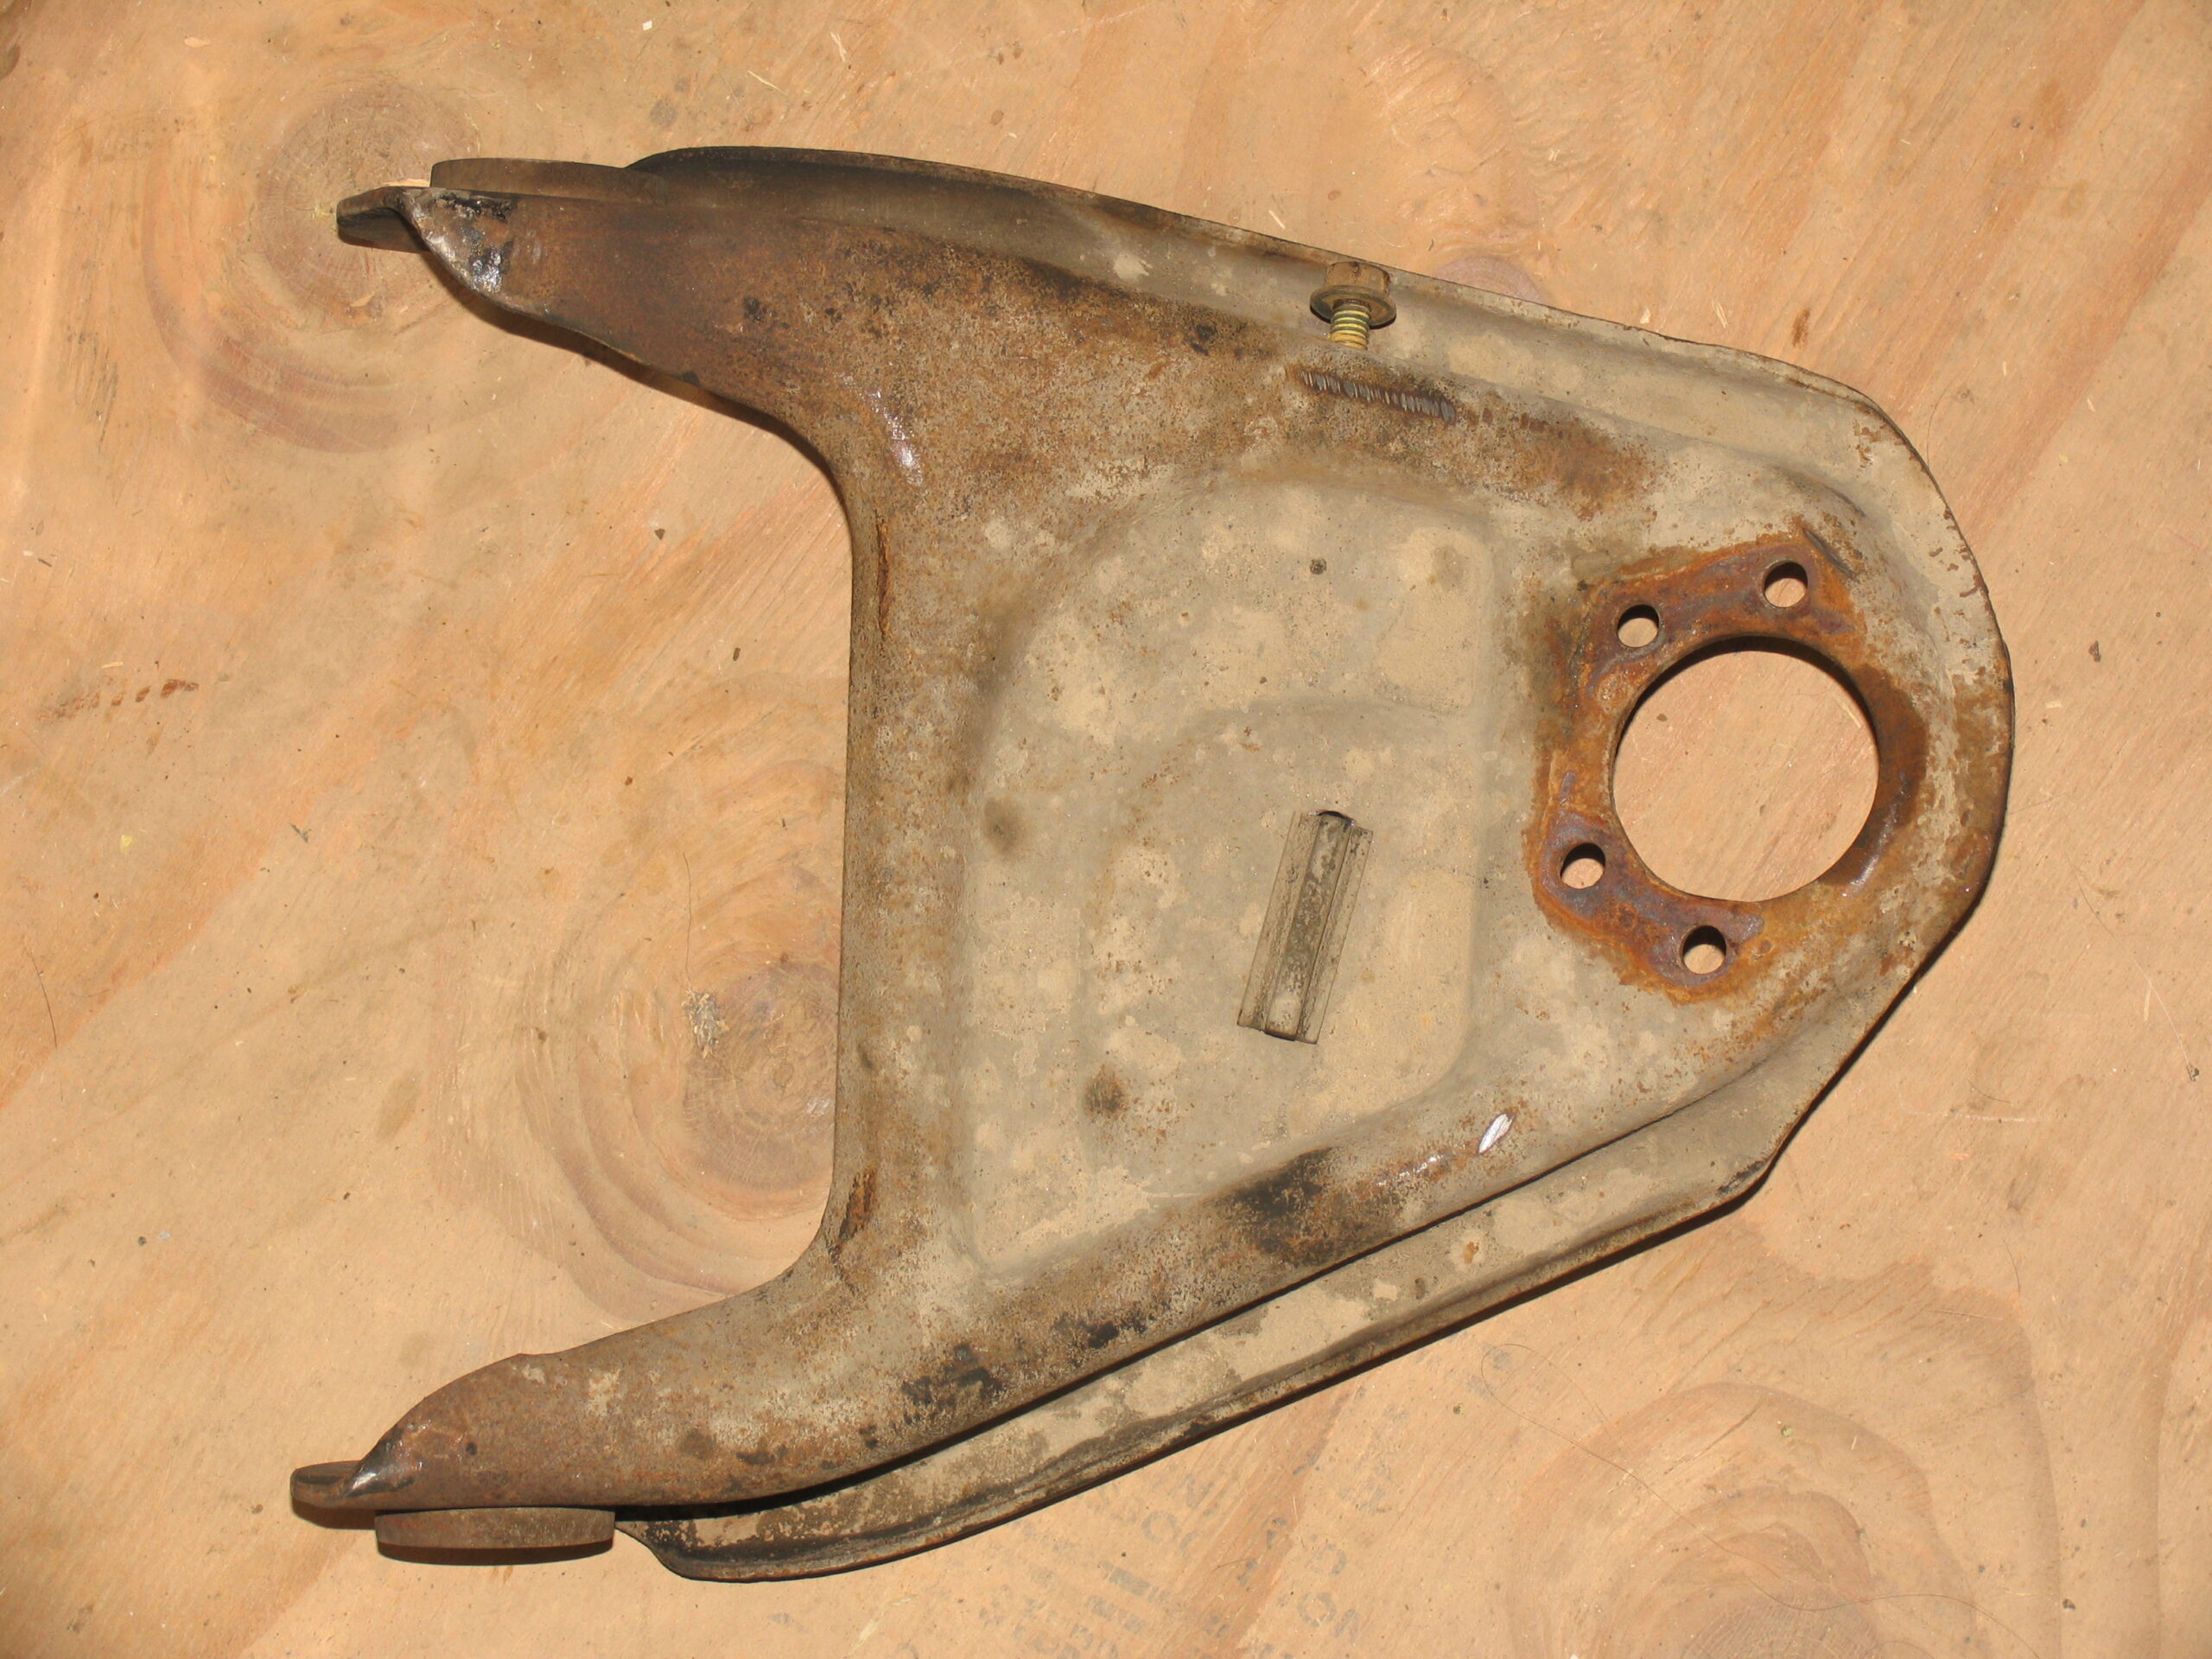
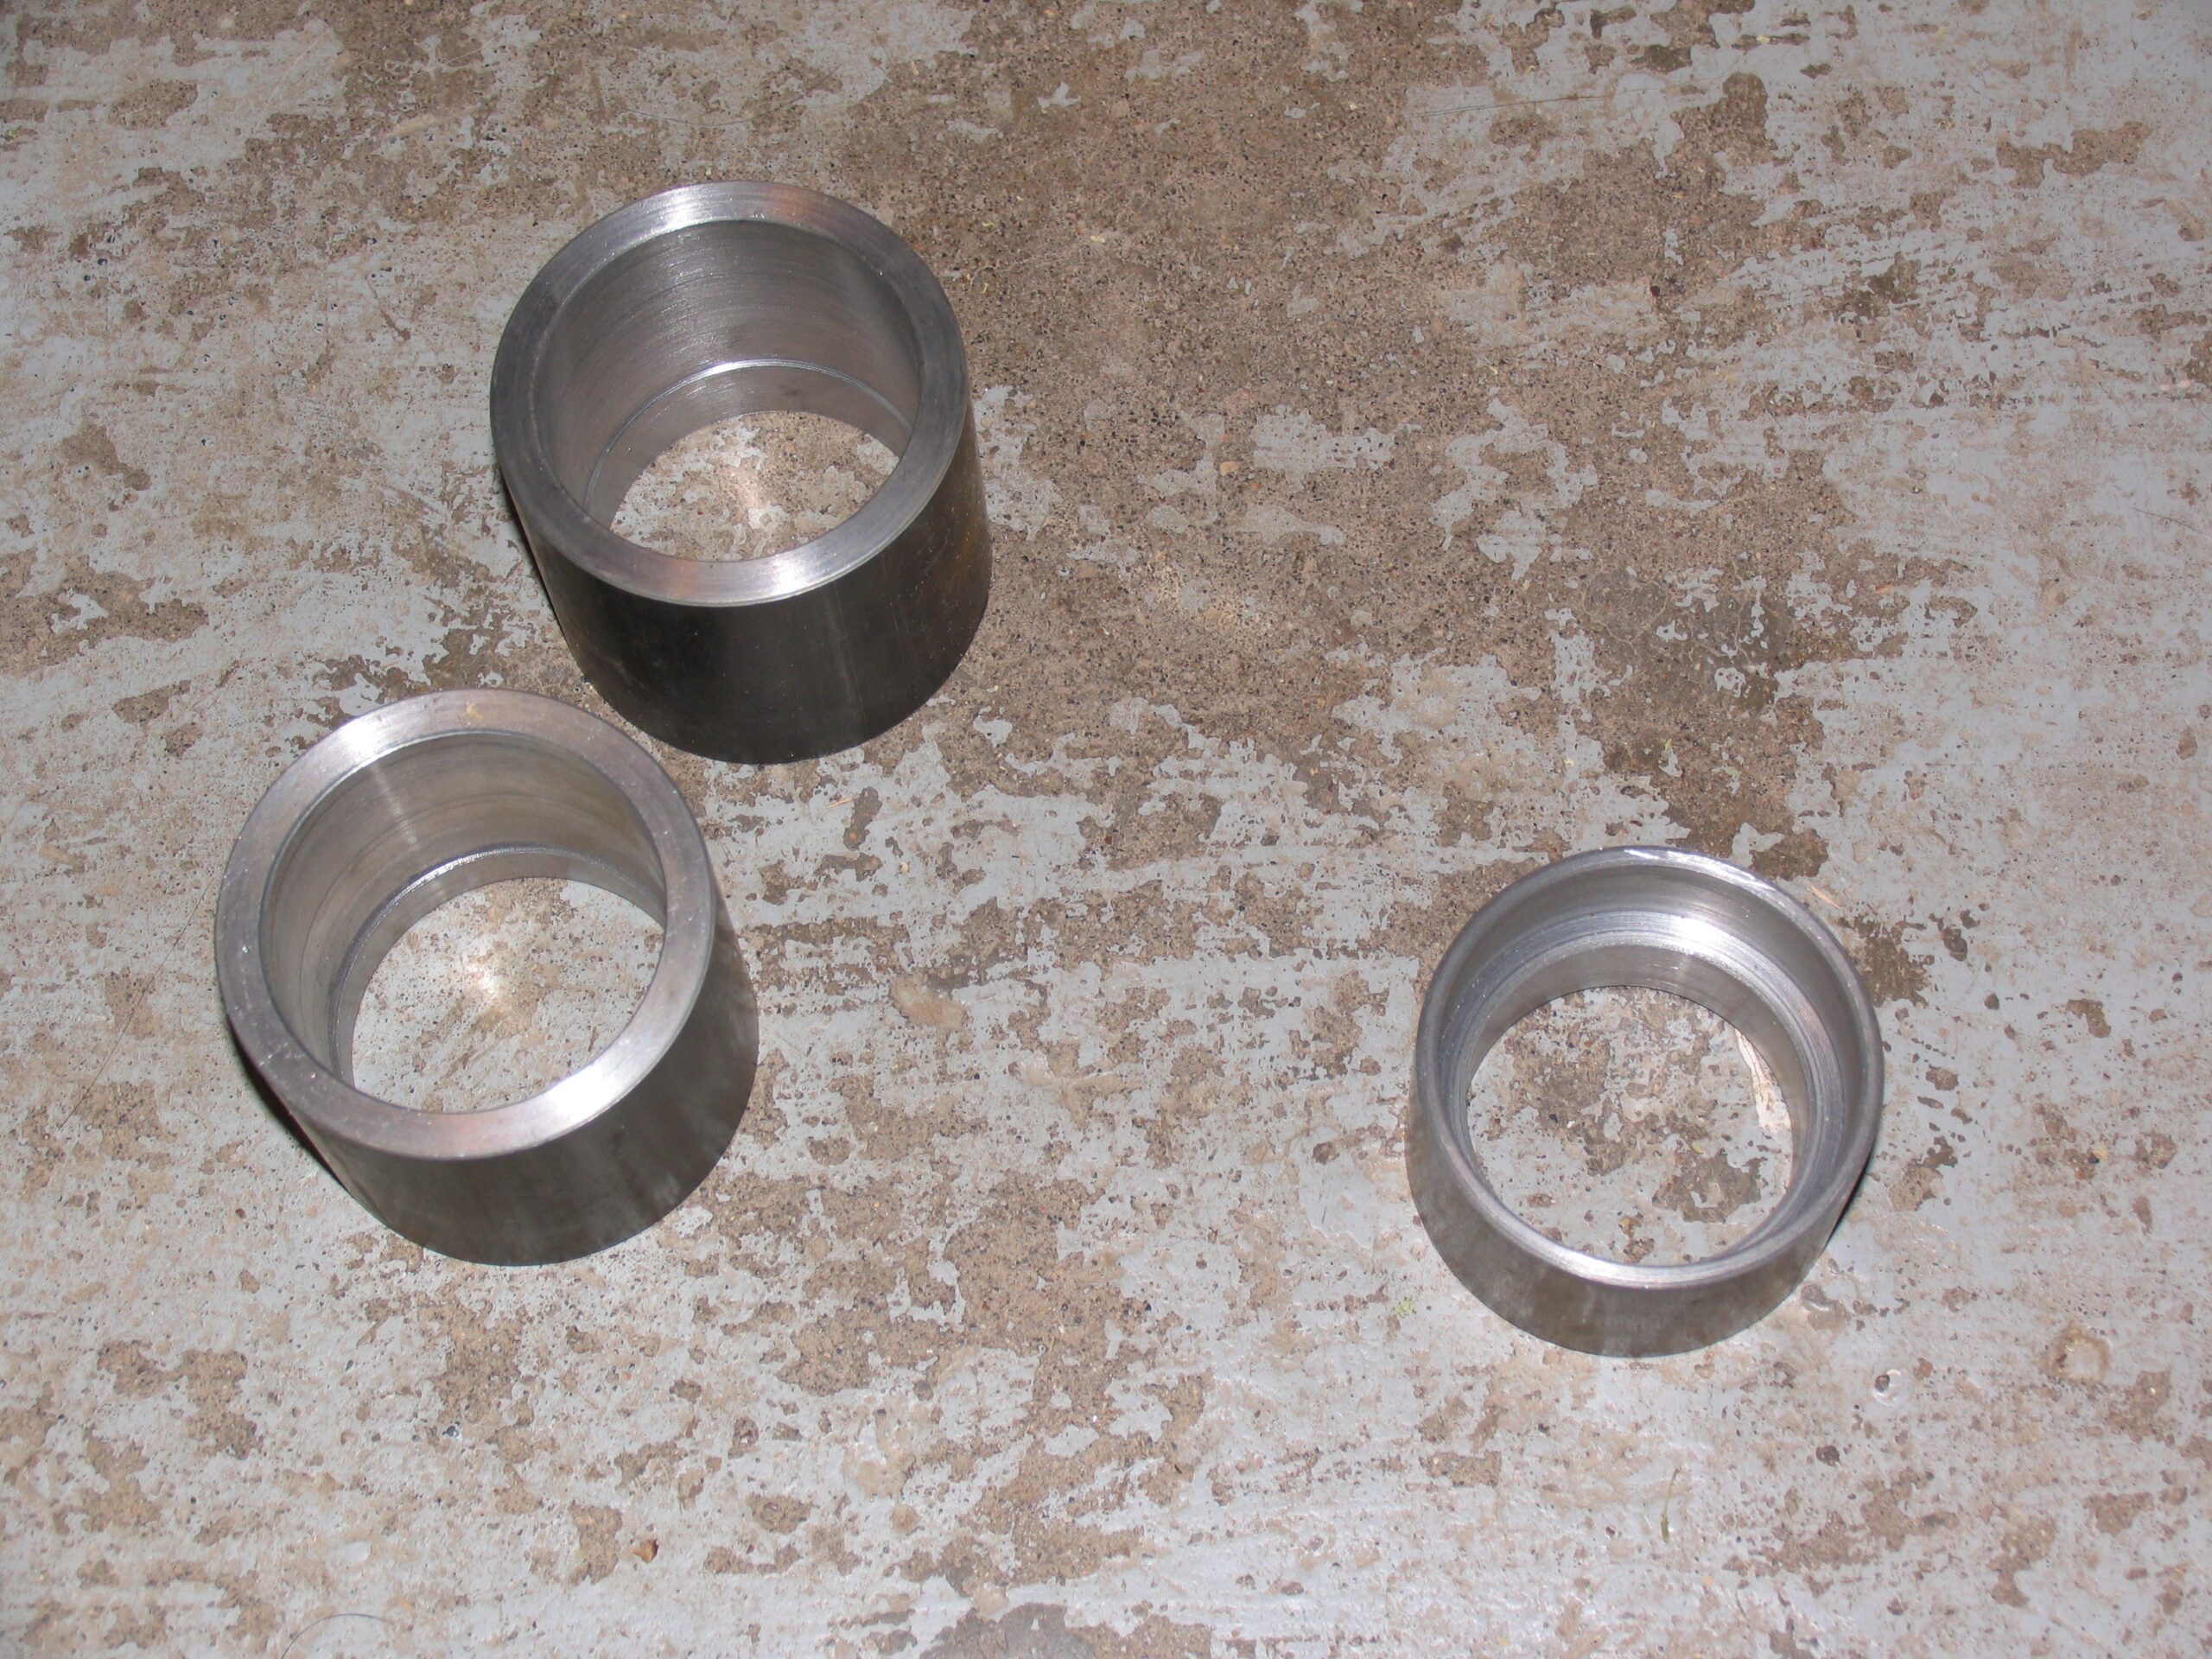
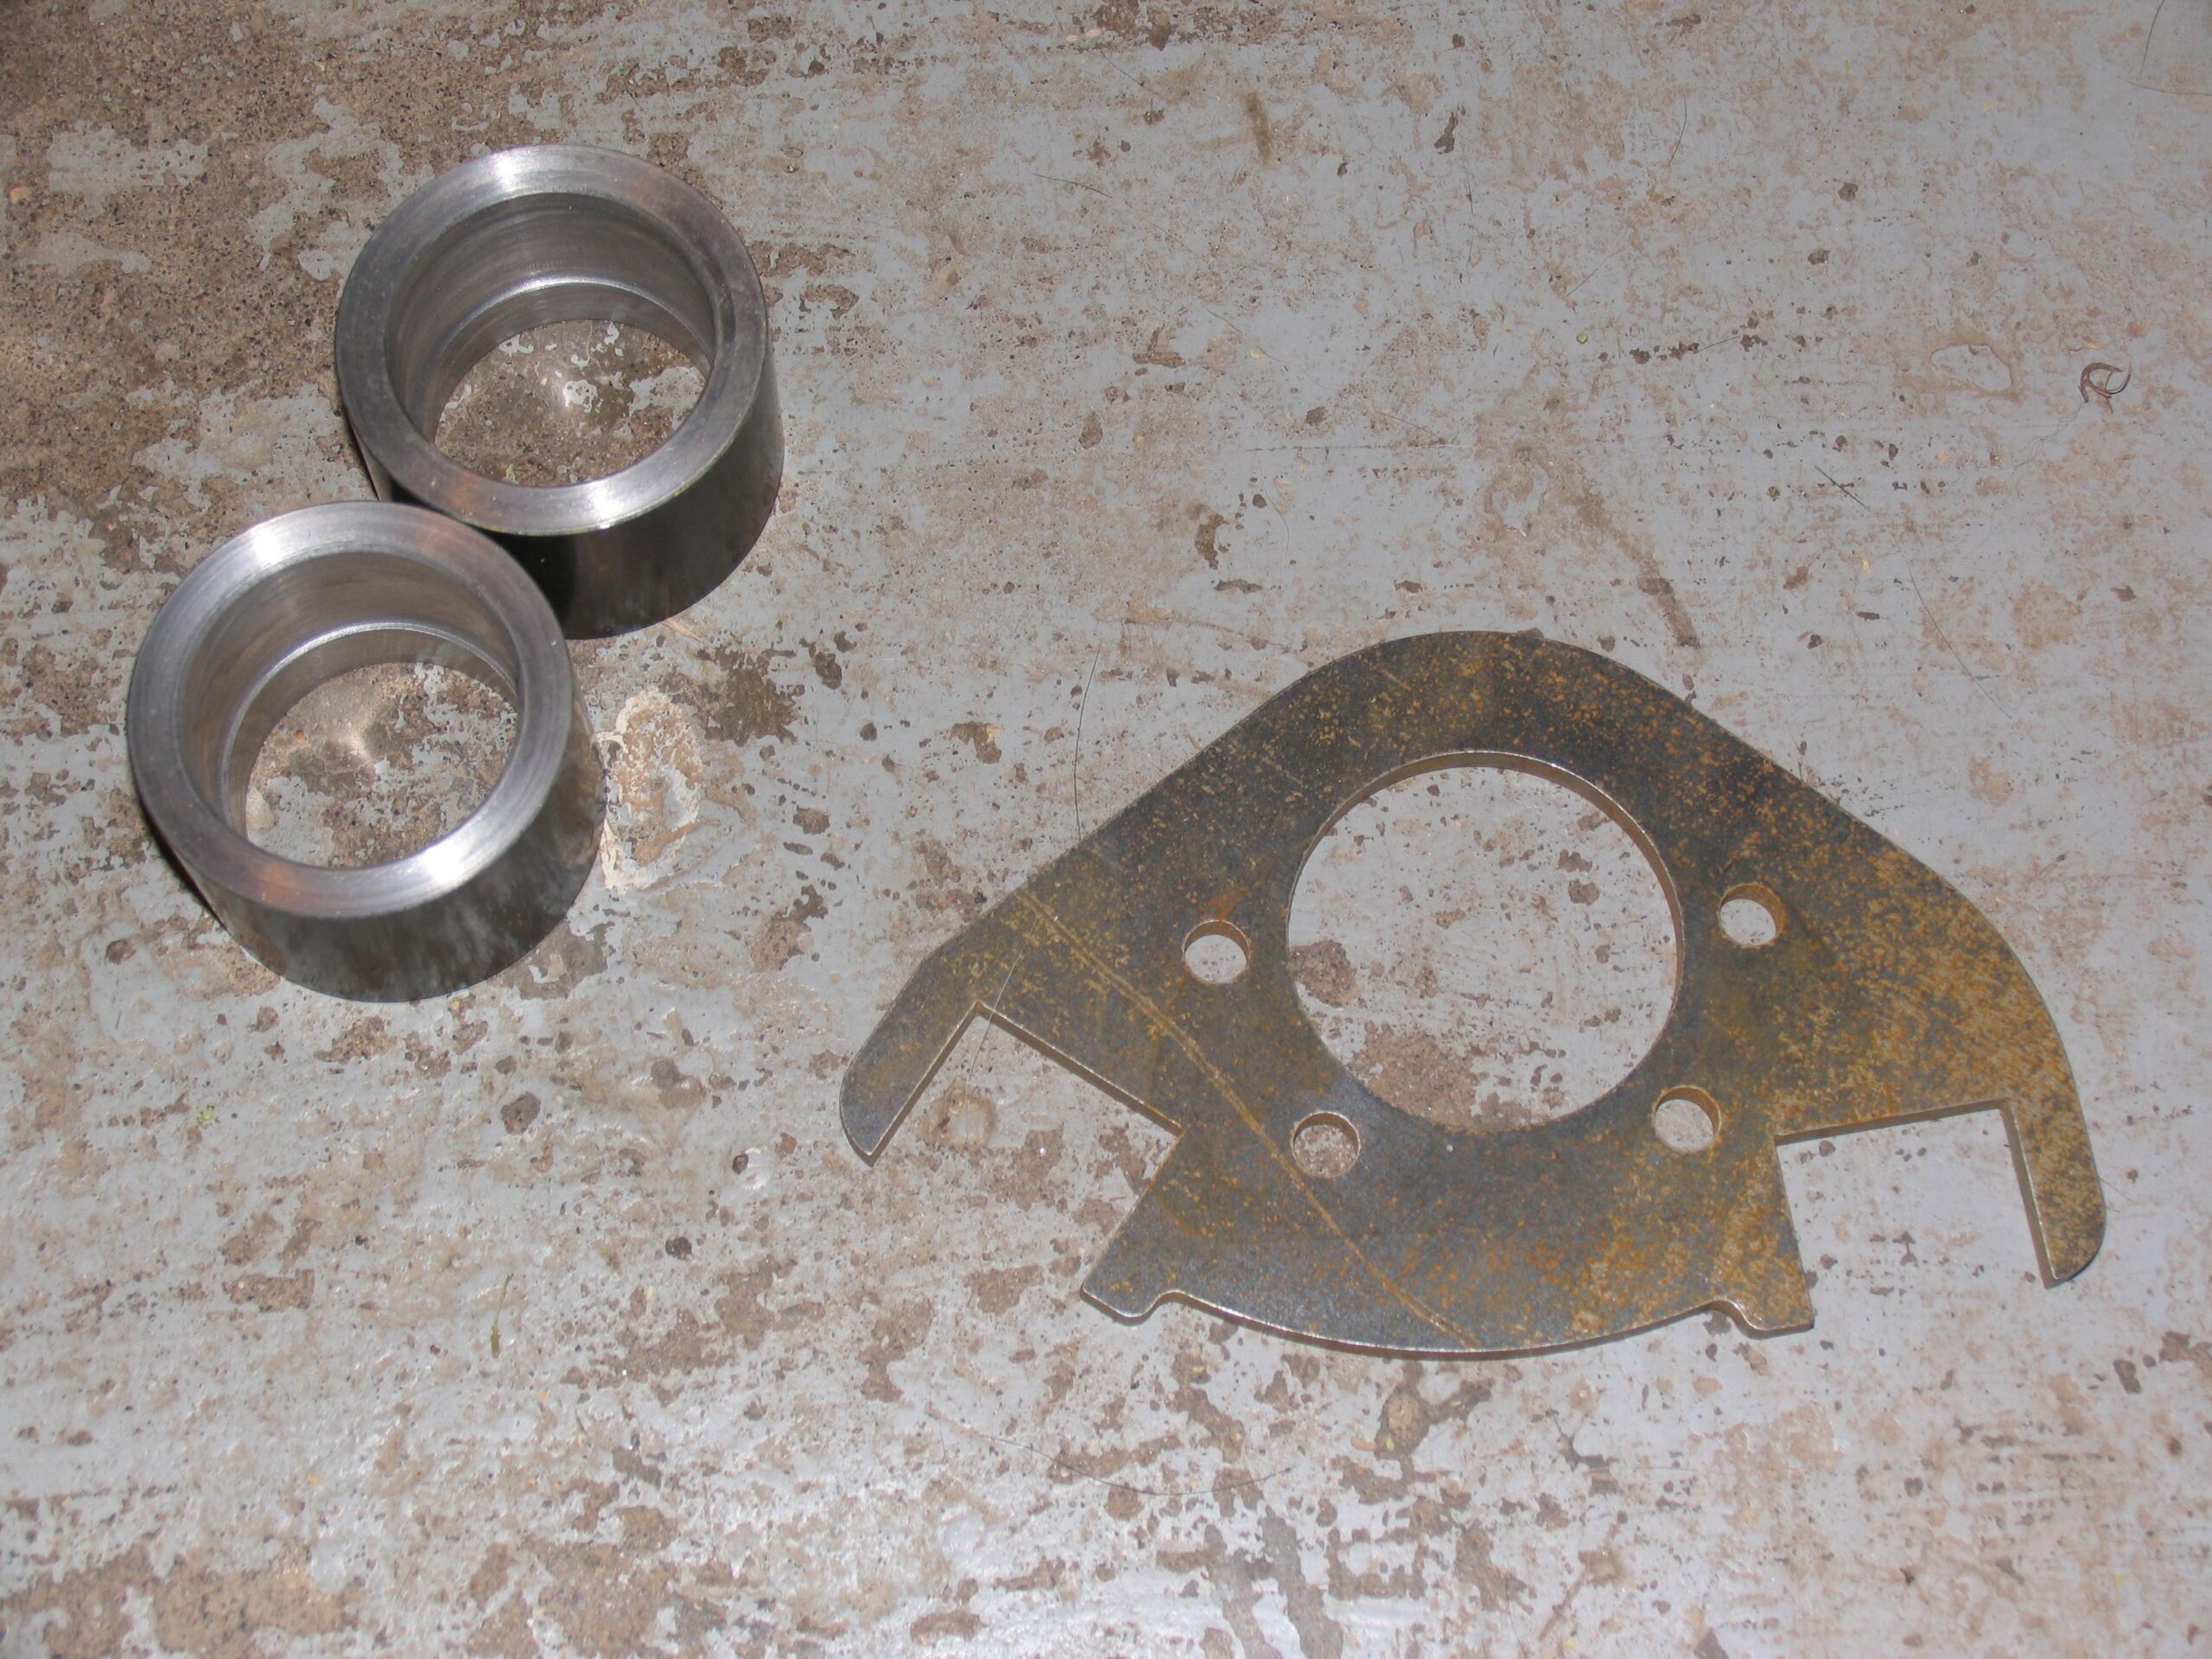
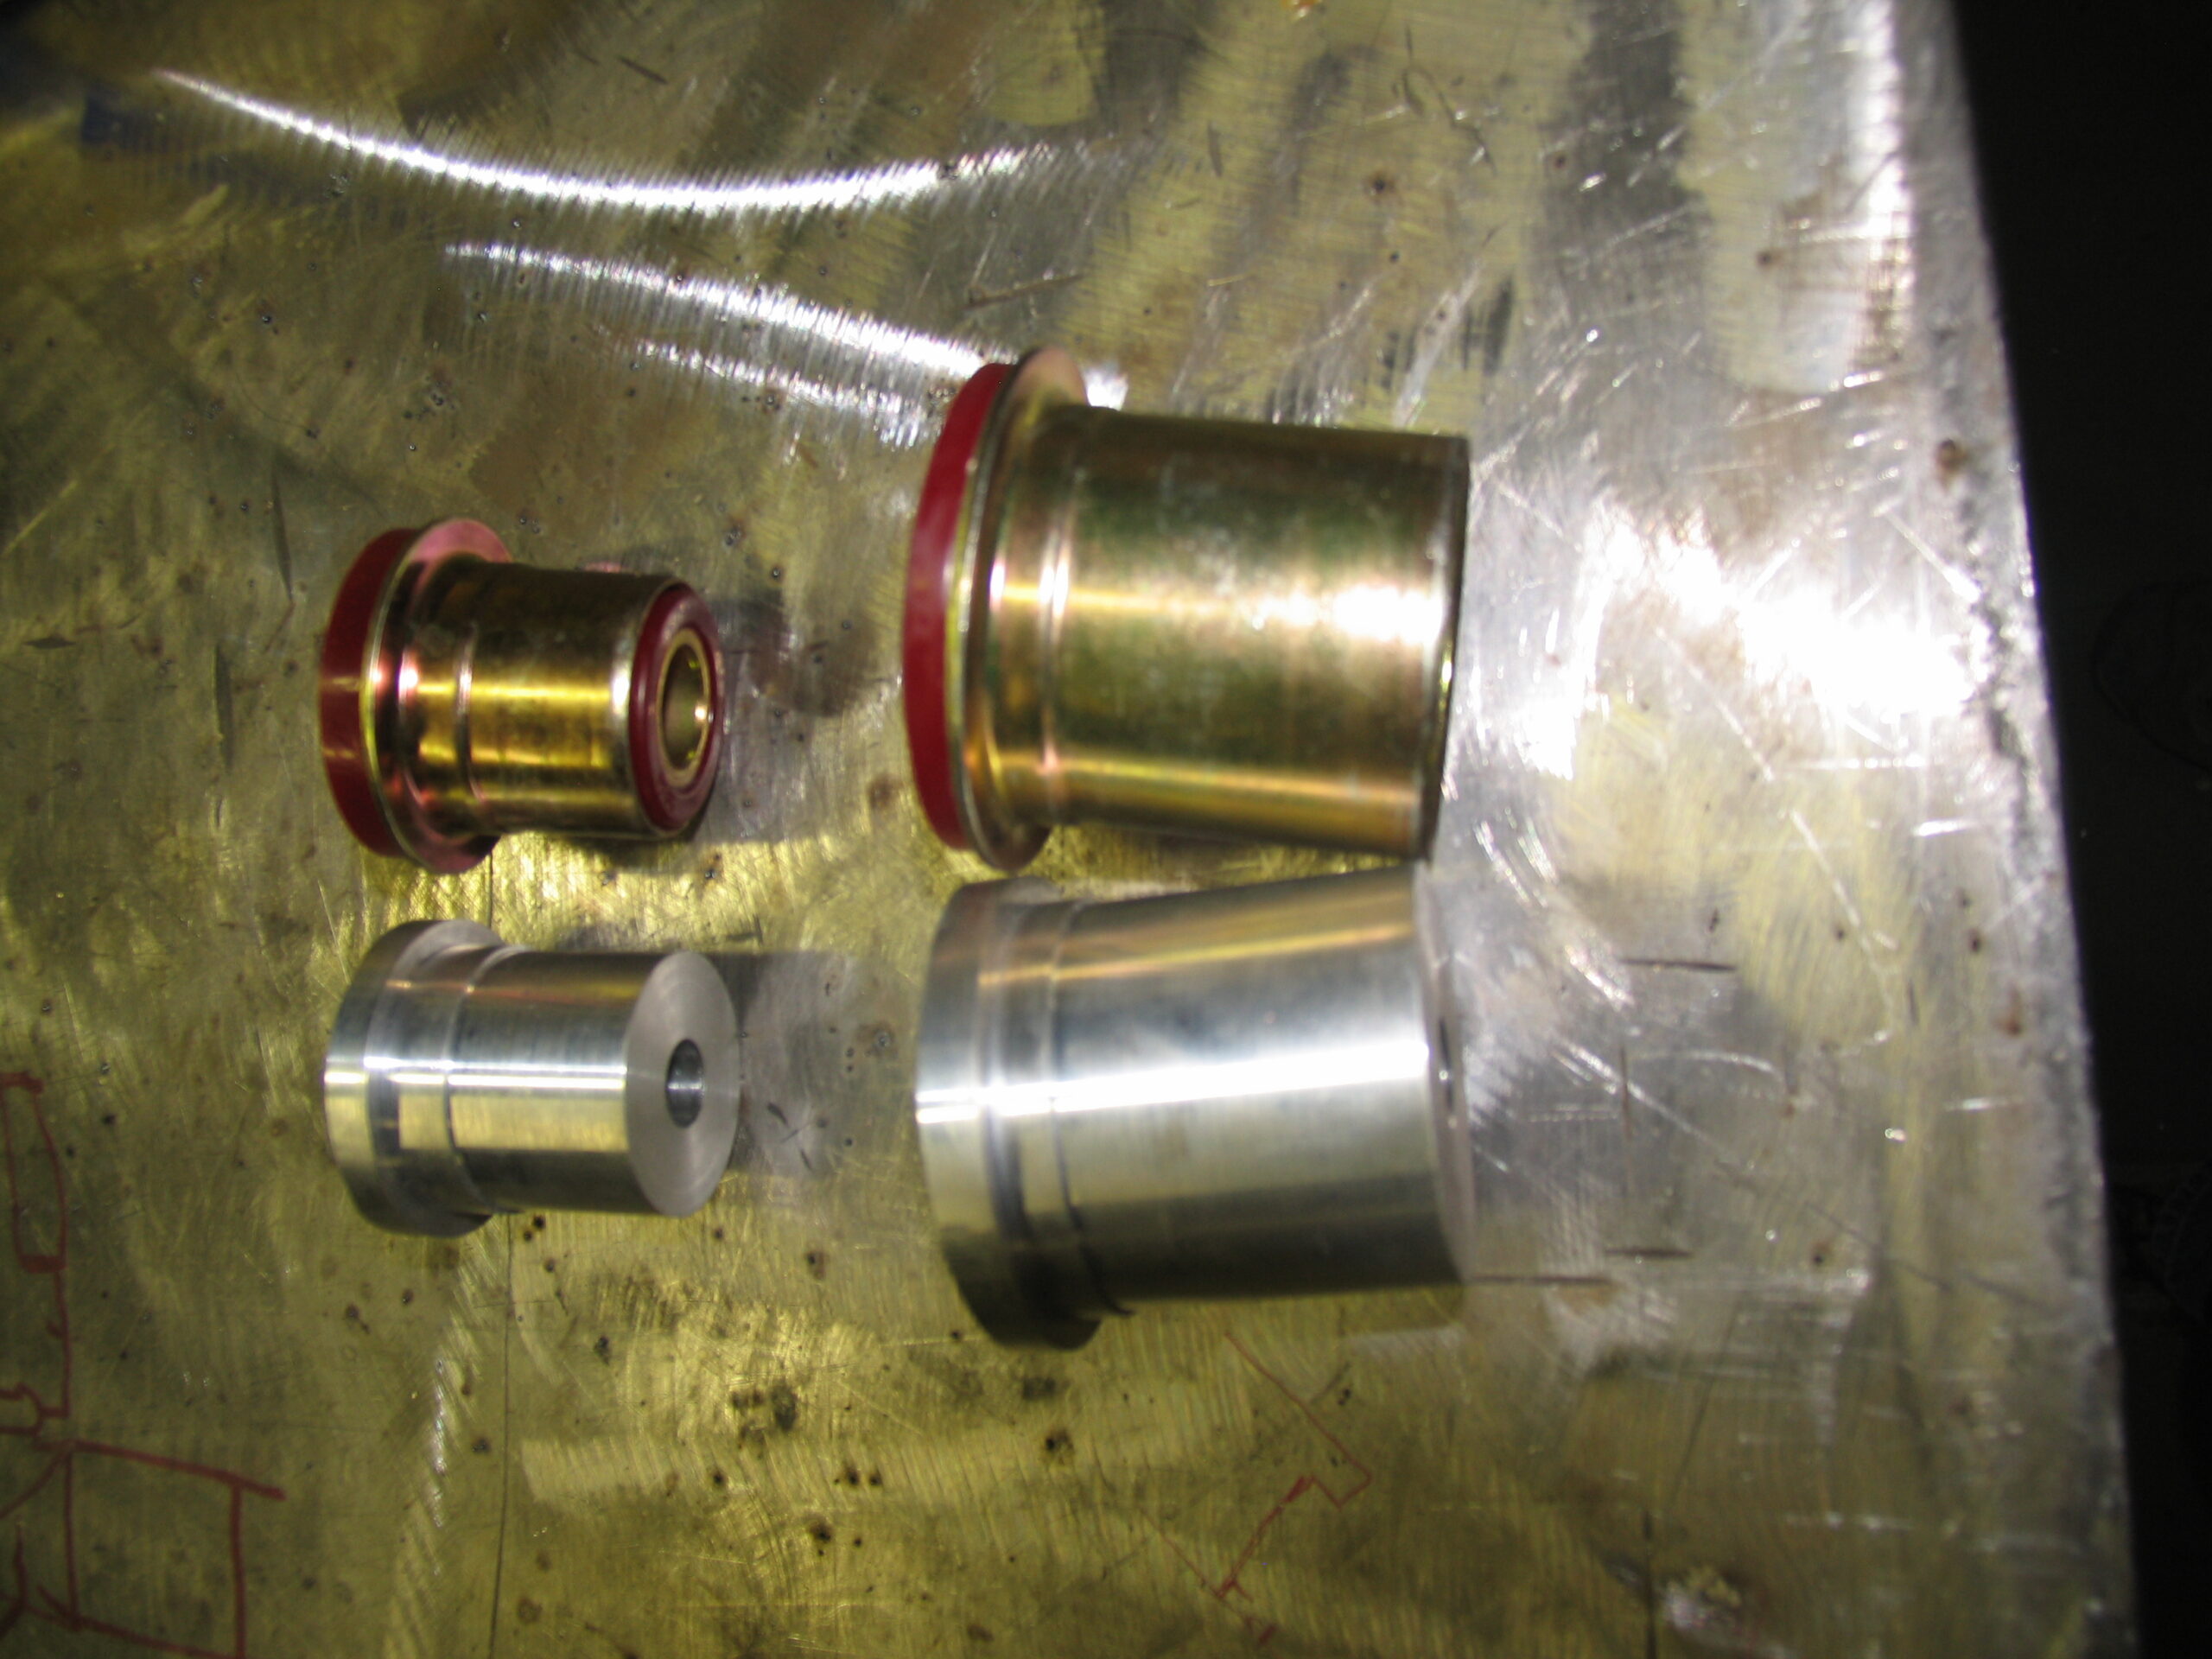
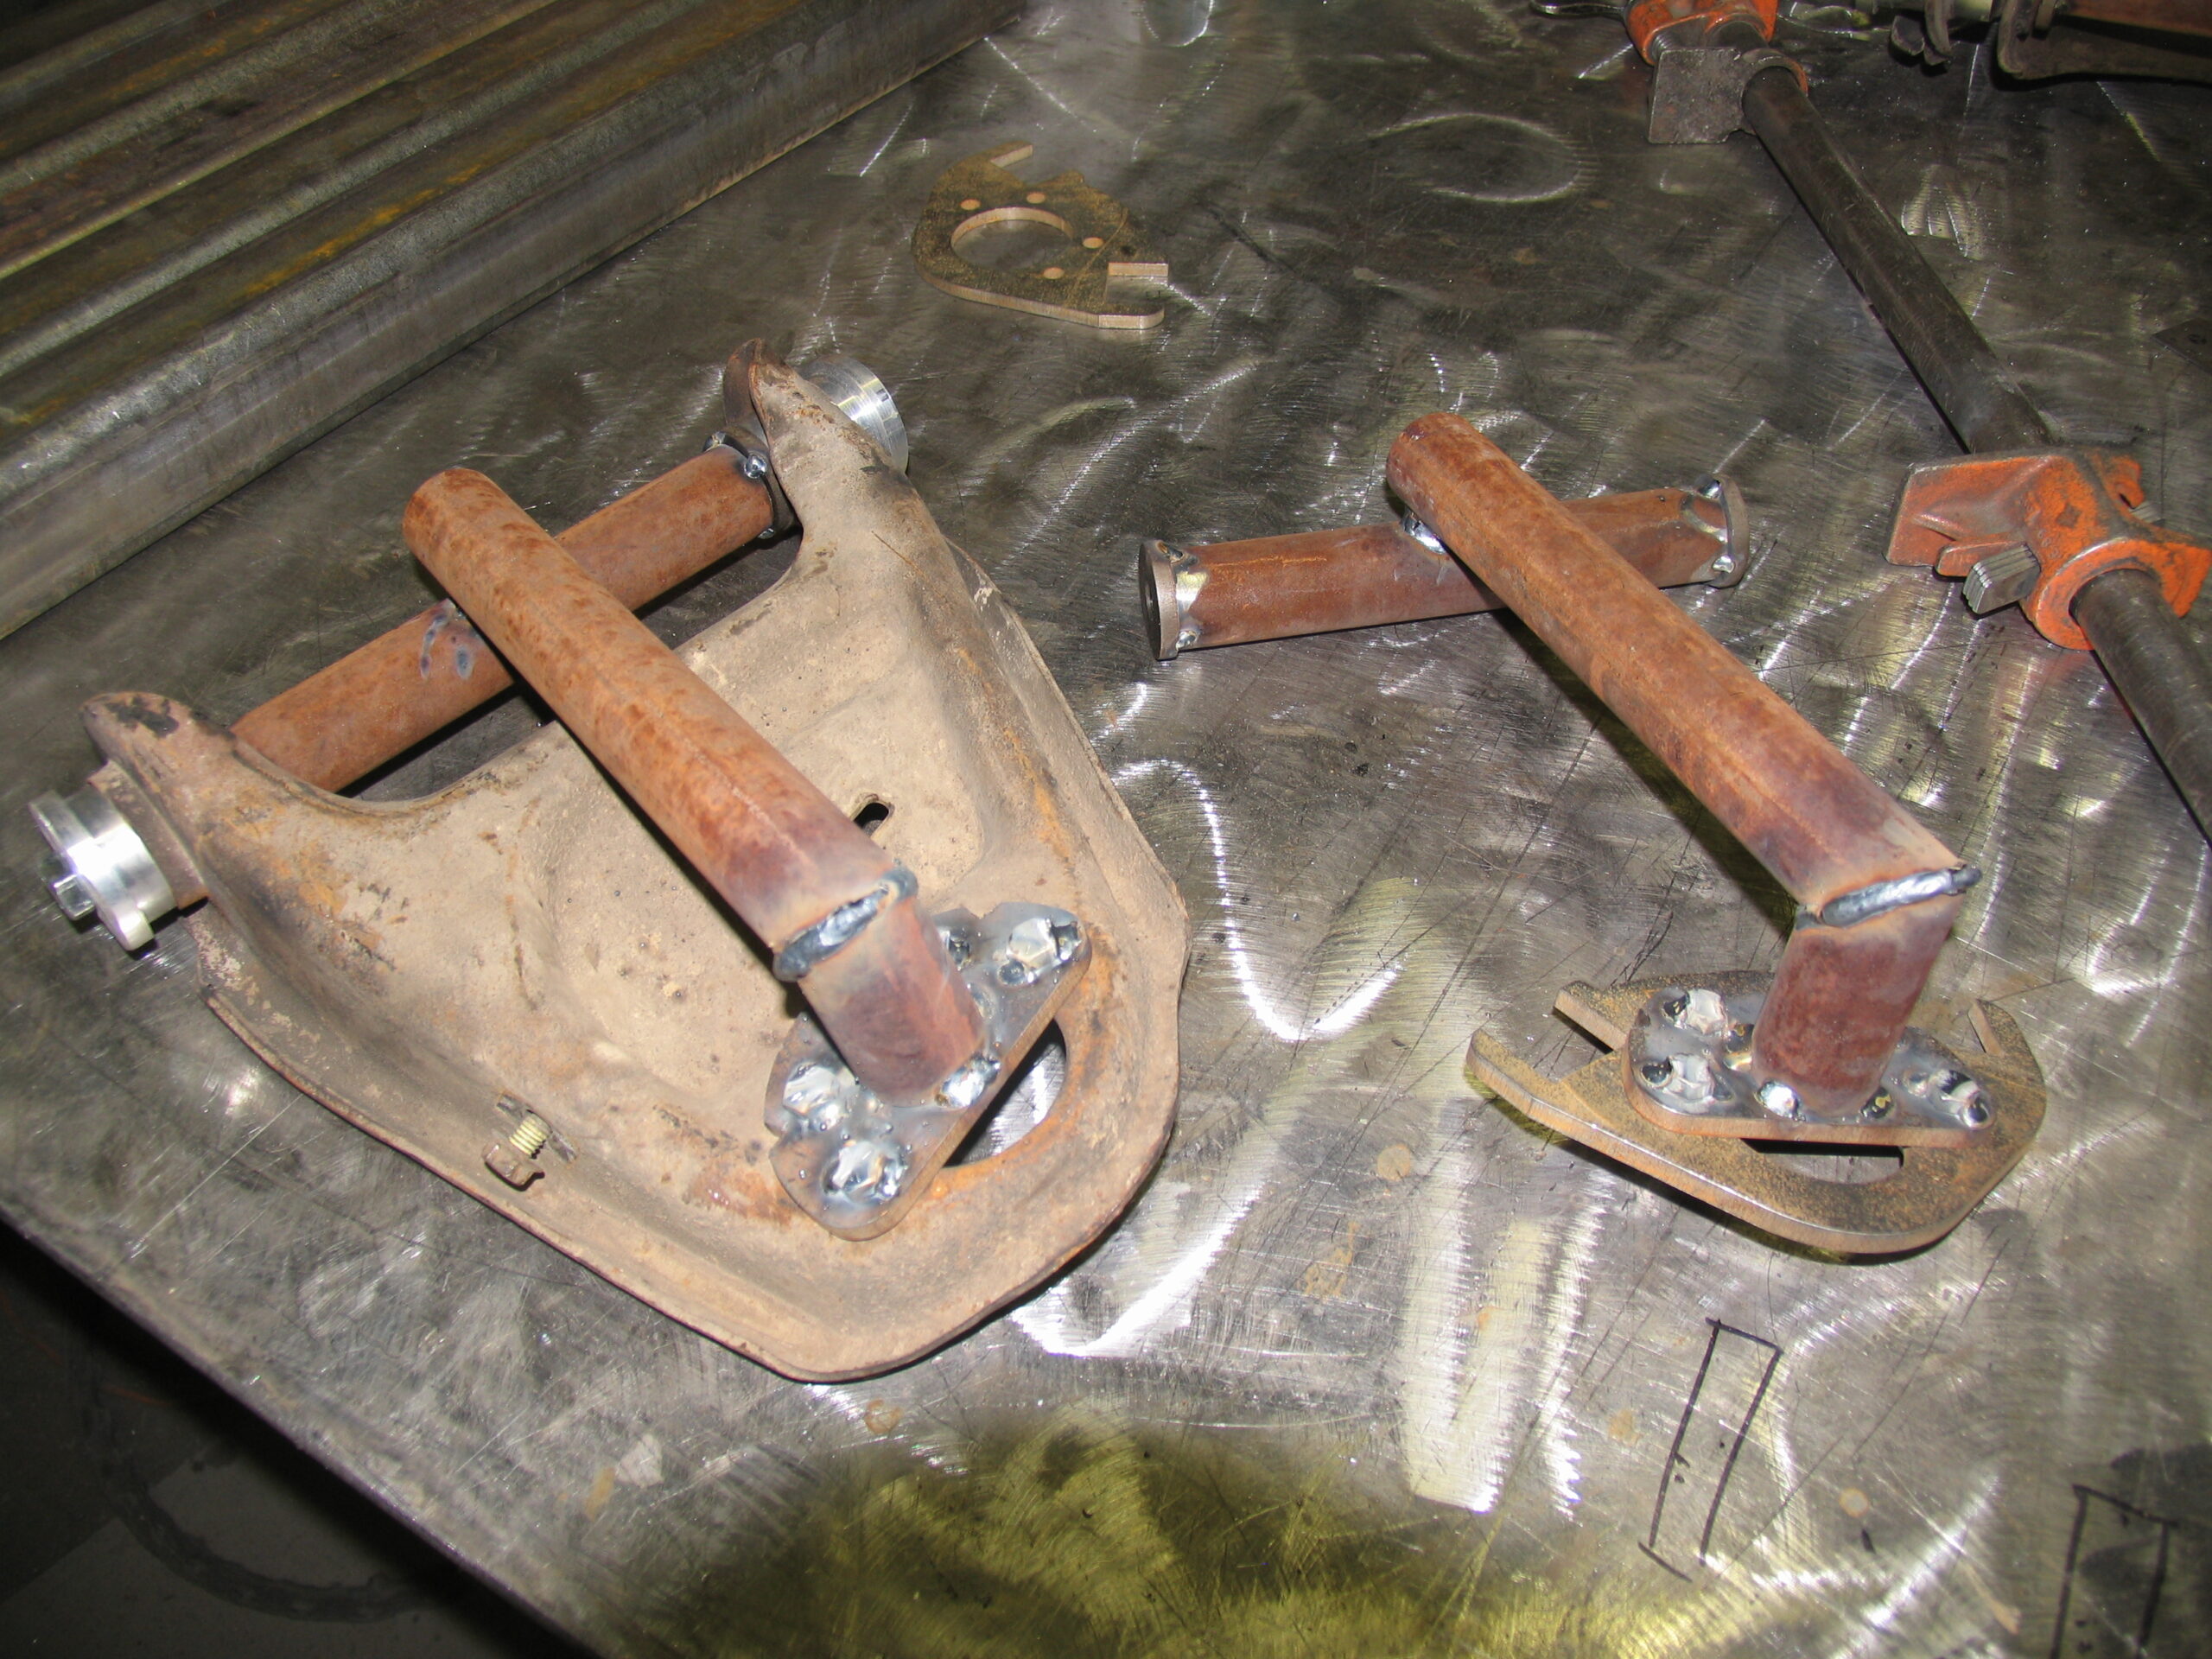
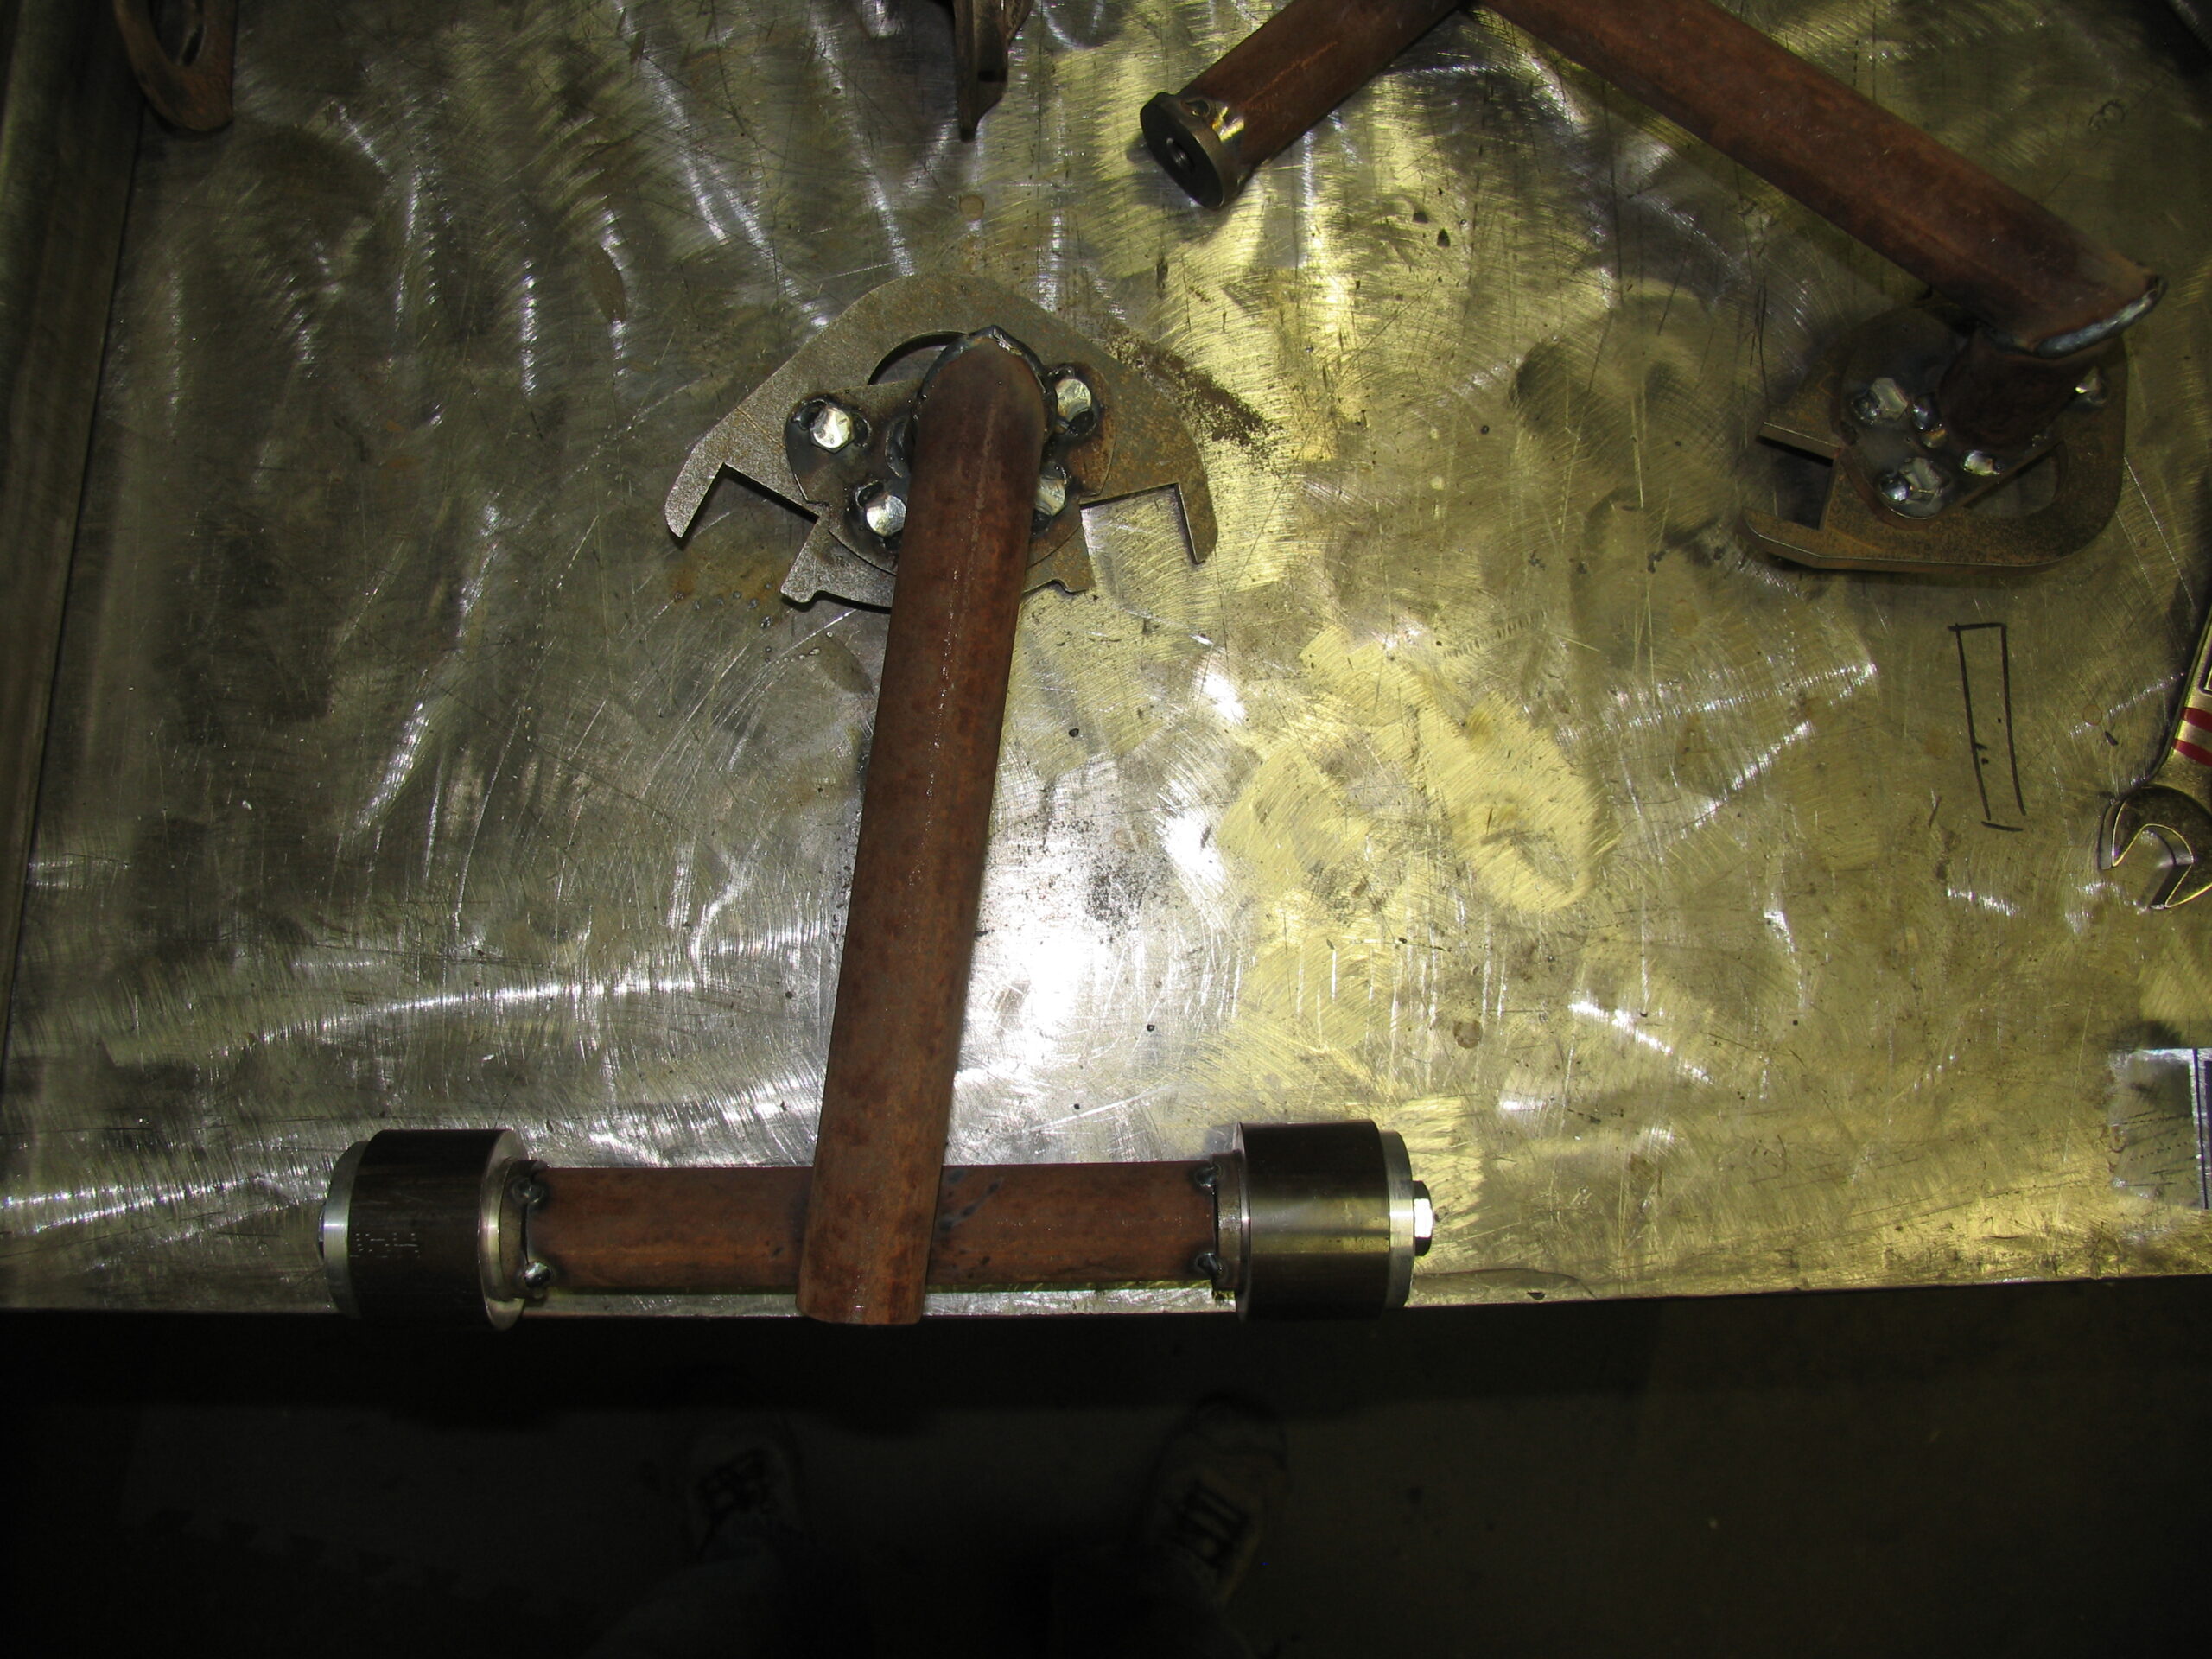
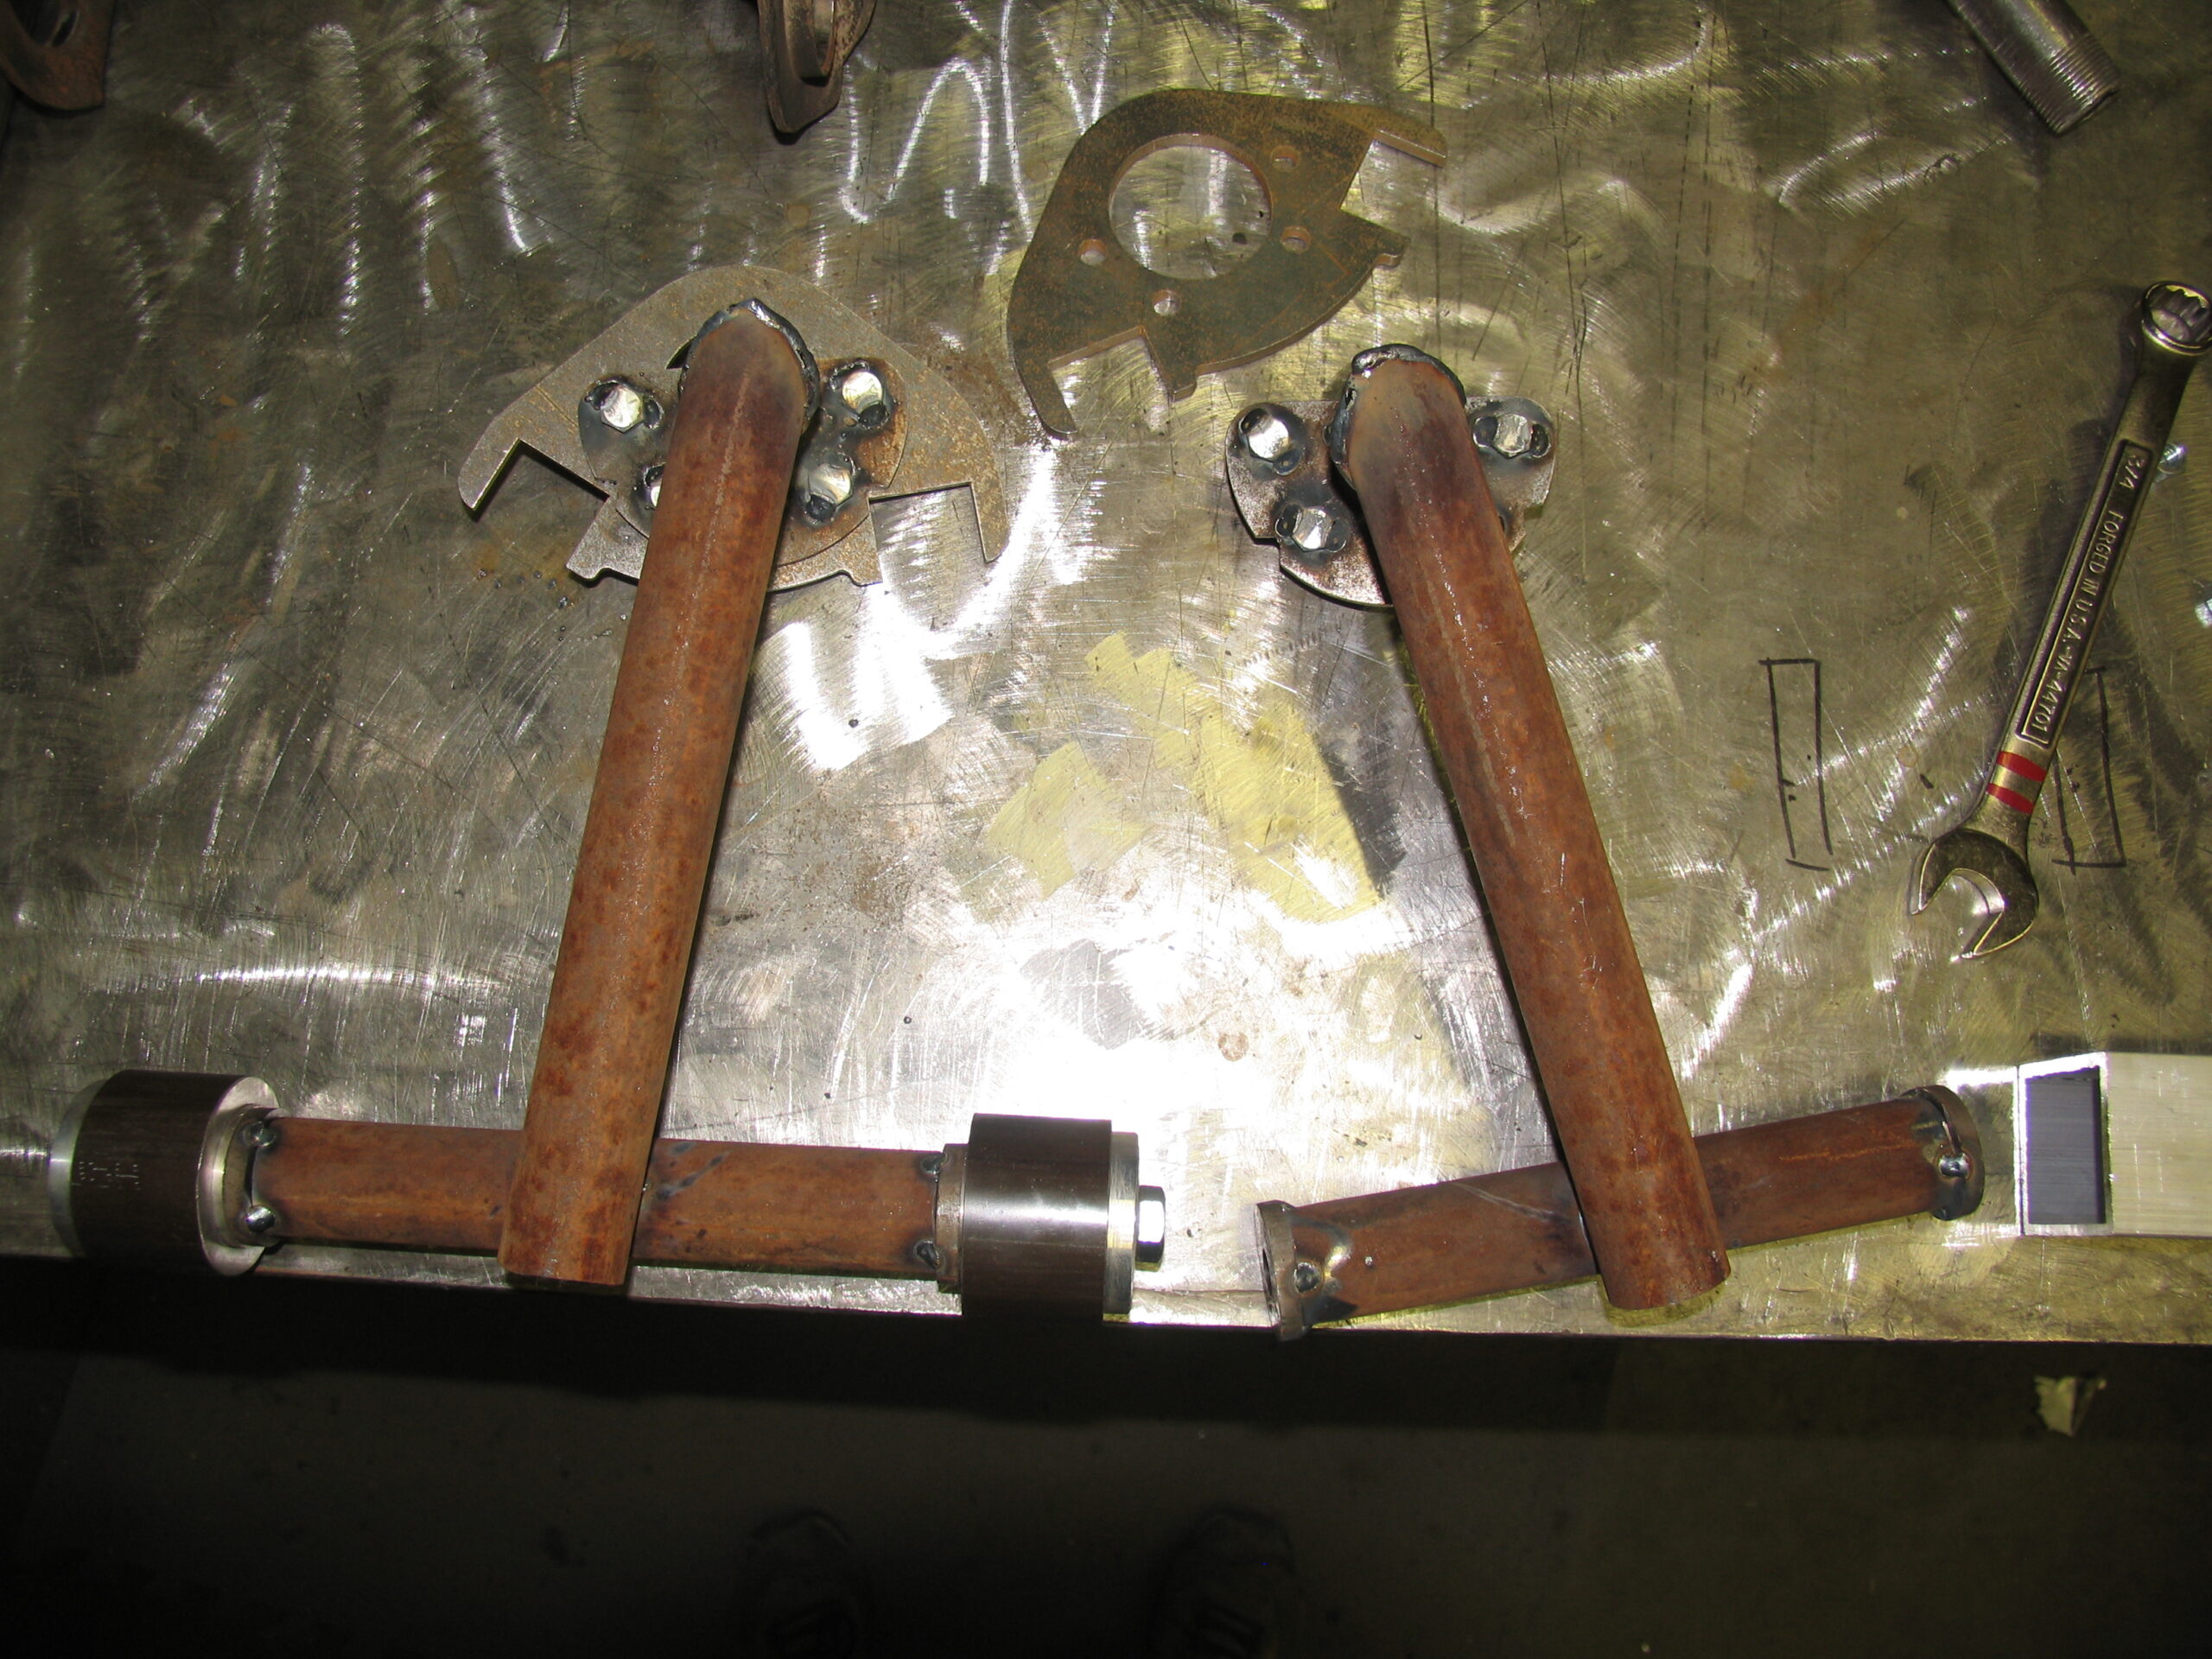
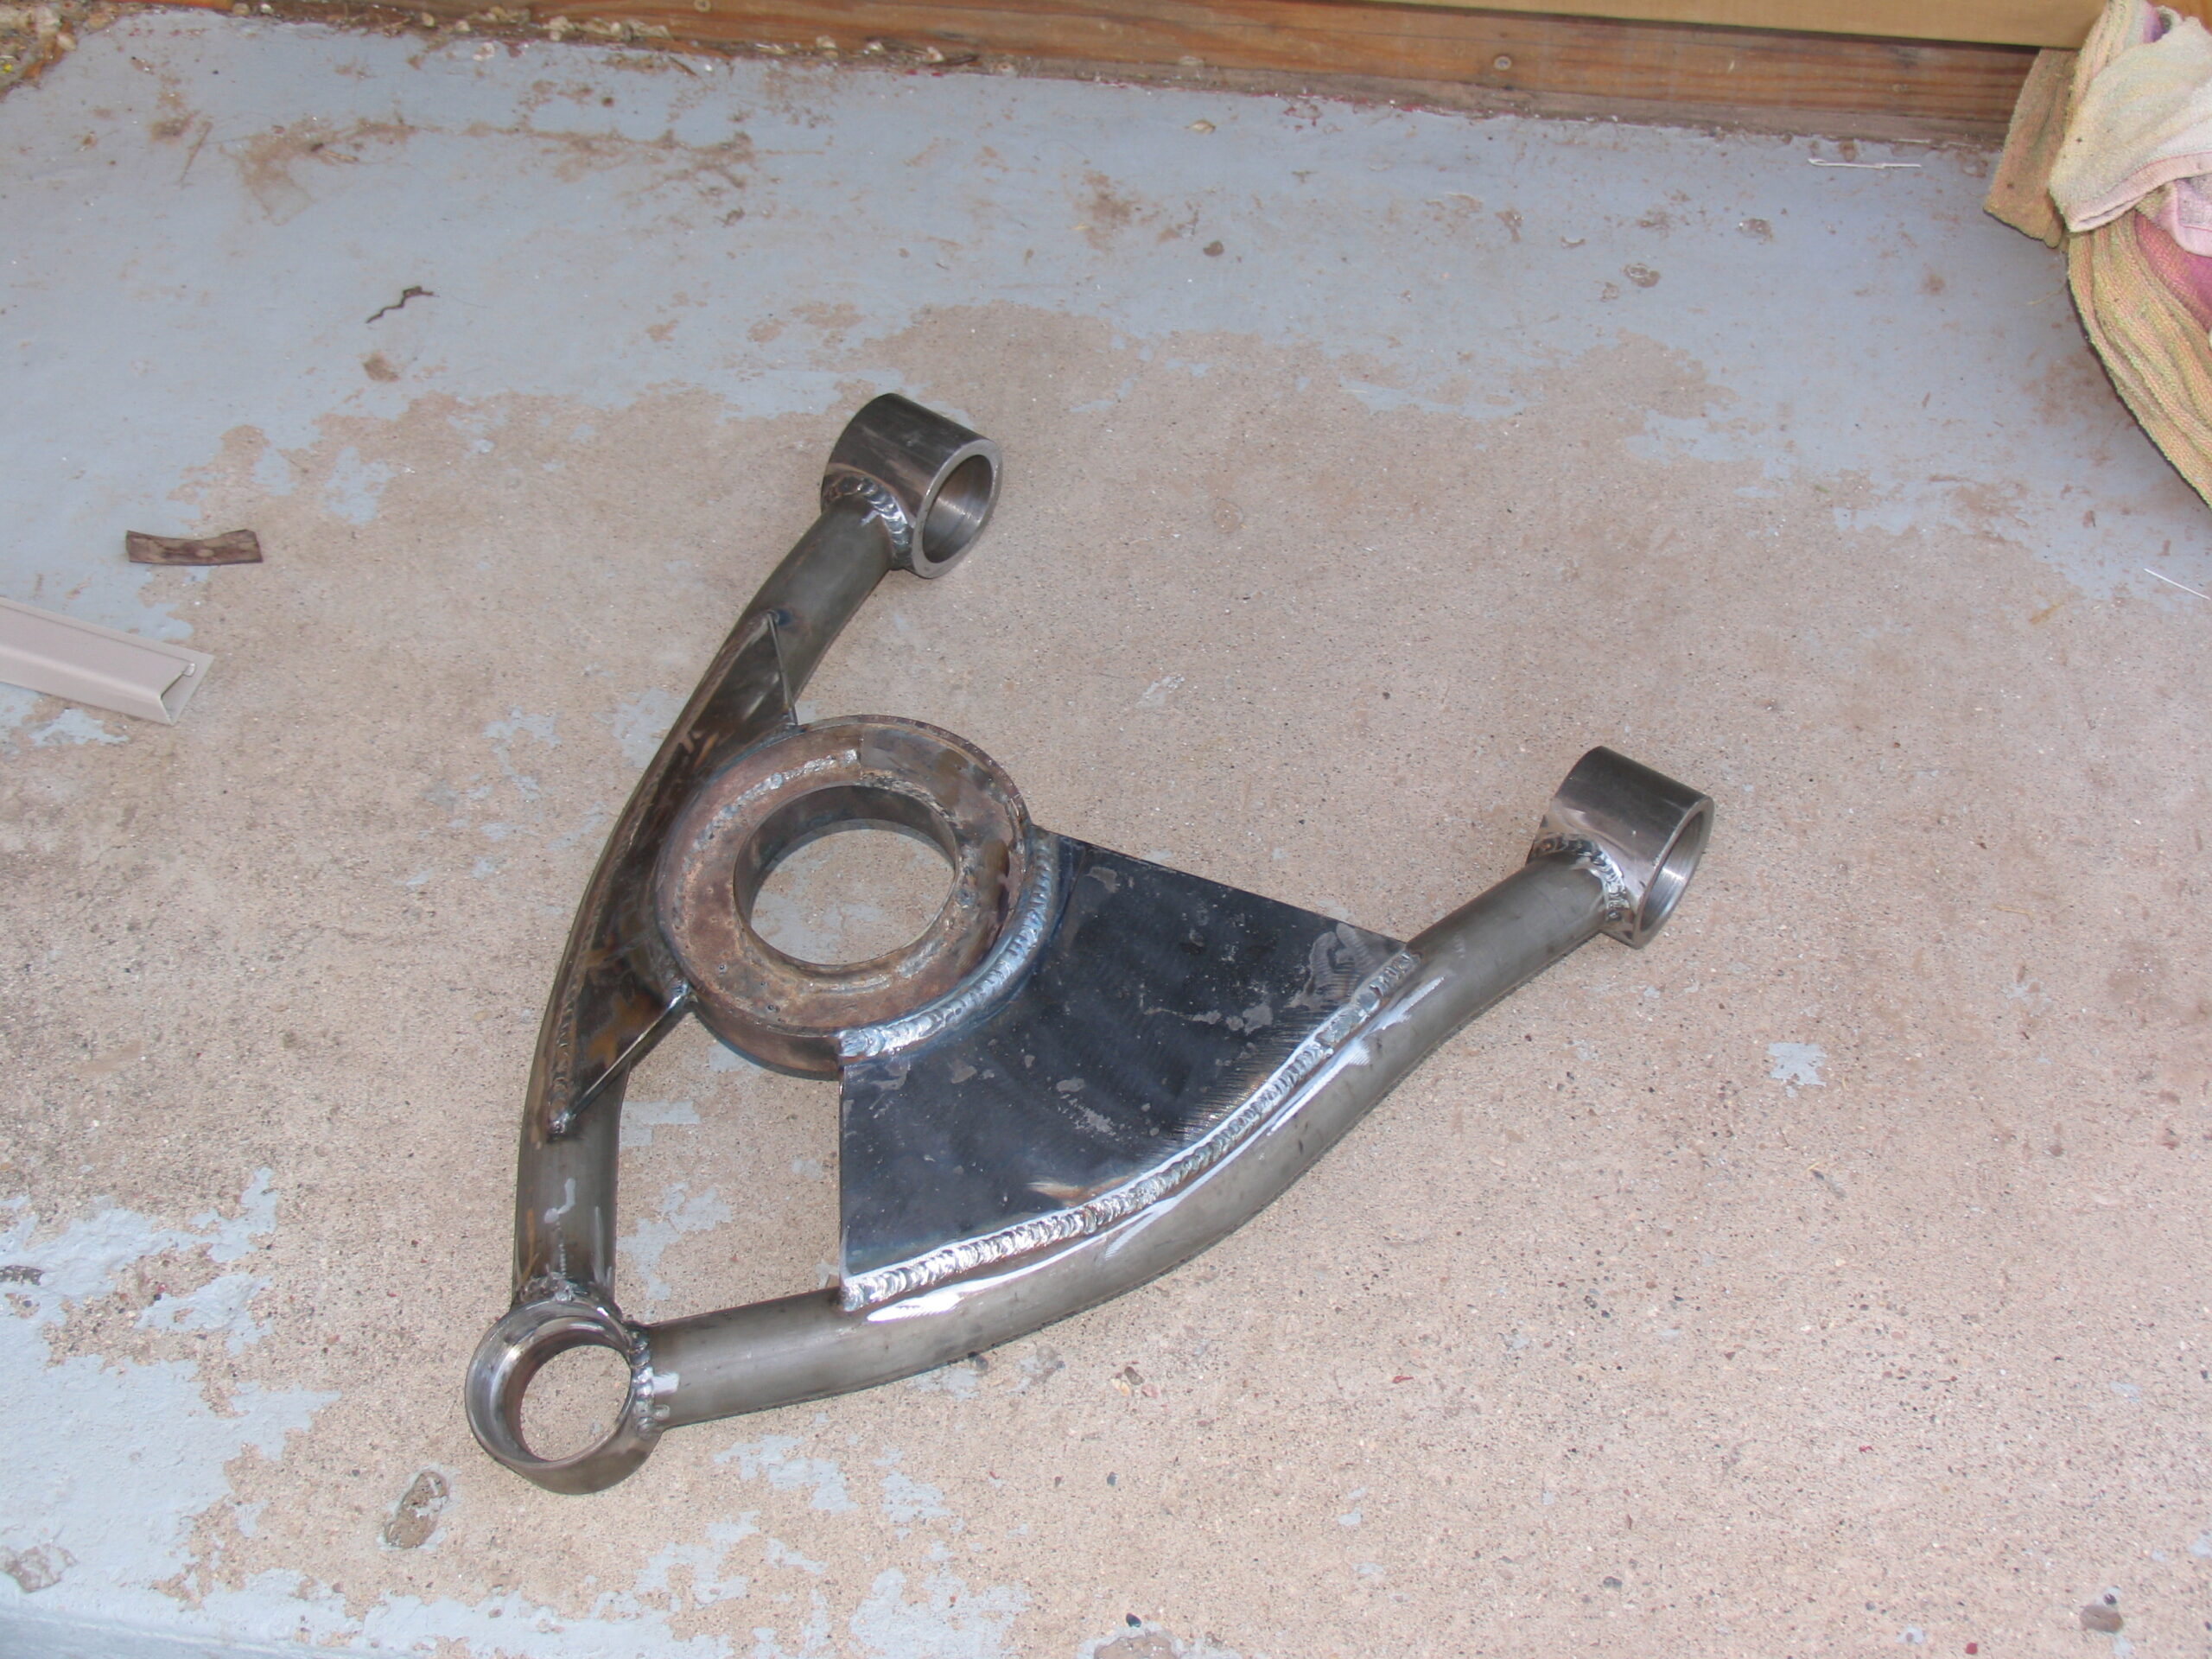
Starting out I needed to make some jigs to make sure everything lined up properly when I was done. While the lower arms were damaged, they still made a decent template for my jigs. The important part of the arms is the relationship between the ball joint and bushings. I had a machinist turn some mock bushings out of aluminum when he turned my new bushing mounts and lower ball joint mount out of DOM tube (too long ago to remember exact specs). The place I worked had a water jet so I drew up a ball joint plate in auto cad and shot the upper ball joint mount. Along with the upper ball joint mount I also shot out a jig mount with the same bolt hole pattern.
With my parts fabed, I started putting together the jigs. I placed my mock bushings in their respective holes and started cutting and welding tube to capture locations for all the important mounts. I had to build a separate jig for each of the 4 arms.
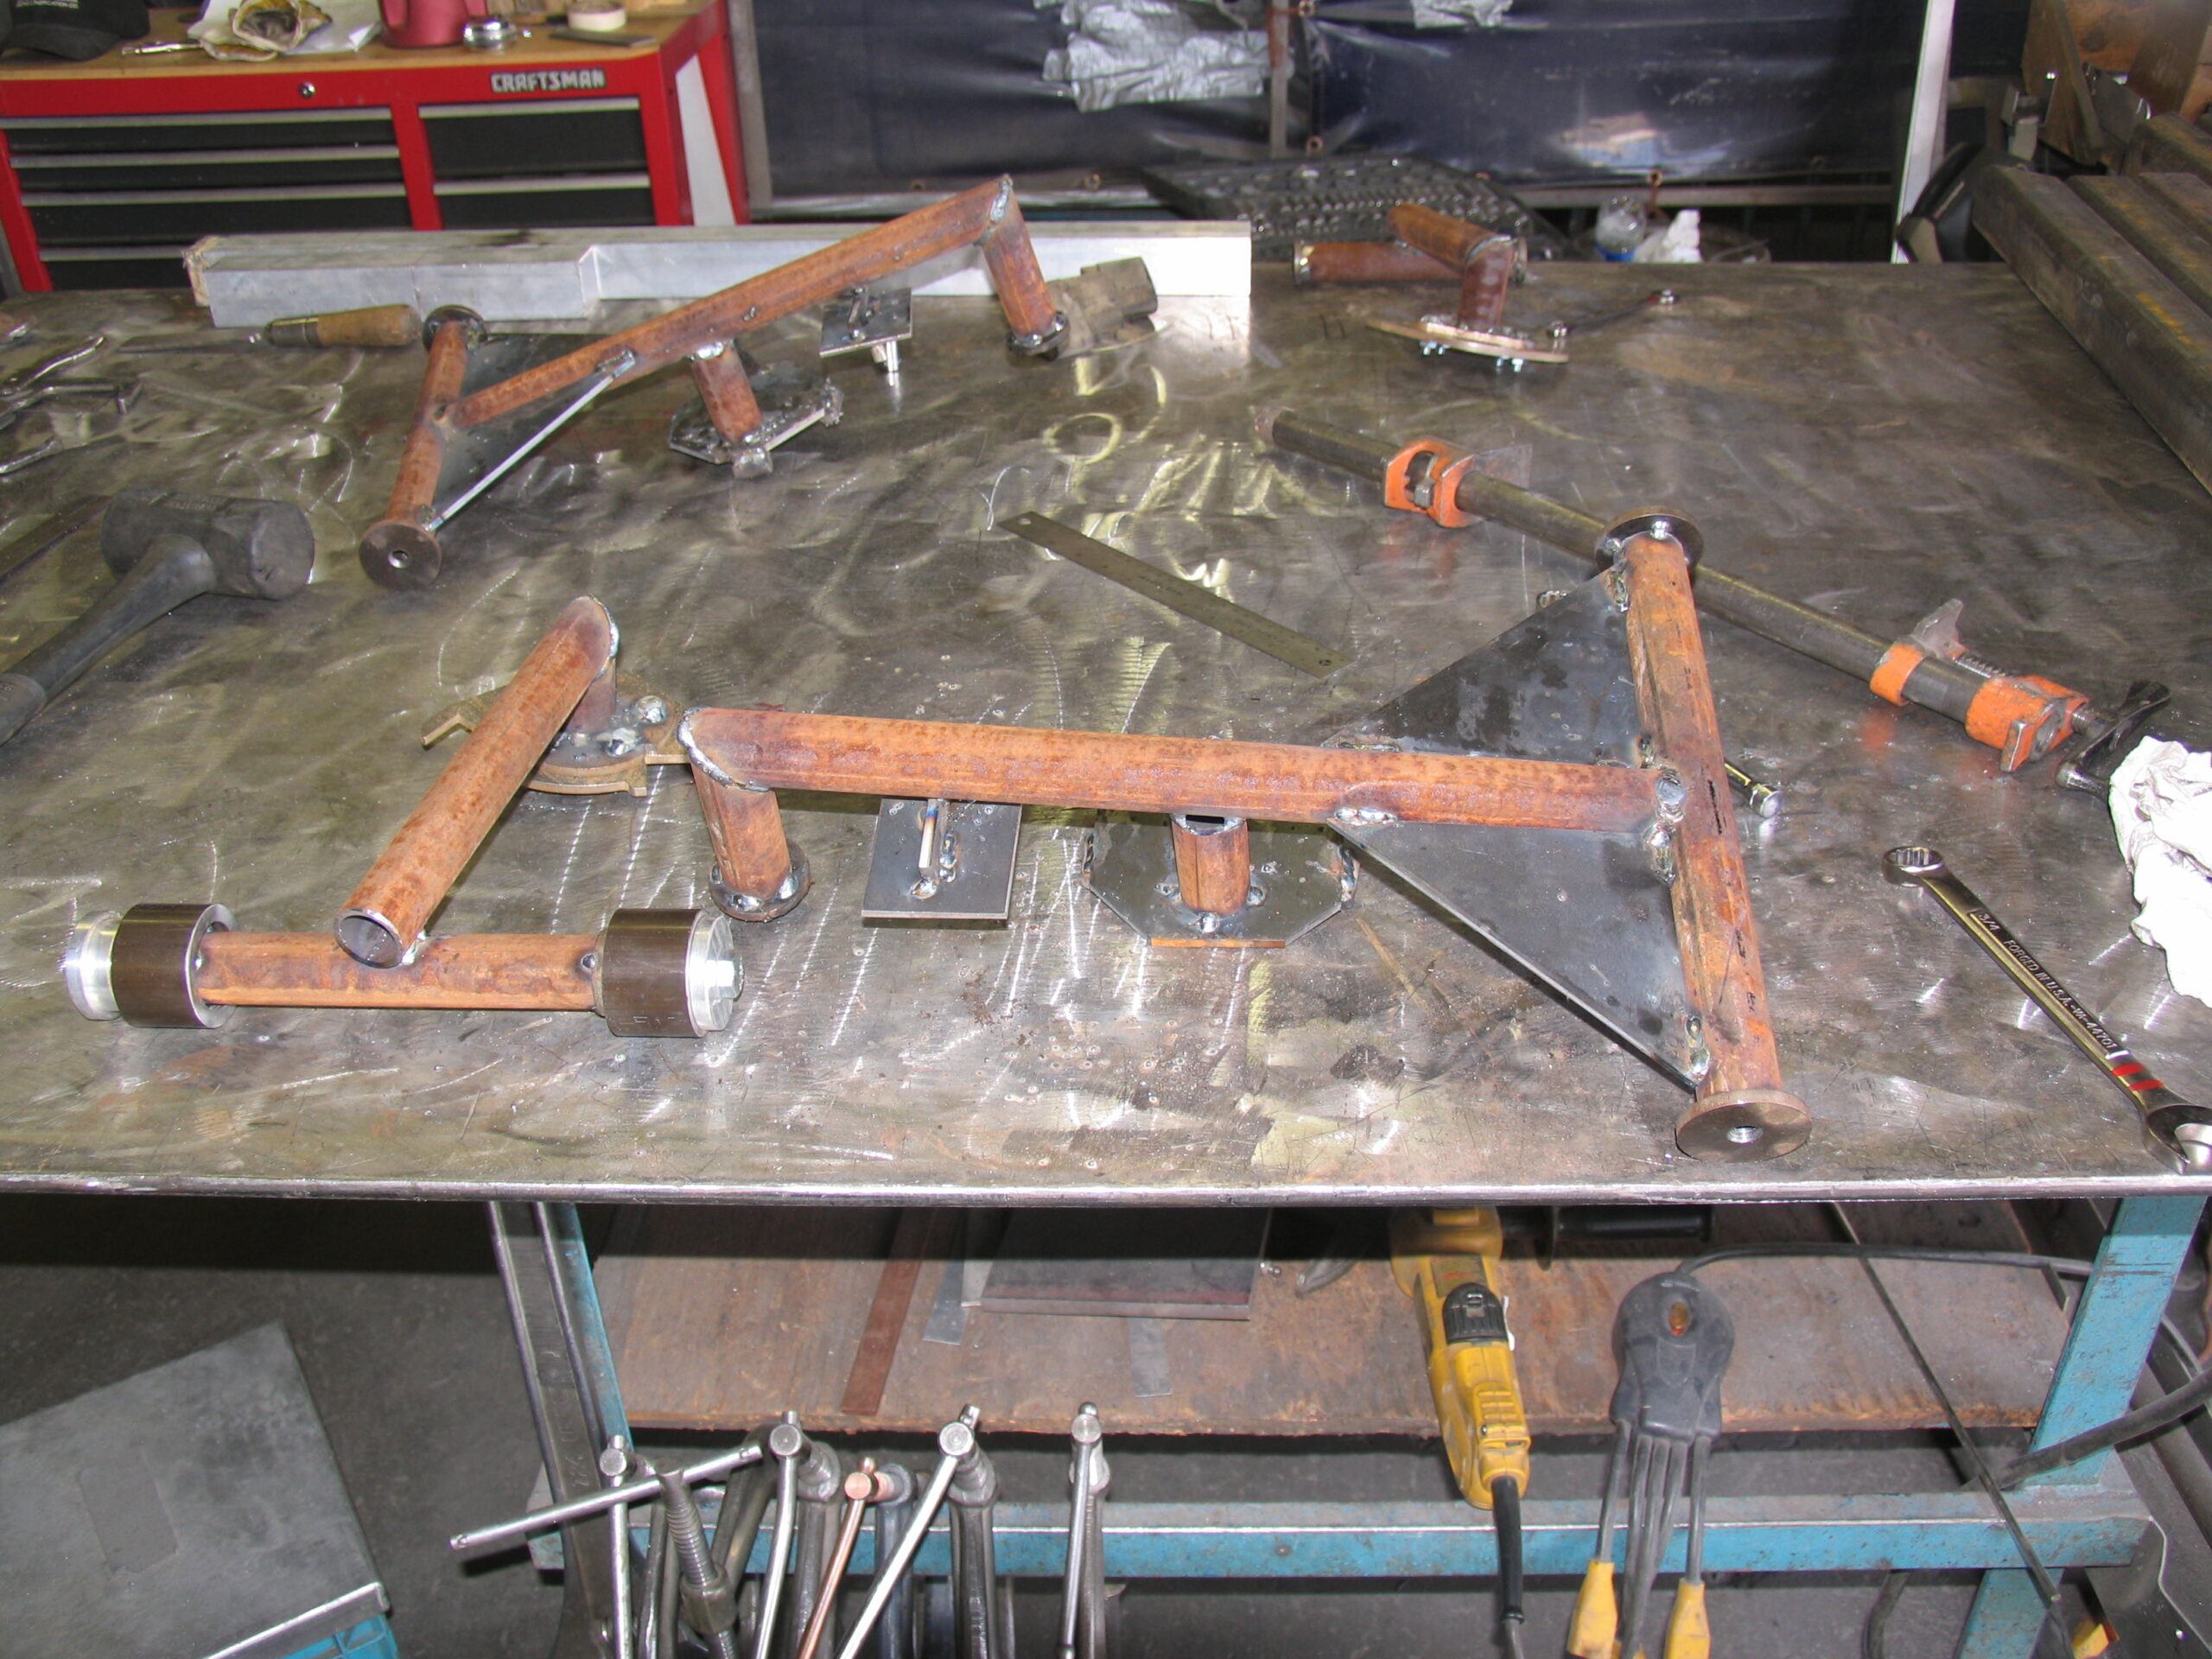
After building the jigs, I proceeded to bolt the mounts in their respective places and used DOM tube to connect everything together (once again too long ago to remember specs). We had a hydraulic tube/pipe bender at the shop which made this soooo much easier.
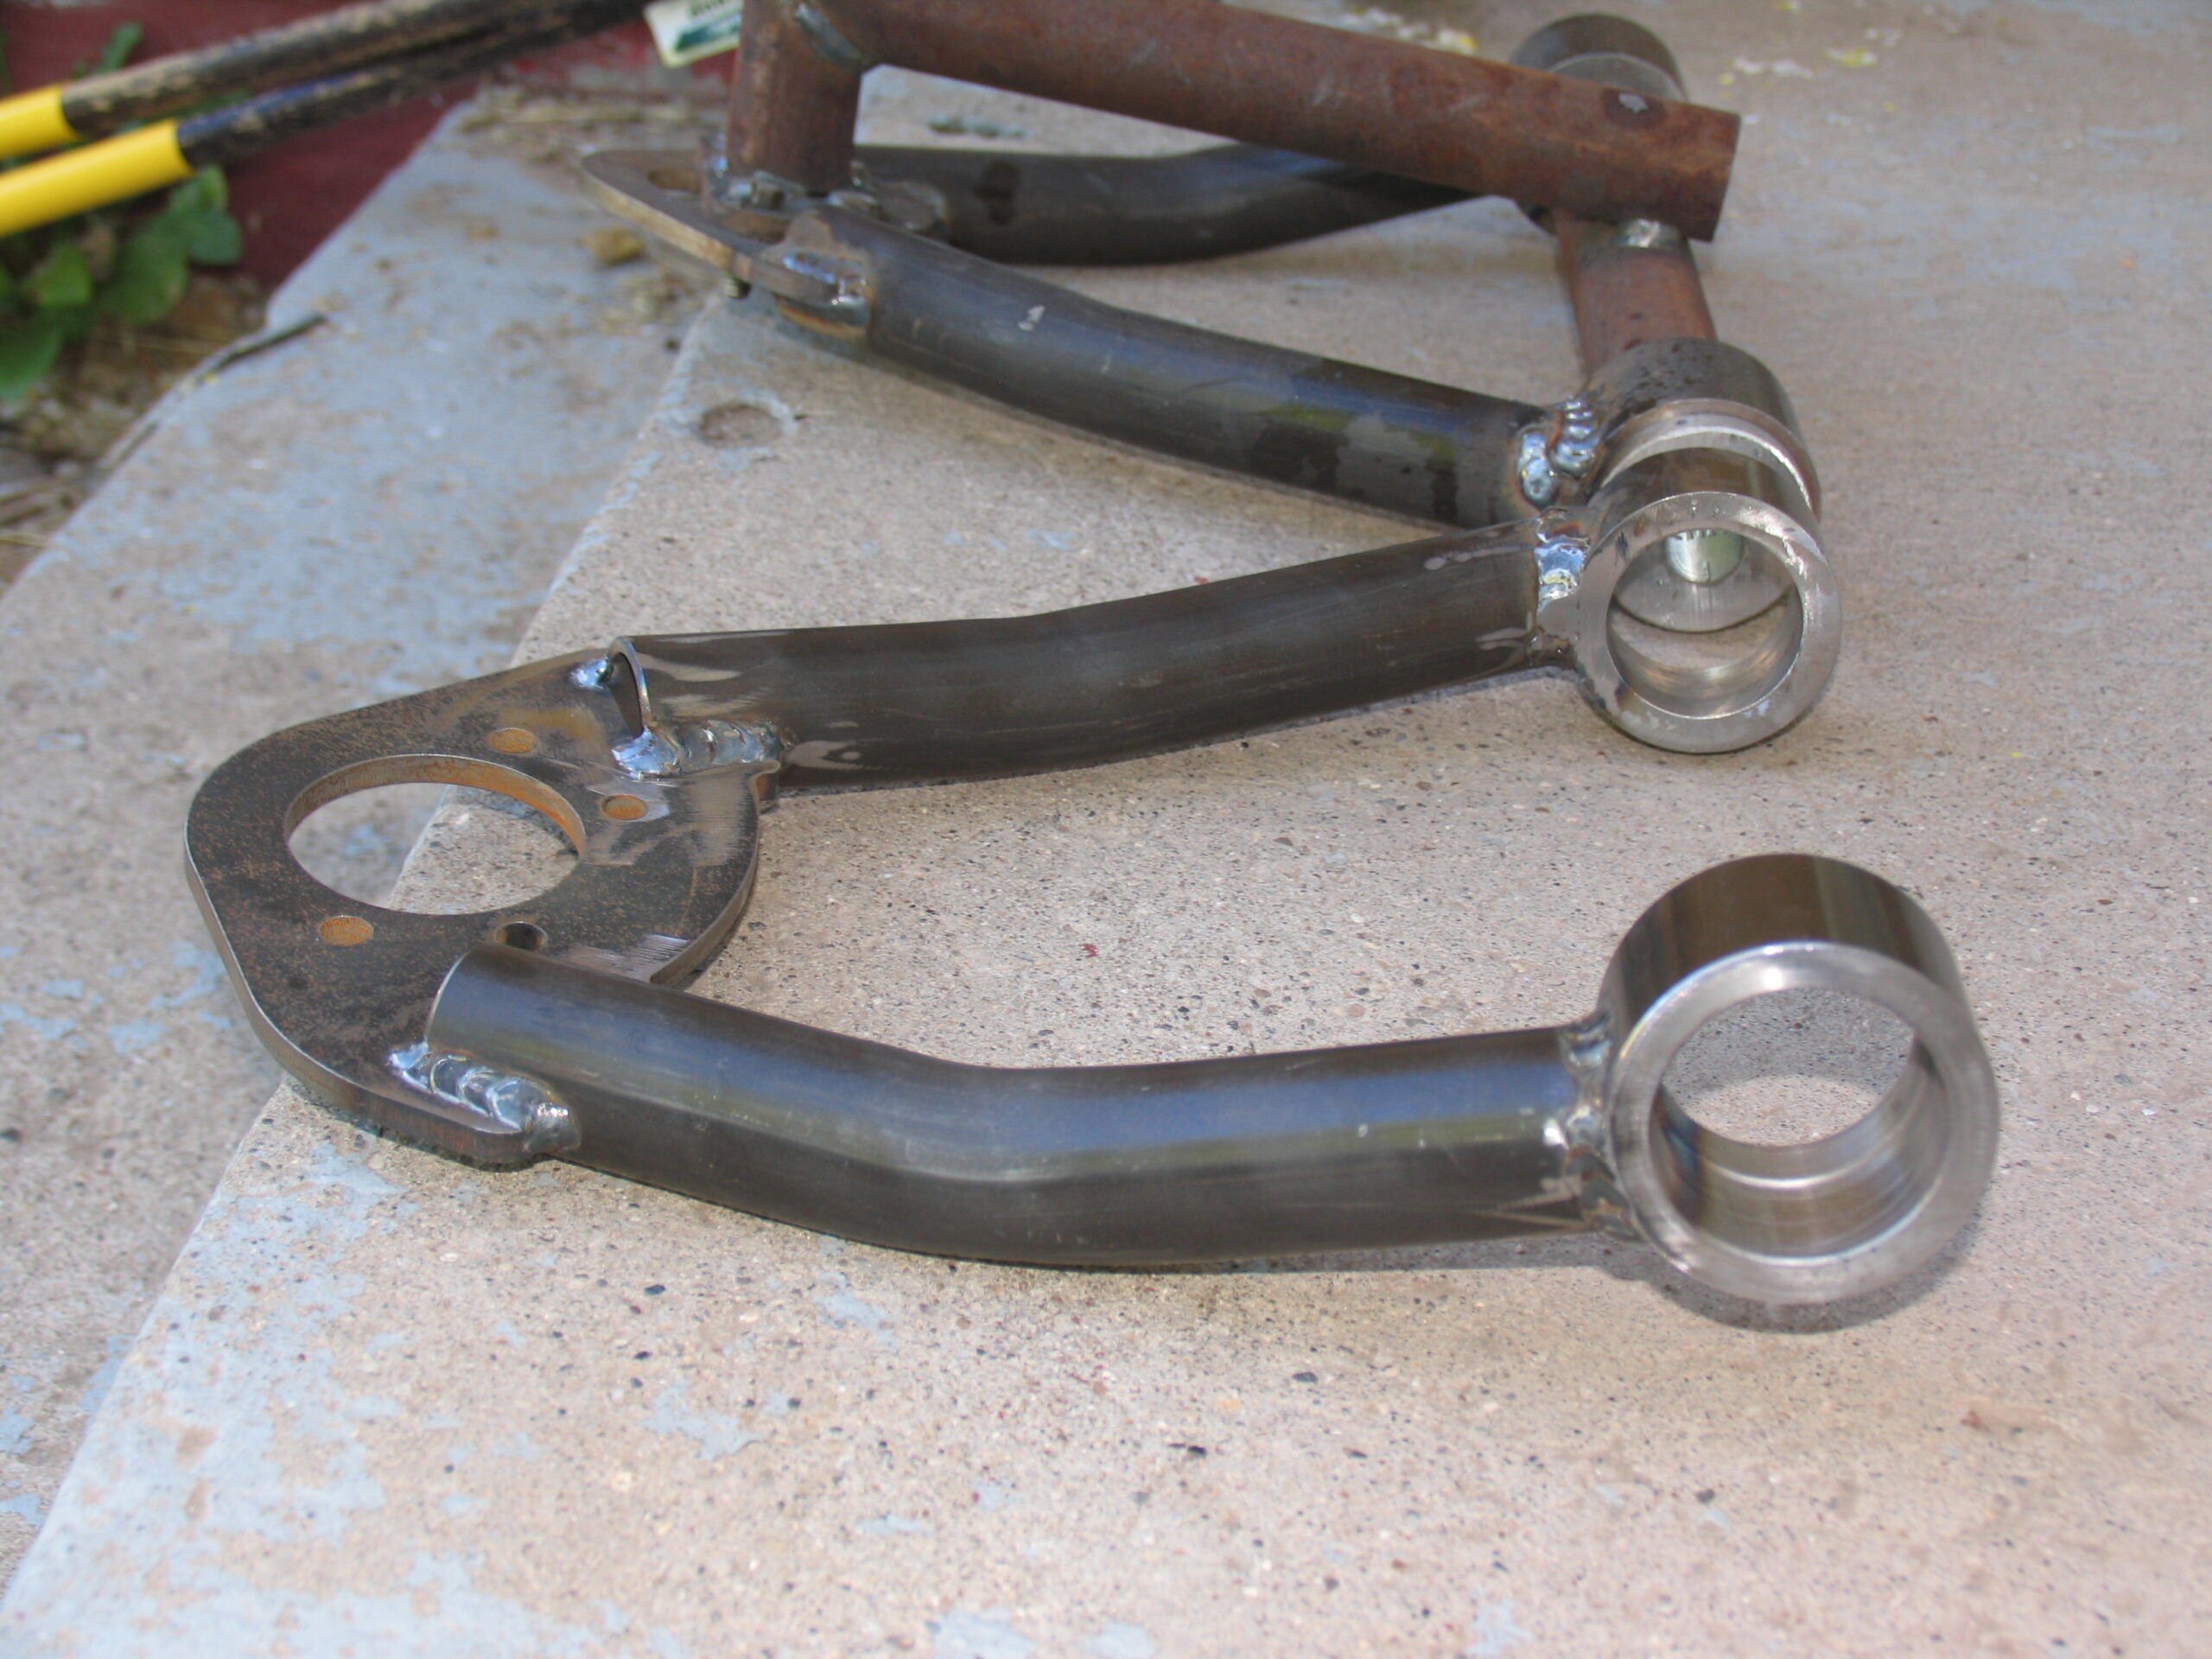
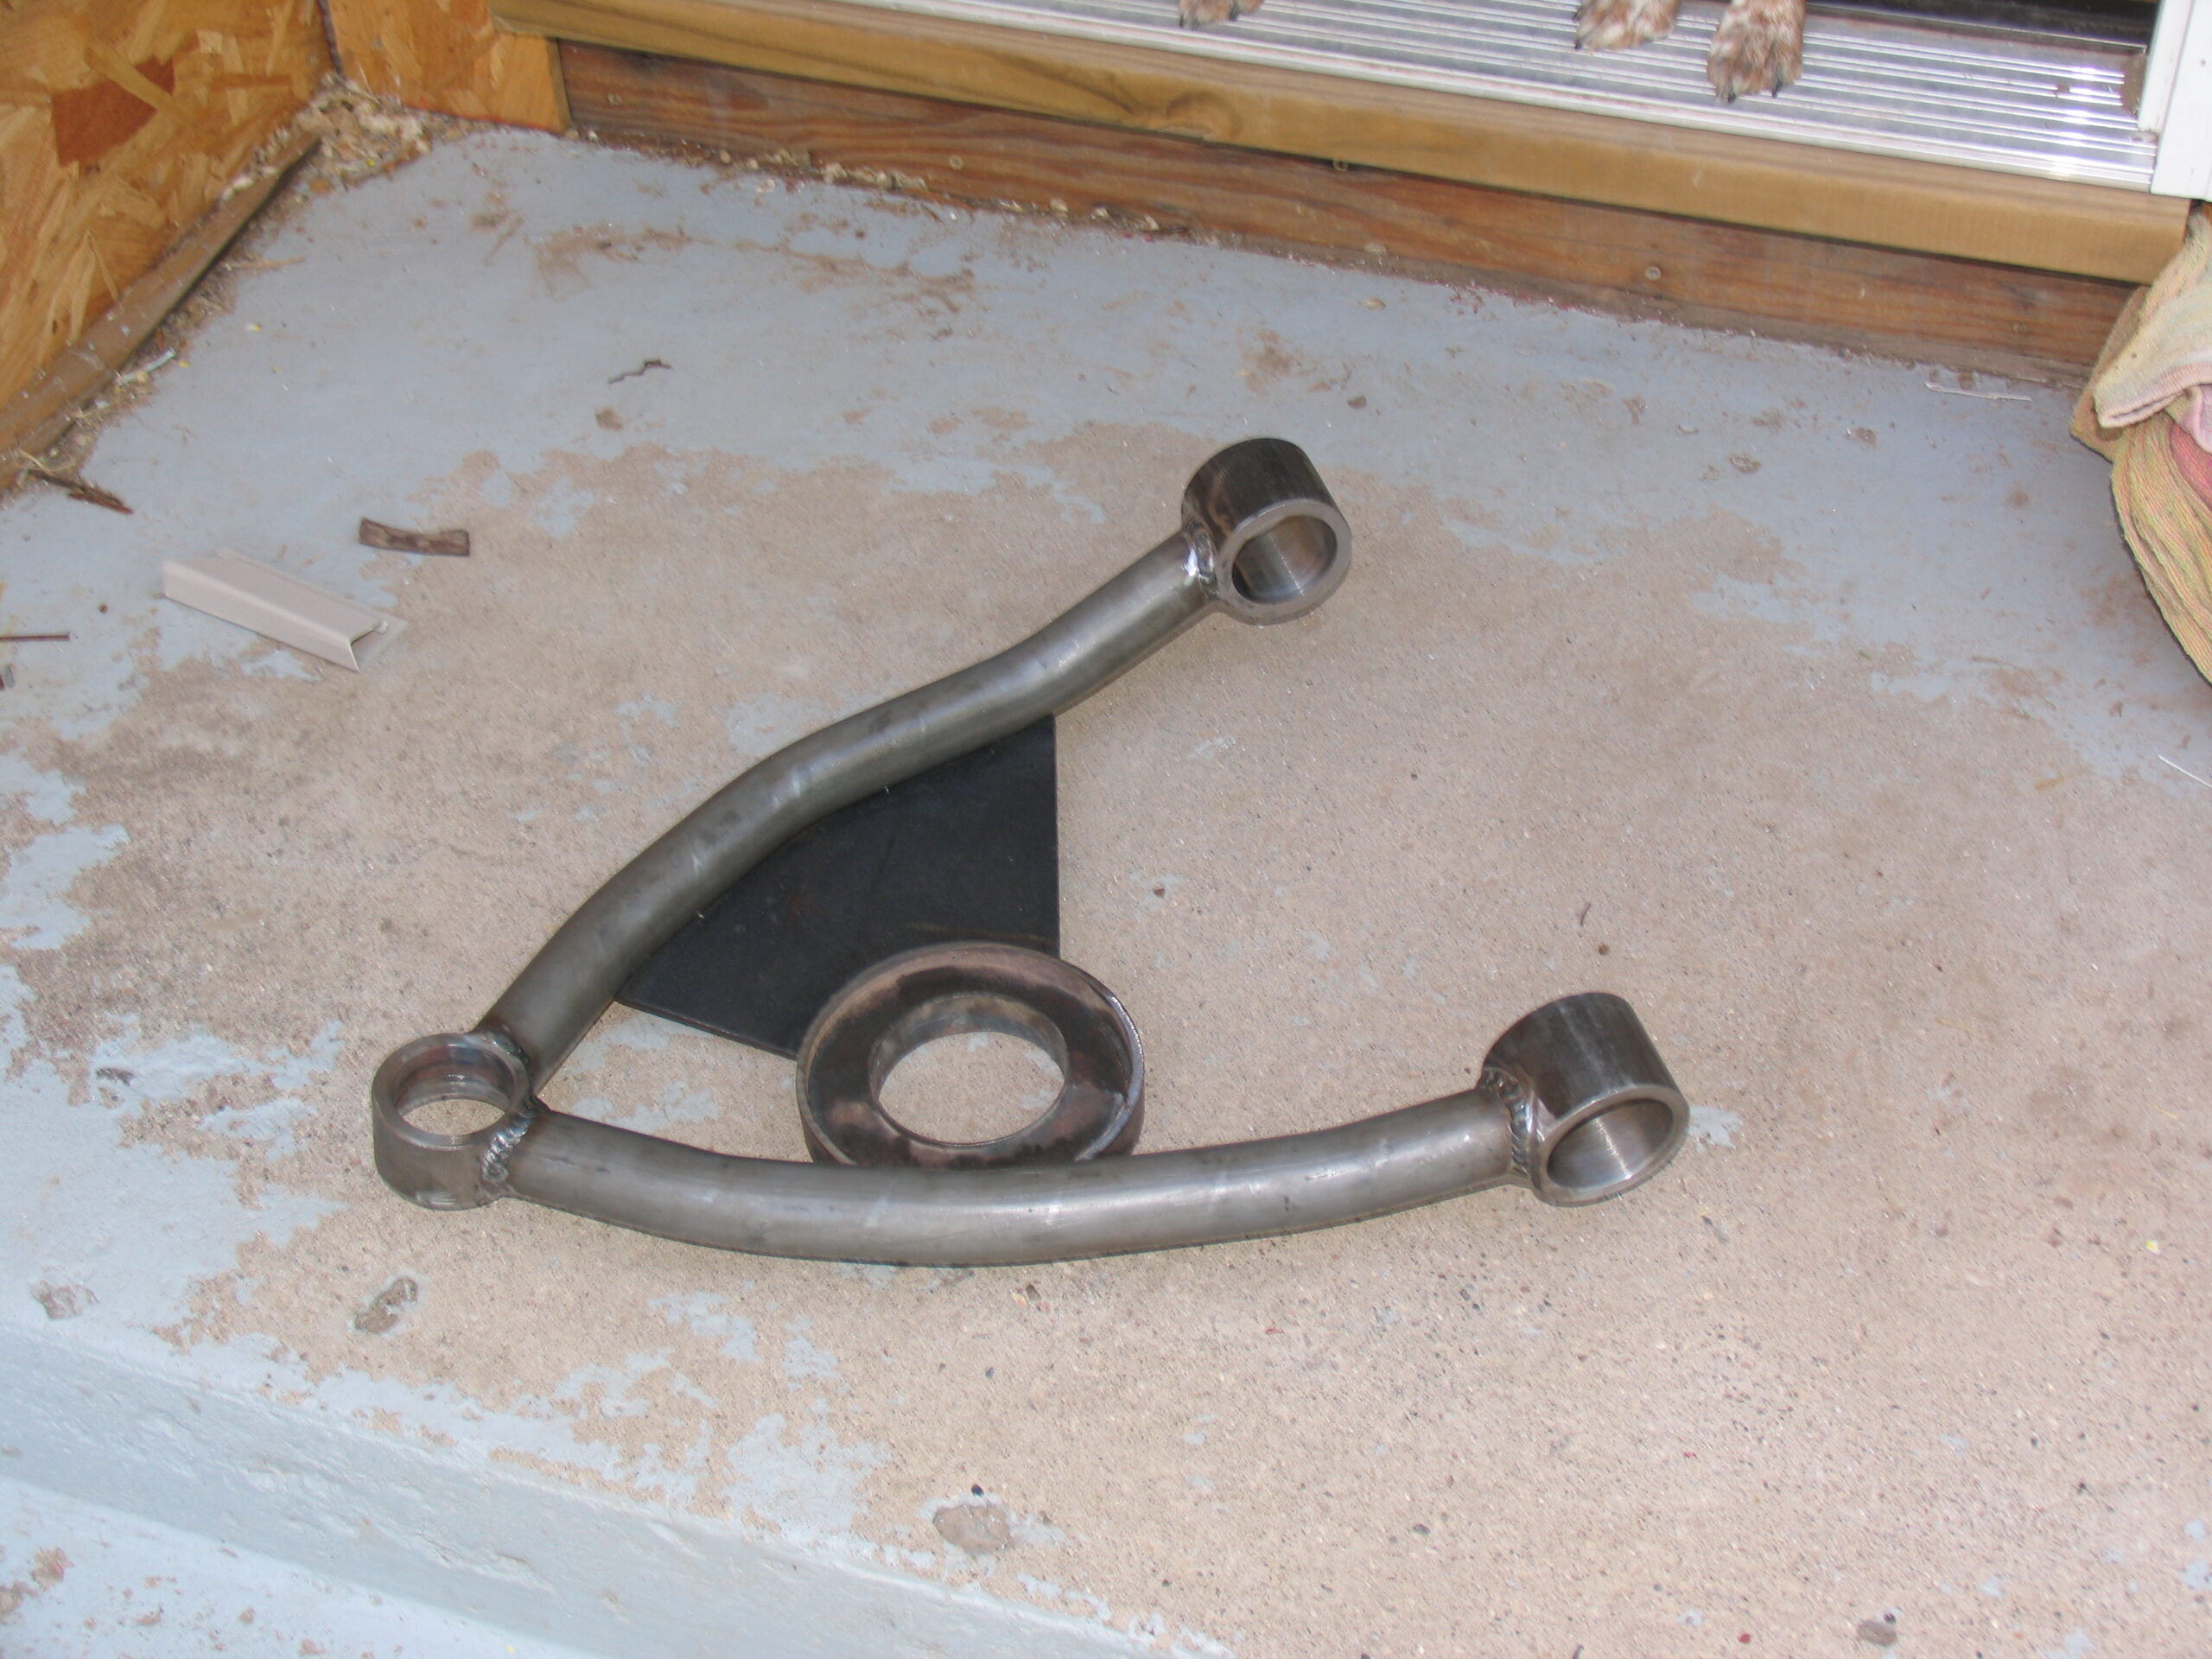
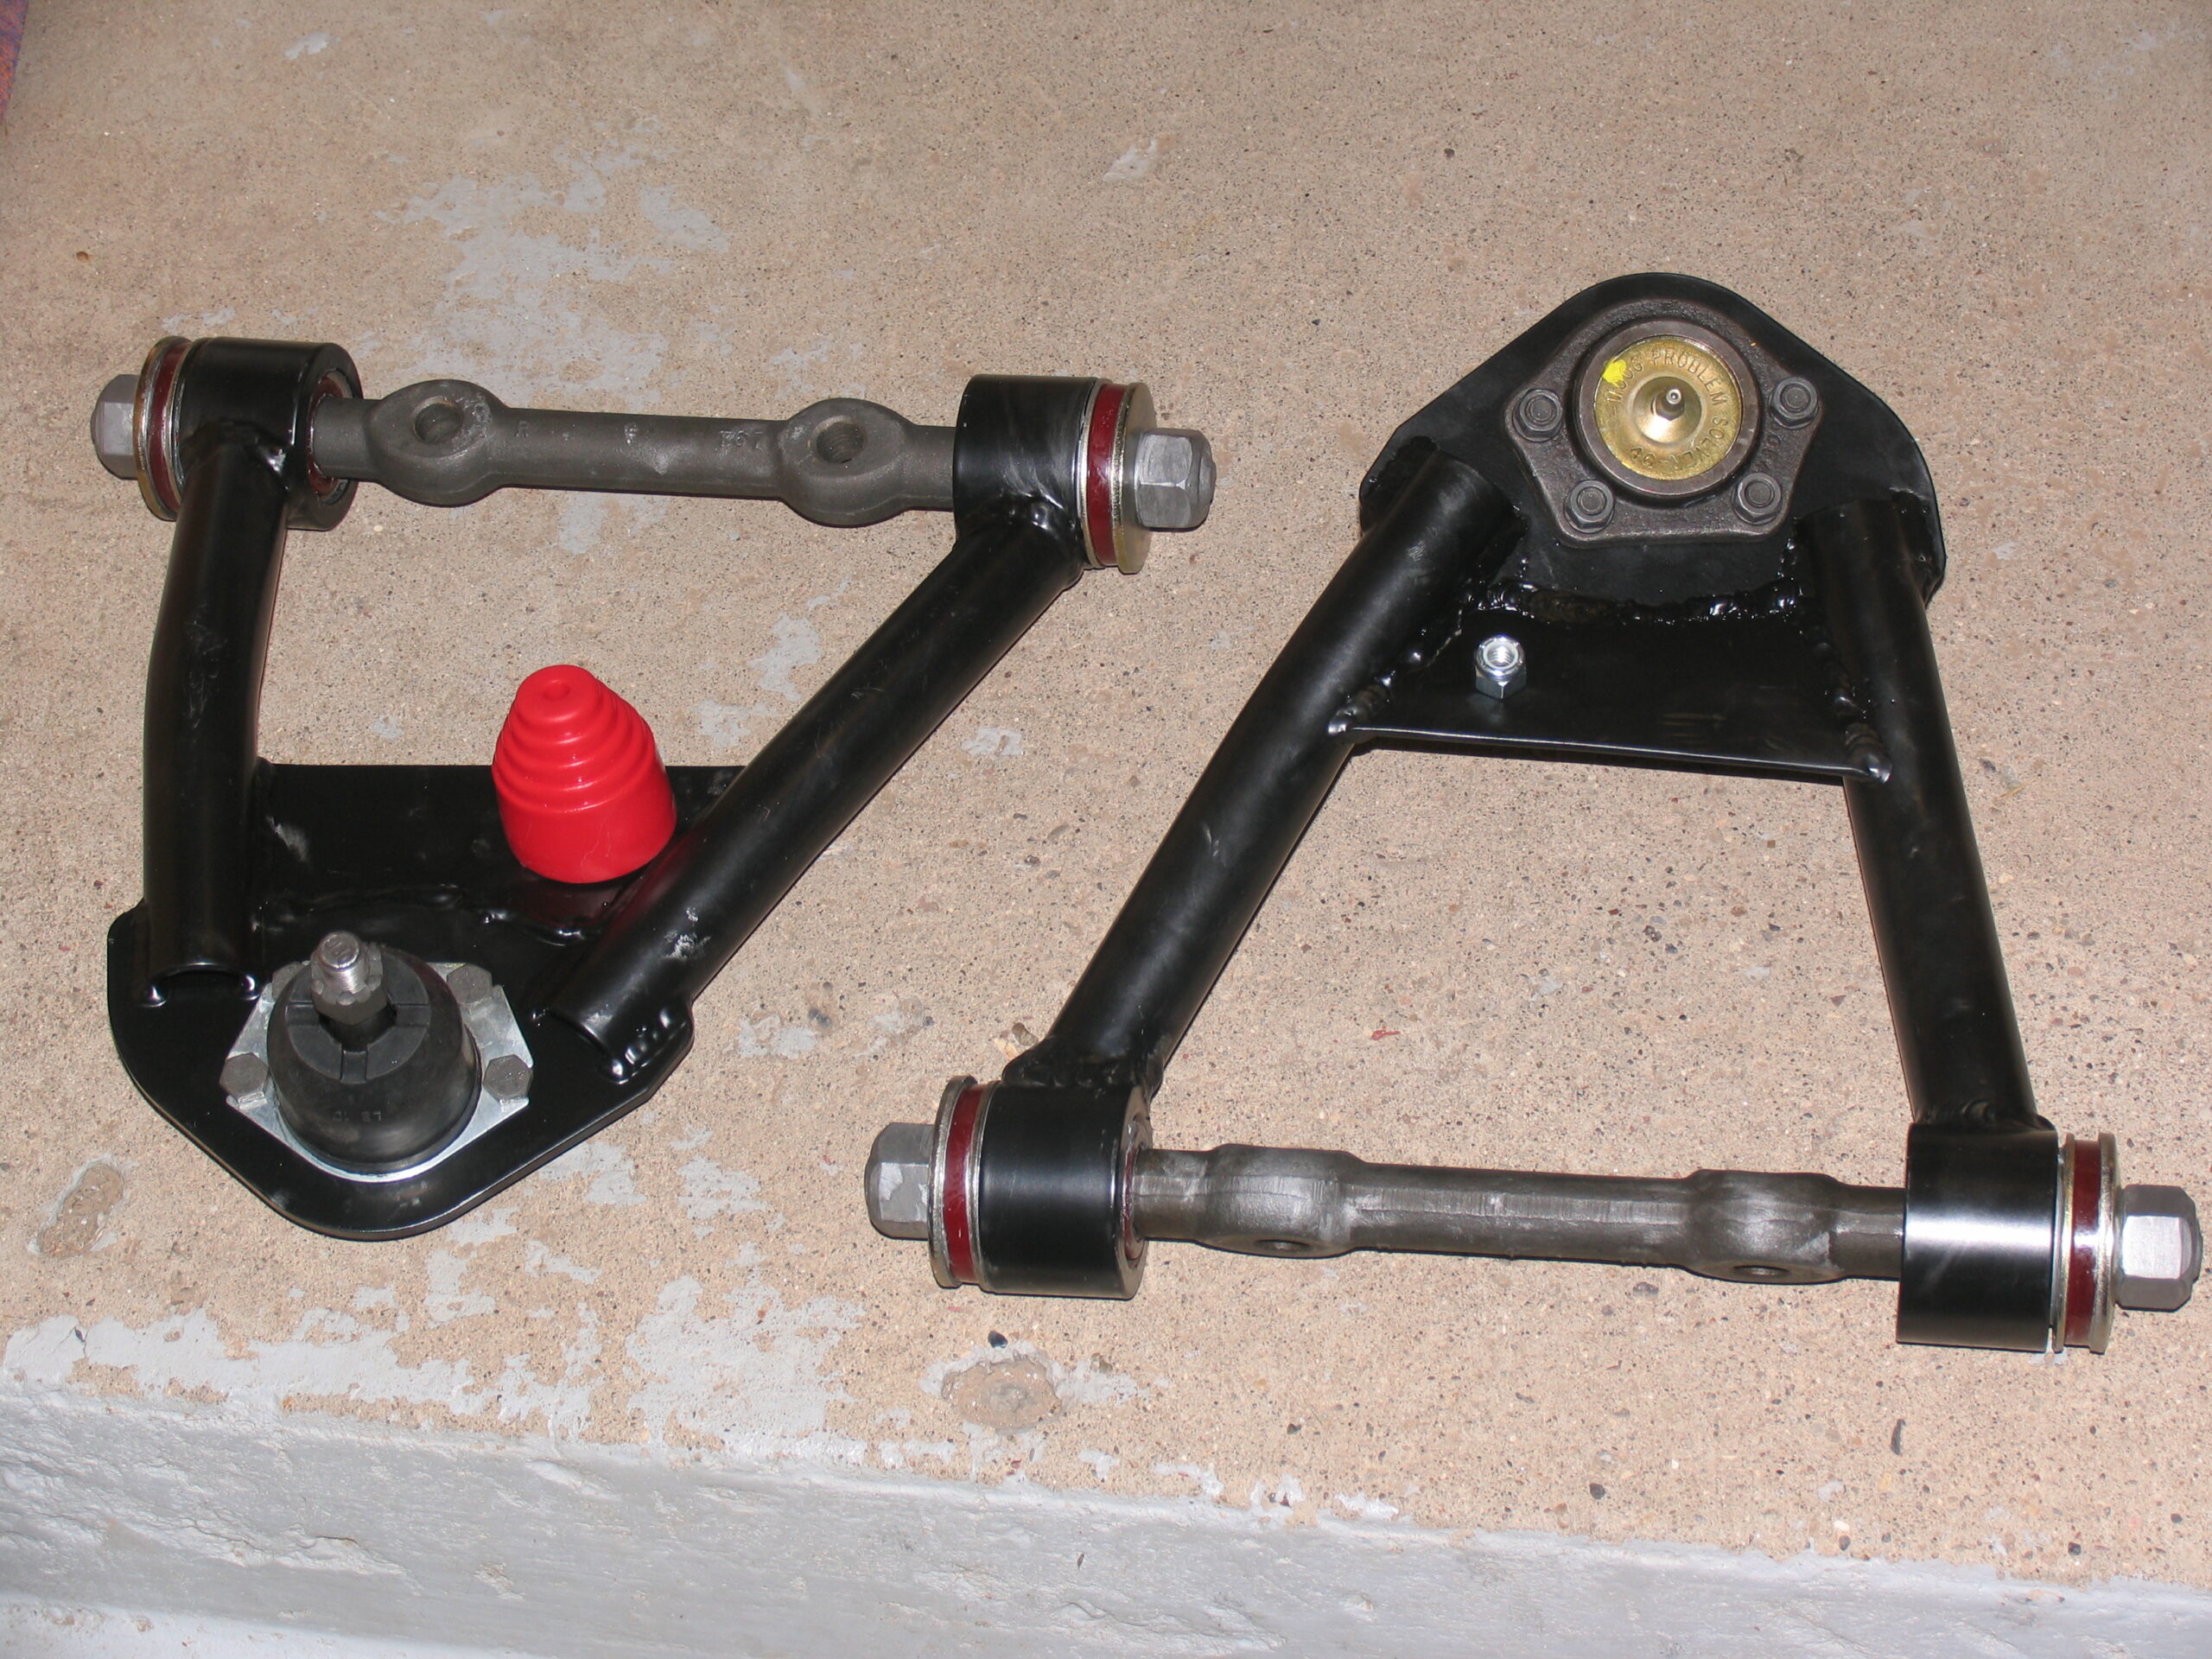
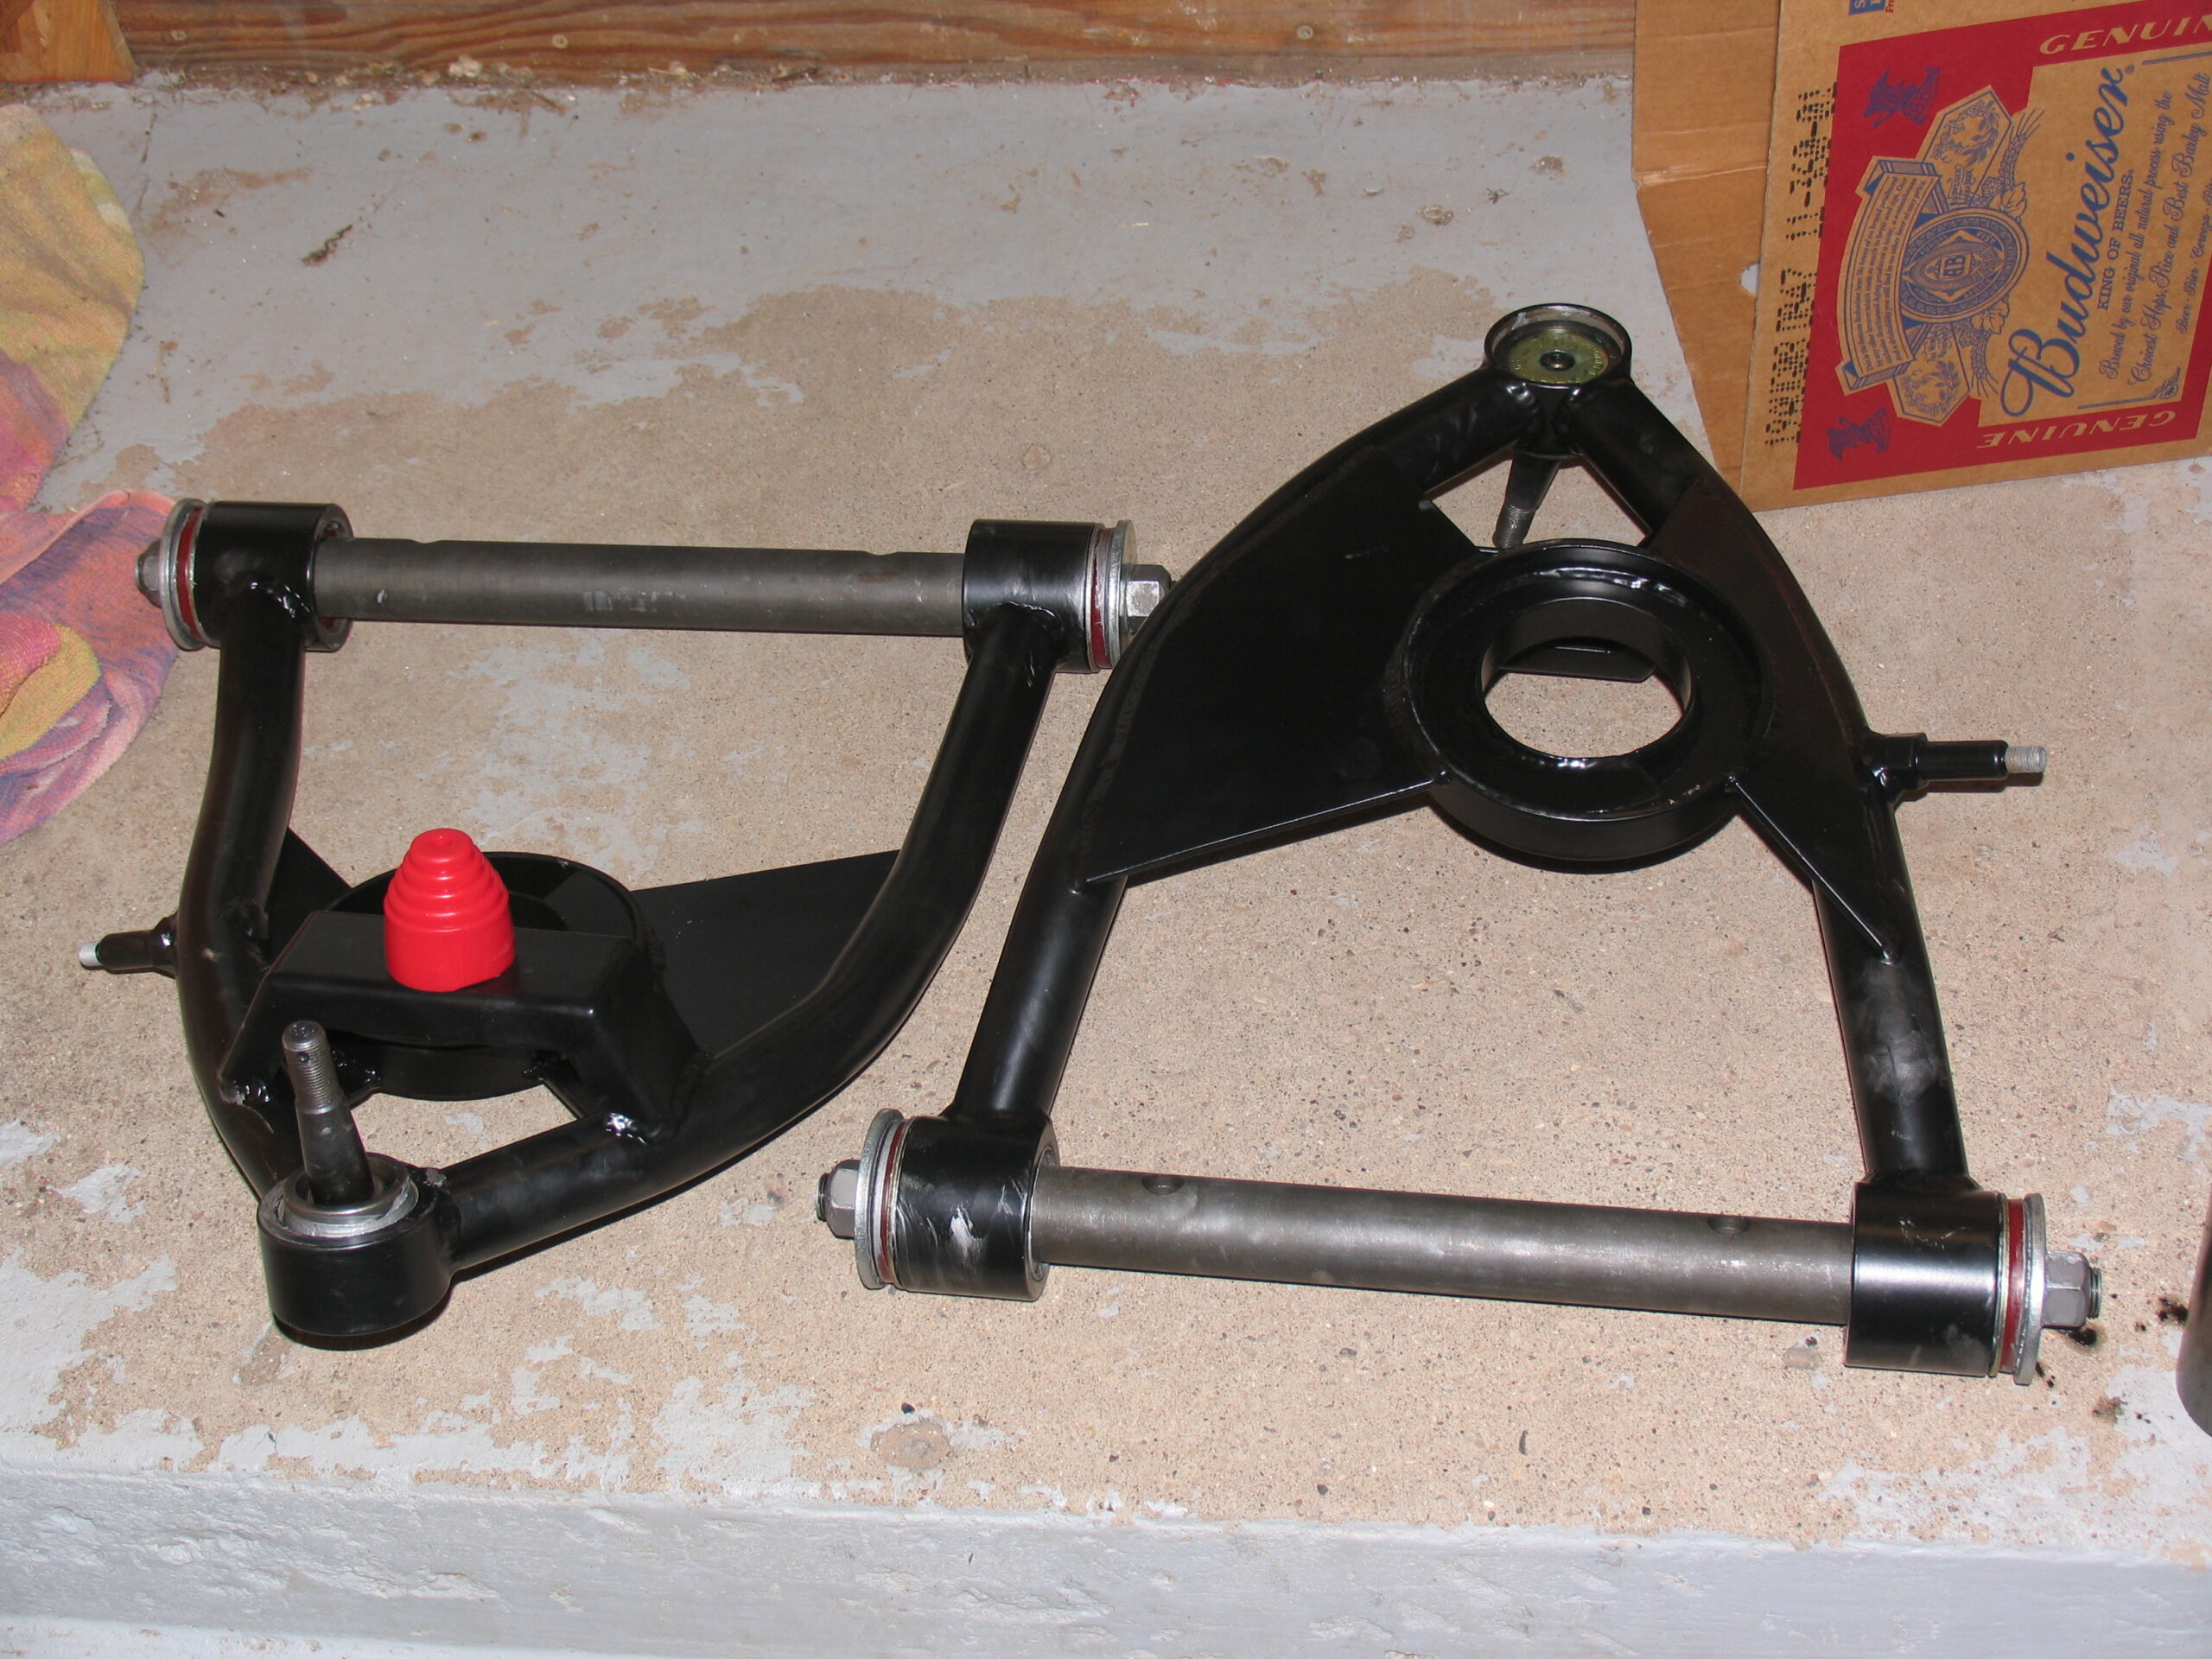
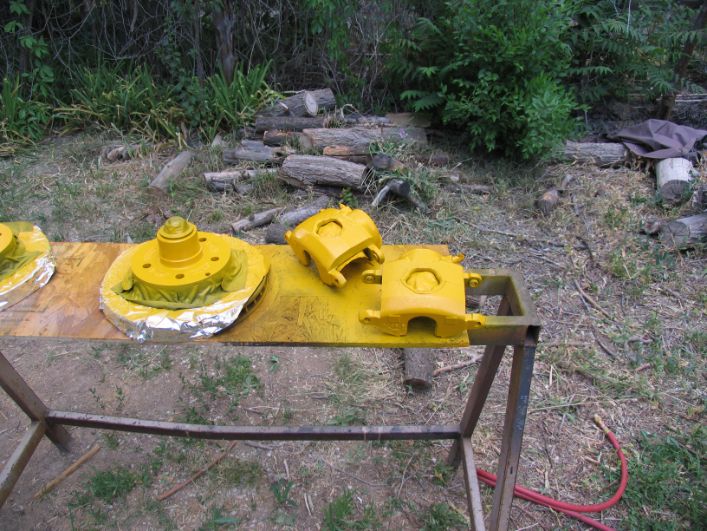
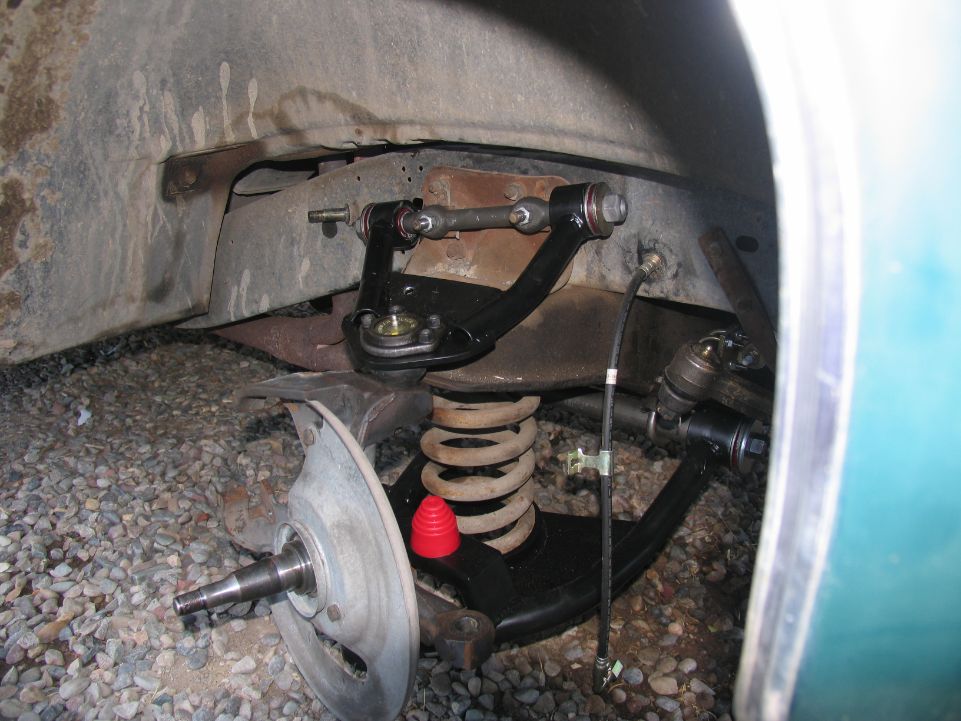
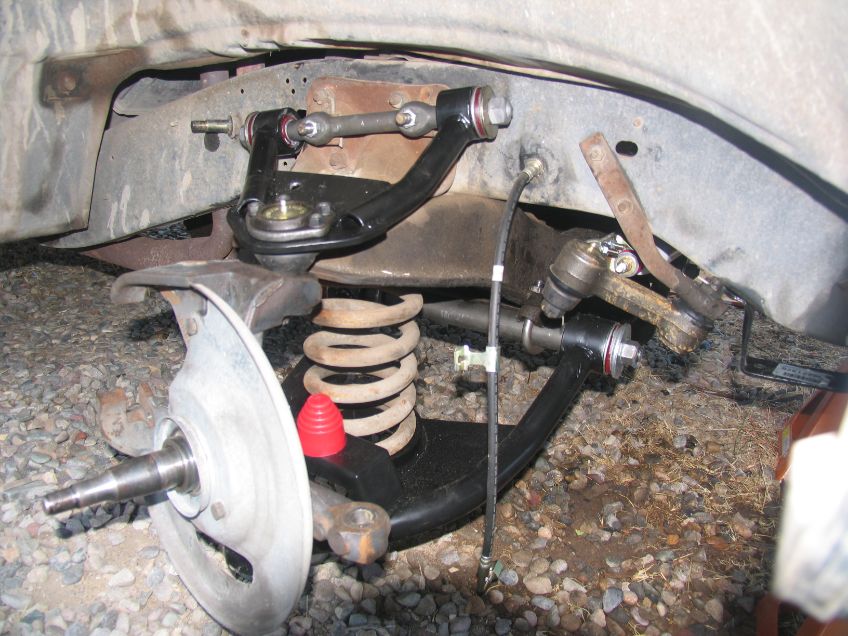
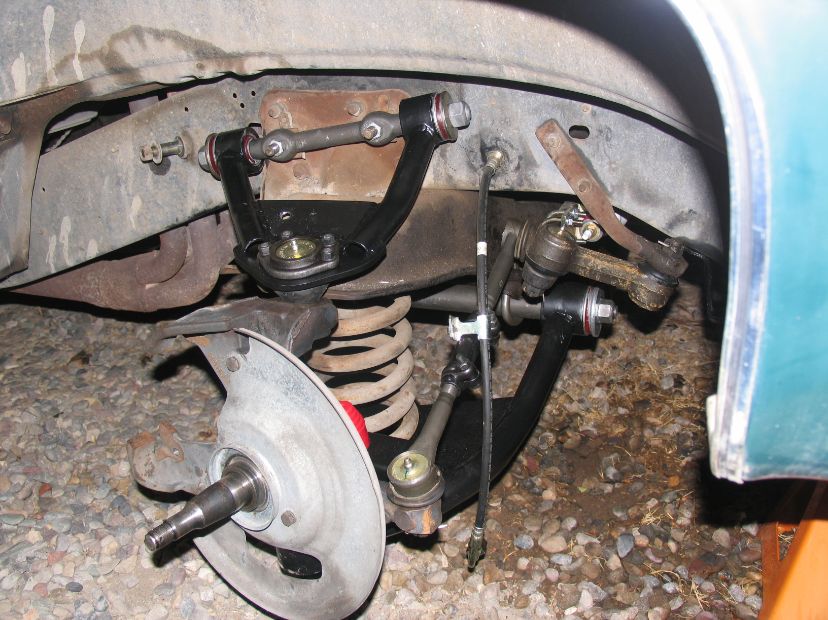
After welding it all together and meticulously verifying that everything lined up with the original arms I sent them off to be powder coated. Bushings are polyurethane from Energy Suspension and the ball joints are from MOOG. I reused the old coil spring but always felt I should have replaced those too.
A little Color:
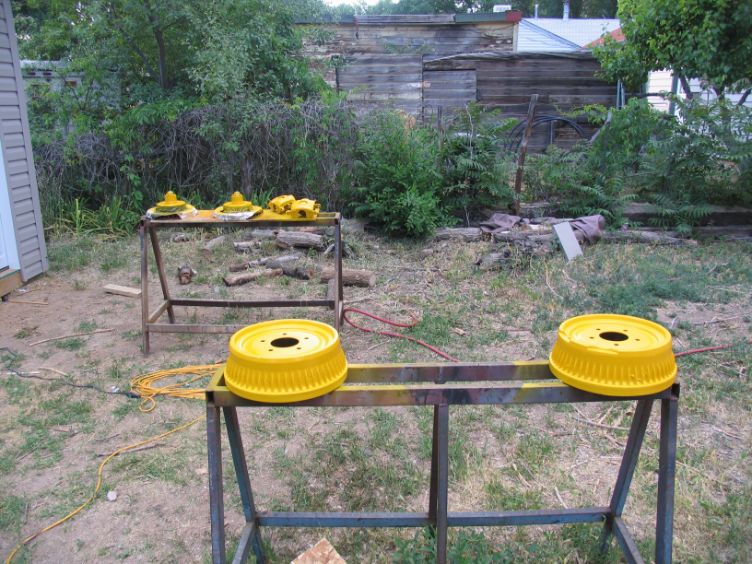
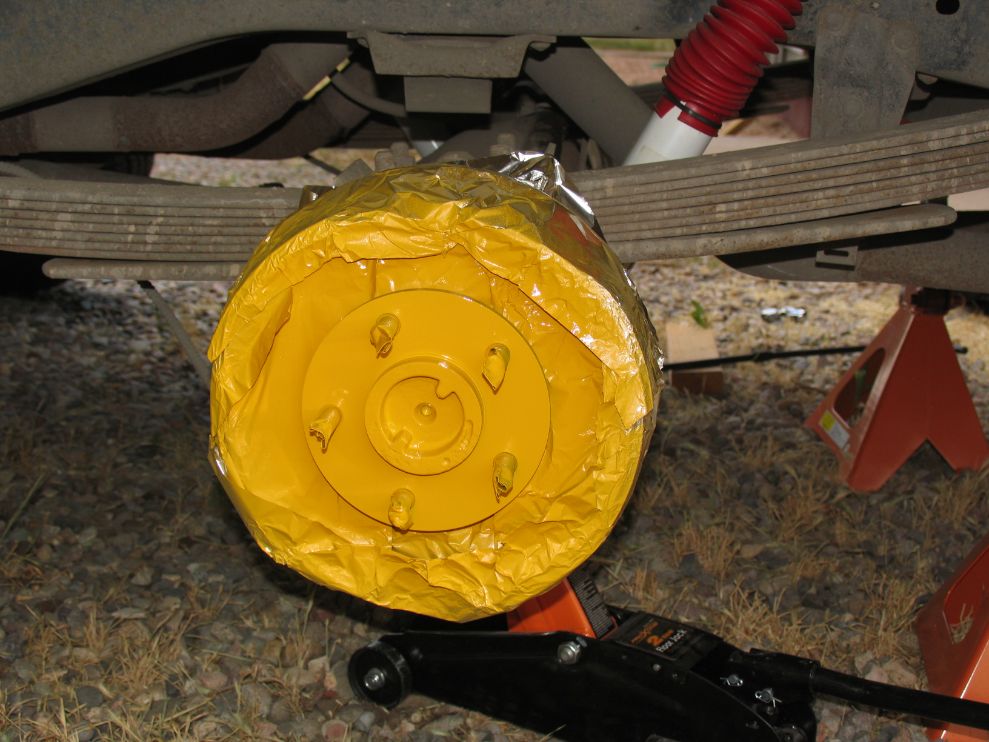
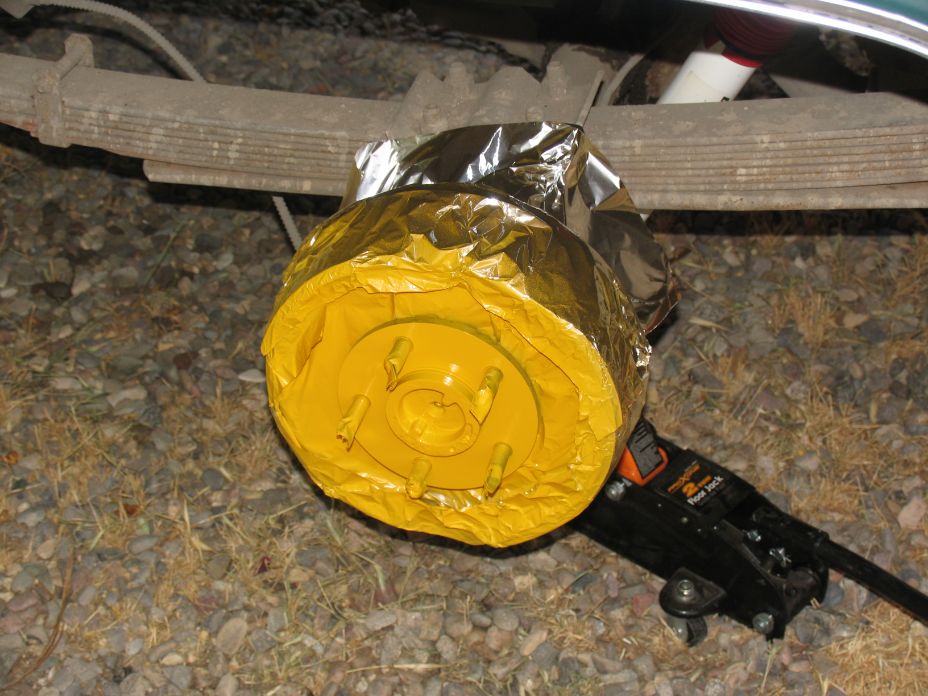
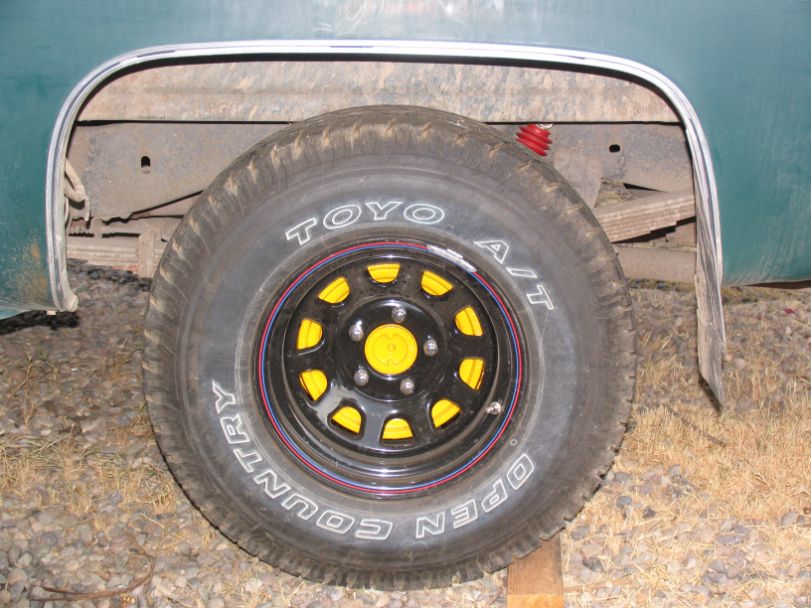
This wasn’t a show car but I do like to make the wheels pop a little. I bought a new set of black painted steel rims and decided to pain the drums, rotors, and calipers yellow with high temp paint. I forget what I used exactly but it was for brakes.
Reassembly:
With my new arms built and powder coated, brakes painted and all my new parts and pieces ready to roll I started reassembling everything. As I was replacing everything connected to the wheels it went together pretty easy. See list below to see all that was replaced.
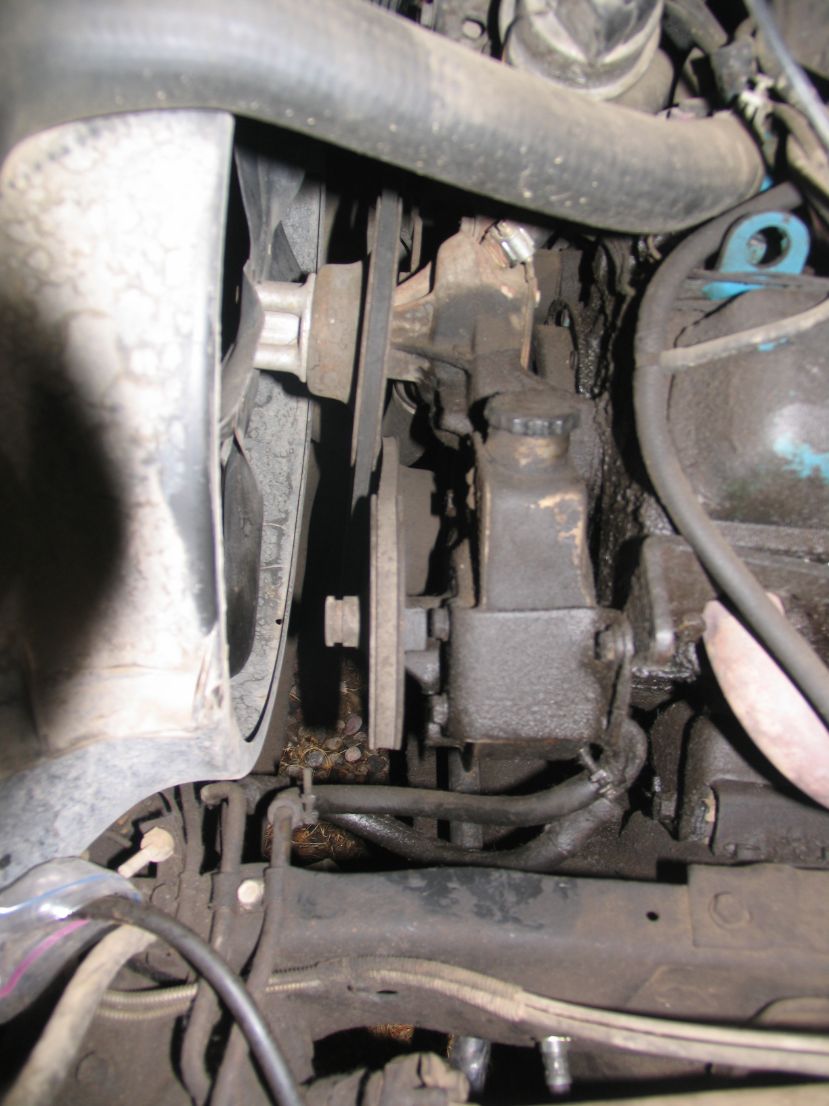
Power Steering Mount:
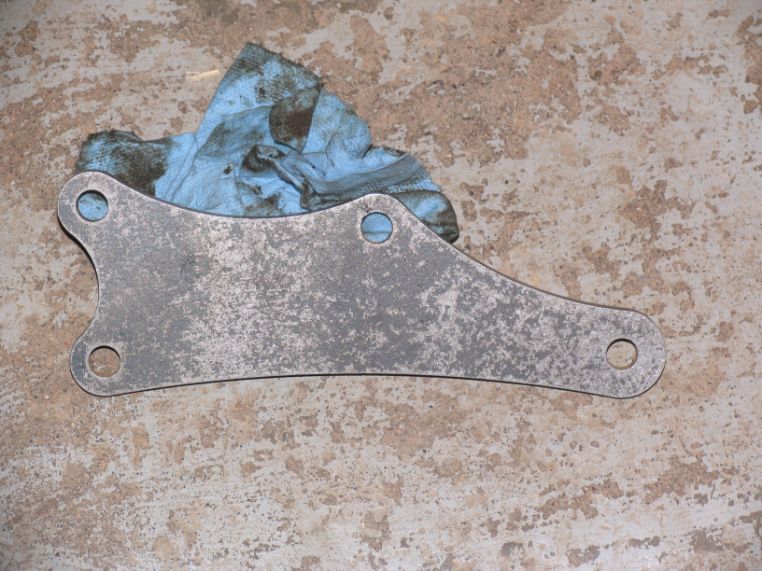
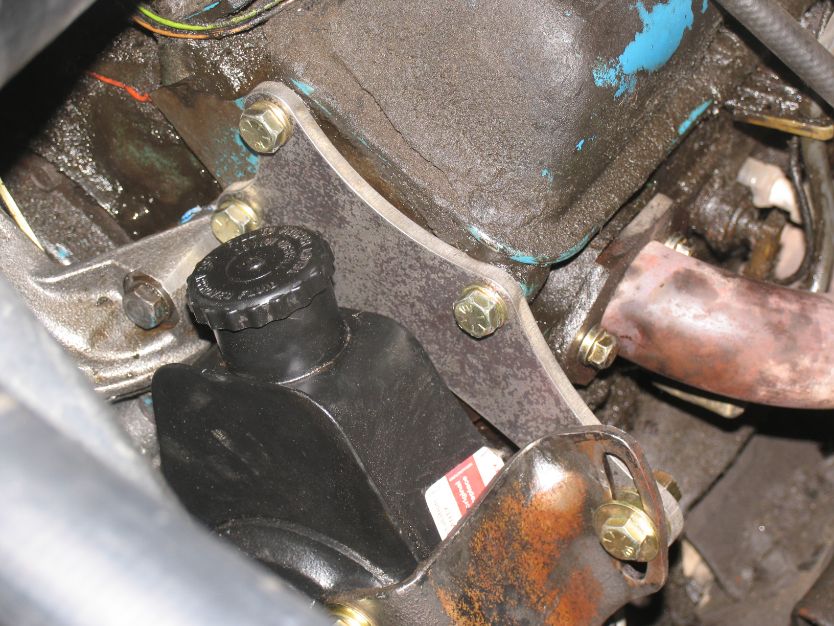
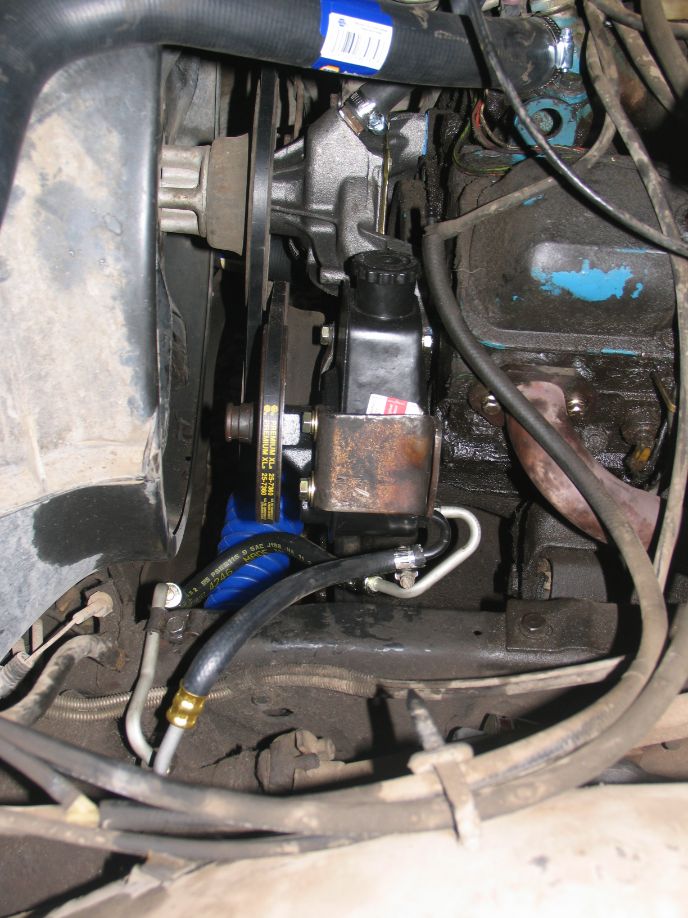
When I went to replace the power steering pump something looked wrong, it was way out of alignment. The upper mount must have been lost or something but a weird bent bracket was bolted into the wrong holes. I drew up a new mount in auto cad and shot it out of 1/4“steel plate at work. Yes, I realized the engine is gross and cleaned it after this project was done.
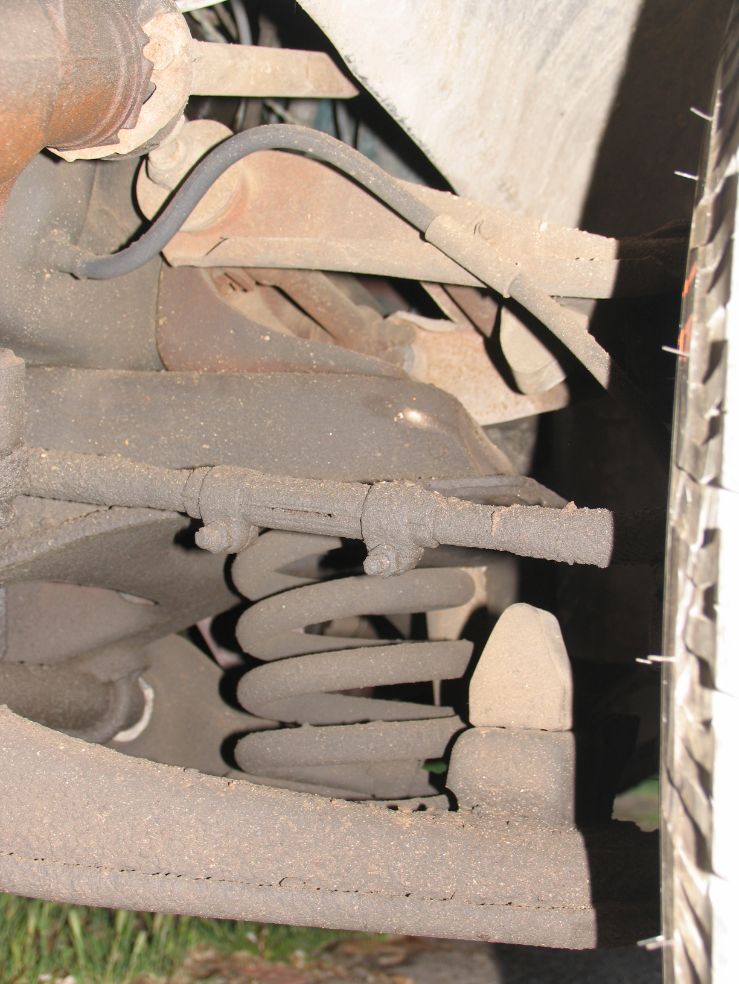
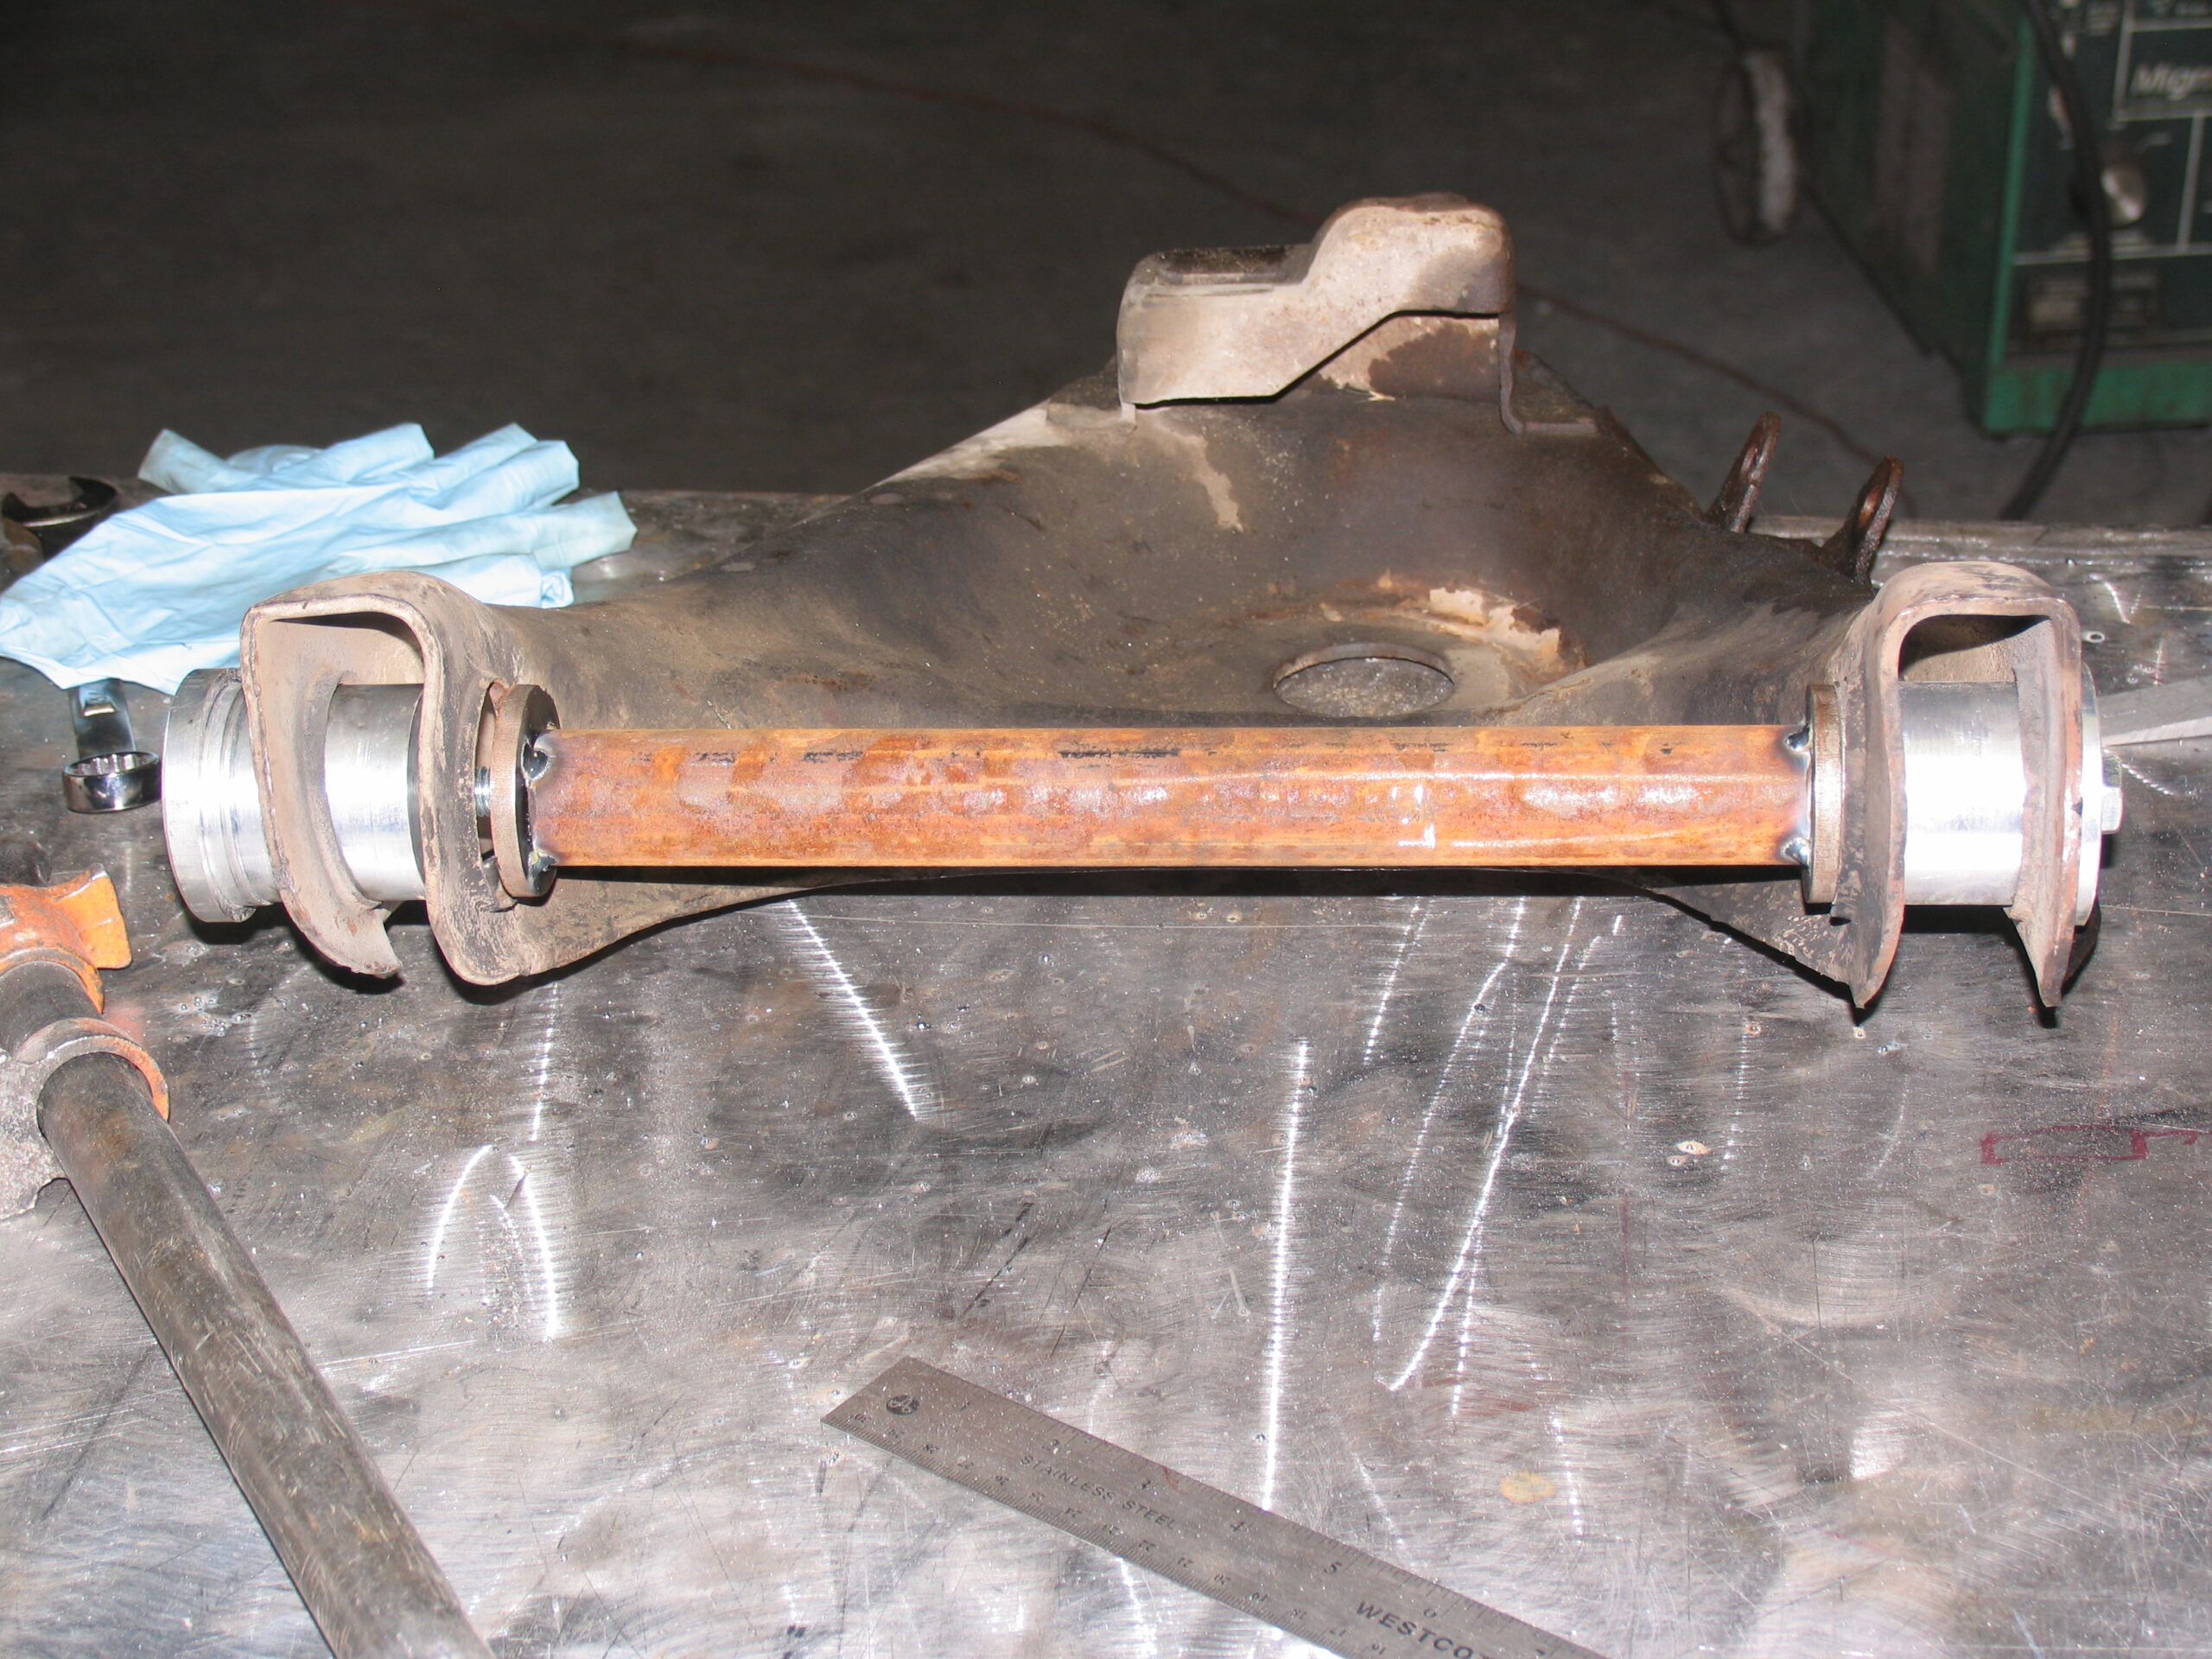
I didn’t do much to the rear end, I replaced the shocks and painted the drums but the leaf springs were in pretty good shape. I bought new poly bushings for the leaf springs but never got around to installing them, I gave them to the new owner but don’t know if he did either. I also bought a front and rear sway bars that I never put it, they new owner did tell me he put them in though. Some projects just never get done. It was a great ride after all the work was done, I hated selling it but I needed a raft trailer and with my new lifestyle the trailer fits a lot better. This was my first time getting that deep into a front end rebuild but it wasn’t my last. I’ve done similar to my old 98 Tacoma and did one for a friend’s 07 Legacy 4 door. I’ve even gotten part numbers and prices on all the parts to do the same to my 99 K3500 that I will likely do after I rebuild the transmission, some project never get finished haha.
I hope you enjoyed the write up, I wish I remembered more details but it was a while ago.
Parts Replaced:
Front End:
- Built new upper and Lower A Arms
- A arm bushings (Energy Suspension)
- Upper and lower Ball joints (MOOG)
- Inner and outer tierod ends (MOOG)
- Pitman arm (MOOG)
- Idler arm (MOOG)
- Tie rod ends (MOOG)
- Steering gear box
- Power steering pump
- Built new bracket for PS Pump
- Wheel Bearings (Napa)
- Steering damper (Rancho)
- Shocks (Rancho)
Front Brakes:
- Master cylinder
- Calipers
- Rotors and pads
Rear End:
- New drums, new shoes
- Slave cylinder
- Shocks (Rancho)
You misspelled brakes, numerous times
Thanks for the heads up.