
It’s been a while since I’ve had anything to post about. I took a new job that pays well, but has me traveling a lot. Keeps me busy enough that I haven’t had time to really work on anything myself so I’ve been taking the truck to a mechanic. I had a string of things go bad and had to do a couple of big repairs but most of that seems to be going good now. My local mechanic is pretty good with these older trucks, he even has a 97 OBS Chevy, so that helps. The only thing he won’t touch is aftermarket parts so any modifications I’ve made, like to the steering column from Cunningham Machine he won’t touch. I kind of get it, he’s staking his rep on parts that might not be designed right so I’ve resigned myself to still working on anything that is not OEM haha.
I sit in hotels a lot these days as I travel for work. We work long days and I’m usually pretty mentally fried by the end of the day but one day I started thinking about projects I’ve been neglecting on the truck. I dove down the rabbit hole watching videos and ordering parts for the next time I was home. Fortunately, while I work a lot of hours when I’m at work, my job also comes with long sloths of time off. So, with my month off and parts in the closet, I dove into a few of the projects I bought parts for and got a bunch done.
I like the older trucks, newer ones have too much crap in them. That said, some modern amenities are really nice. At work we bought a used F350 Dually Platinum Edition that I get to drive around the country and it led me to start to want a few things for my truck. Backup camera, Android Auto, heated seats, and wireless charging. Also, In my 20s, I was into building sound systems for competitions and while I’m not really into super loud any more, I would like to build up my stereo for a crisper more full range sound. So, this is the beginning of a few interior projects as I work through the cab of my truck over the next year or so.
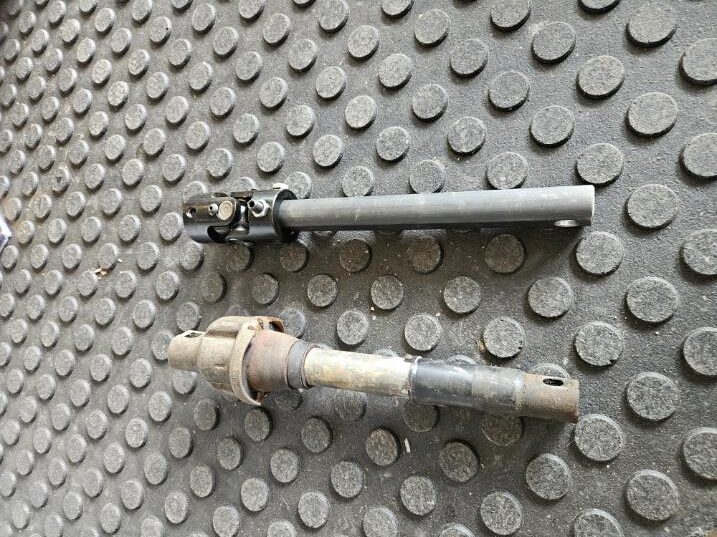
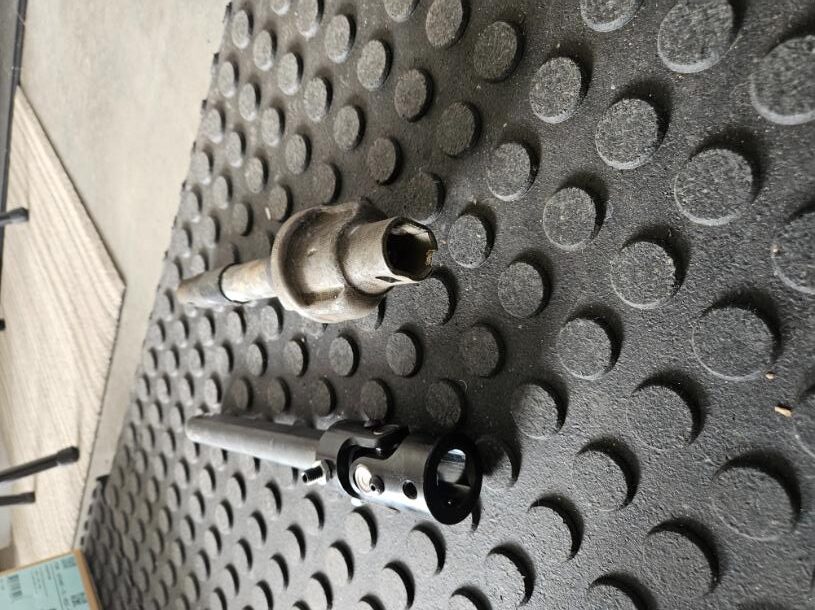
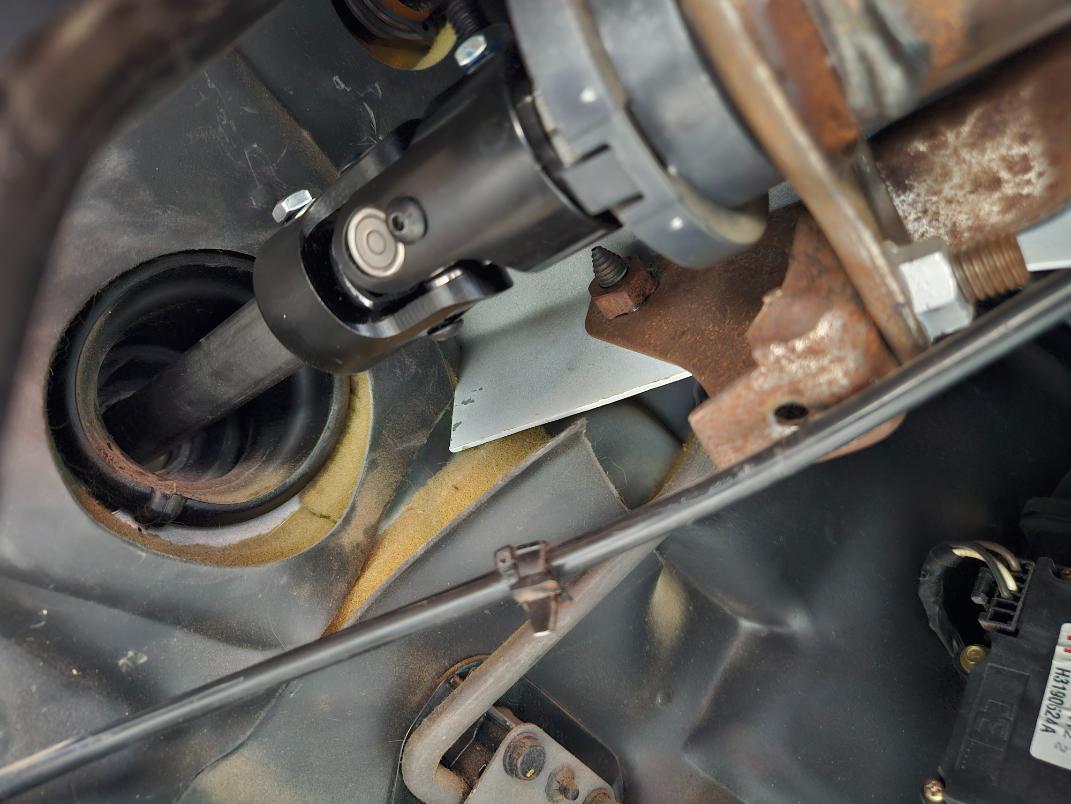
Steering Shaft:
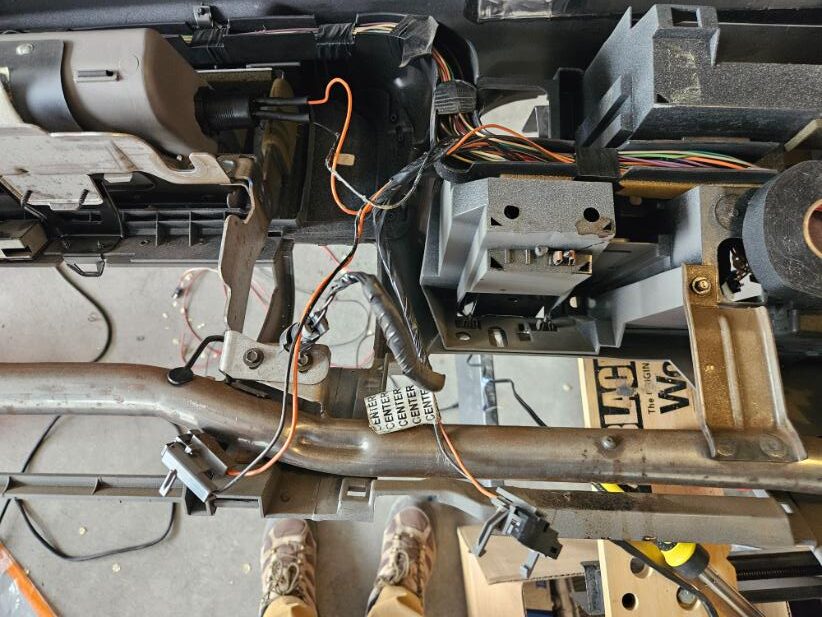
After the steering rebuild a few years ago I still had a little slop in the wheel. At the time I had only replaced the lower steering shaft, but now I’ve replaced the upper and the steering is much nicer. My Mechanic wanted to remove the lower and put the OEM back in and I said “no”. I still have a little slop that I suspect might be an adjustment in the gear box but the truck no longer drifts or feels super sloppy.
Dashboard:
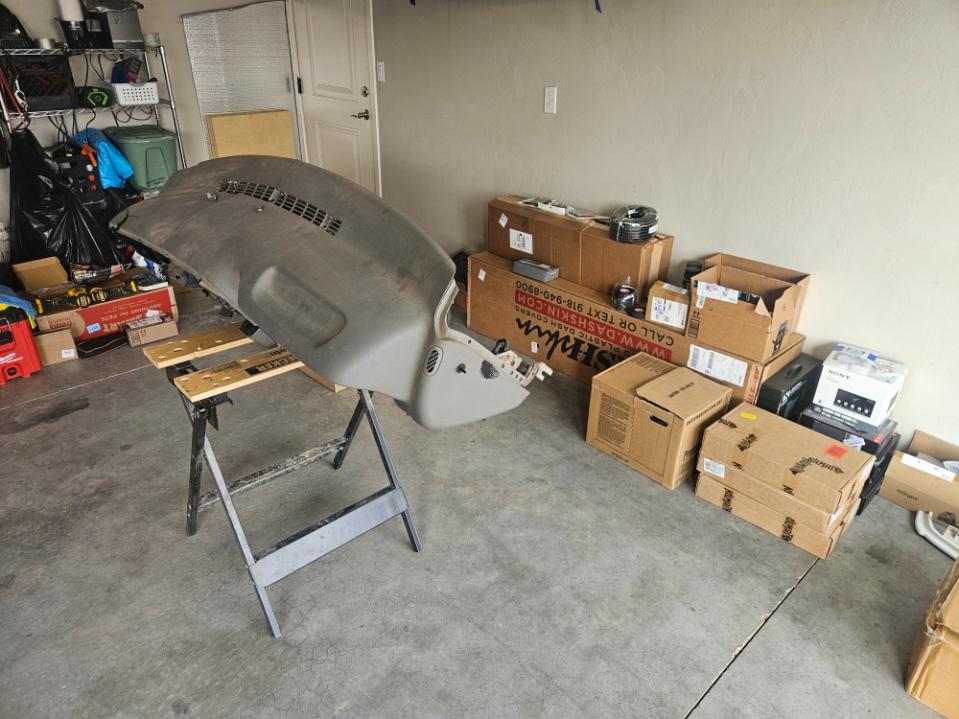
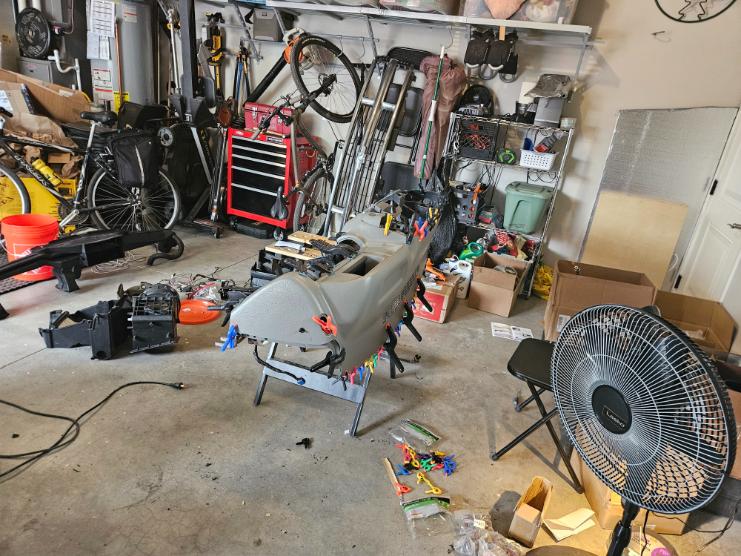
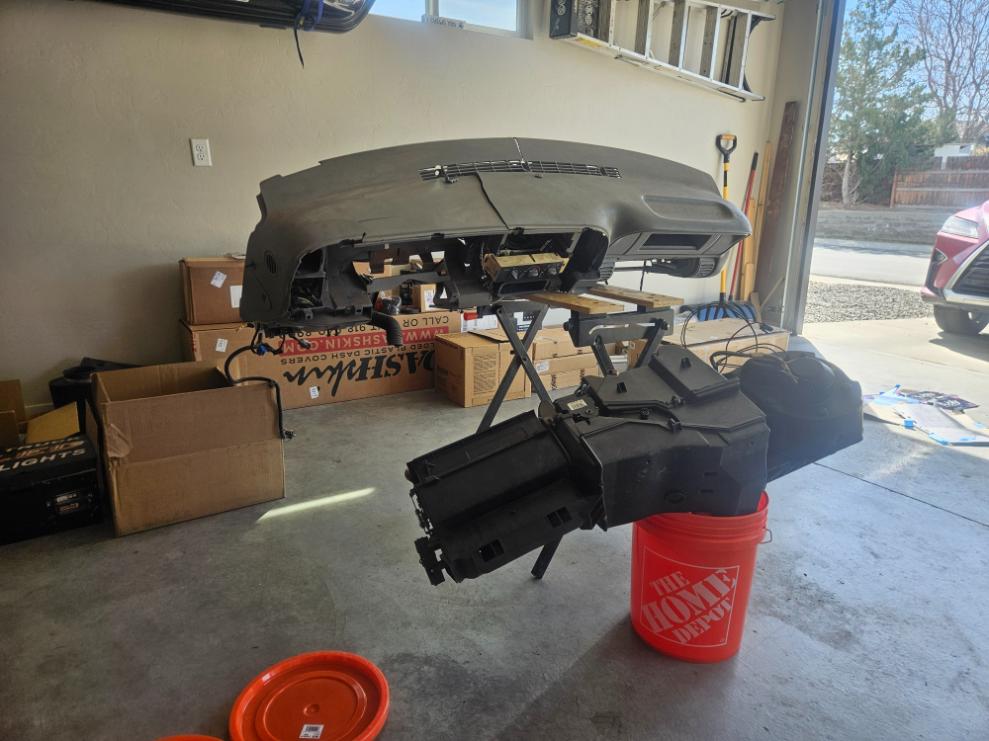
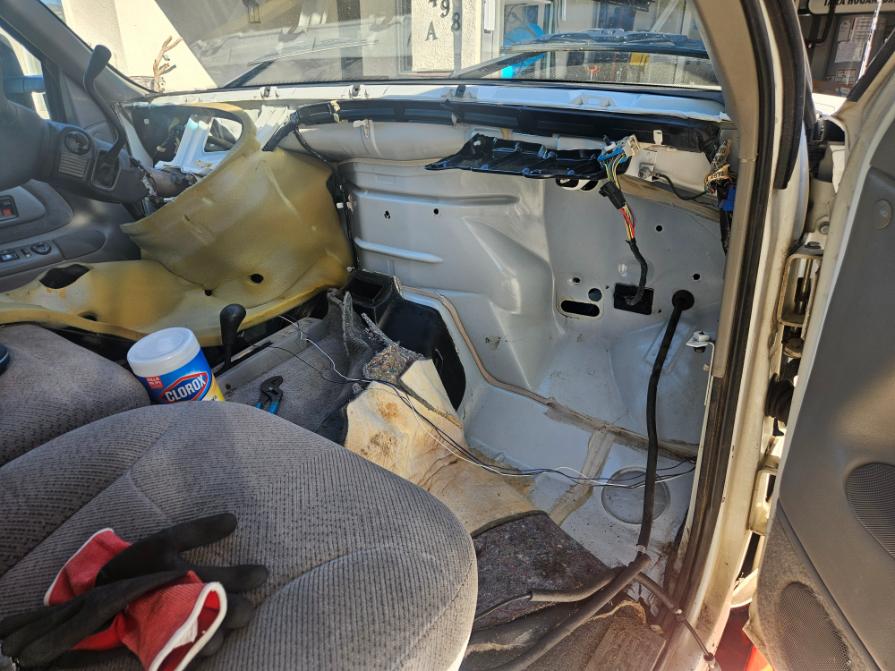
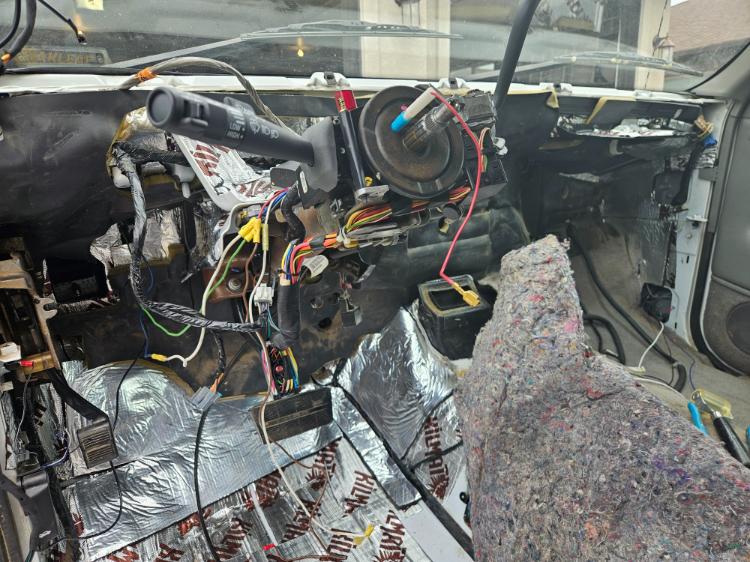
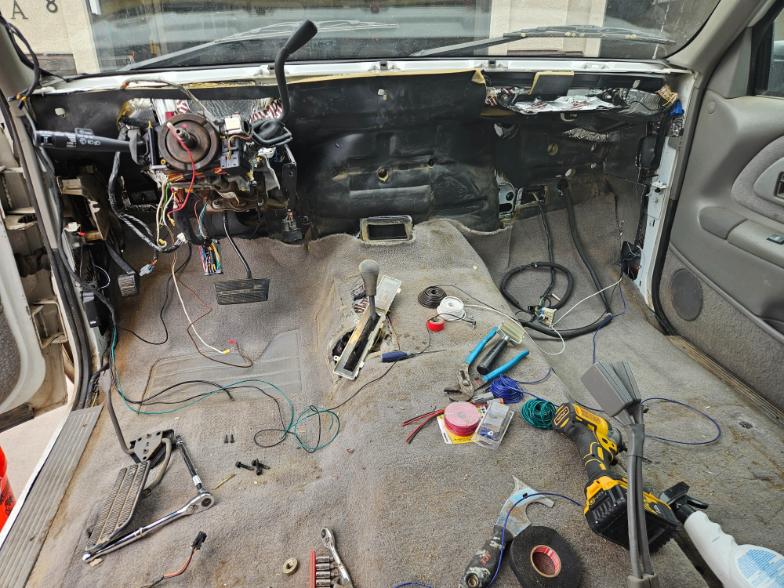
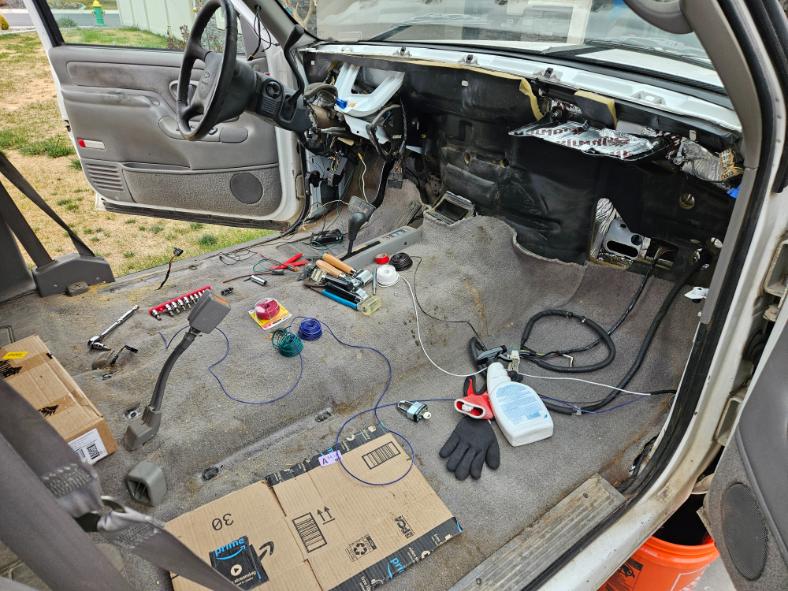
When I first bought the truck in 2018, I had one small crack in the dash. As the years have gone on, I have developed several other cracks leading to a lot of vibration noise to the point where my GF always brought a sweater to throw up to muffle the sound. It annoyed me too, but I would just turn the radio up when I was alone haha. I also had my AC checked and they told me the evap core was leaking and quoted me $800 to pull the dash to replace it. With a desire to add some more modern amenities, fix my AC, and repair the dash I dove into pulling the dash out of the truck.

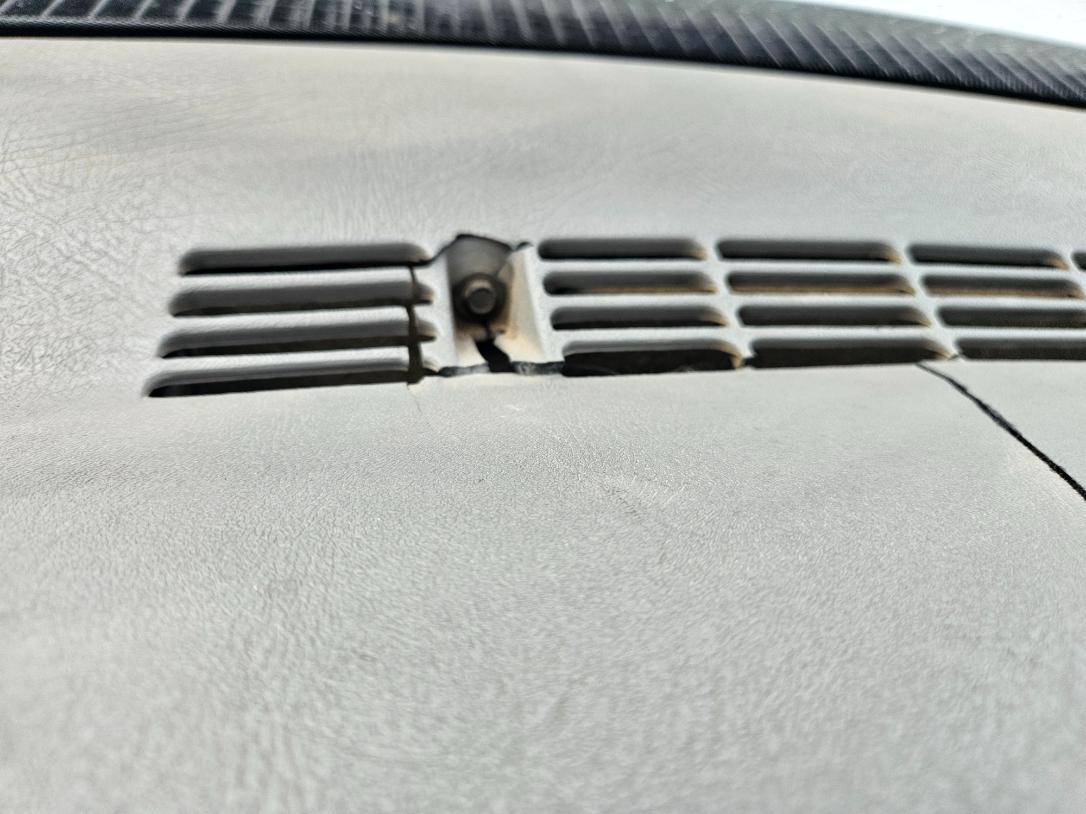
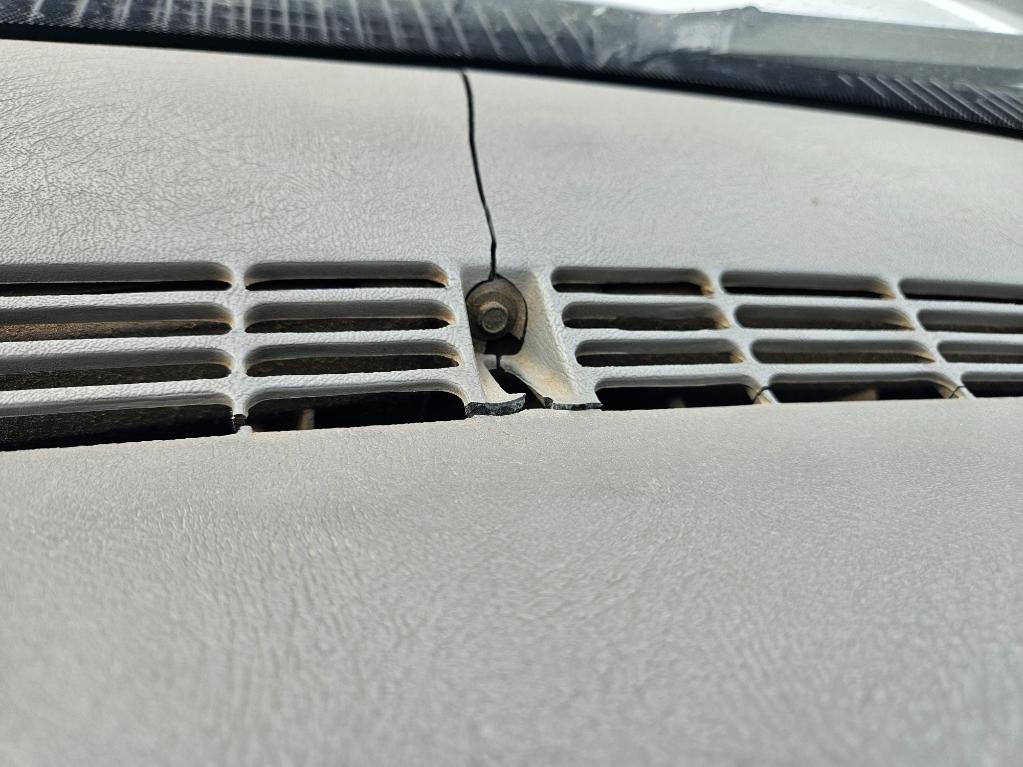


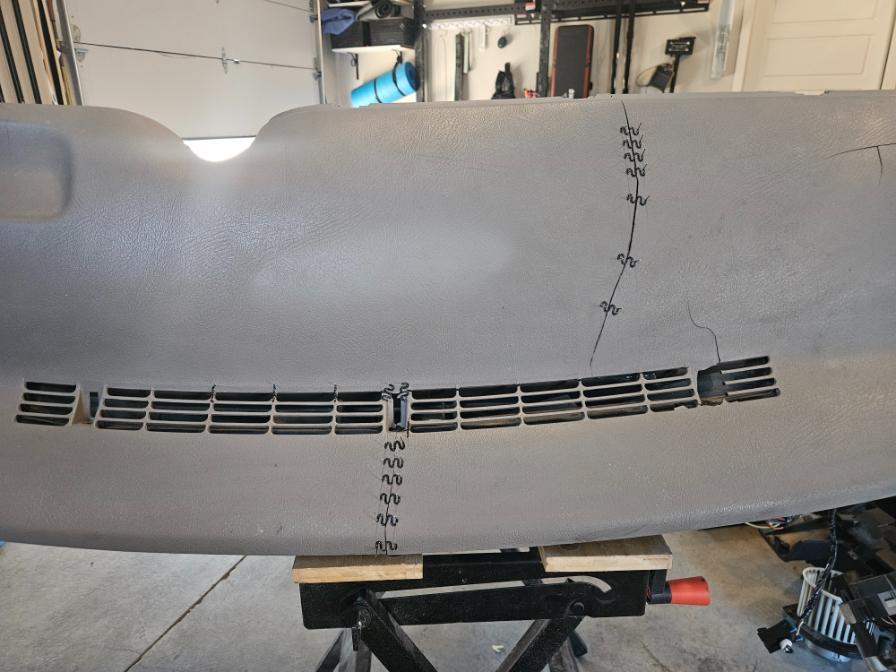
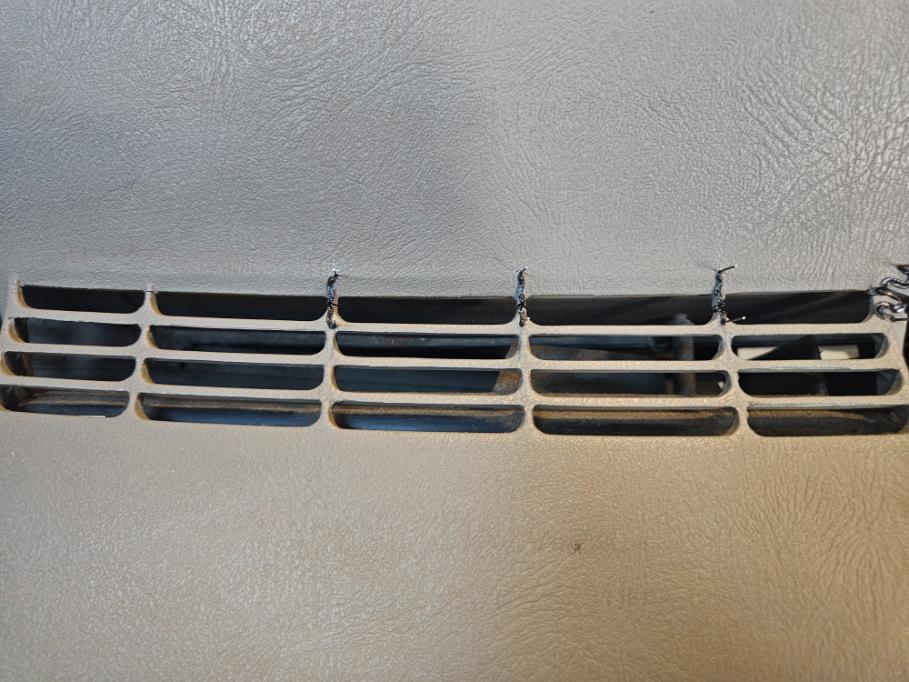
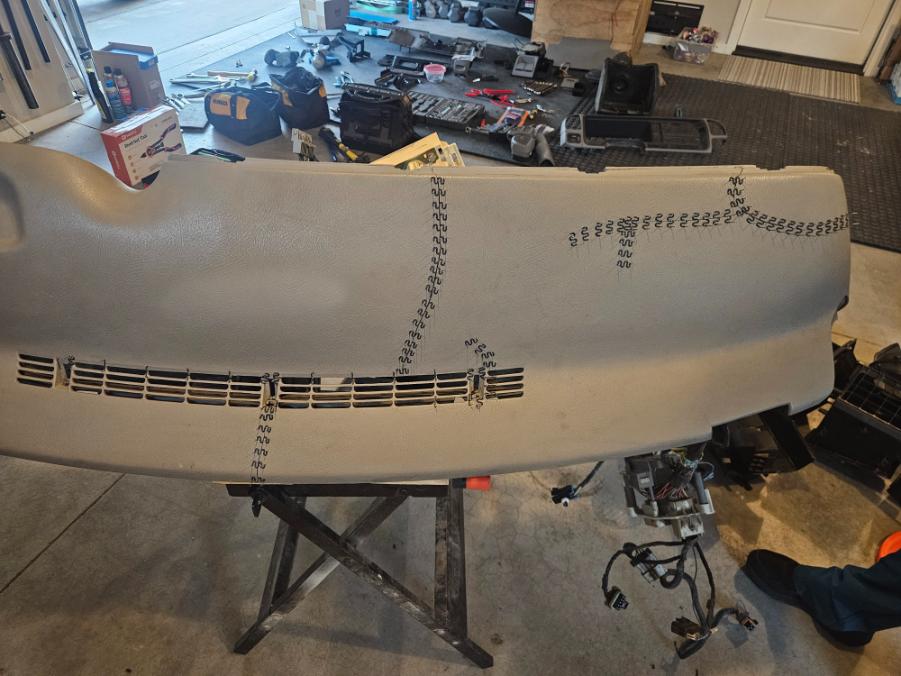
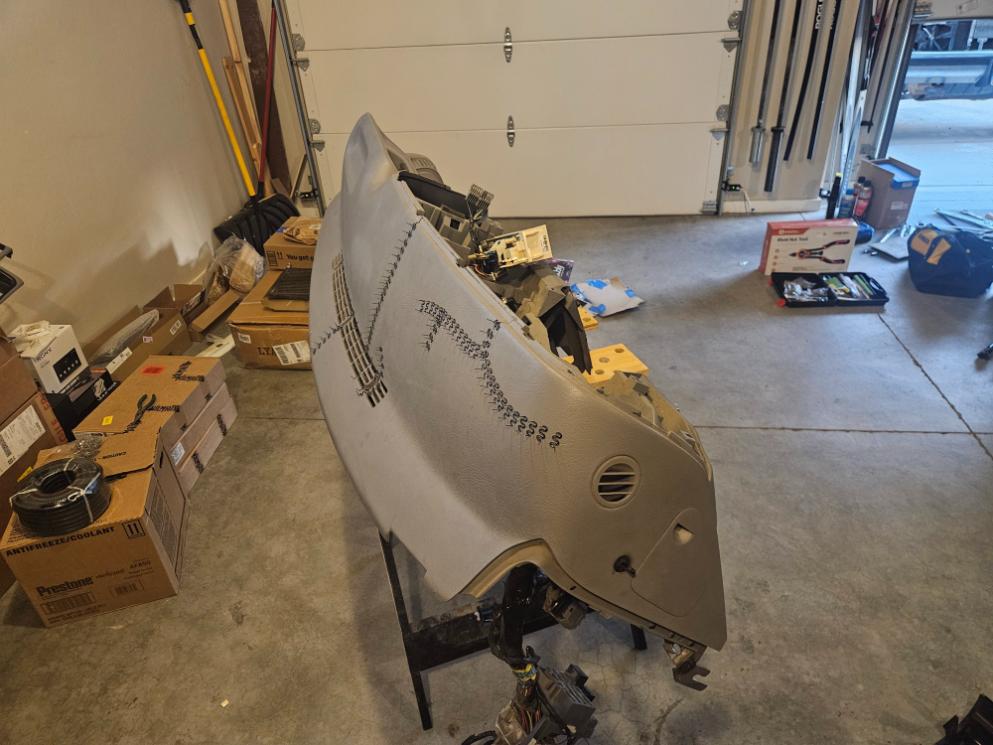
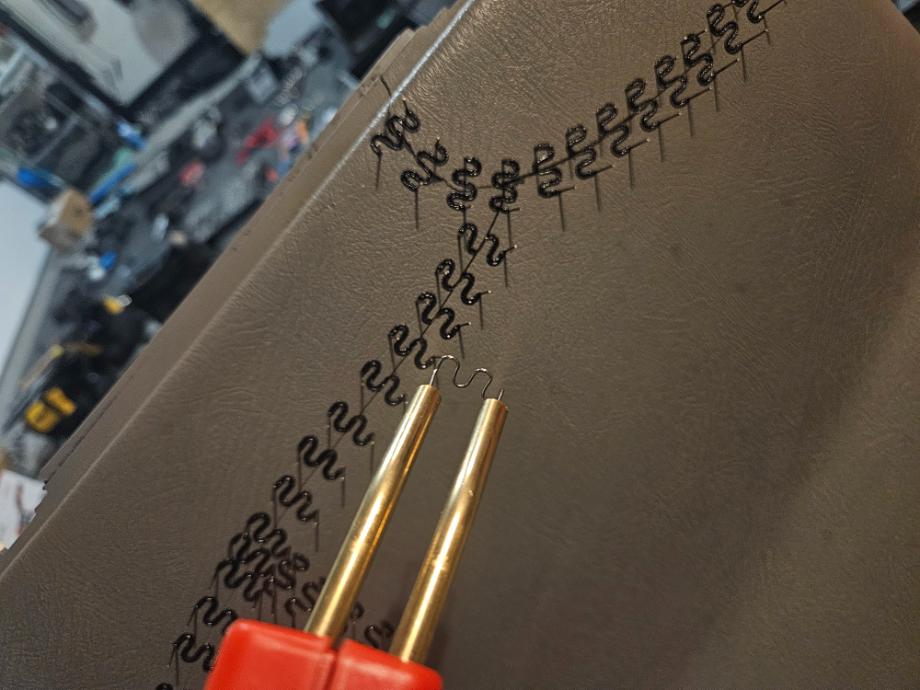
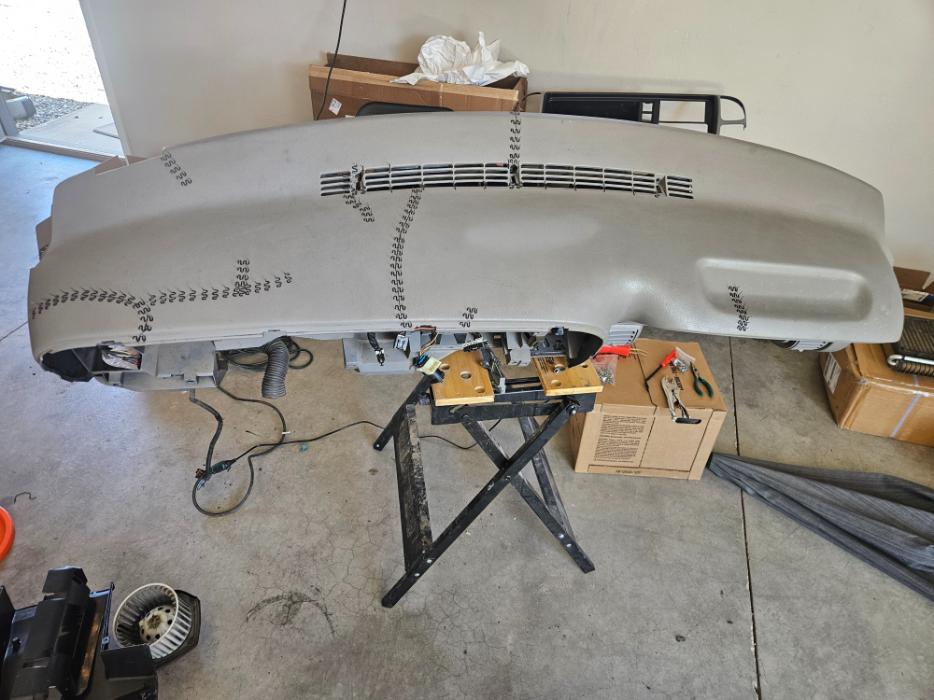
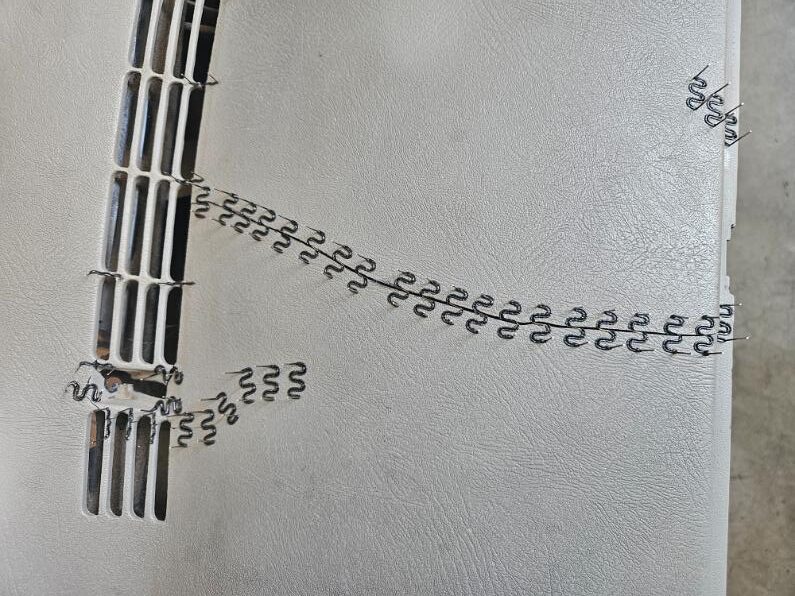

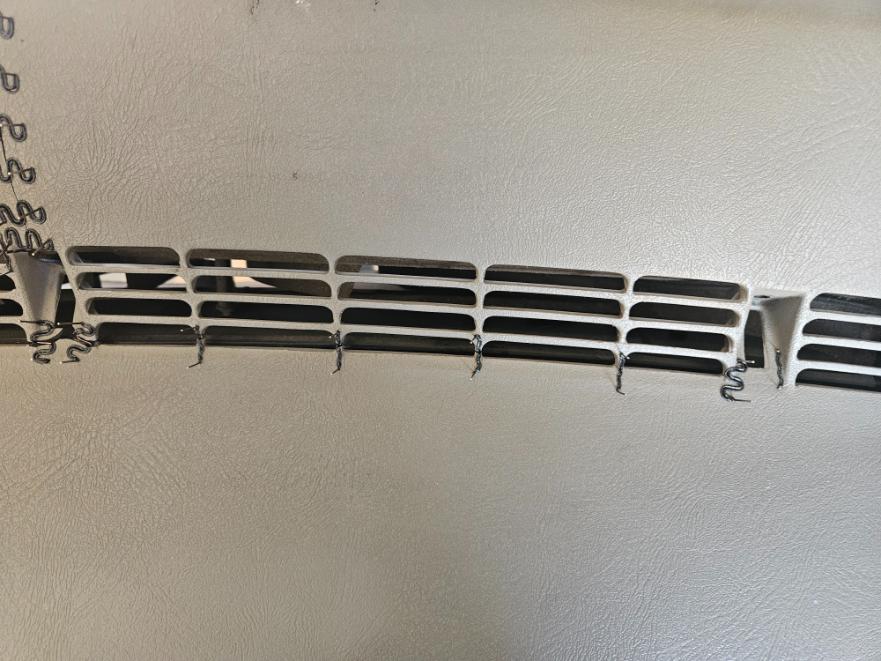
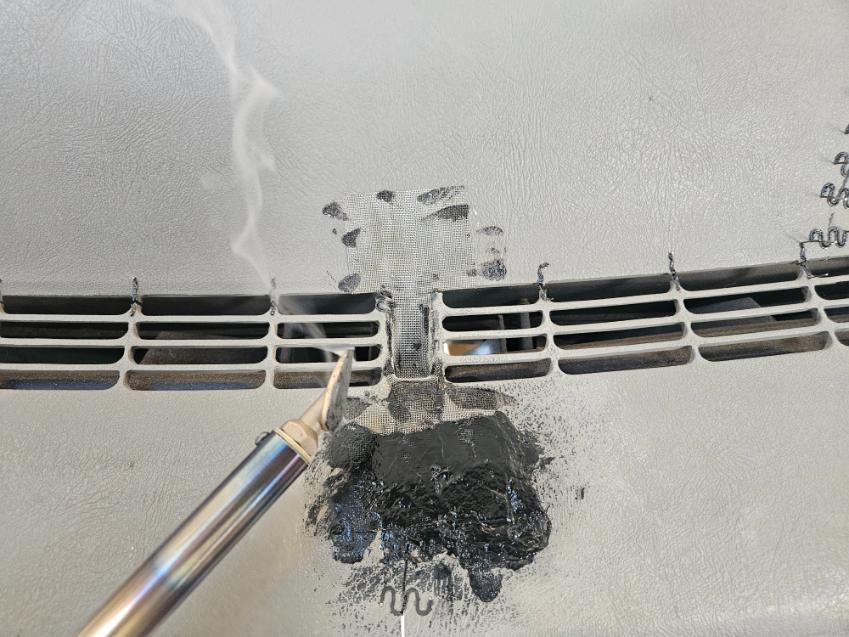
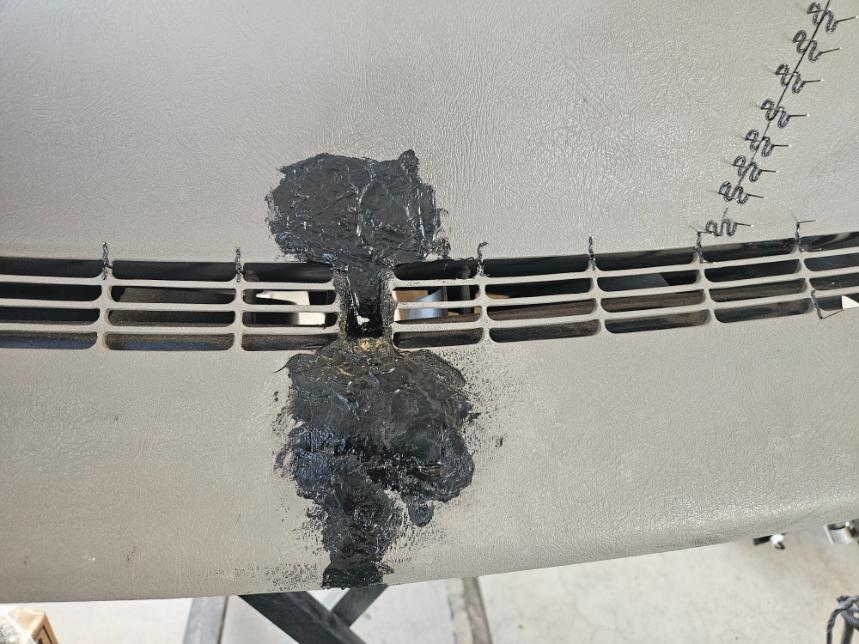
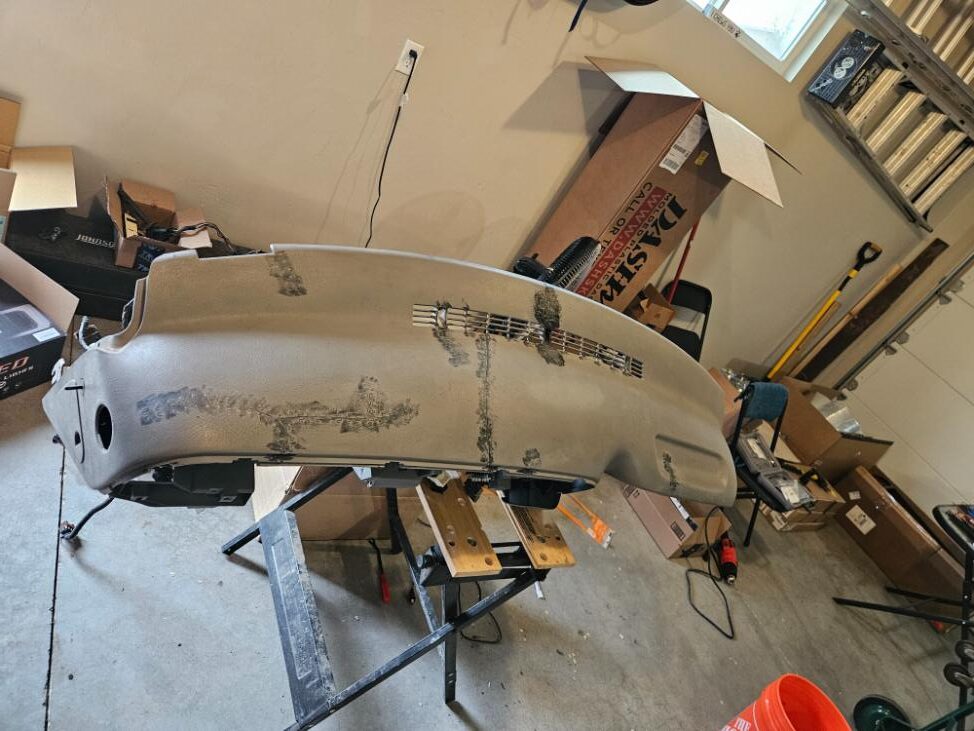
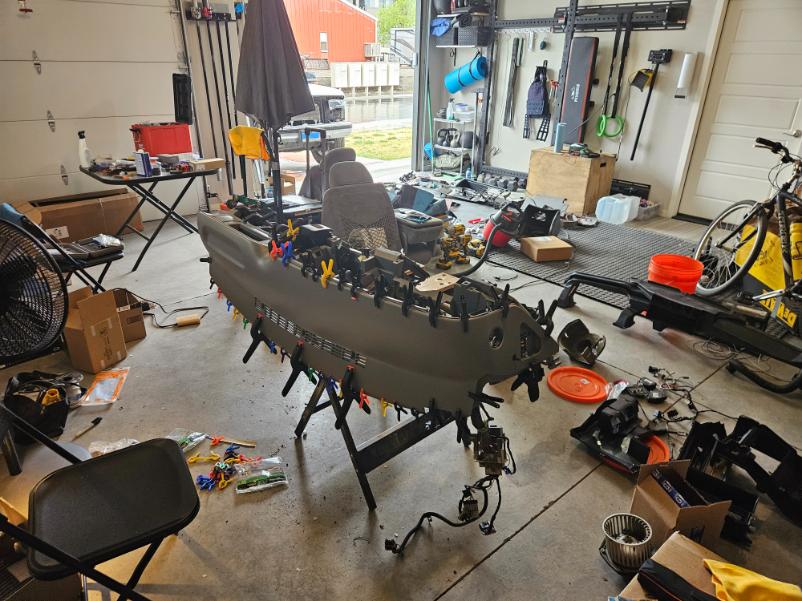
With the dash out, I commenced to weld all of the cracks using a staple welder as well as a soldering iron welder. I have a bit of experience with the iron welder as I used to fix broken whitewater kayaks but this was the first time with the staple welder. I was quite impressed and I felt it really reinforced the welds. Where the top screw holds go, the plastic was pretty much gone so I had to rebuild the plastic. I stapled what was still there, then laid wire mesh down and started to melt some filler plastic into the zone filling and rebuilding the inset screw hole. This was tedious but I feel it was worth it. There is no rattling or vibration coming from the dash anymore.
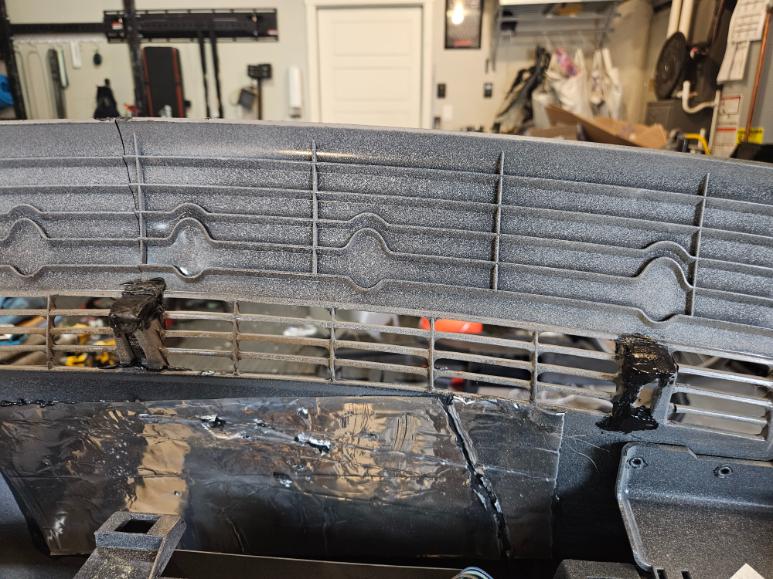
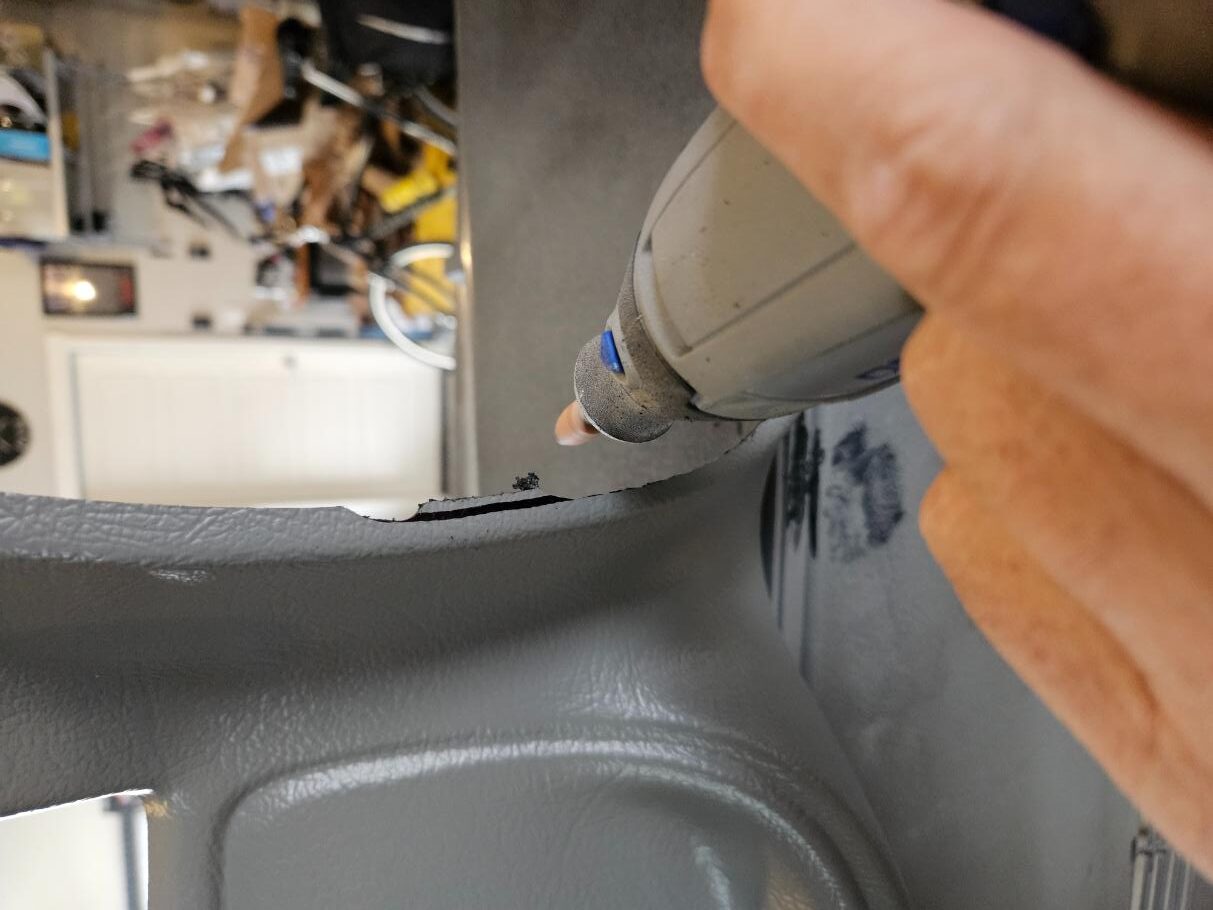
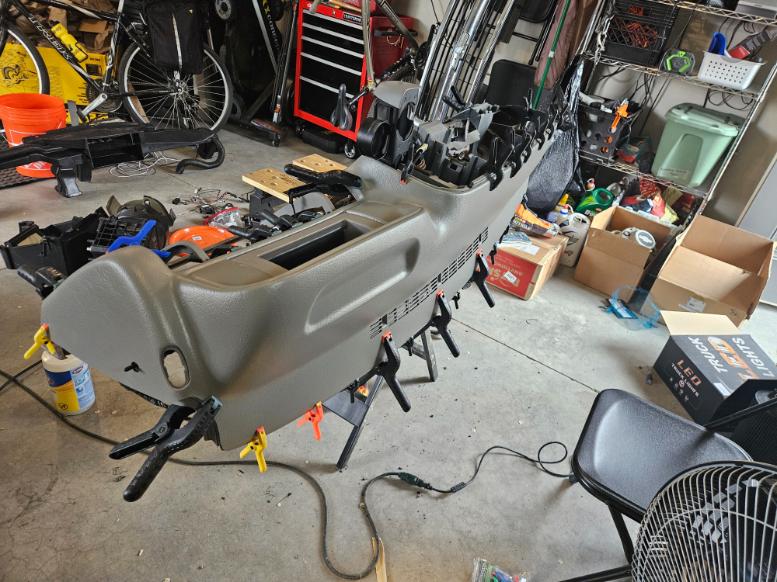
With the cracks in the dash fixed I glued a Dash Skin on to cover all the ugly welds. I also painted all of the dash pieces to match the new skin. It was a little easier to get the skin to line up with it out of the vehicle, at least it seemed to be to me. It did require quite a bit of trimming to get everything to line up well. I used my Dremel with a grinding stone and made several trims and test fits to get it to drop in place properly. Even with this, when it came to the final glue down, I still had a couple of places I wish fit a little better. All in all though, I’m really happy with the way it came out. I lost count of how many pinch clamps I used.
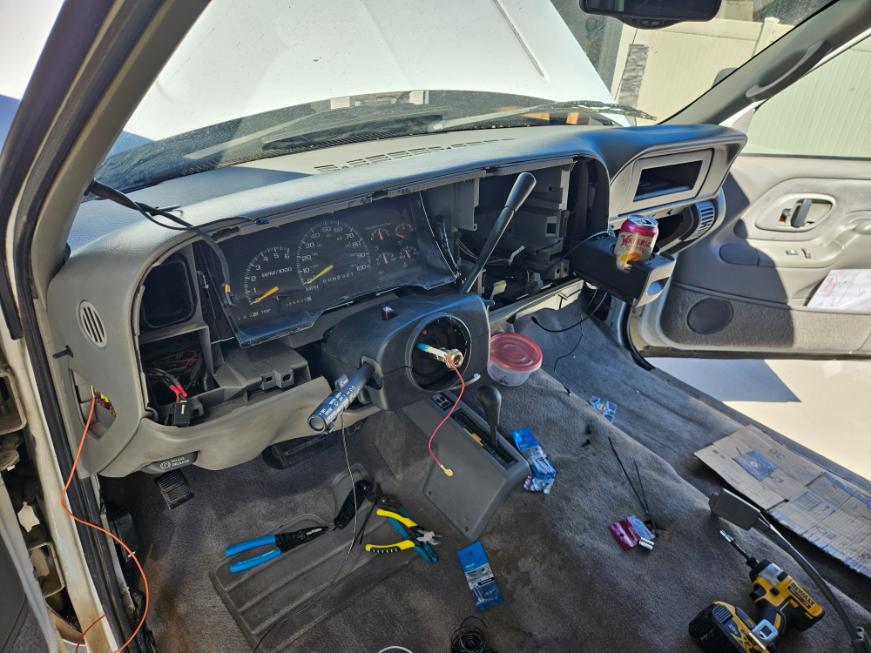
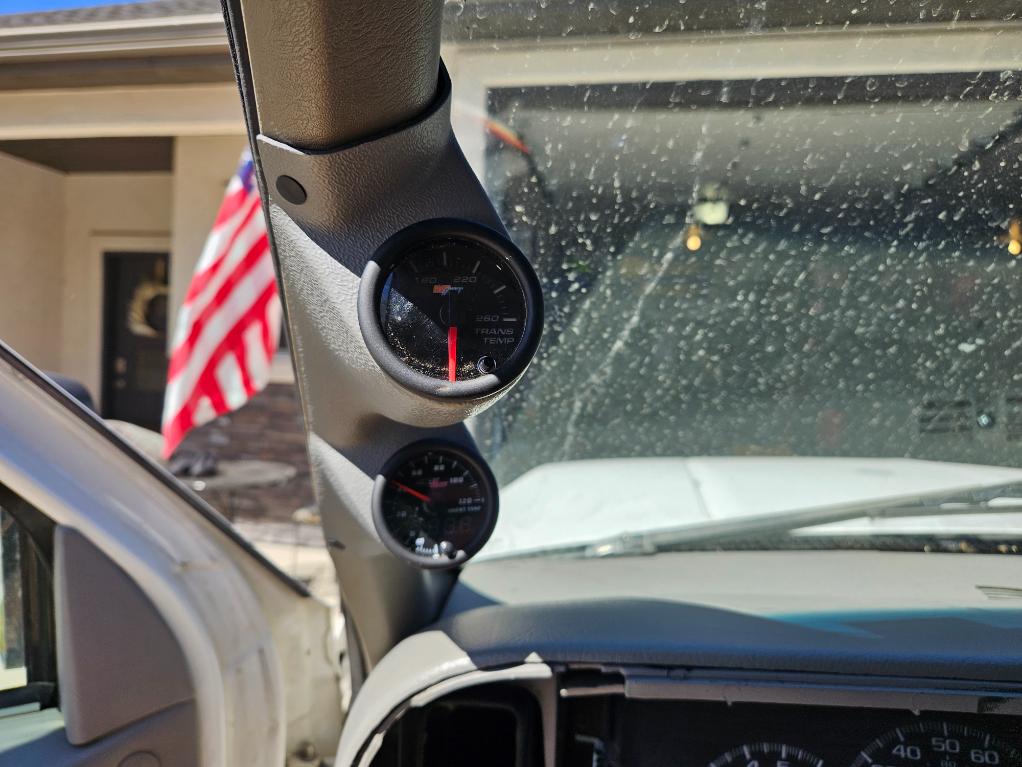
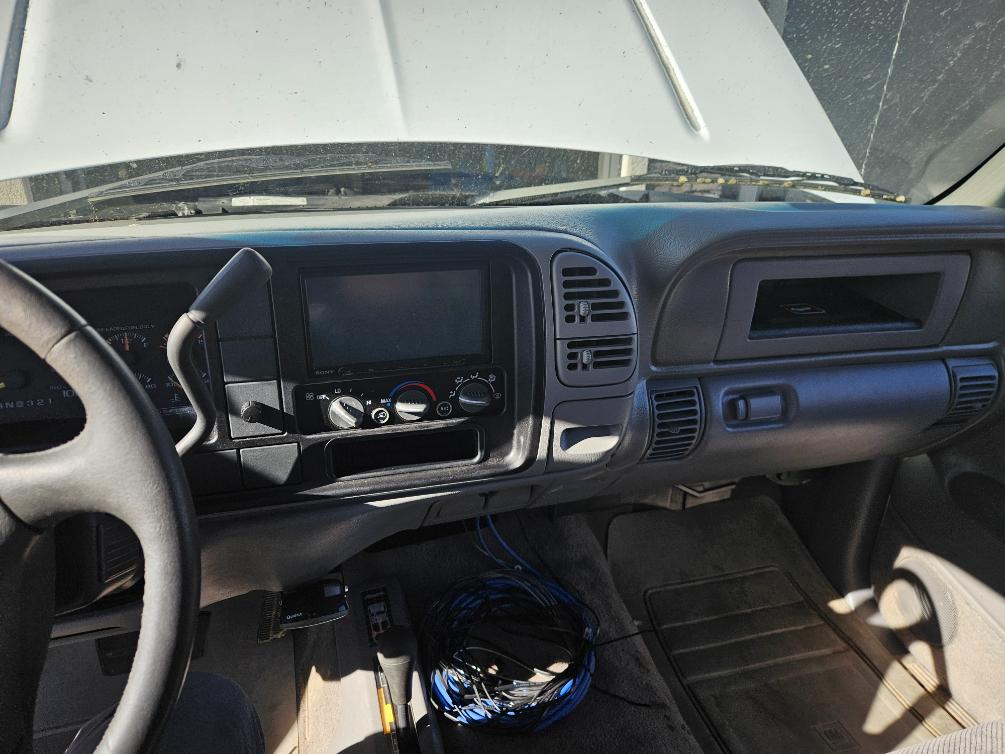
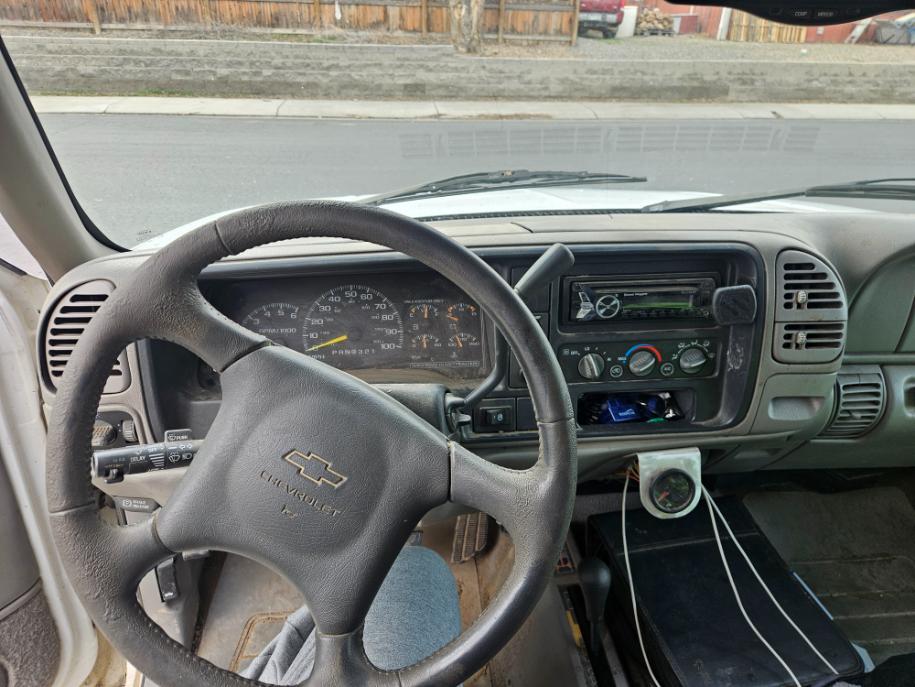
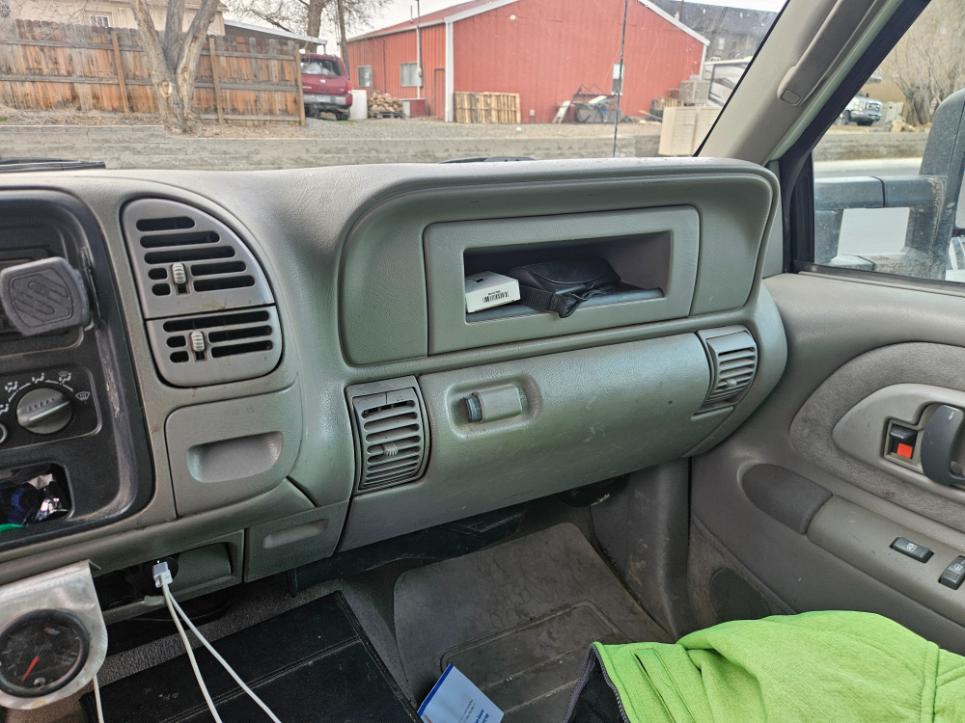
While I had it out, I installed a couple of creature features like a double din radio with backup camera, I had installed a transmission temp gauge on the lower part of the dash years ago but I moved it up to the A pillar and added an ambient outside temp gauge so I would know how hot it is out, I’ve never been a big fan of these A pillar gauges but it was a good place to put it where I can see it easily. With the double din radio, I bought a new bezzle from Metra. It requires that you cut a part of the inner dash and drill a couple of holes so that you can move the HVAC controls down. If you have a bigger radio you may also have to cut more away to fit the radio but I didn’t. The new bezzle came in solid black so I had to mask it off and paint it to match the vents and cup holder.
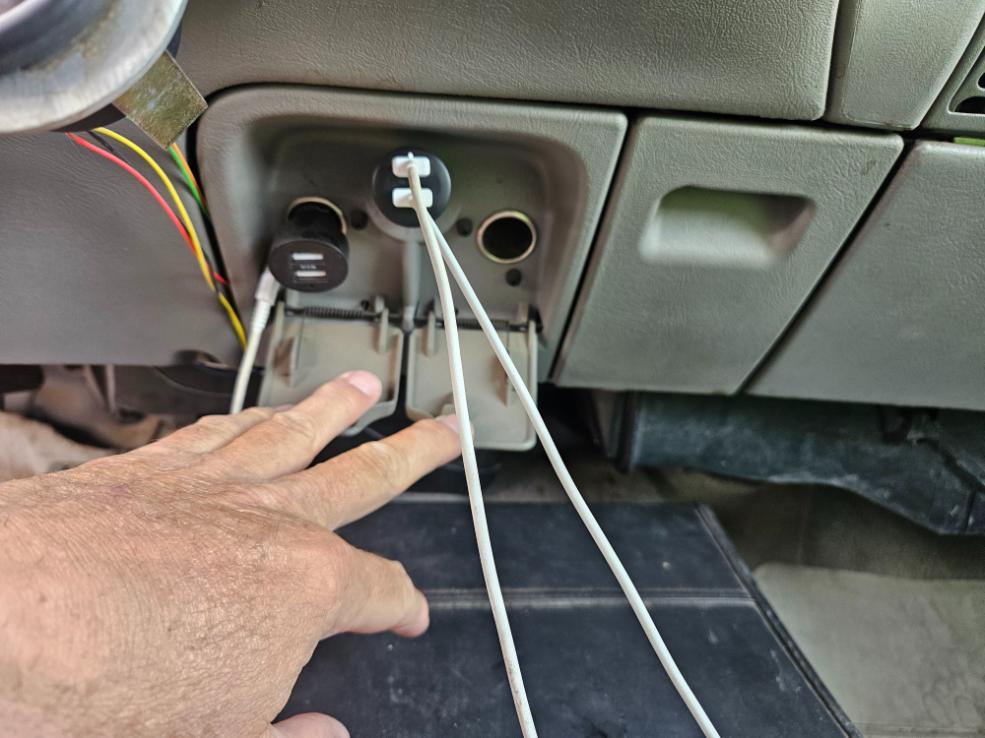
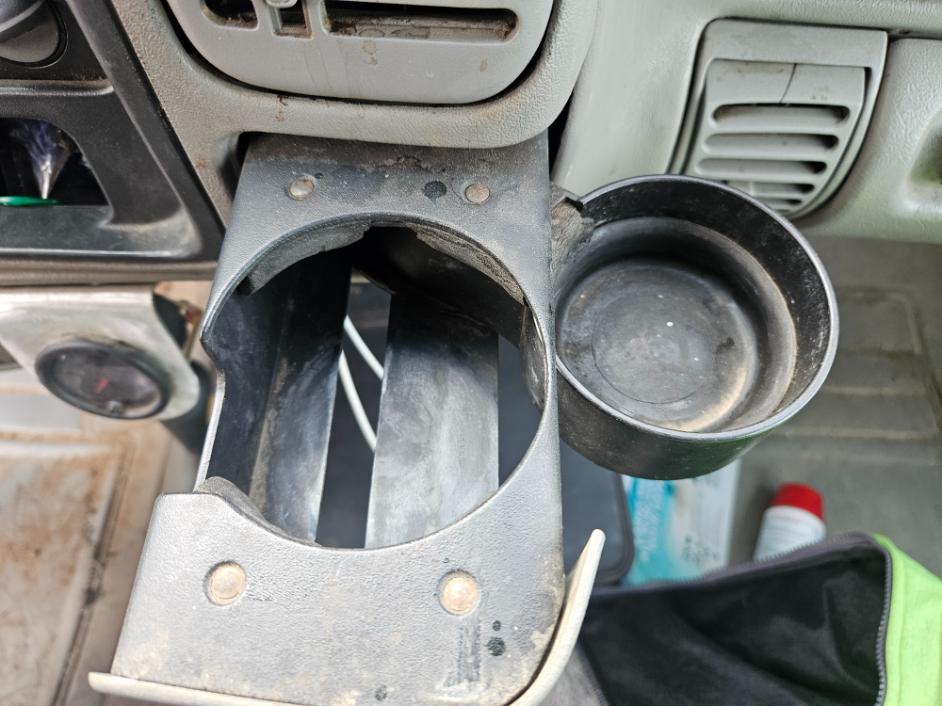
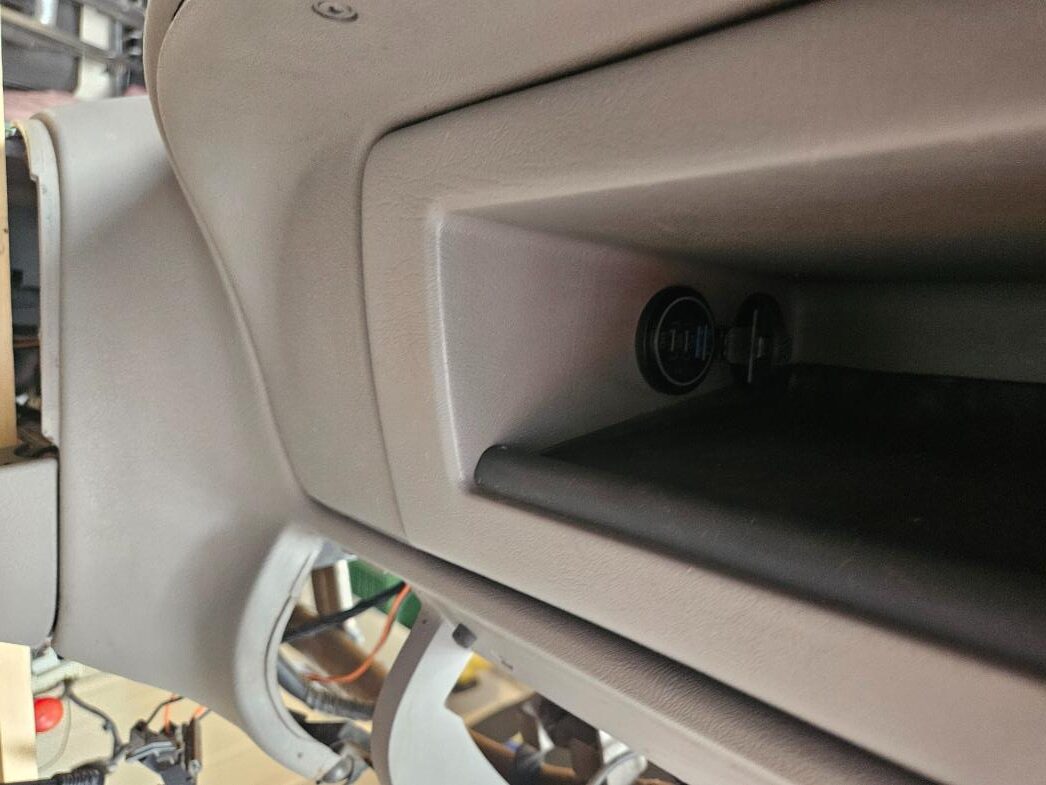
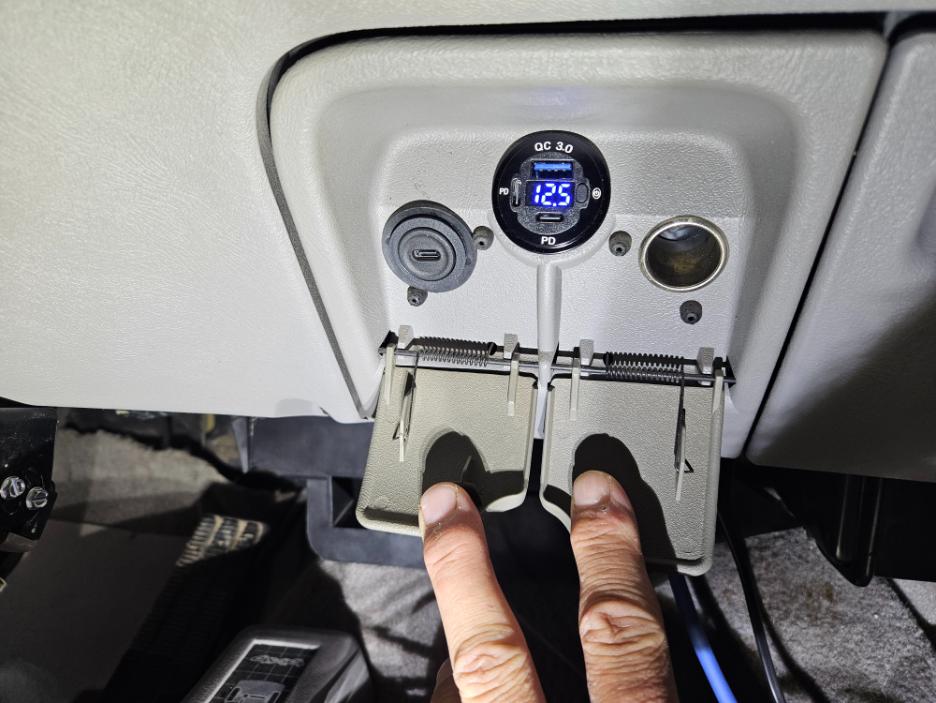
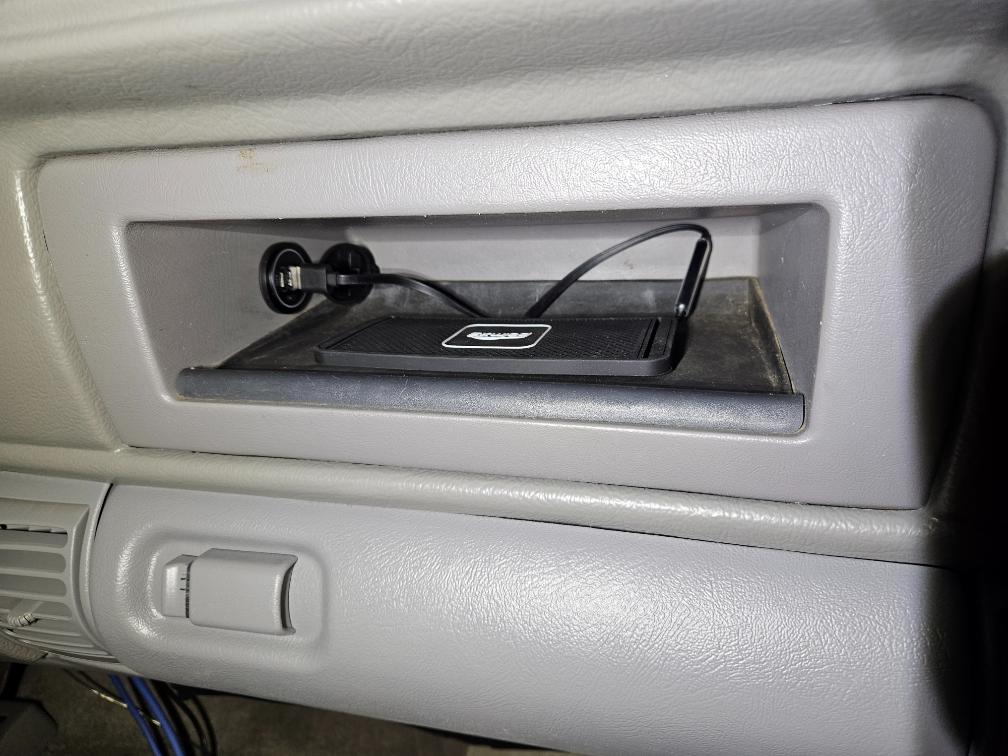
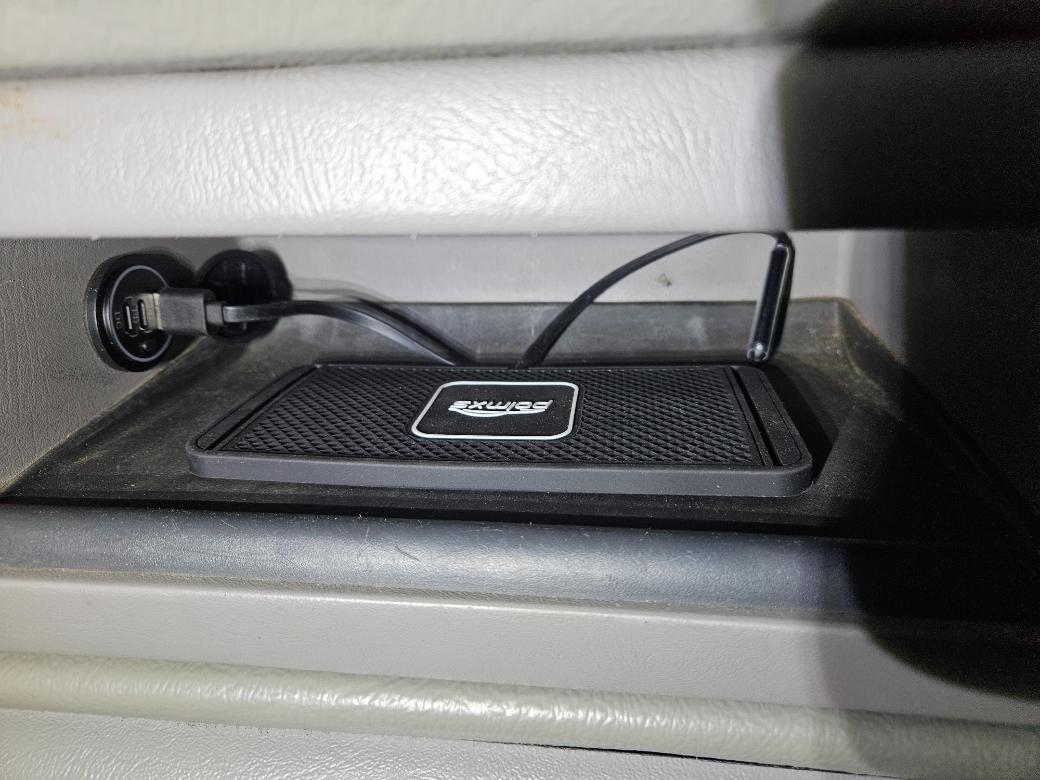
I also redid the cigarette lighter and charging ports. The Sony radio has the ability to plug in with USB C so I got an outlet from Scosche and put it in the bottom left position. This left one of the three sets of wires free, so I wired it to a USB/USB C outlet that I put in the useless cubby they give you when you don’t have airbags. With that I put a wireless phone charger so my GF can charge her phone on road trips. It has two more ports open if other things need to be charged. I took out the main cigarette lighter and replaced it with a USB/USB C outlet that also reads the volts on the battery. Didn’t really need the volt readout but though it would be nice to have. I left one charging port incase I ever need to charge a laptop of something else that required that outlet.
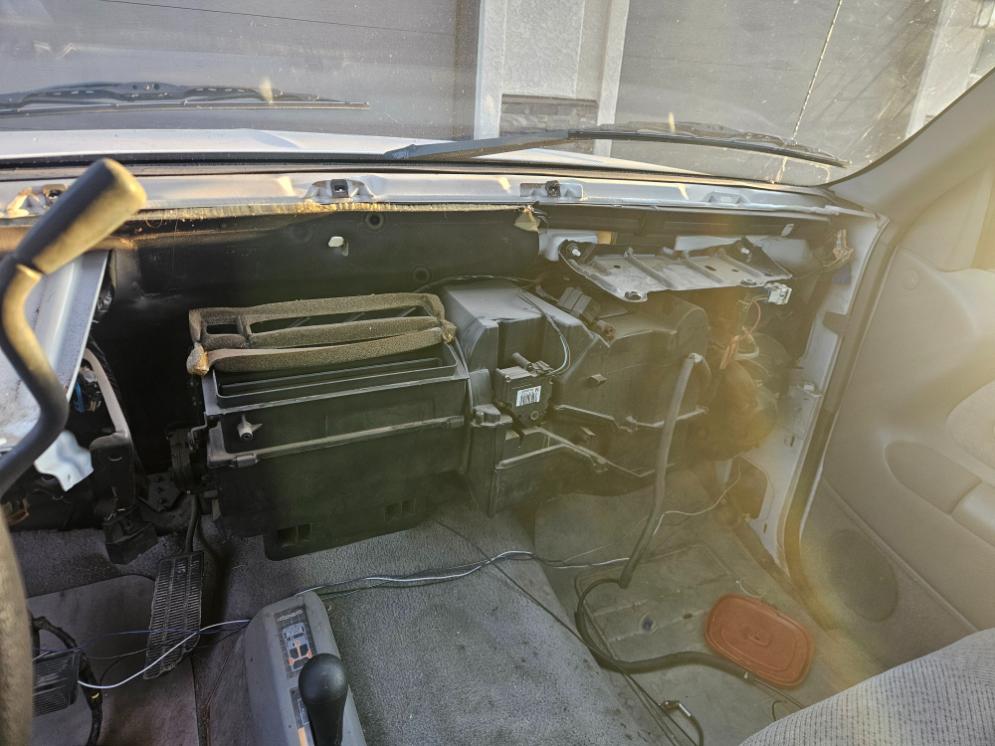
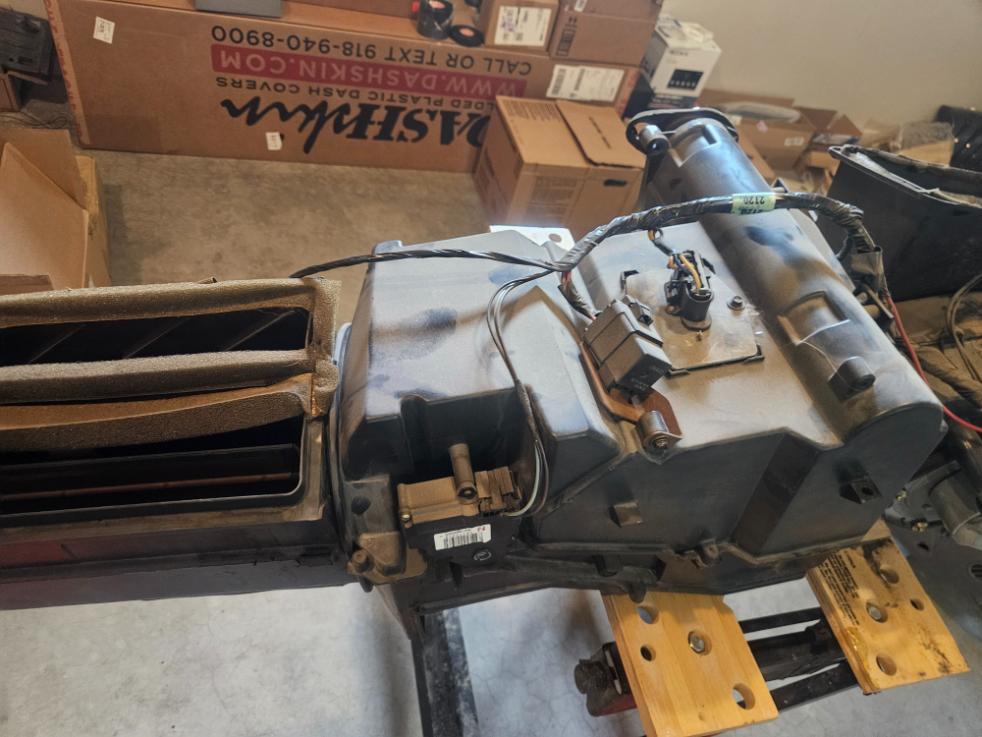
HVAC:
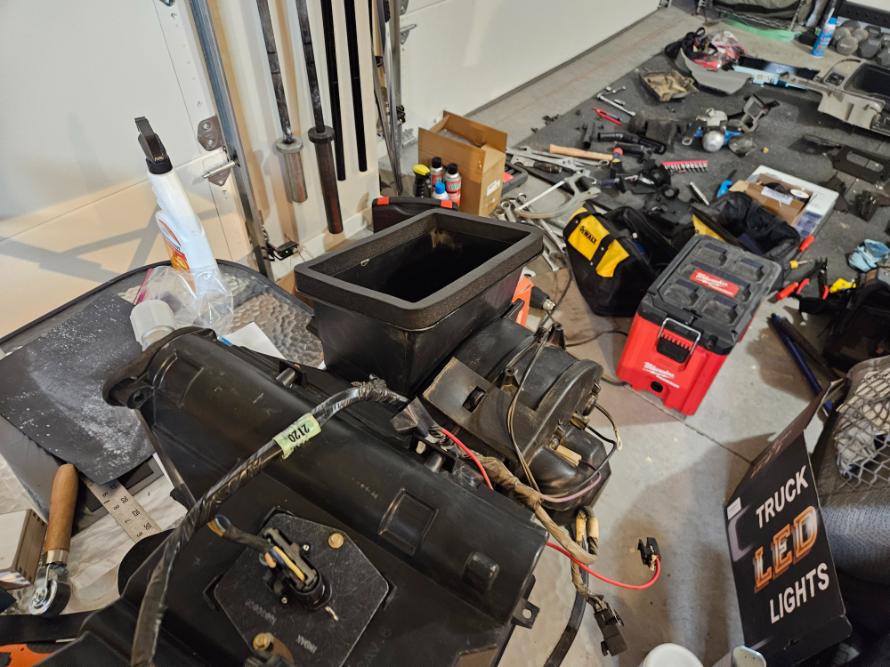
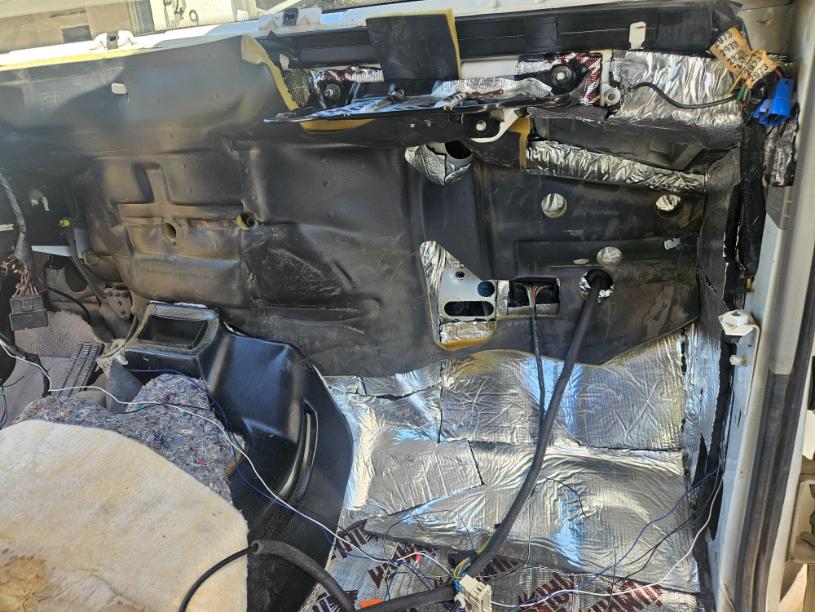
While the crack in the dash was the primary goal, the removal of the dash to fix it came from the need to replace my evaporator core. My AC worked for now but when I had it recharged several months ago, I had them add the die to see if I had any leaks, and of course I did. I watched a video of a guy removing the core without pulling the dash but F that haha. This truck is 27 years old and it was time to go through a few things anyways. While I had it out, I took the entire thing apart and cleaned it all, I replaced all the actuators and sensors. I replaced the blower motor and gaskets, and for good measure the heater core. It had 27 years worth of dust, but also since there is no cabin filter or even a screen to keep leaves and crap out from the intake I had some of that in there too. Though not as bad as I had expected.
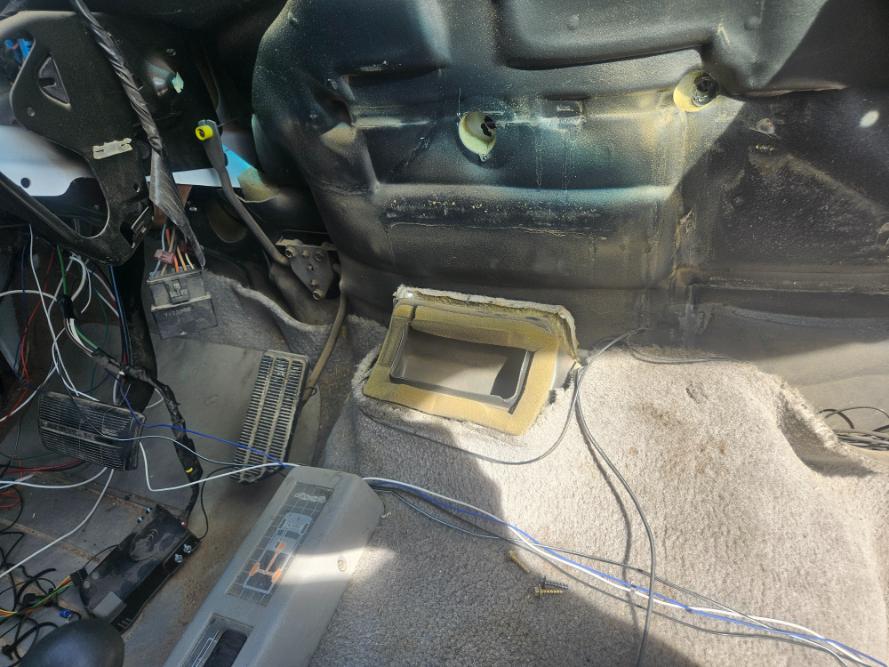
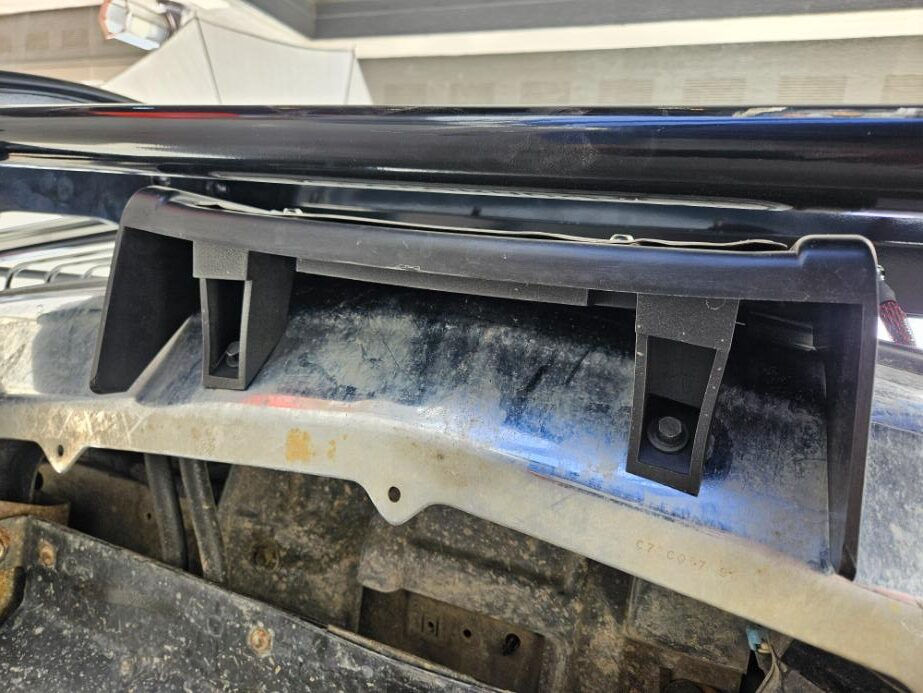
Once I got the dash out, I noticed that when the dash was installed at the factory, they folded the main divider gasket back, meaning air was leaking out and just blowing out under the dash. I was planning to replace the duct gaskets anyway, but didn’t have a source at the onset of the project. Magically one morning, I was on one of the Facebook forums and a small company that waterjet cuts foam gaskets, GasketSolutions, posted that they were working on a new set of prototypes and needed testers to give feedback on fit. They offered to mail a set for free to anyone that was in the middle of one of these projects and I just happened to be.
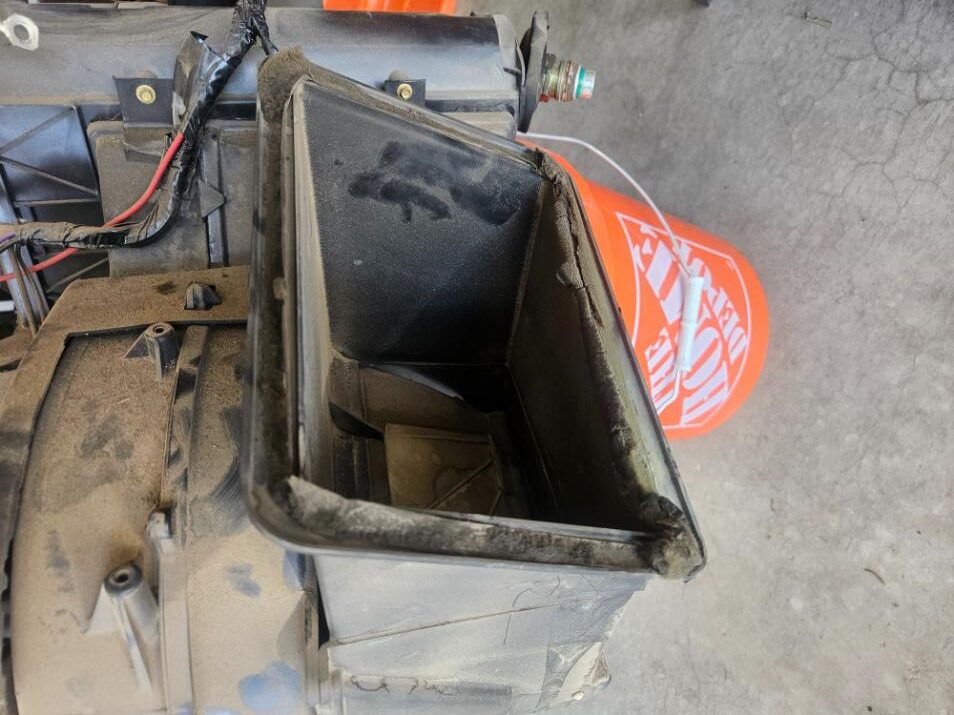
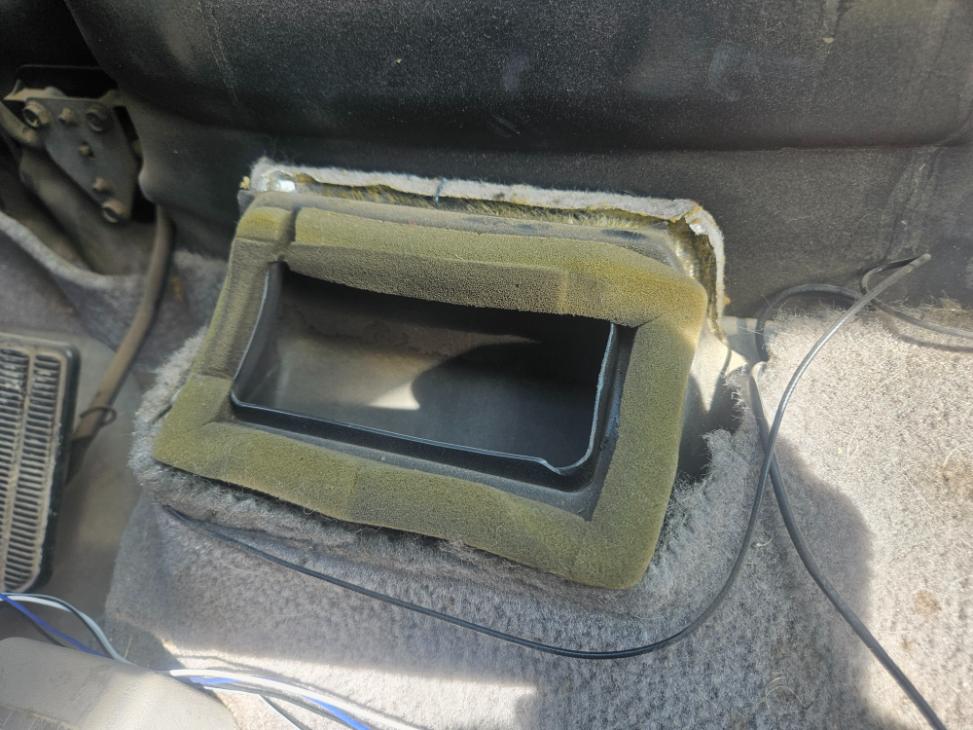
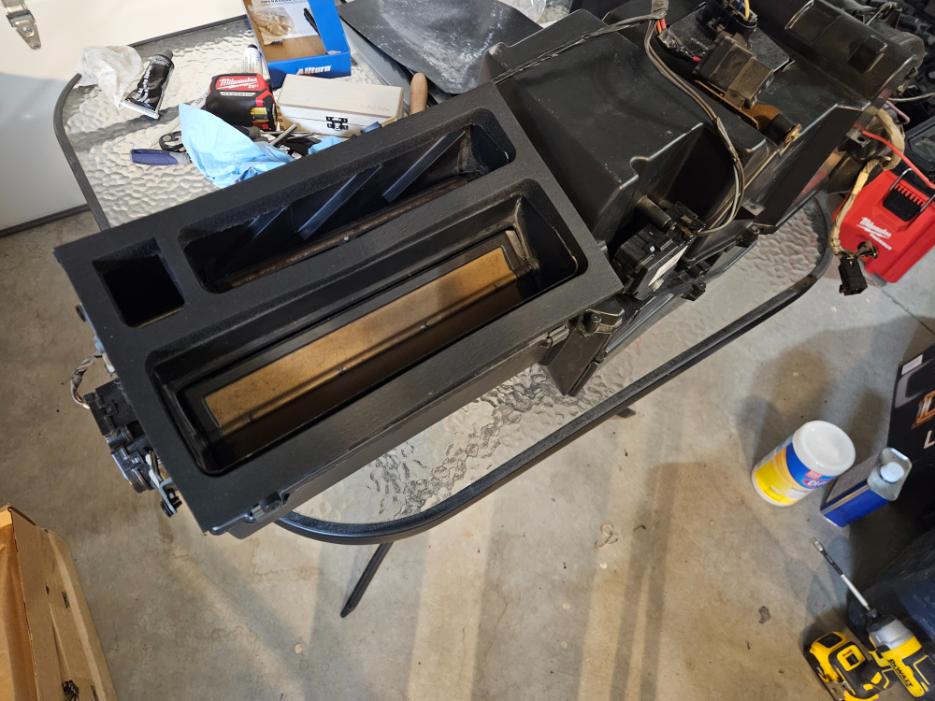

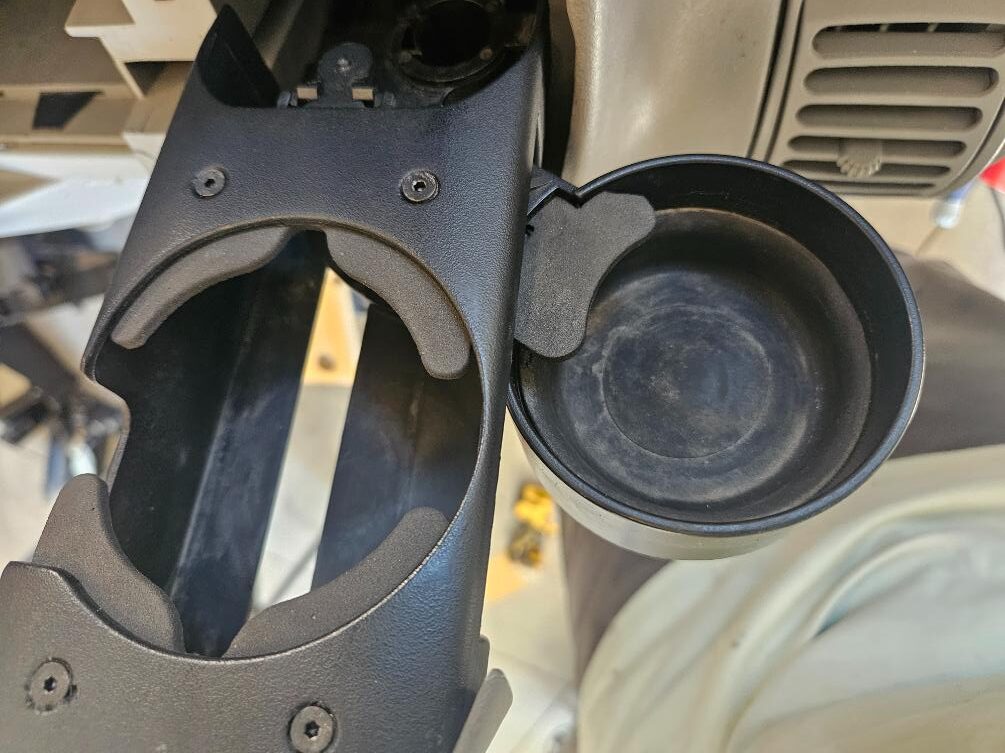
I had already ordered a set of cup holder rubber from GasketSolutions and was really happy with the quality so I was excited to get a set of HVAC gaskets from them, and I couldn’t beat the price haha. These are high quality, waterjet cut, gaskets and the fit was great. I couldn’t be happier with them. They are sticky backed so they stayed in place while I fought with the dash getting it back in and the seal is much better than before. I also replaced the blower motor and the gasket didn’t fold over, but the air pressure coming out the vents is double what I had before. I’m always psyched to support a small startup and it’s fun to do some test fitting and give feedback.
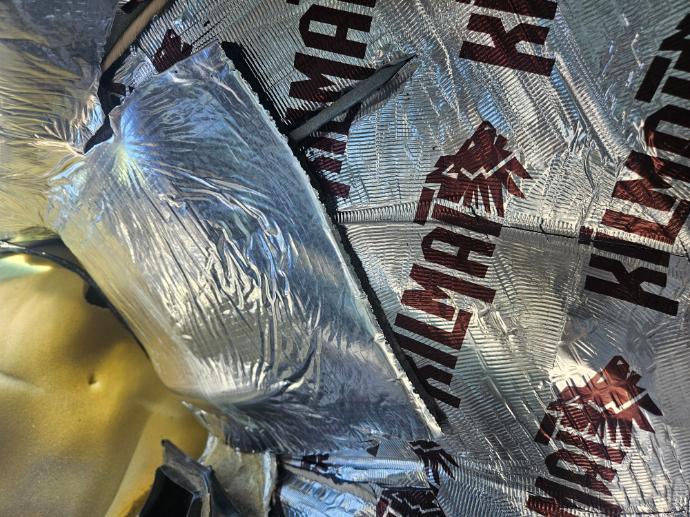
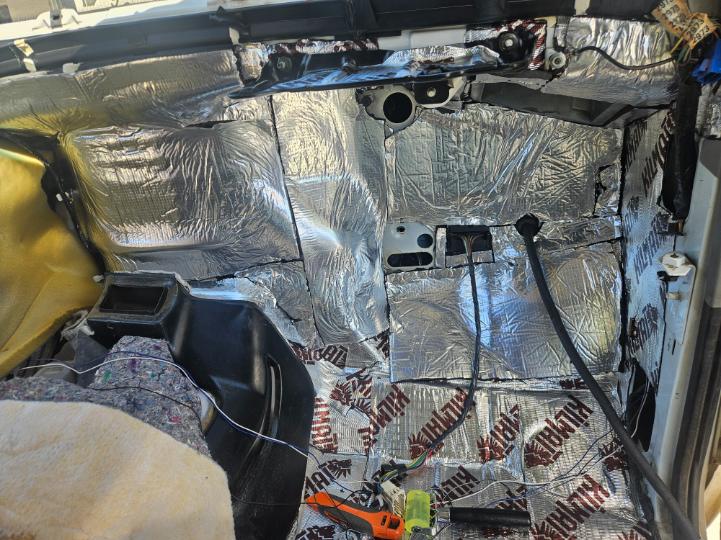
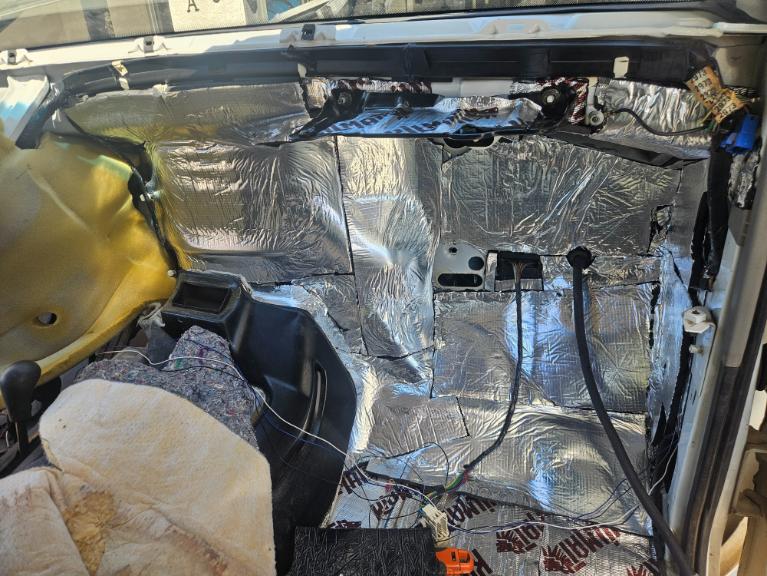
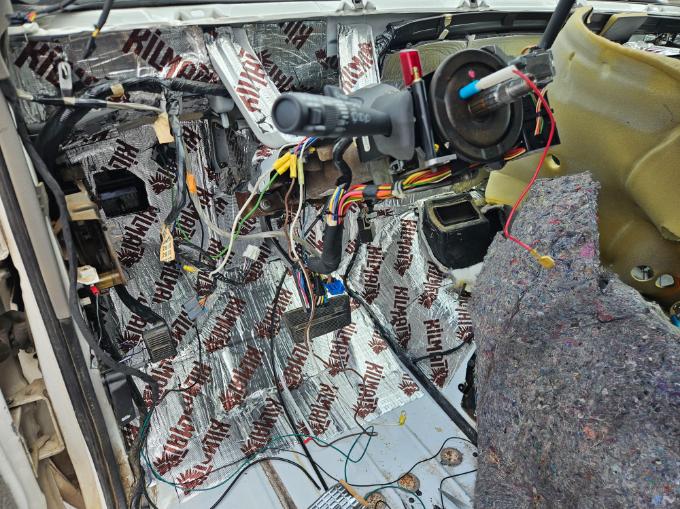
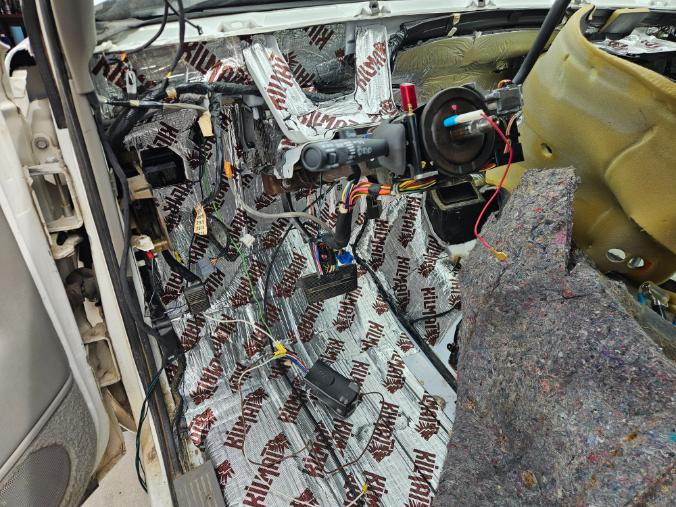
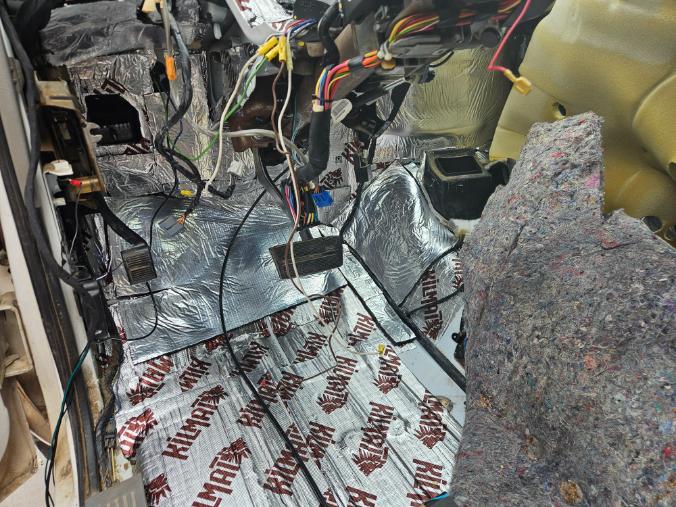
Sound Proofing:
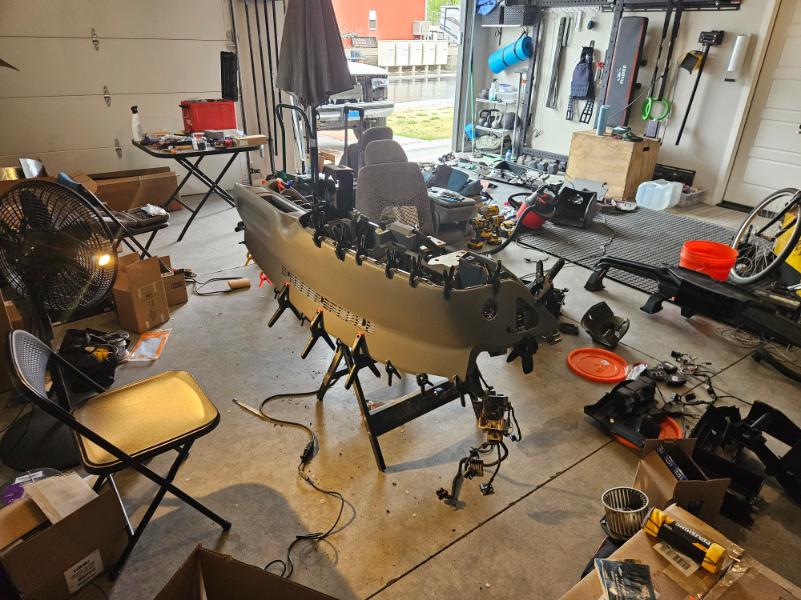
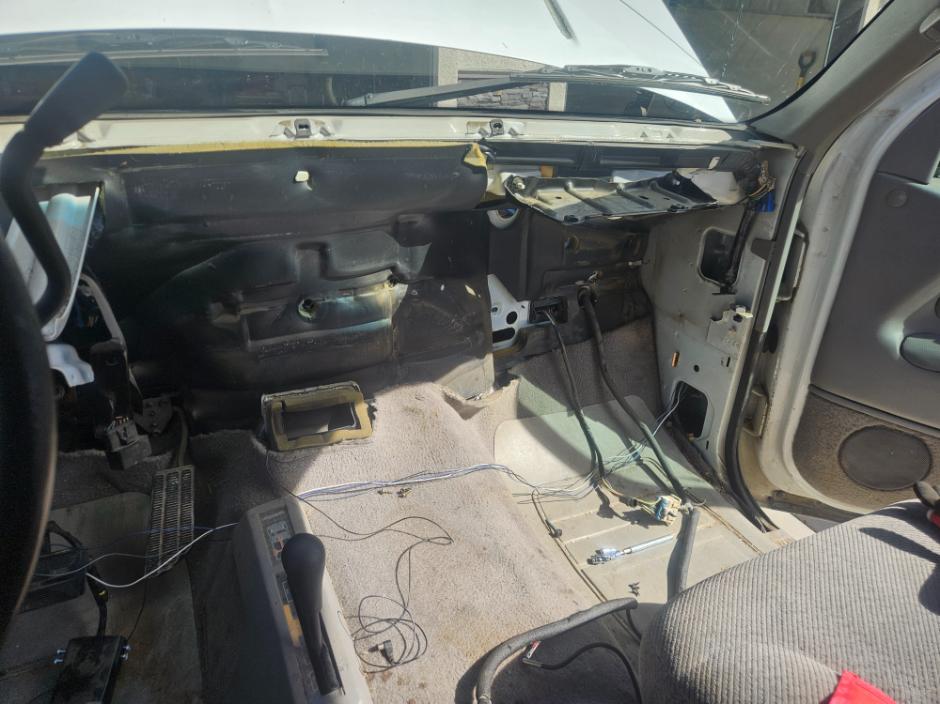
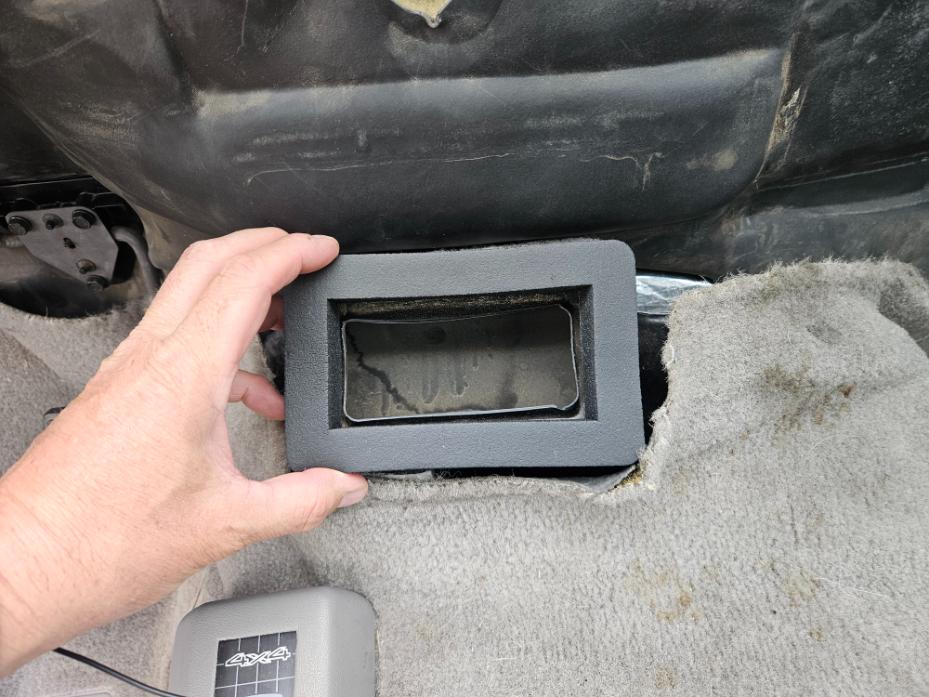
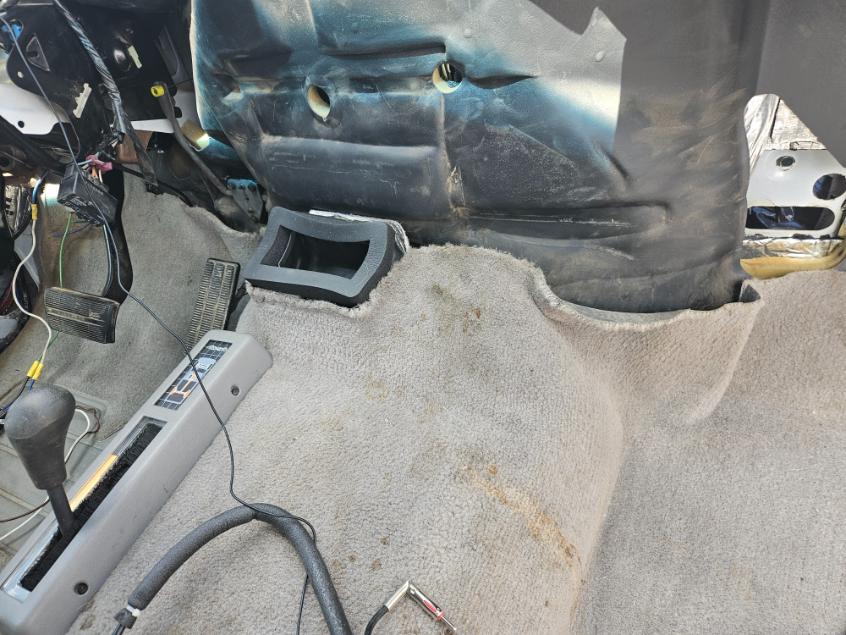
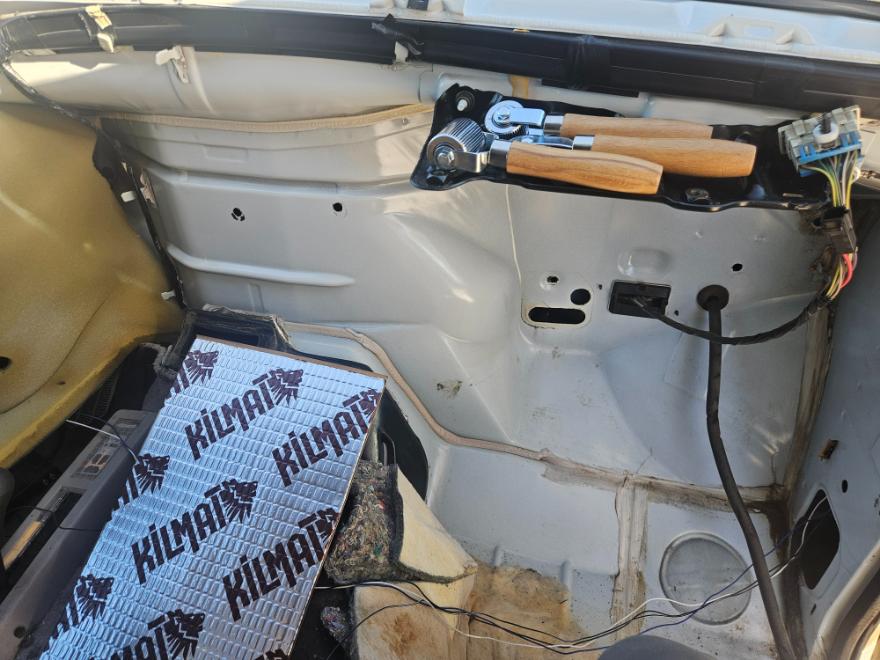
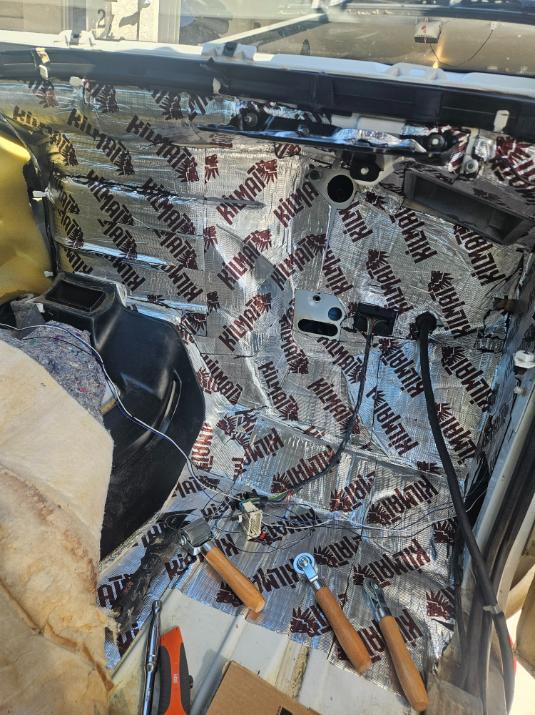
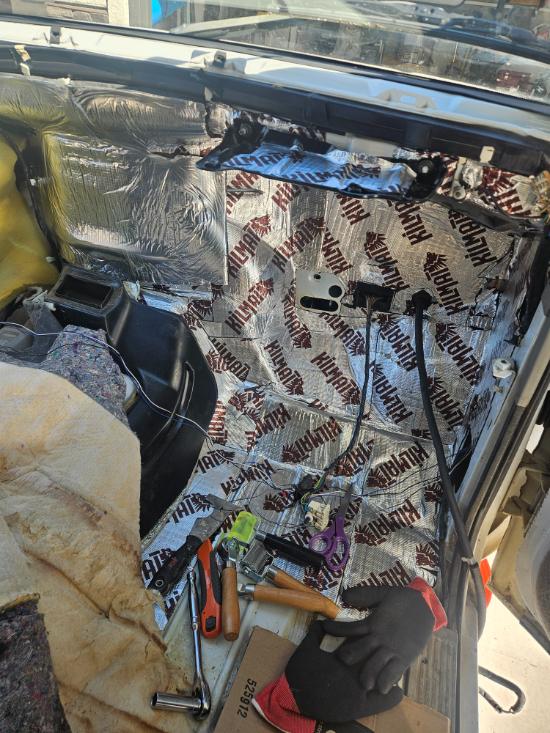
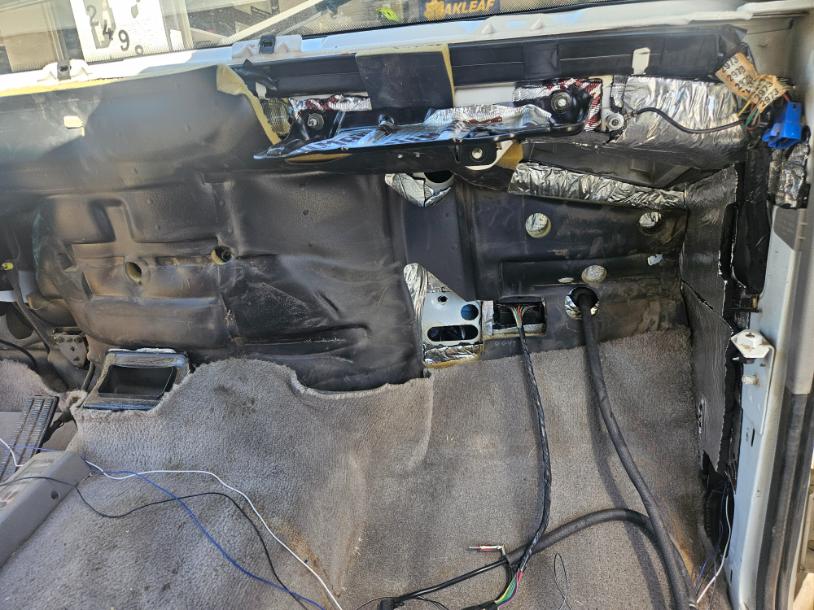
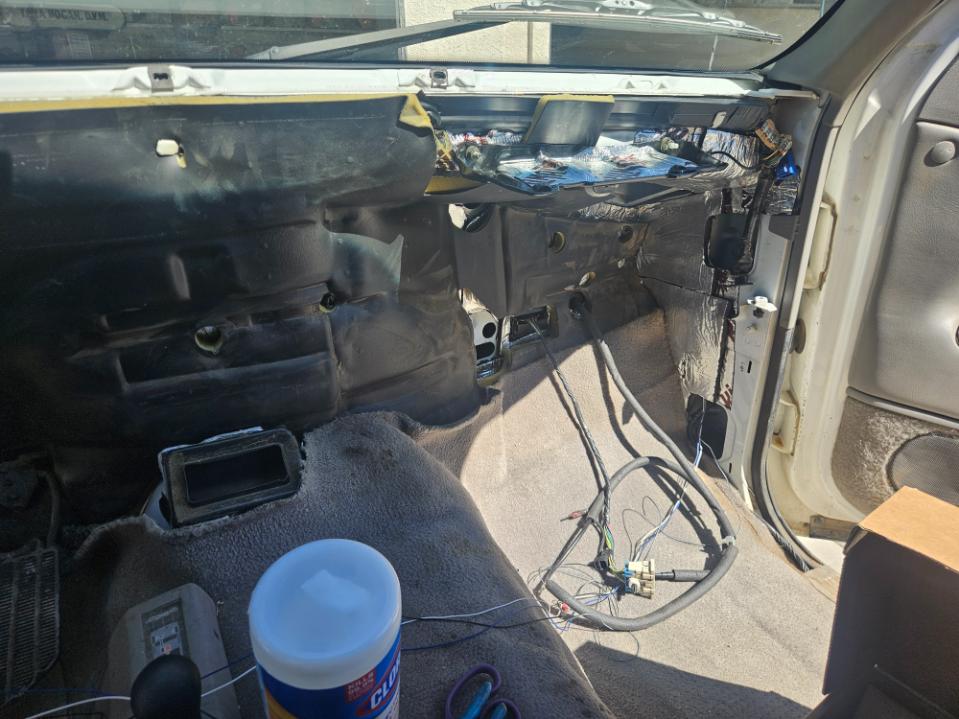
Over the next year I plan to do a lot of work in the cab. One of the main things that will be installed throughout the cab will be Kilmat as well as a foam sound proofing. While the dash was out, it was my opportunity to get the sound proofing up the firewall. The process was pretty easy though very tedious. I just threw on some music, cracked a cold one and resigned myself to a few hours of mindless work. Everything went in pretty well; the only difficulty came when I was putting the dash back in and lining everything up with an extra 3/8” to 1/2” of foam. I had to use my floor jack inside the truck to get the HVAC high enough haha. It all came together thanks to the help of my amazing girl friend that came out to help me line it up and get the bolts in.

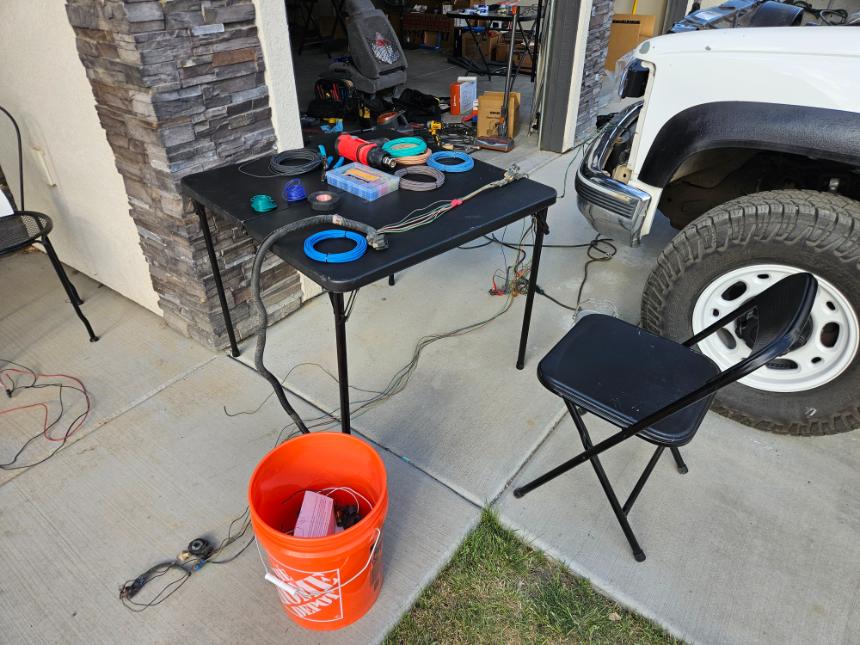
Wire Cleanup:
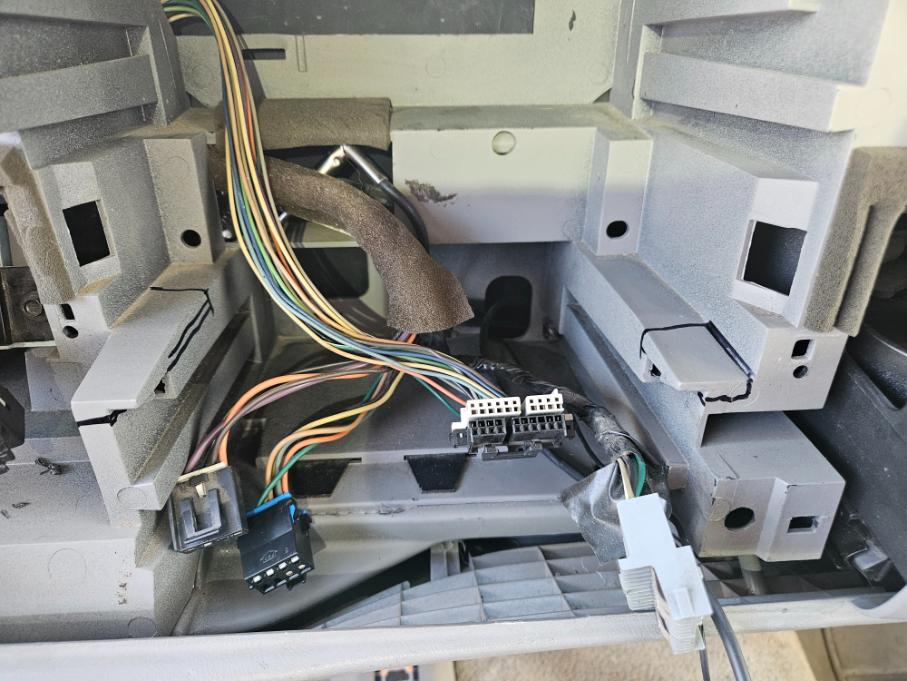
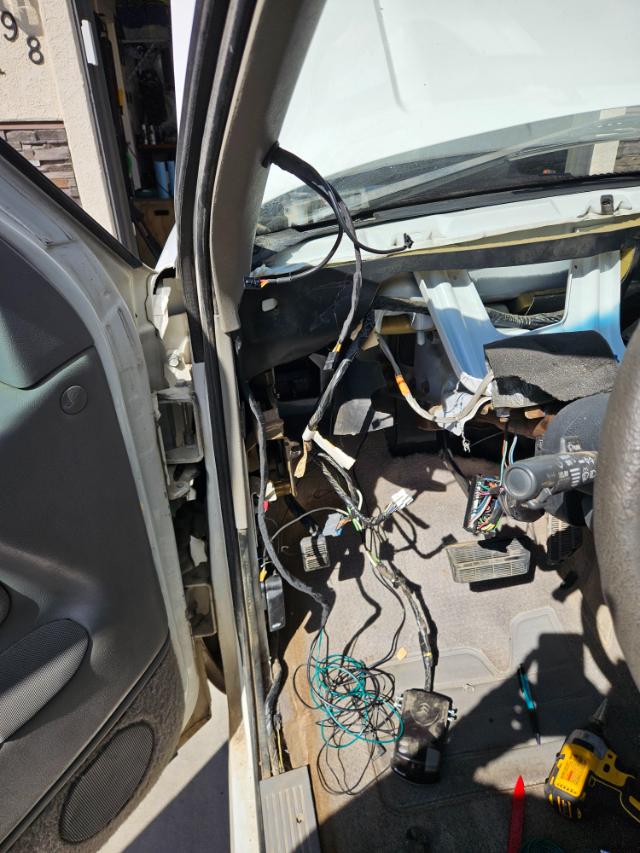
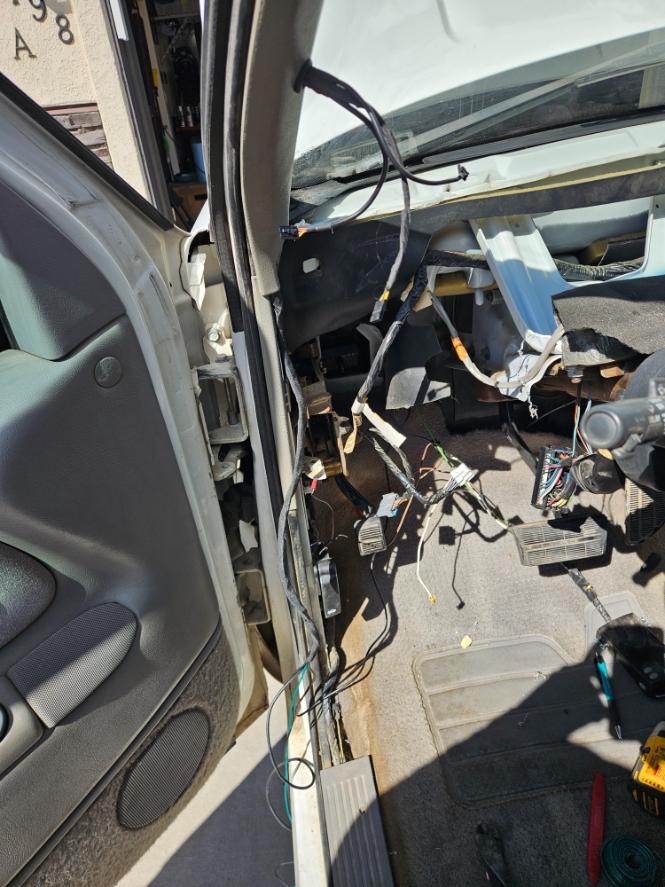
Over the years I have installed a few things with wires running all willy nilly under the dash because of laziness. With the dash out I had no excuses but I will also be running more wires and the time is right to clean it up a bit.
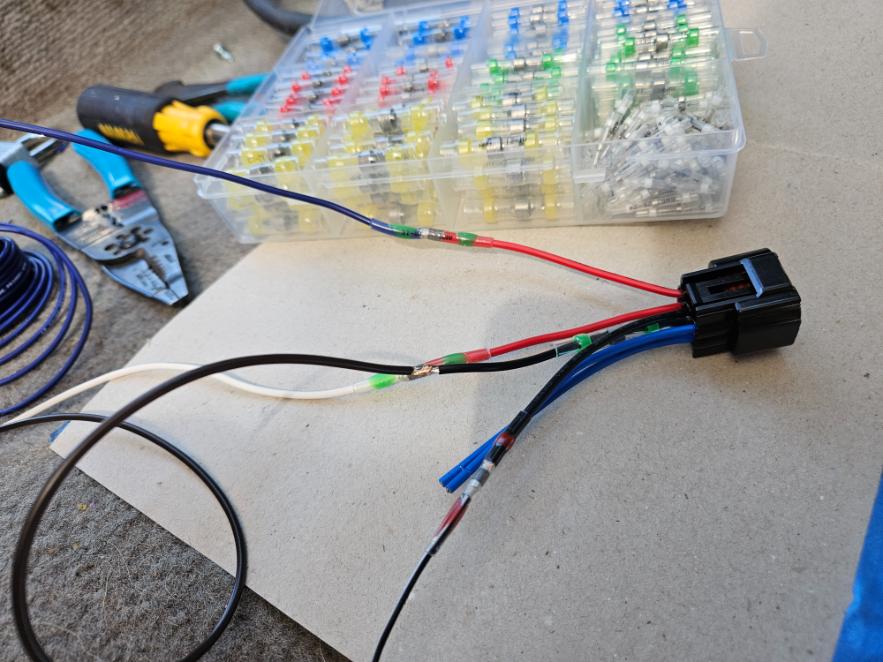
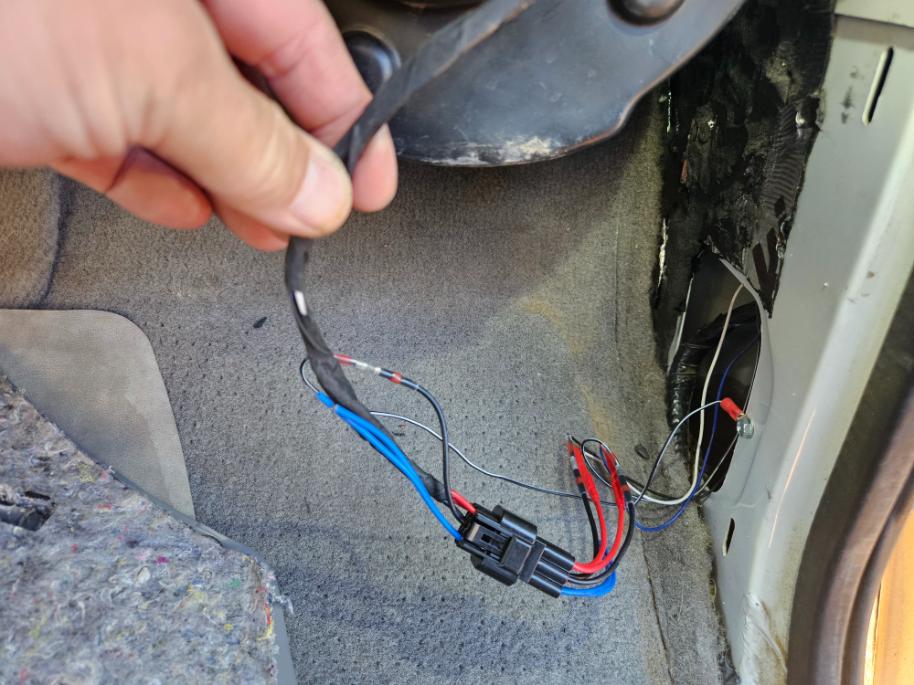
When I installed the tow mirrors they plugged into the existing mirror plug for the adjustment controls but the extra features had to be wired separately. Originally, I just ran the individual wires to their respective tie in points but with no way to remove the doors to work on them without cutting the wires. There are 4 extra wires per side with a ground, heater, turn signal, and reverse and I plan to put in an amp and run speaker wire from the amp to the door speakers. I ordered these 6 pin plugs and ran new wires from the plugs to the respective connection points wrapping the loom with Tesa tape and zip tying the loom up out of site under the dash. Now I can disconnect without having to cut the wires next time I work on the doors, which is coming soon.
When I bought the truck, it had an aftermarket break controller. It was installed alright but not a professional job. I rewrapped the wires in Tesa tape and cleaned it up a bit. It works, and I don’t really tow with a trailer break much these days so my primary concern is that it works the next time I need it. The wires are covered so you can’t see that they change colors and then change back in the loom haha.
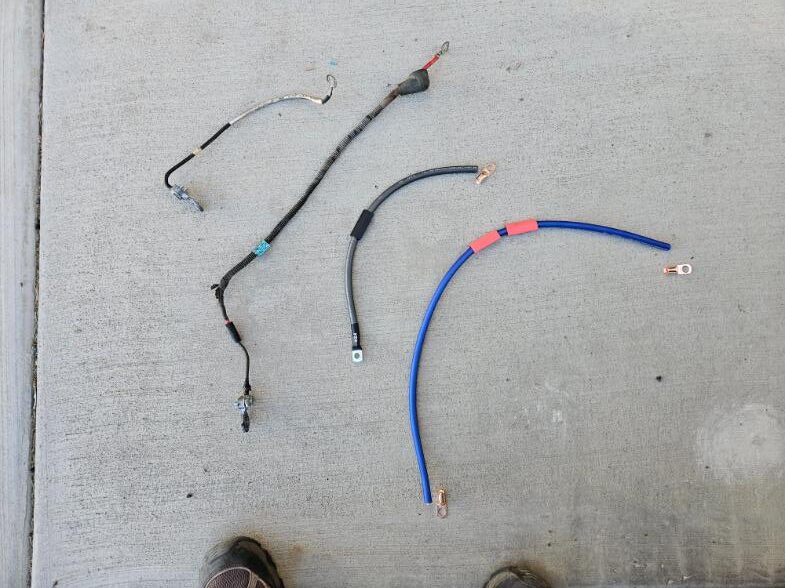
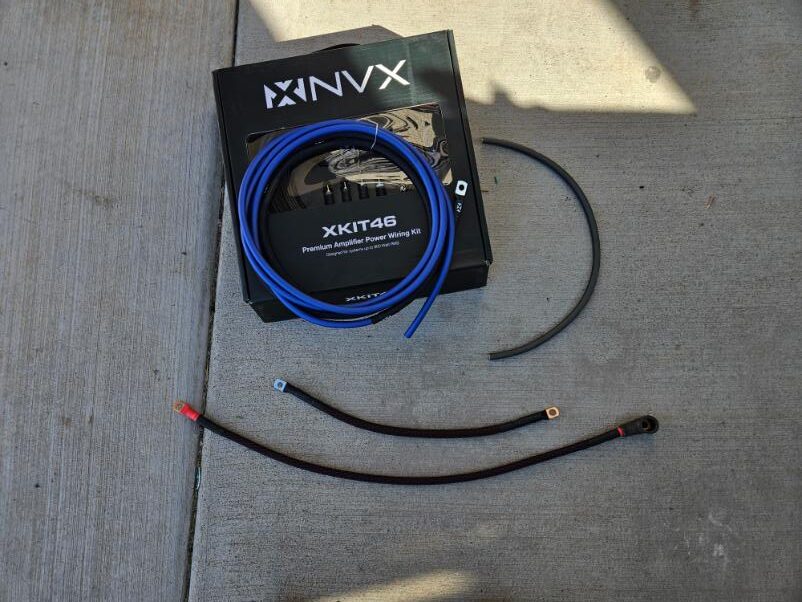
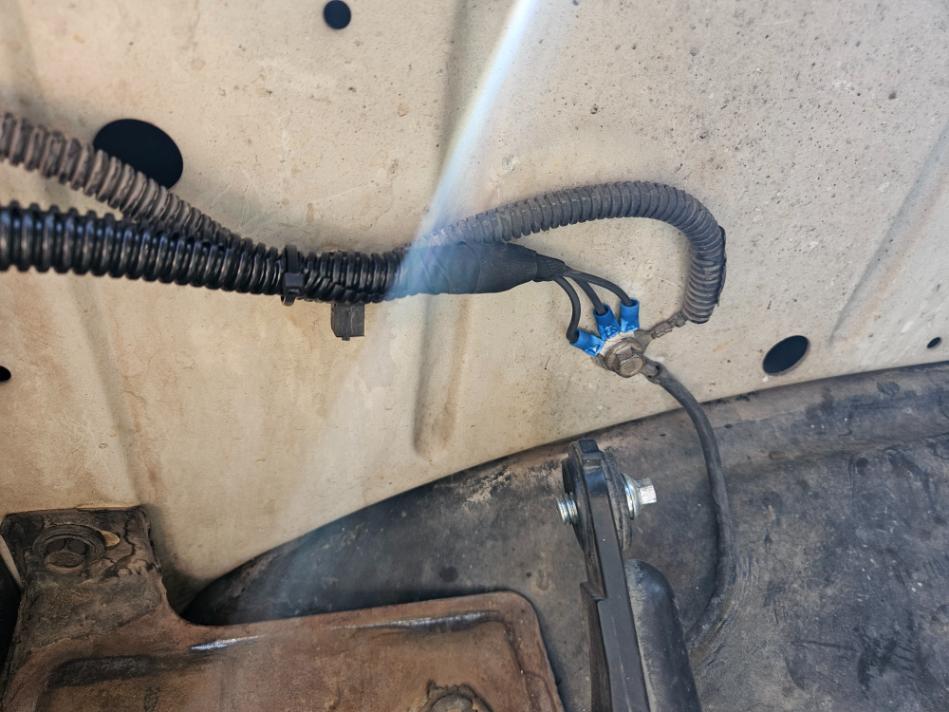
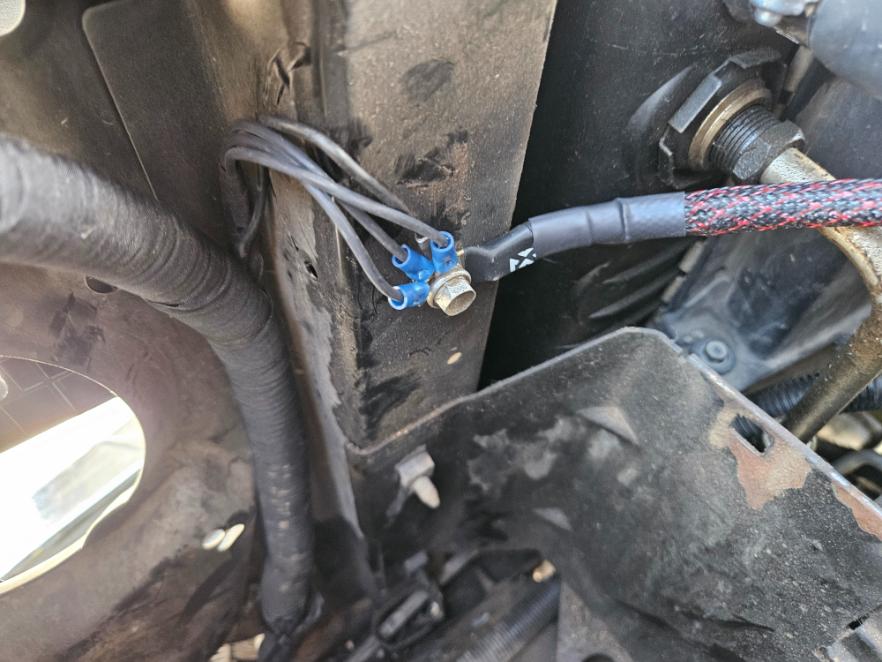
My truck came with the camper package from the dealer and as such came equipped with a second battery, though that had been taken out by the time I bought it. Fortunately, the previous owner didn’t pull anything out when he took out the second battery. It looks like he just wrapped duct tape around the leads and called it good. Before hooking up the new second battery I had my mechanic look it over and make sure it was good to go. While the factory wires were still there, they were a little corroded and rather small. Unlike in a diesel where the duel batteries work together to give more cranking power, in a gas motor with a camper package the second battery is there to help run the accessories without draining the main cranking battery. While probably unnecessary, I had enough extra 4awg wire from the amp wiring kit that I bought to redo the leads. I wrapped them in nylon sleeves to protect them more. I crimped on connectors and used heat shrink on the ends.
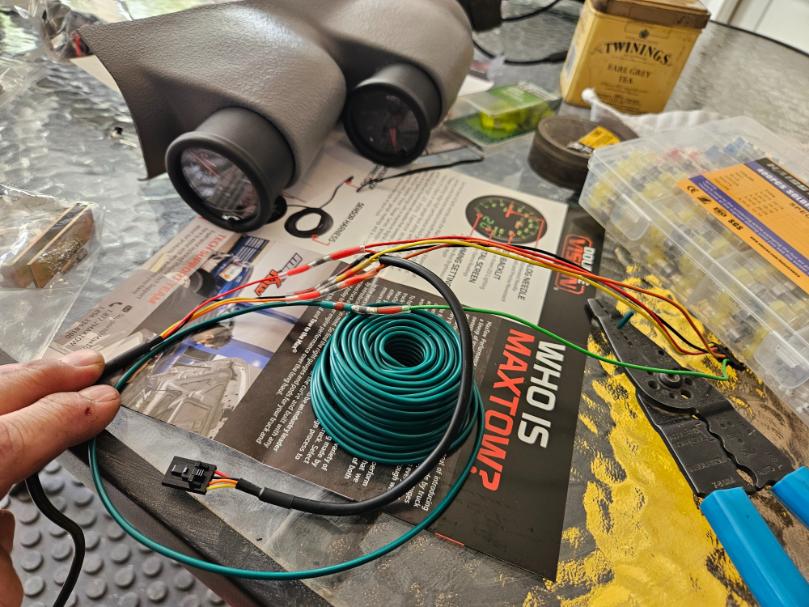
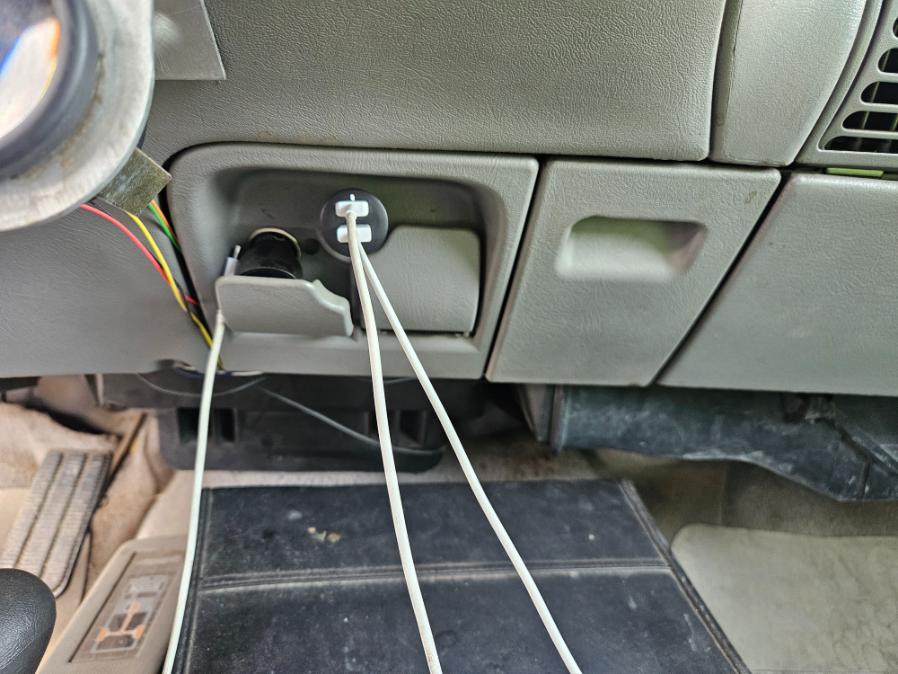
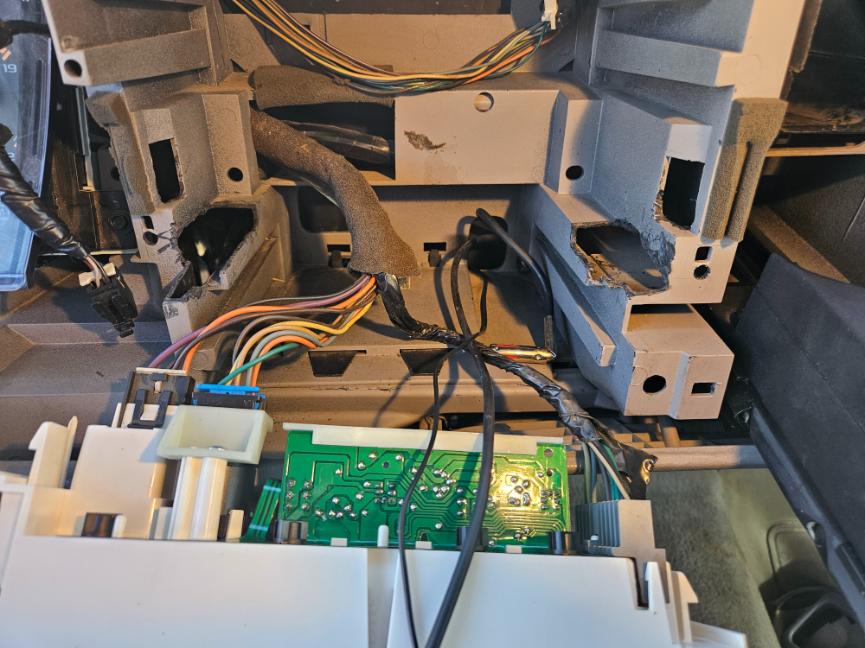
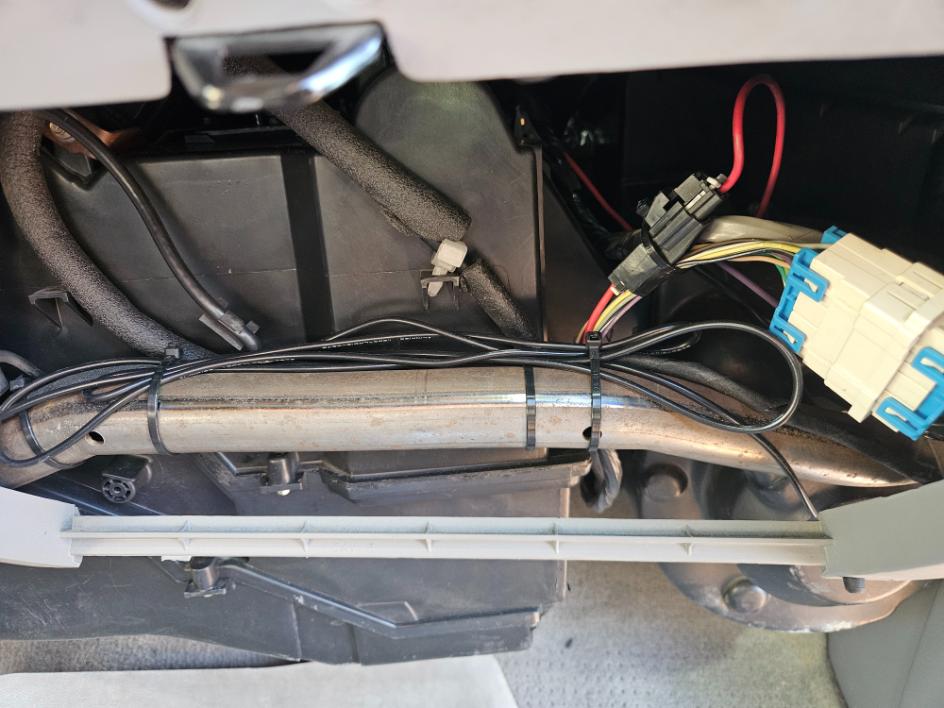
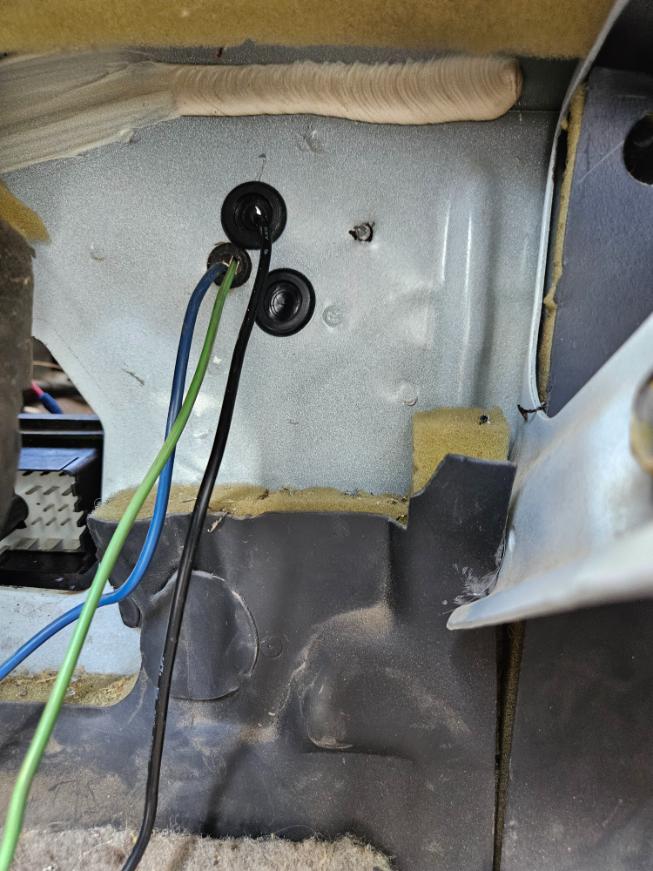
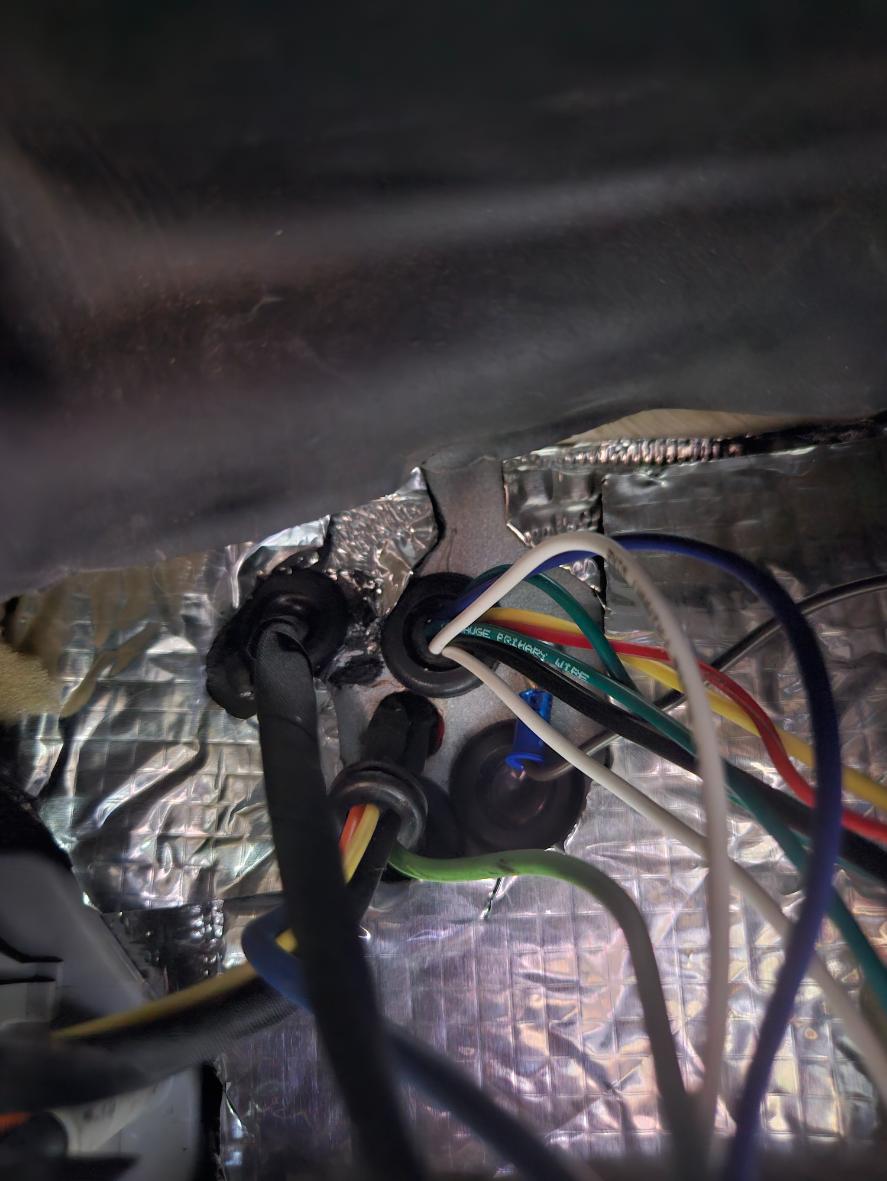
With adding a second gauge and mounting them up on the A pillar I wired the lights together starting on the pillar and just ran one set of wires down to their respective connection points. I wrapped the loom in Tesa tape and drilled a hole in the plastic cover and put a gromet to make it clean. This all lands under the mount so it’s not seen but I know it’s there haha.
It’s a lot cleaner under there and a few new wires were added. In one of the next phases, I will be installing a 5 channel Kenwood amp and a 700w pure sign inverter so I plan to have even more wires coming through the firewall. I predrilled for those already and put grommets in. It’s getting a little crowded down there, be nice if I could find a bulkhead plug to take the place here but some of those are sensor wires and the two amp/inverter wires will be 4 awg. Maybe I’ll do some research though and see if I can find a plug and then just have a few other wires going through holes.
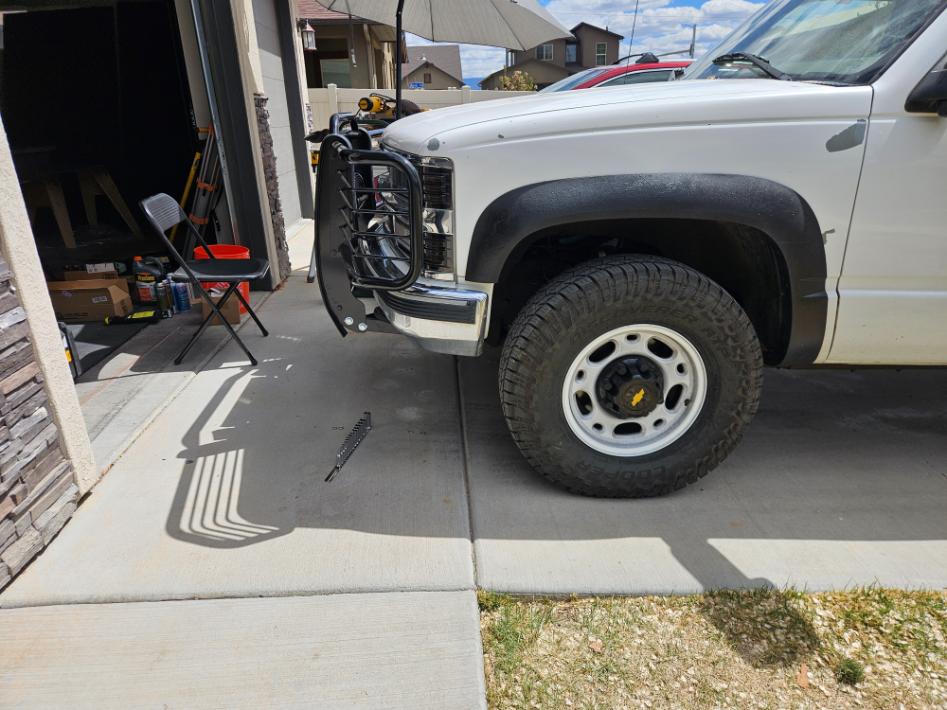
Rims:
I’ve never cared that much about the appearance of my vehicle. I drive off road almost as much as on it and while I don’t do any rock crawling or other hardcore wheeling, I constantly find myself on some tough roads getting to trailheads or climbing areas. One night while sitting on marketplace in my hotel I found a set of alum/mag rims off a GMT800 for $80. I knew they weren’t going to be in the best shape at that price but figured I would check them out. They turned out to be straight; I put them on the truck without a tire and rotated them with a dial indicator and they were good. The clear coat on the other hand… I toyed with a couple different ideas like sanding
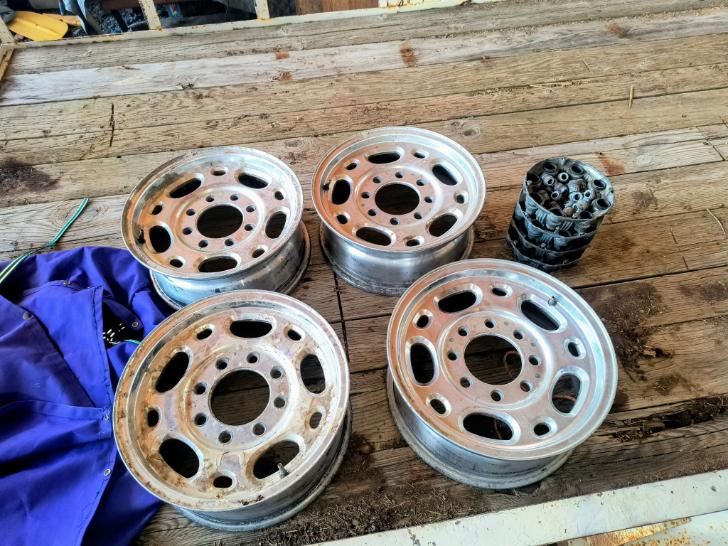
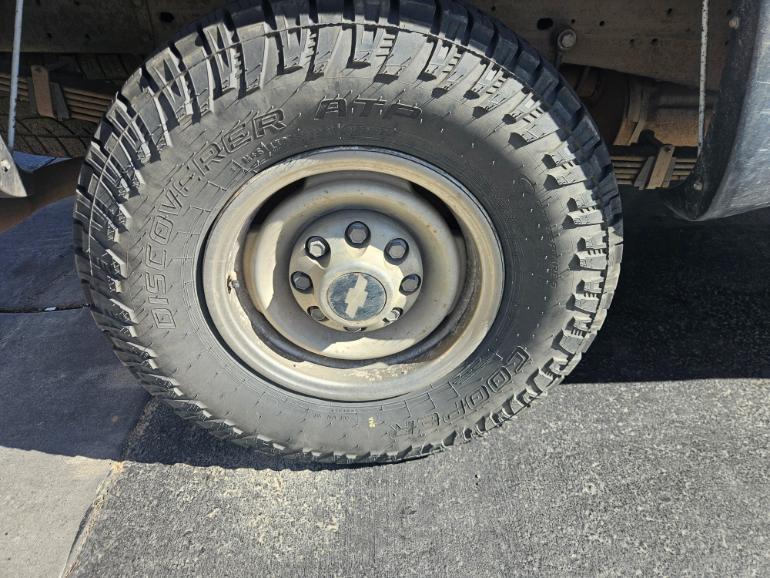
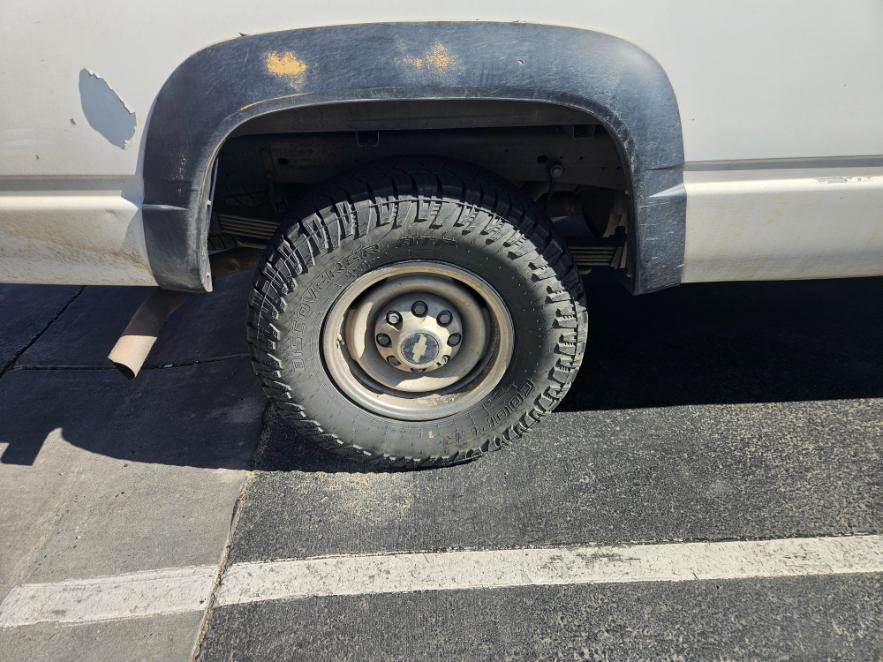

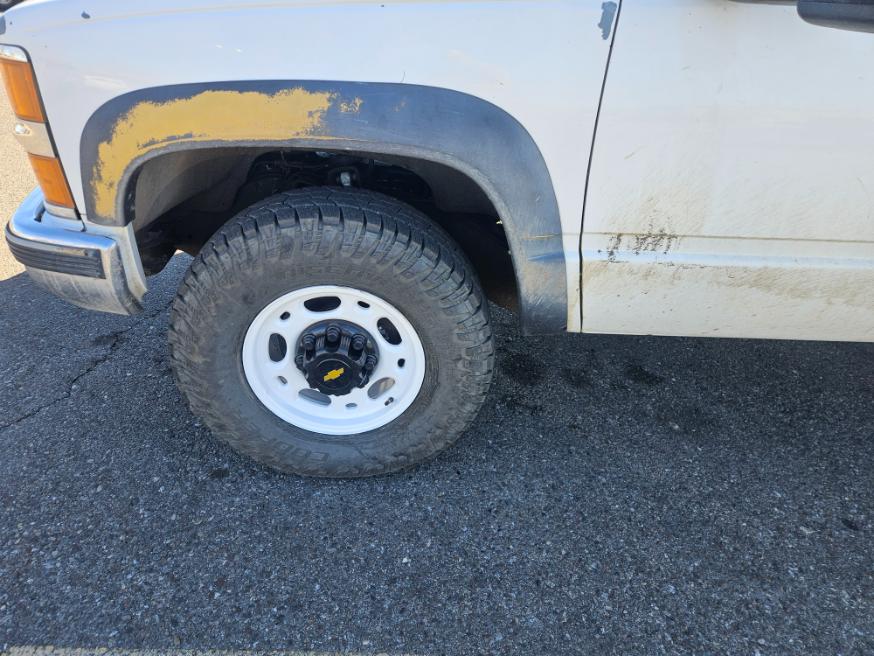
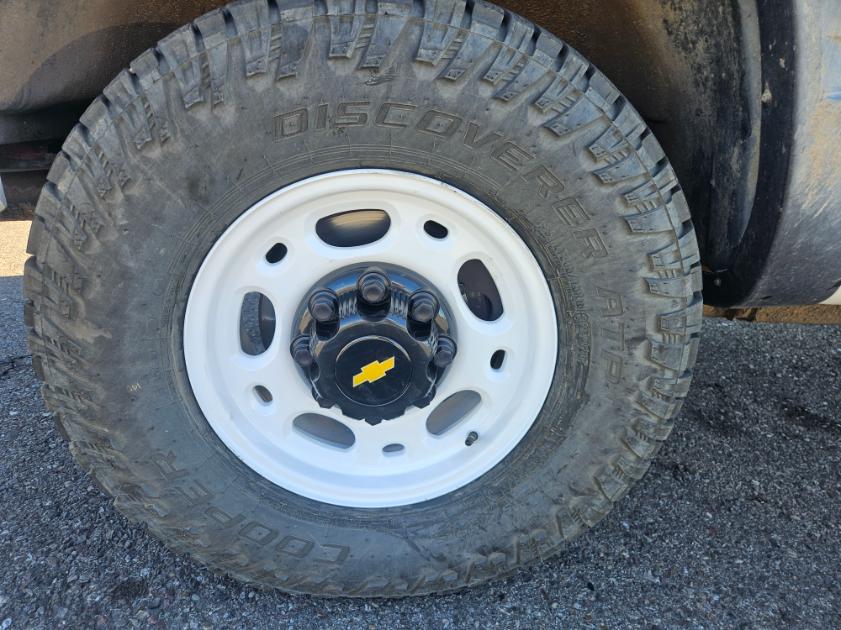

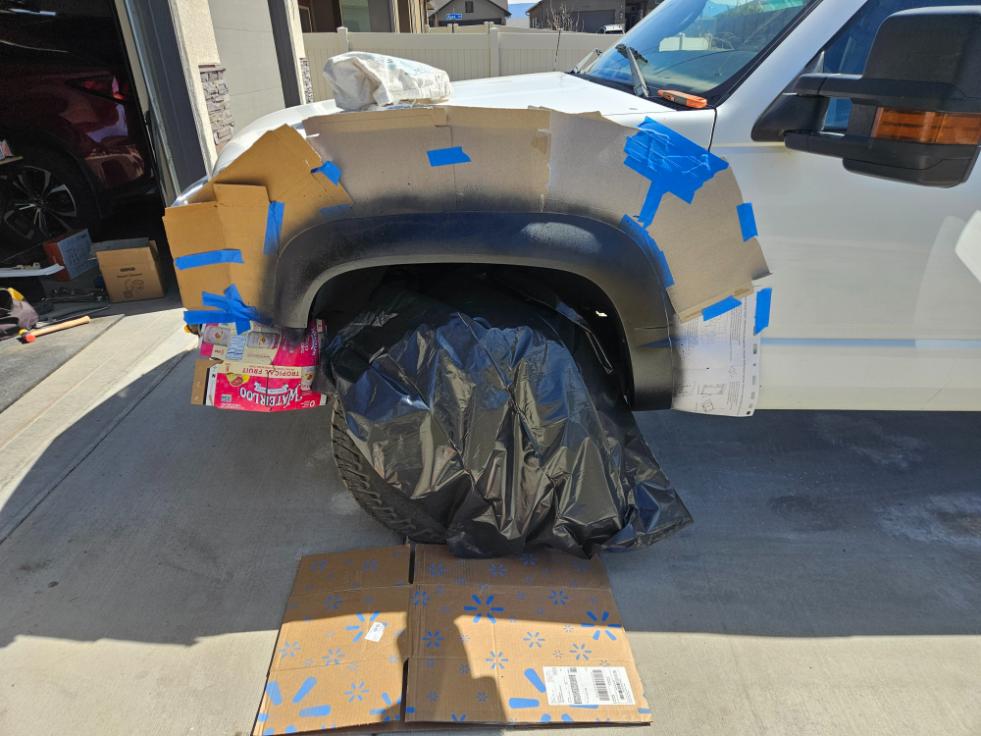
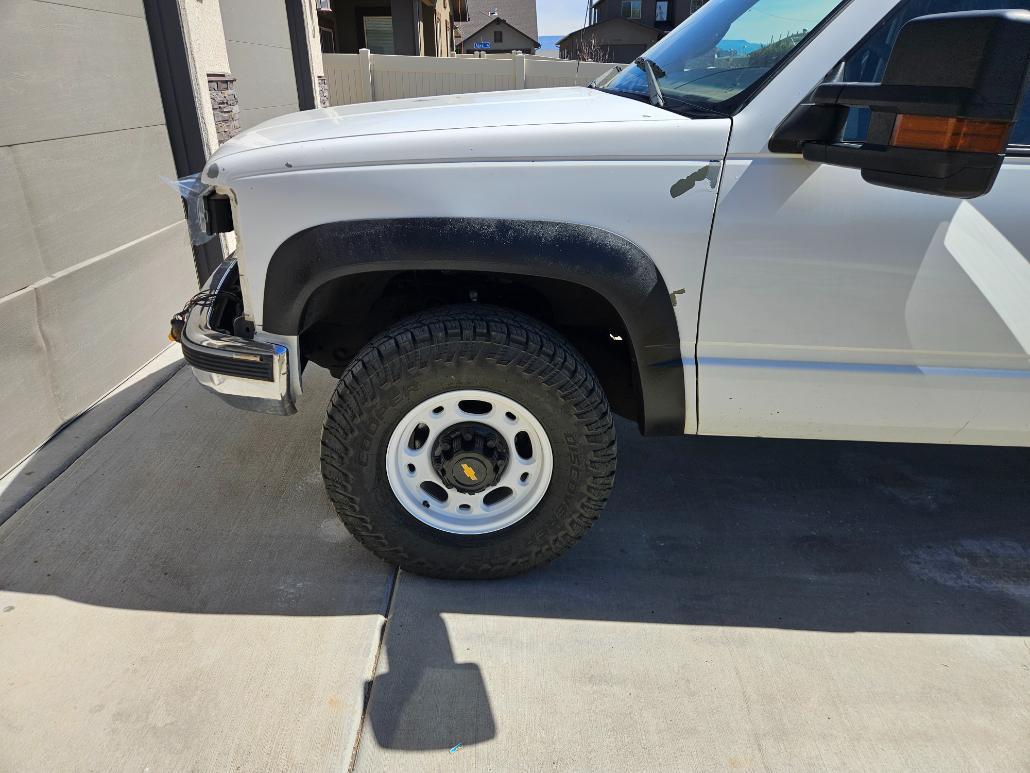

them down and repolishing them or paint. I didn’t want to spend my days off sanding and polishing and when I priced out paint it was going to run around $300 for a good paint, primer, and clear coat. I called the local powder coat shop and he quoted me $100 a wheel and I was sold. The white does get dirty quicker but oh well. The fender fleers are ugly. I got some textured panel paint and gave them a quick paint job to make them not as bad but really with the 90s two tone on the rest of the paint job I wasn’t going to spend too much time on them.
Front End:
I’ve had a headlight problem for a little while now. It started right after I replaced my power steering, all of it. I had gone through 3 pumps in a couple of years so I finally went to new instead of reman. I was having a lot of slop from the reman gear box as well, more than just what was coming from the shaft. I decided to just replace it all and go with new from Edelman Plews and a hydro boost from AC Delco. I replaced all of the lines and cooler with AC Delco as well and also added an inline filter. On the back of the pump was a switch that was supposed to reduce the power steering at higher speeds. I couldn’t find a replacement part for it but I did find a delete that GM put out and installed that. It has been a couple of years and I haven’t had an issue with the power steering since.
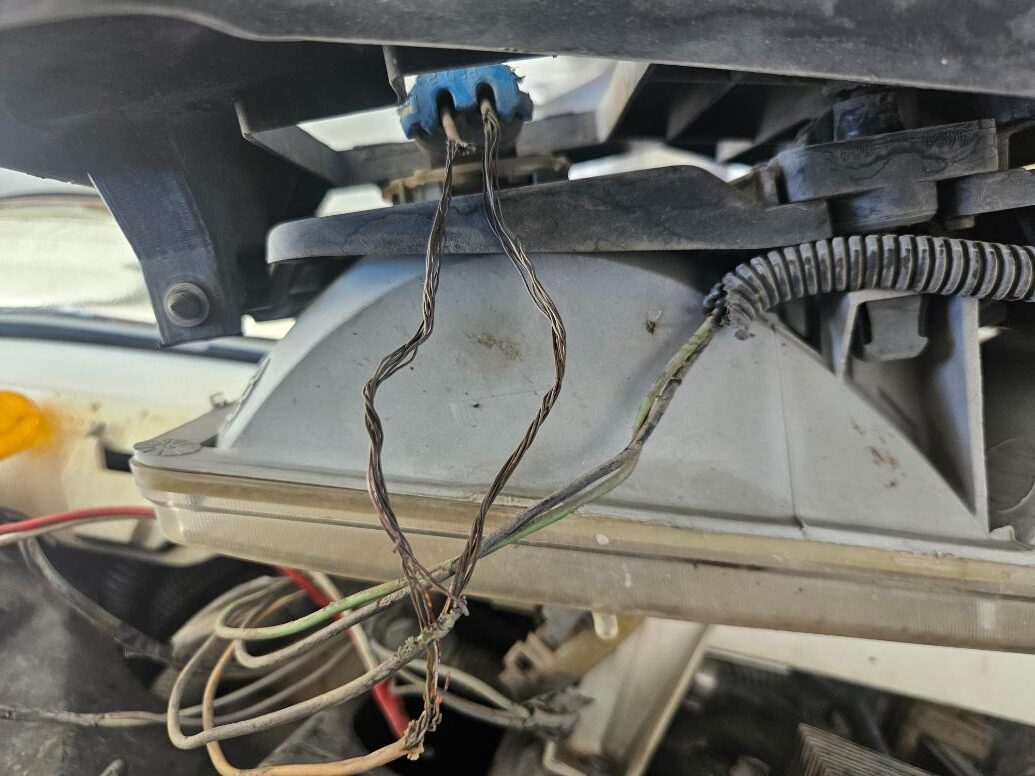
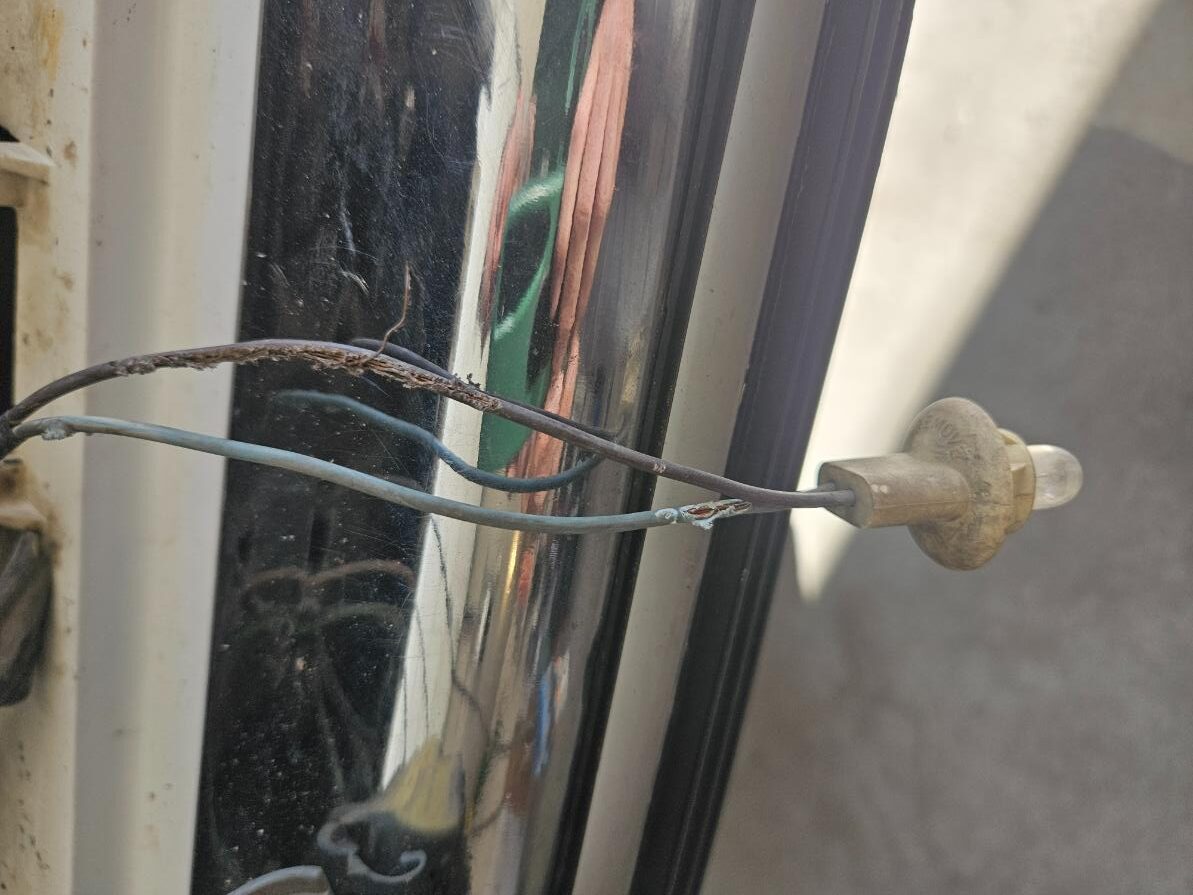
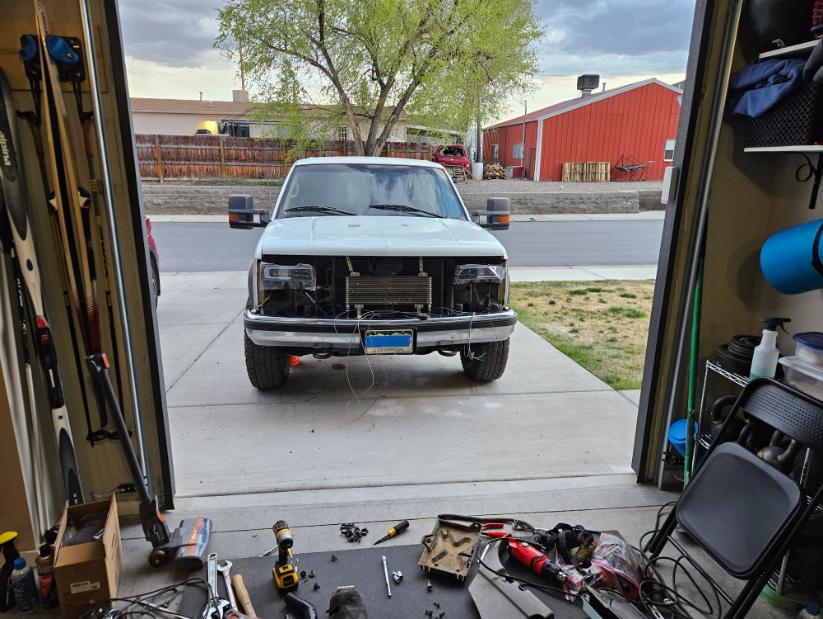
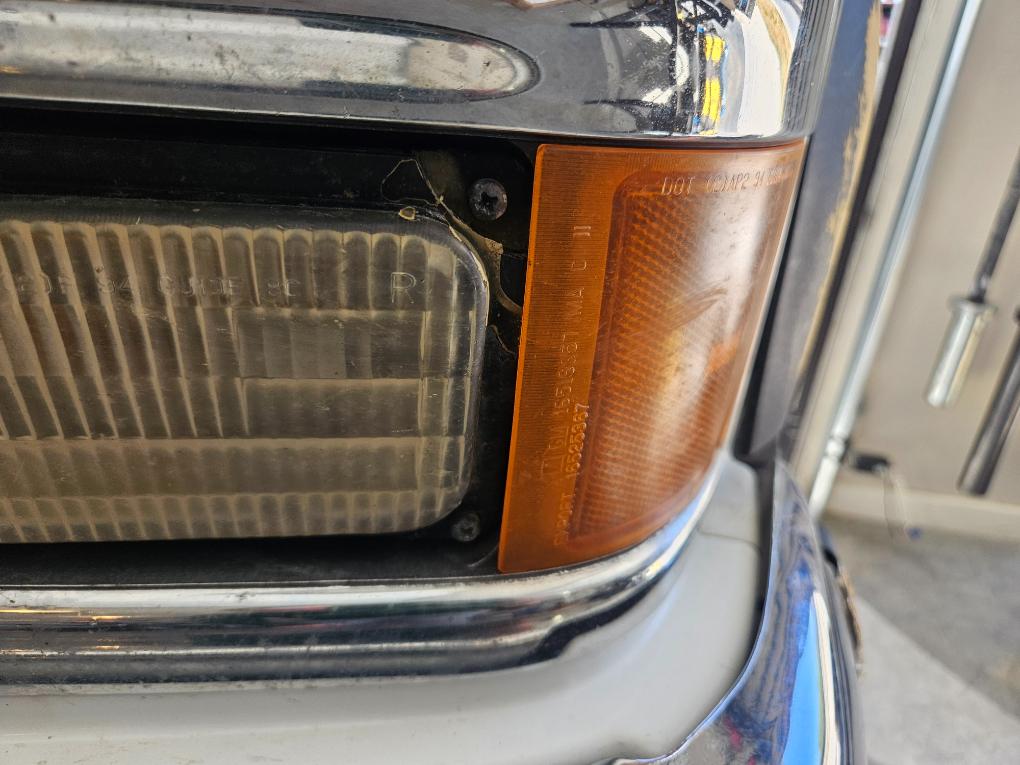
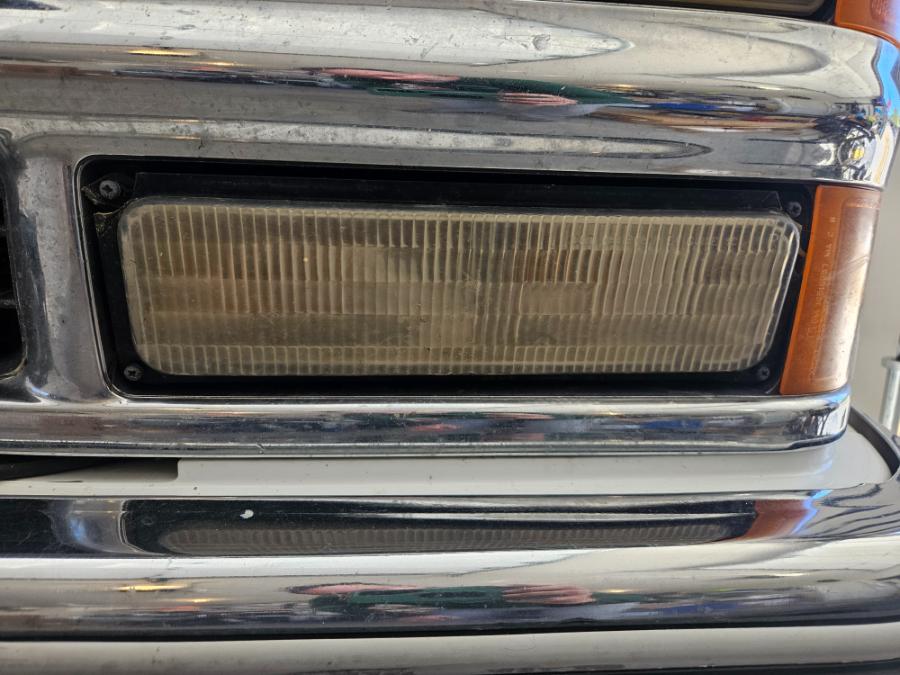
With all new parts in, I made the foolish decision to power wash that side of the engine compartment to clean it up a bit. Immediately after I did that the low beams stopped working. Since then, I have been extremely busy and out of town about 85%-90% of the time so I haven’t delt with it. The high beams still worked so it could be a problem for another time haha. Strangely, when I installed the upper steering shaft the blinkers stopped working, WTF haha. Well, when I popped open the front grill and took the headlights off it became very clear what both of my light issues were, but it is odd that both presented for the first time while doing something else. The blinker wire looks chewed on, the head light wires may have also been chewed on but they have also obviously fried a couple of times so it’s hard to tell what started it.
I was working in the mountains near Telluride over the summer a couple of years ago and the rodents up there were relentless. I thought I had made it through unscathed; I apparently was wrong. The issue didn’t present at the time so I didn’t equate it to that but it is a likely culprit.
The wires were only fried for a short distance but I didn’t want to take a chance. I pulled the entire loom back to a plug on the drive side just behind the fuse block. I already had the fuse block detached because of the dash removal so access was easy. I ordered 14awg Painless Performance Extreme Condition wire in the six colors I needed to match factory and remade my wire loom. The grounds in these OBS Chevys are notorious for going bad so I also ran new grounds, opting to run a new wire to the grounding bolt for each component, total of three per side.
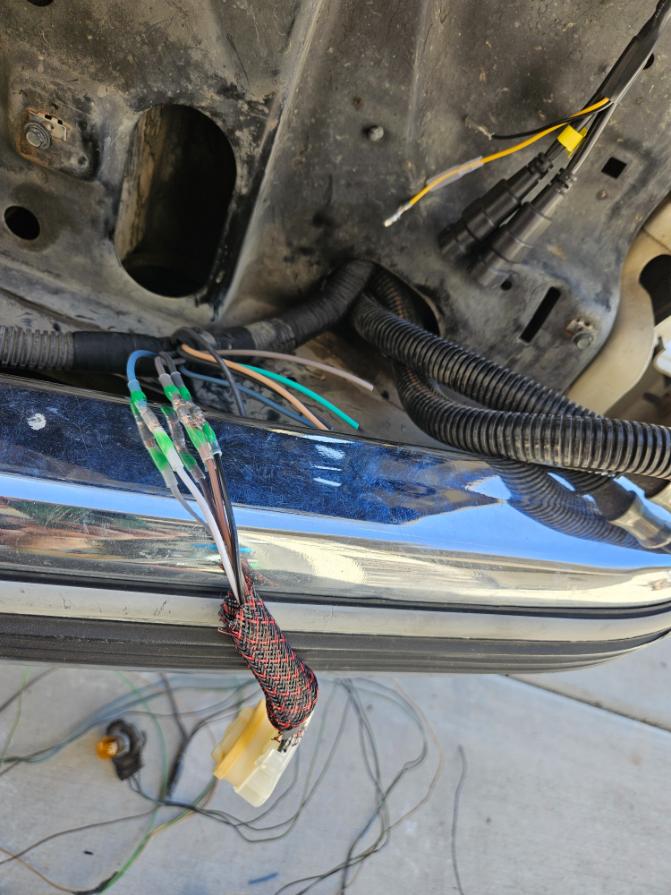
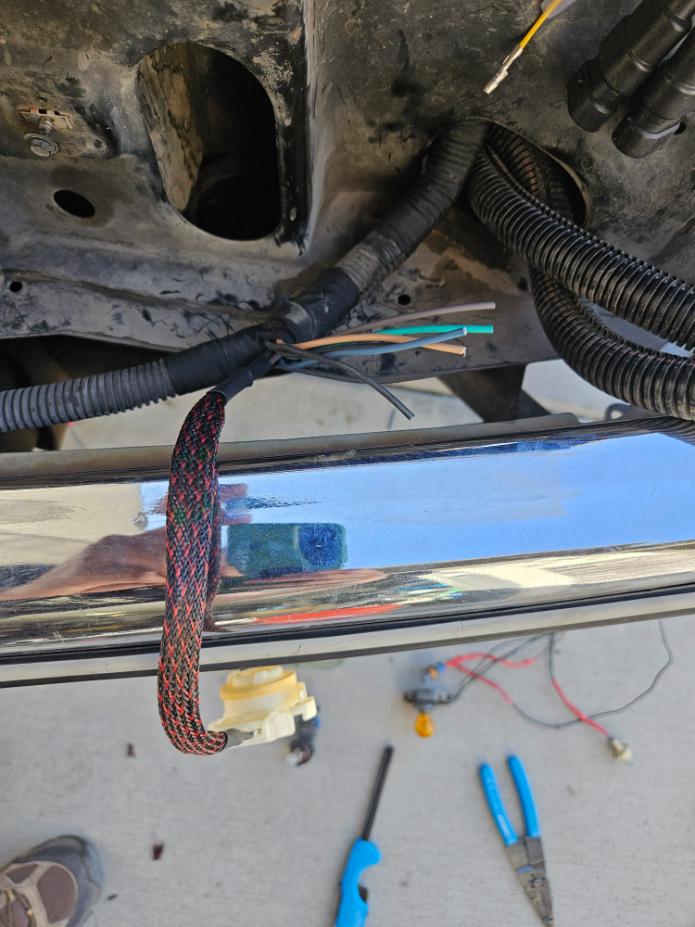
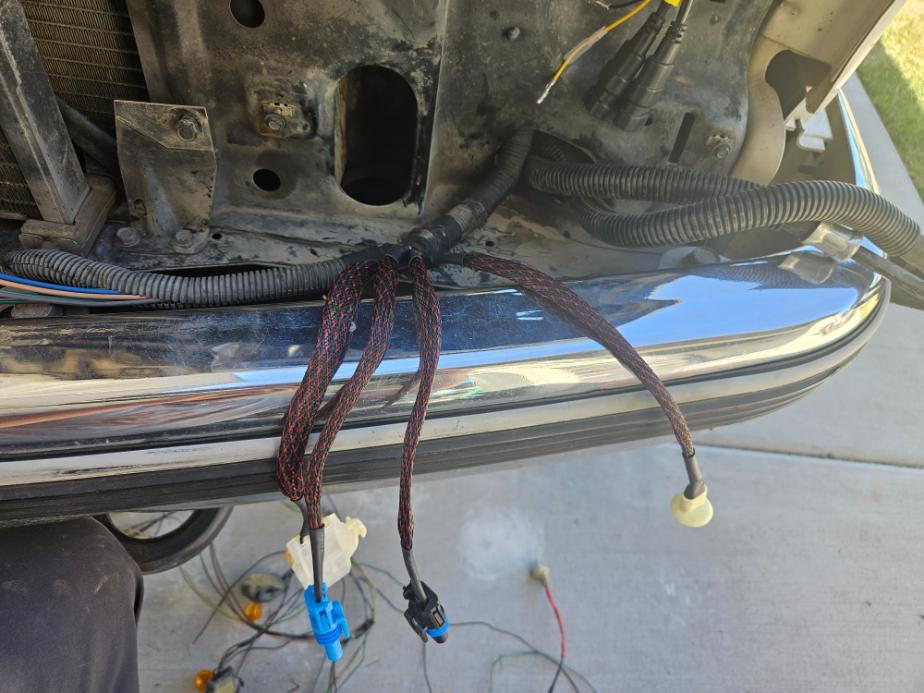
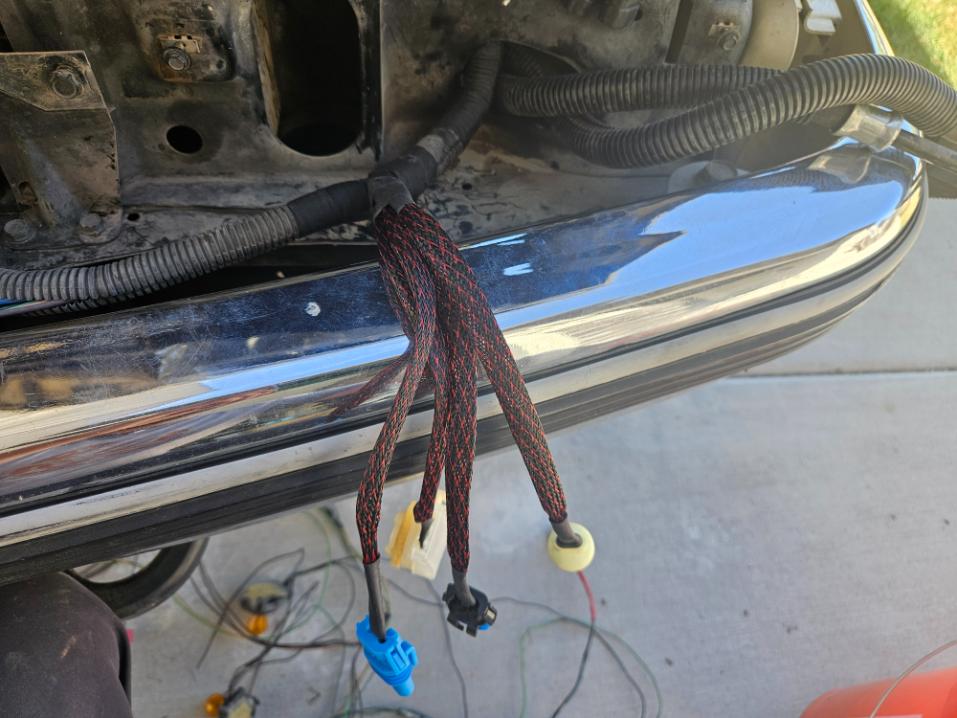
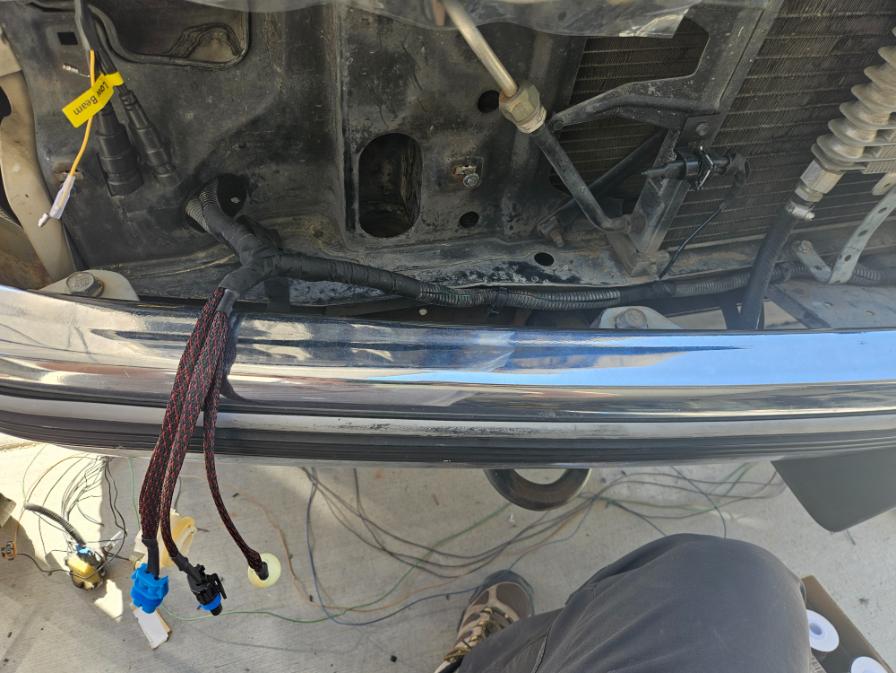
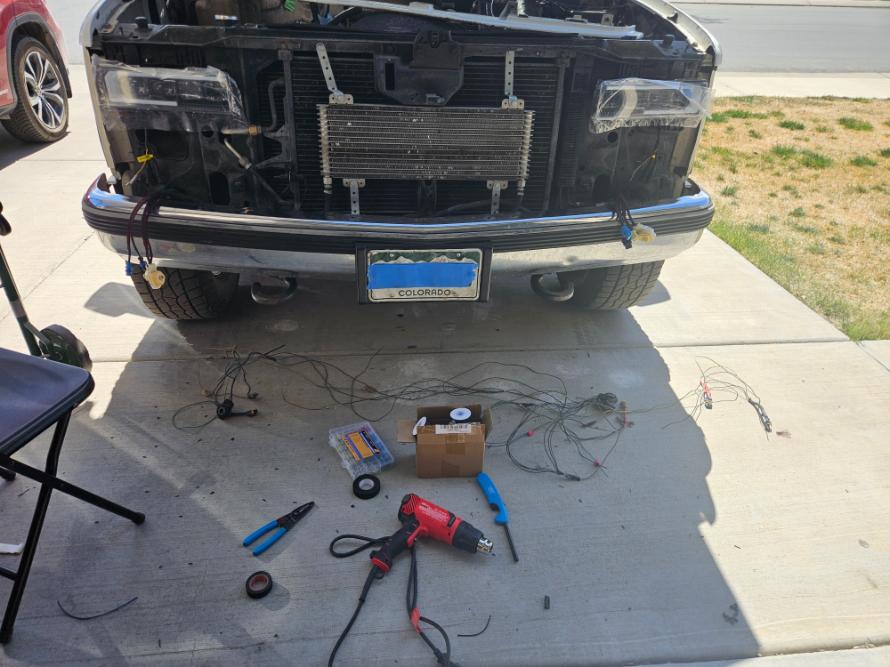
I ordered new AC Delco plugs for each light. The factory blinker in the front takes two lights but the new LED lights I brought only need one of them. Rather than wiring a plug I don’t need right now I only wired one back in. To protect the wires a little more I put nylon expanding wire loom over the wires coming out of the main loom.
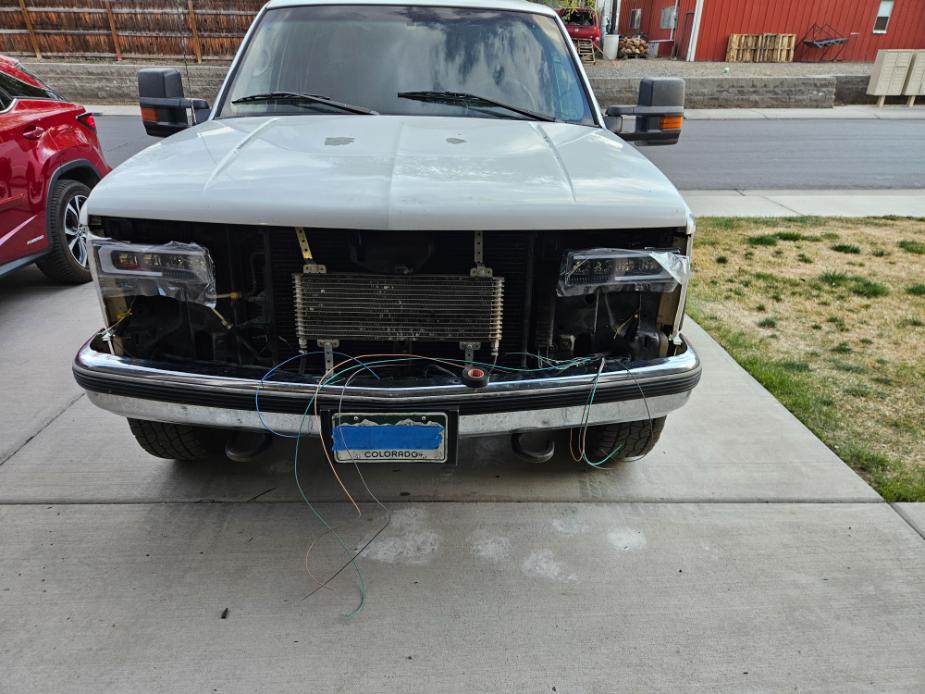
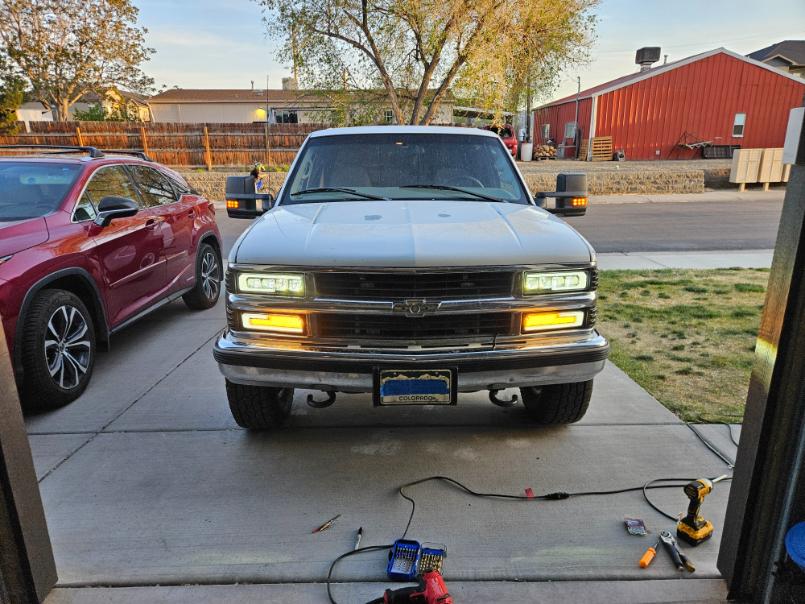
27-year-old headlights are pretty abysmal. As I was driving home in the rain in rural Colorado on the way to start this project I almost pulled over and waited for the rain to stop because I just couldn’t see. I had polished the lenses a few years ago and it didn’t really help; it was time for LEDs. I did some research and found good reviews on these aftermarket lights from Movotor. We’ll try them for a bit and see how they go. Installed they are much brighter than the old ones but we’ll see how they last. I also replaced the side markers with Movotor and like that both top and bottom have lights in them, the factory light was only on the bottom and the top was just a reflector. I like the look and I’m really happy to have all lights working again.
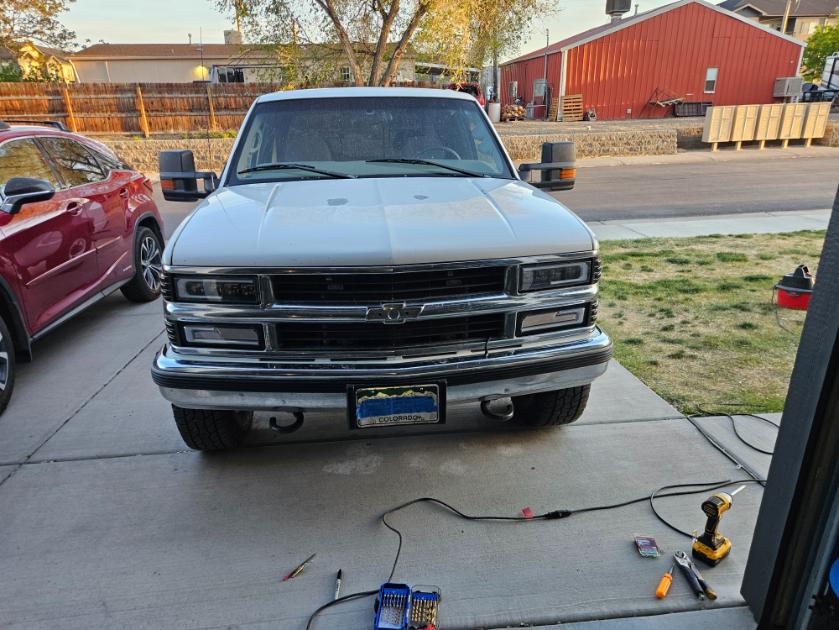
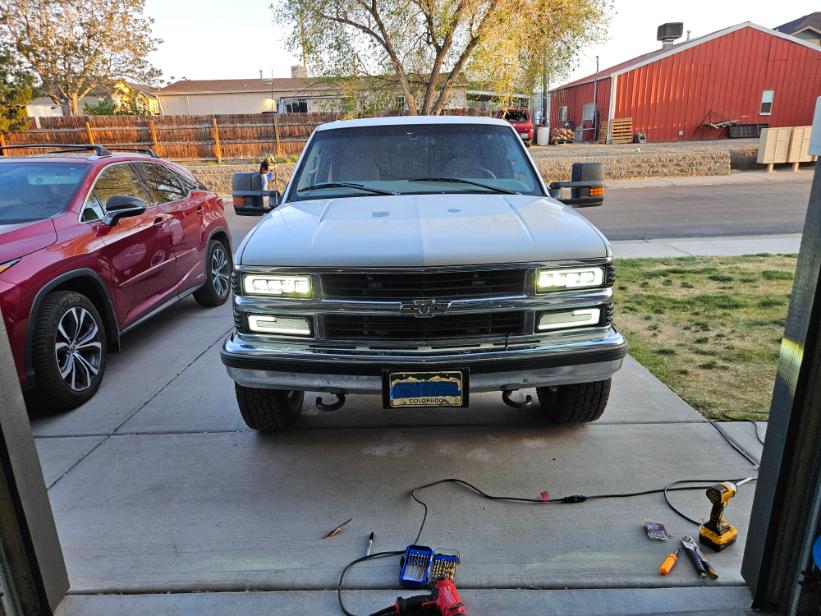
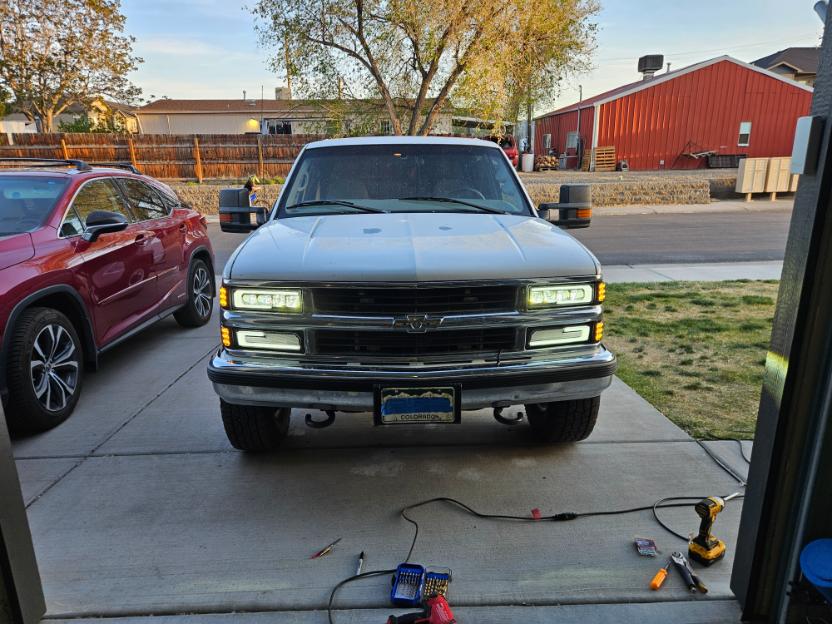
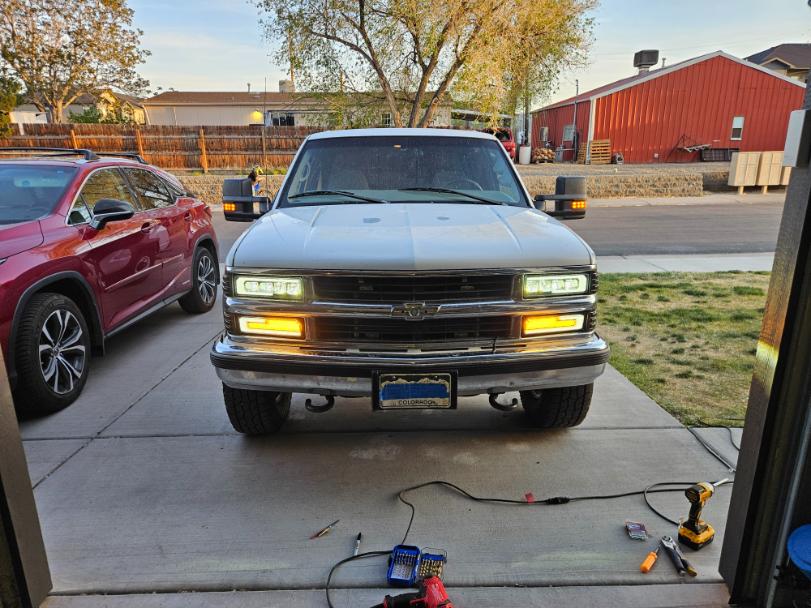


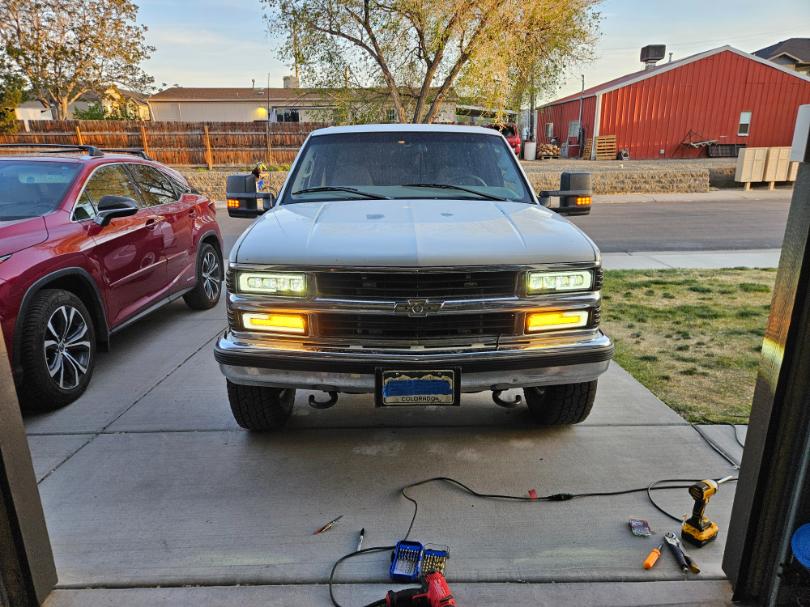
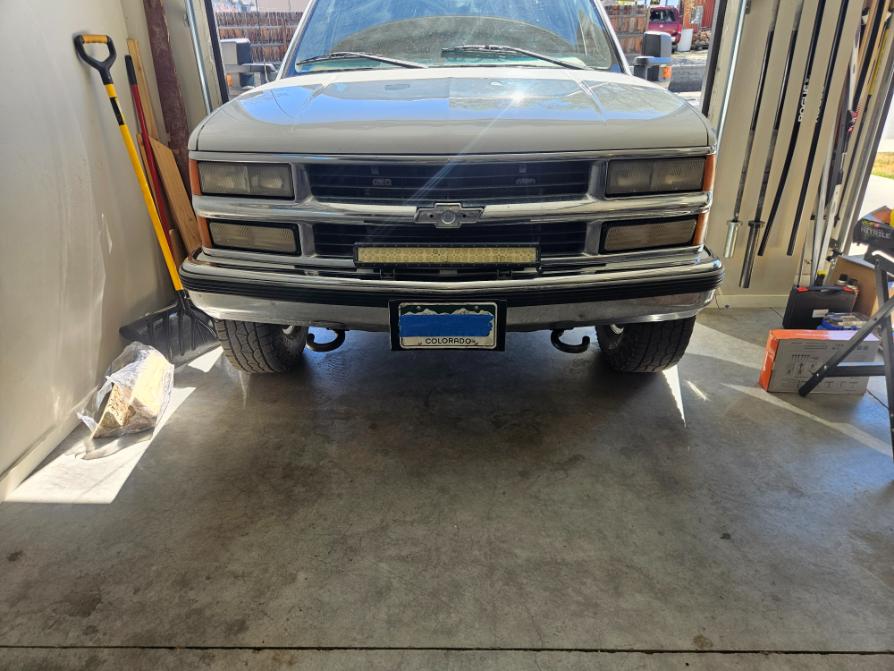

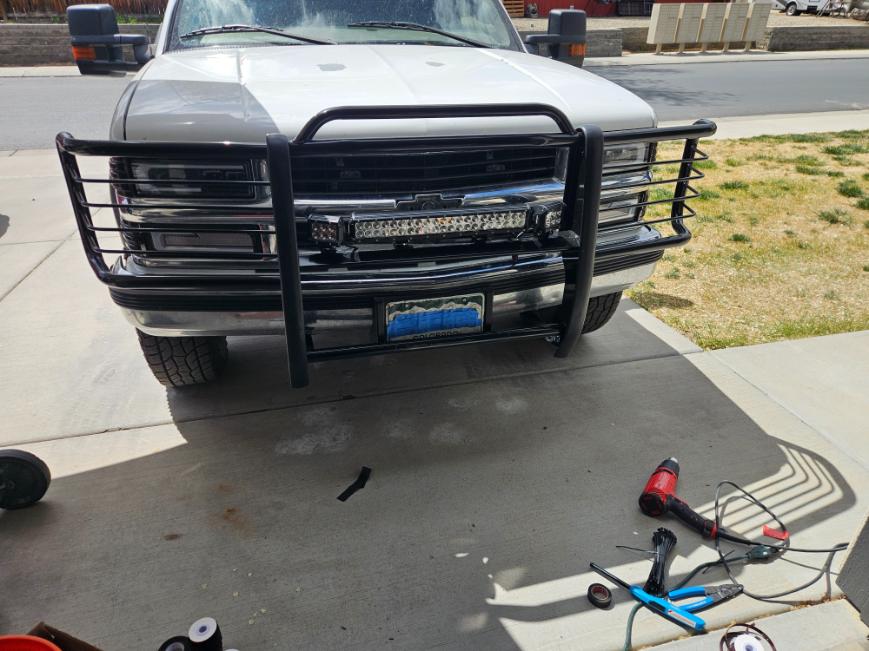
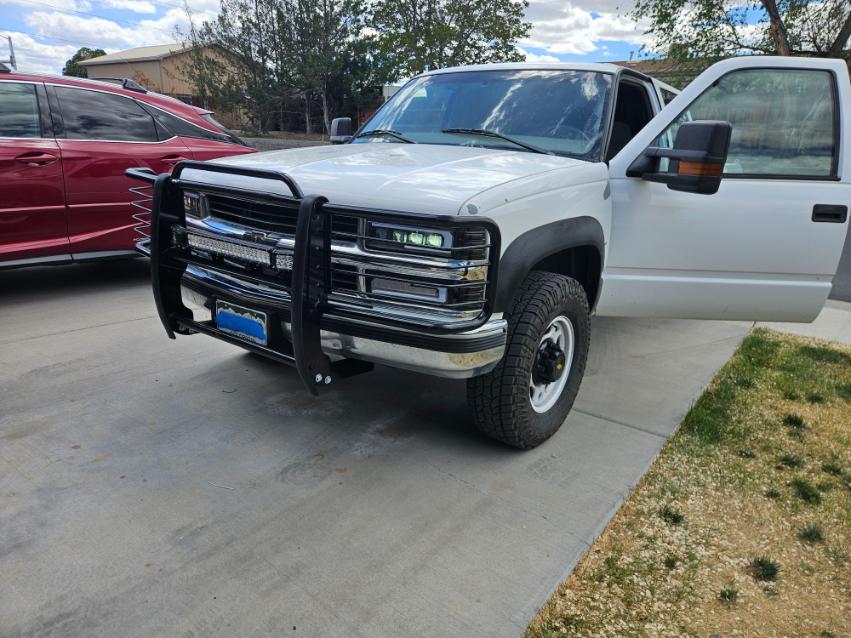
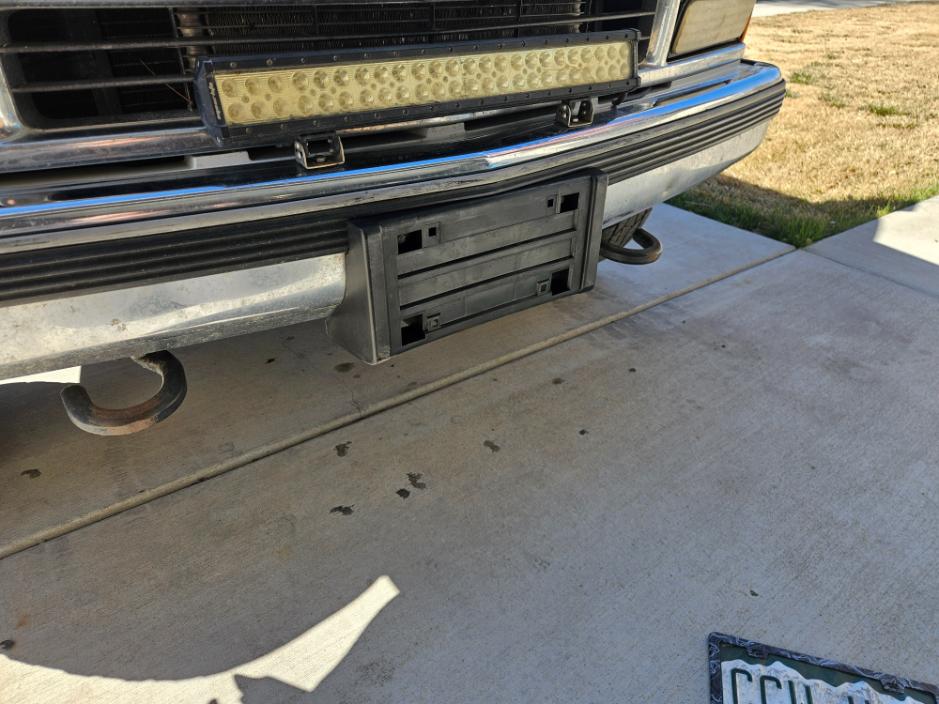
With the lights all sorted out it was time to add the brush guard. Something I’ve been wanting since I bought the truck. I know a lot of people hate on these brush guards, and if you live in a city and only do city driving, they don’t make a lot of sense, if you live rural however… I hit a yearling deer a few years back and it cracked a bunch of stuff on the grill that I was able to repair but with the bumper… I spend a lot of time on dirt and 4X4 roads that are often overgrown scratching up the headlights and adding a nice pinstripe to my 90s two tone paint job. I had one of these on my old Tacoma and it saved me a lot of hassles.
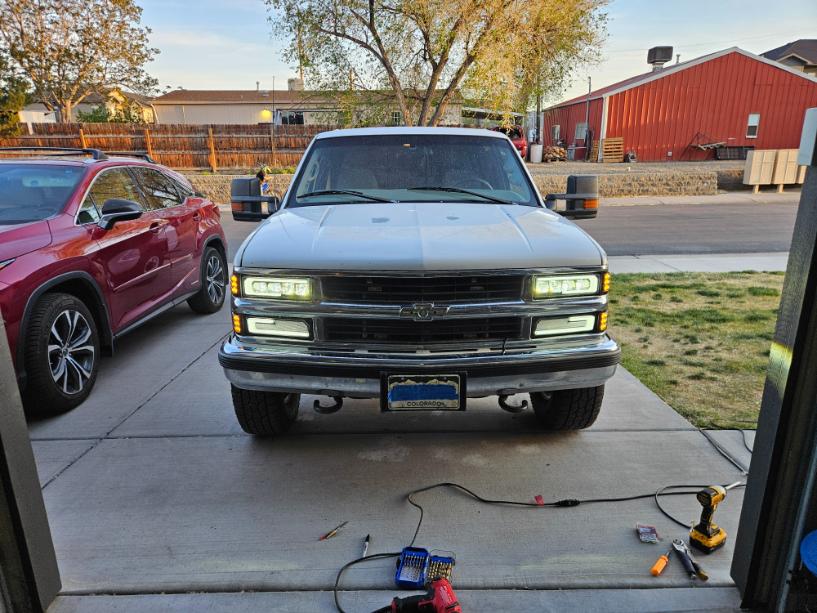
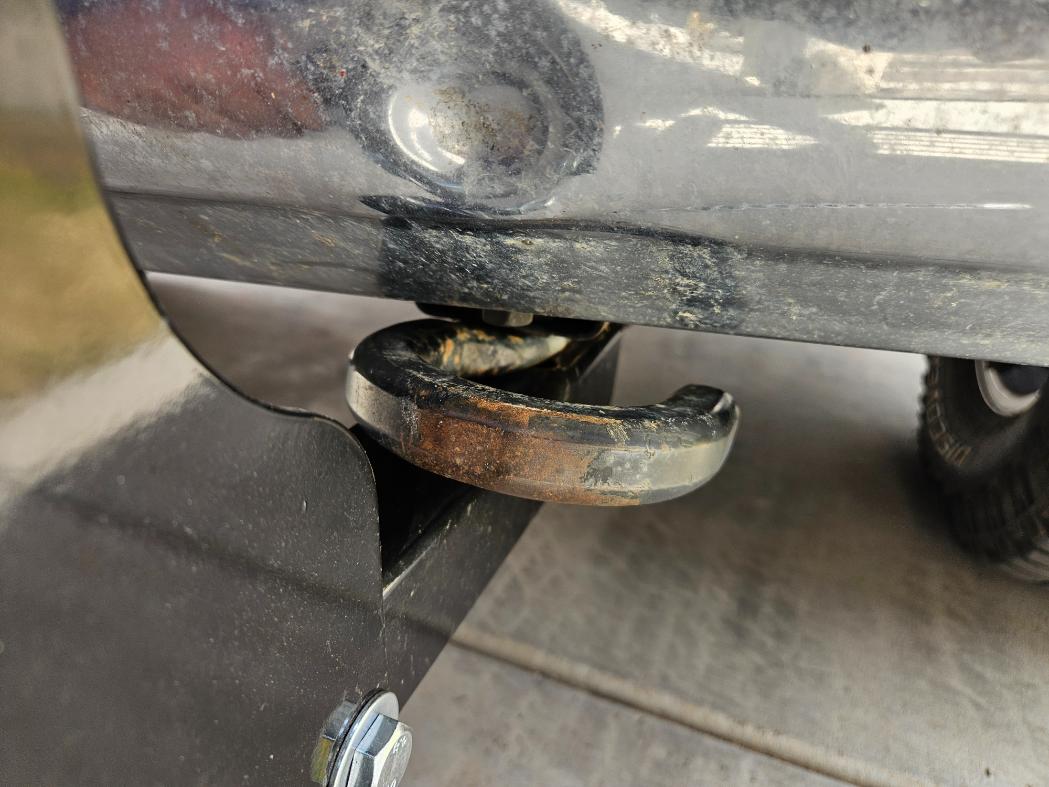
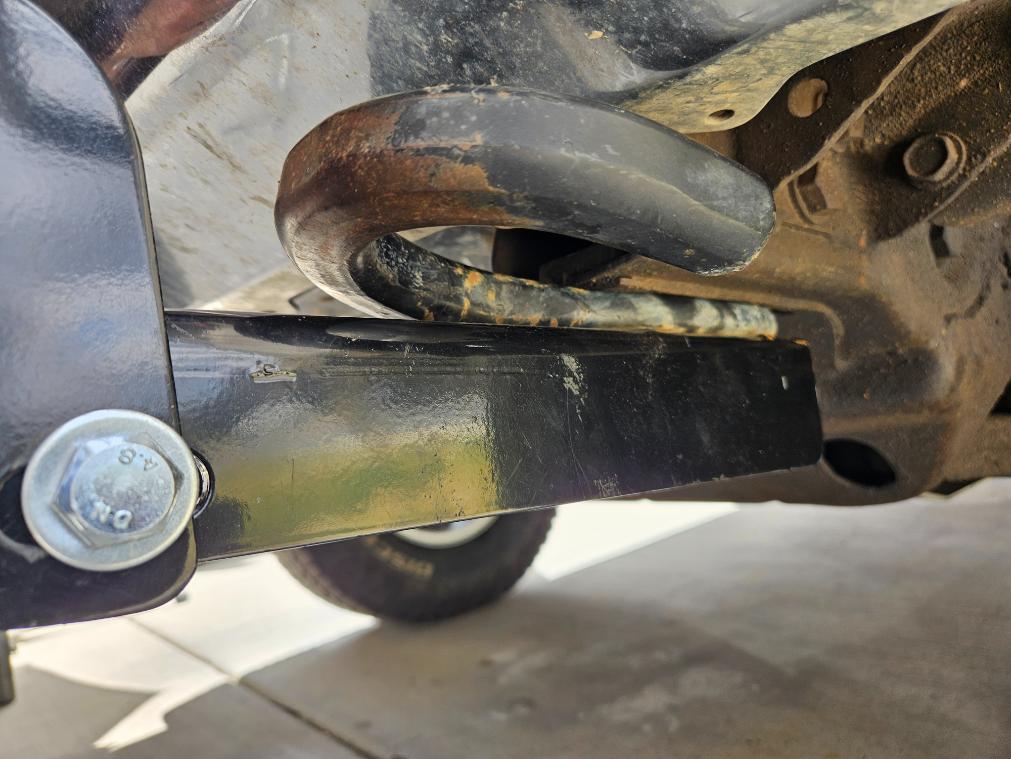
A couple of years ago I had bought a used one off of marketplace but it needed a lot of modifications. I was likely going to have to rebuild the entire mounting system, or make a custom bumper to fit it. With my current job having me out of town these days I didn’t want to get tied up in that for a month so I bought one off Amazon. All of the pictures and reviews said I would have to remove the front license plate and tow hooks but by flipping the hooks I was able to keep them, and it doesn’t hit the plate so I’m good. when I first mounted the brush guard without the hooks it was a little too high and didn’t line up with the headlights and turn signals very well. By mounting the hooks in between the brush guard and frame it lowered the guard 3/4″ and it lines up much better now.
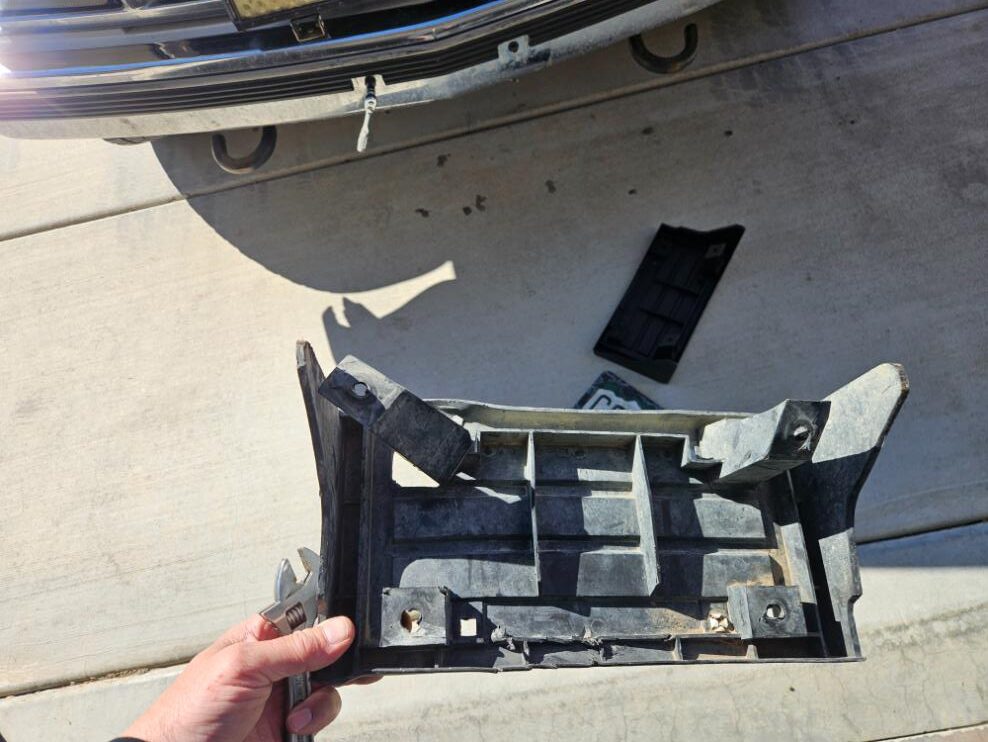
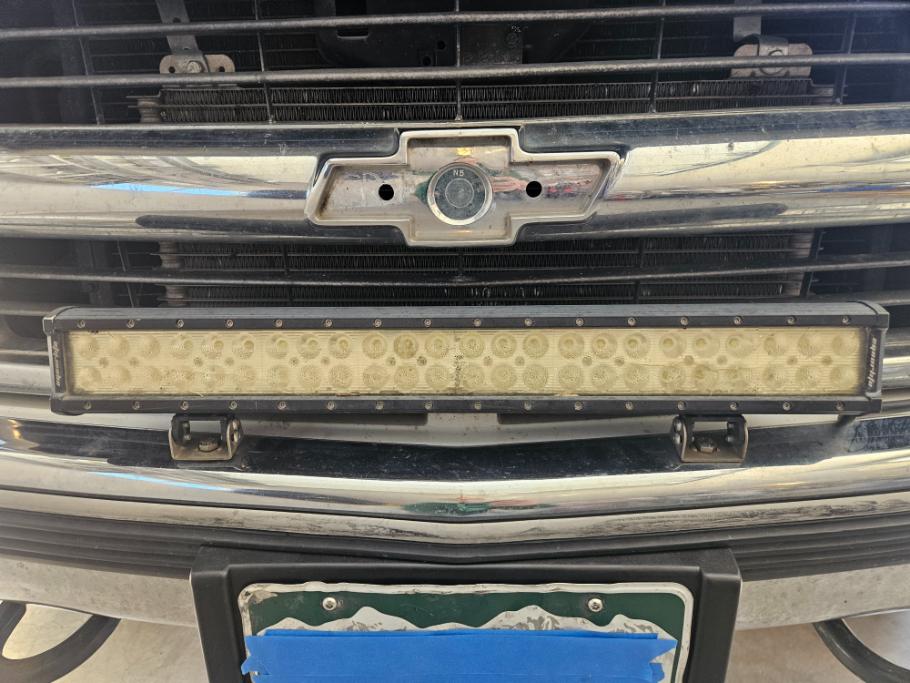
My motor blew up on the way home from Kentucky a couple of years ago and I had it towed to a mechanic that put a new motor in it for me. While it wasn’t running, he put a dead tire in between his truck and mine to push it around. I’ve done it myself; it’s a legit method, however when he did it, it ripped the license plate holder off and cracked the crap out of my bar lens and bent it all up. He handed me back my plate holder and said sorry, oh well. I got a new mount, straightened the plate and put it back on. I ordered new lights and this time opted for a slightly shorter bar and 2 smaller spots. I mounted them to the brush guard aiming the spots out a little.
Rear end:
The tailgate on this truck has always been hard to open and close. A few years ago I replaced the inner rods and greased everything and it helped a little but not enough. This time I replaced all of the latches and strikes and tried to replace the handle but the new one from Doorman was garbage. I greased the original handle and it all works great now, I can even open and close it one handed now, so nice. I also replaced the taillights with LED, I like the look and they are brighter than the stock lights. I had polished these when I did the headlights but…
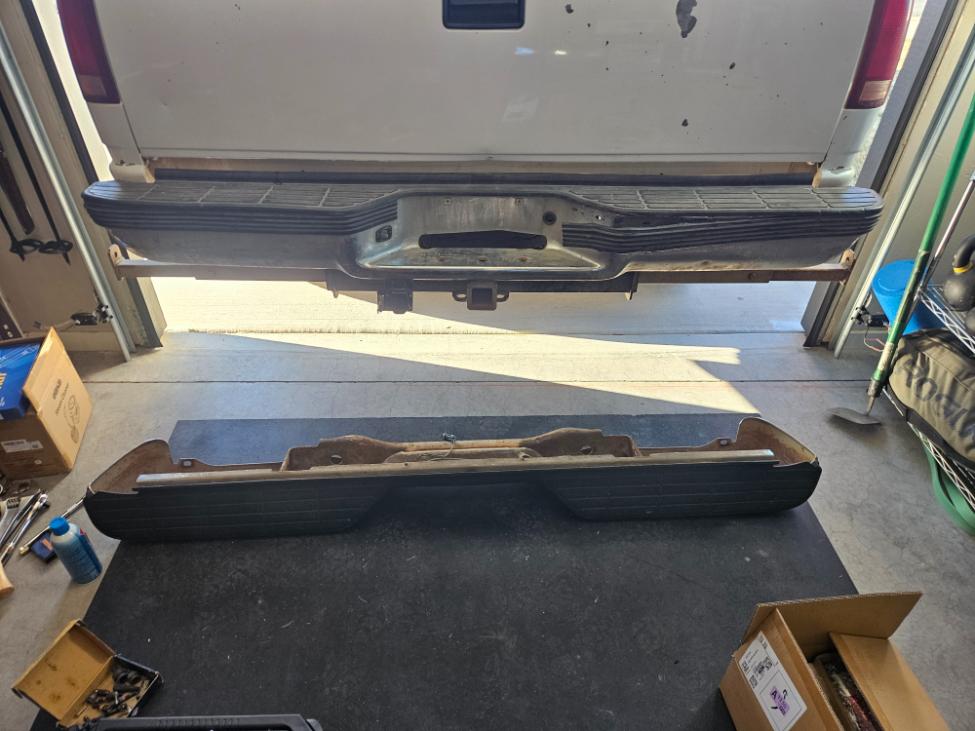
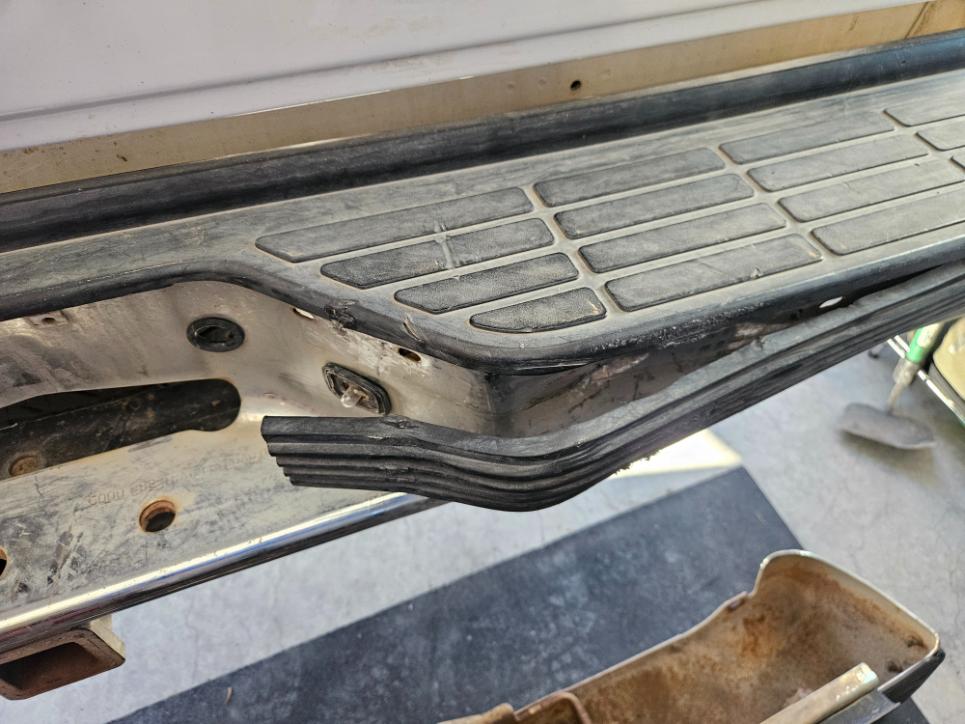
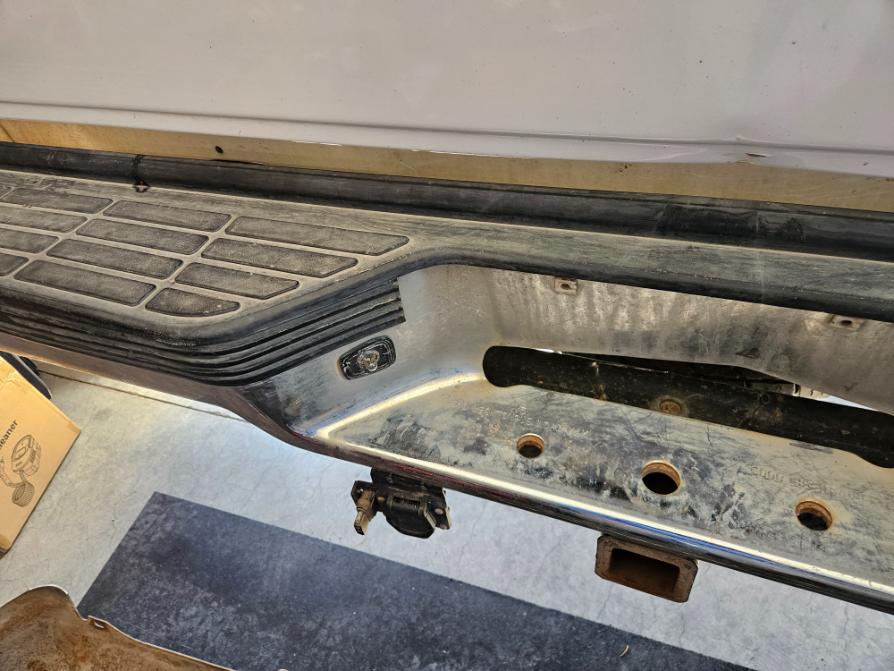
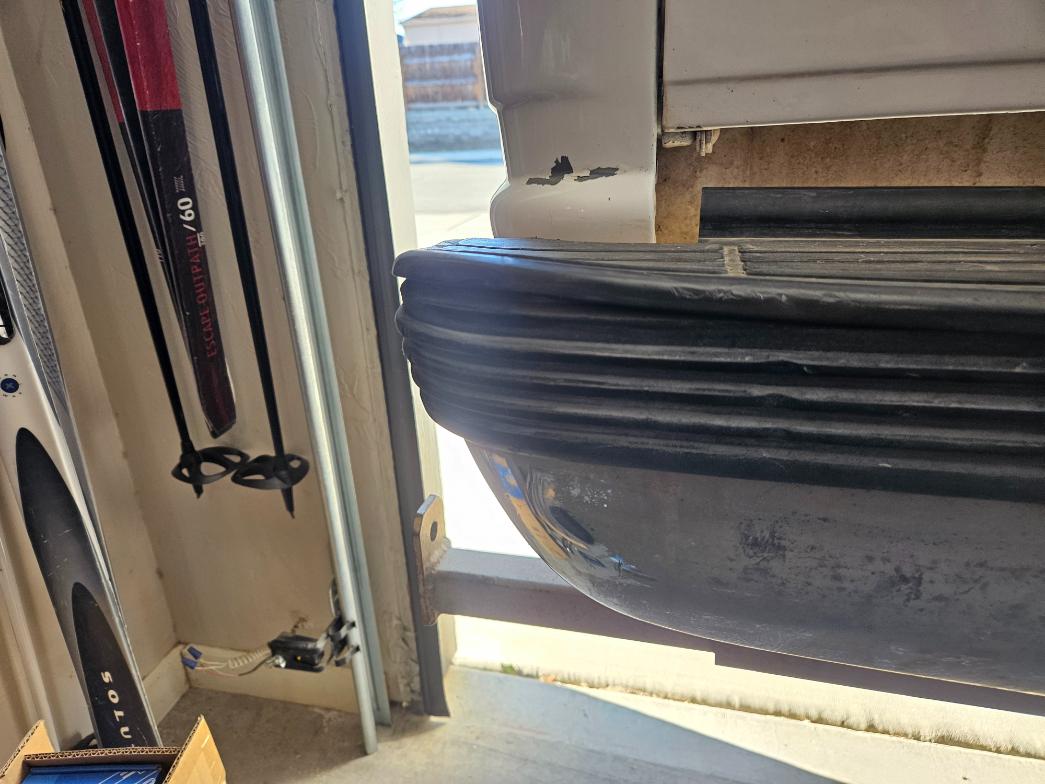
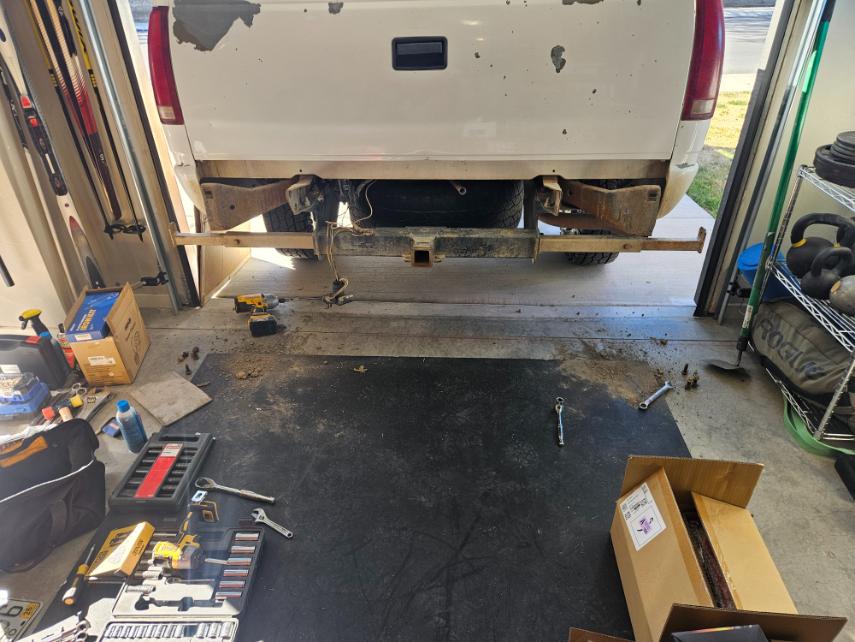
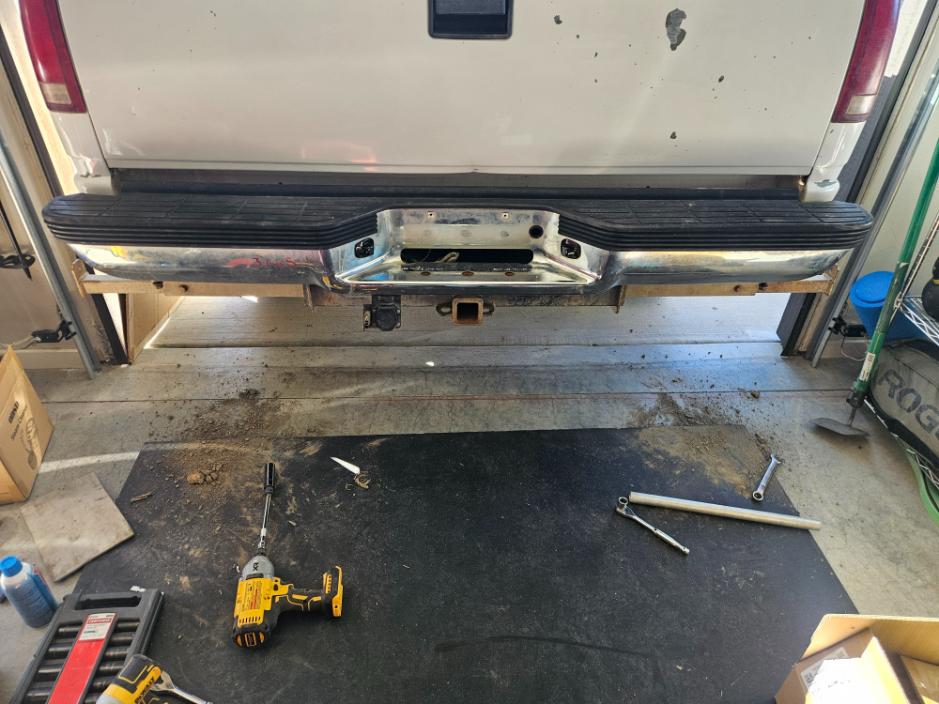
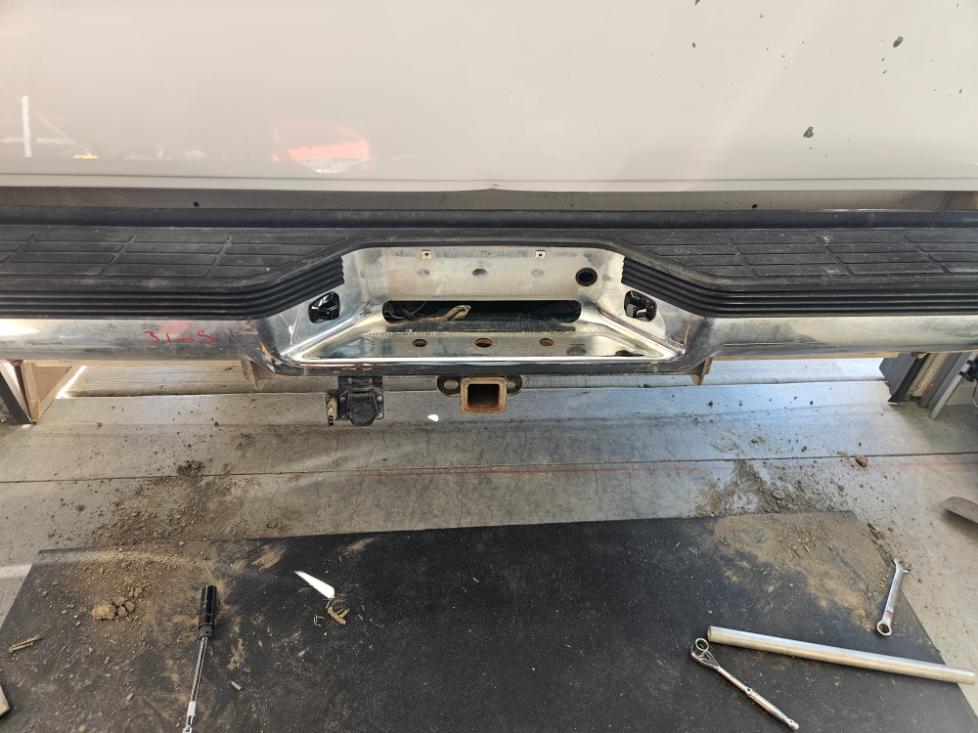
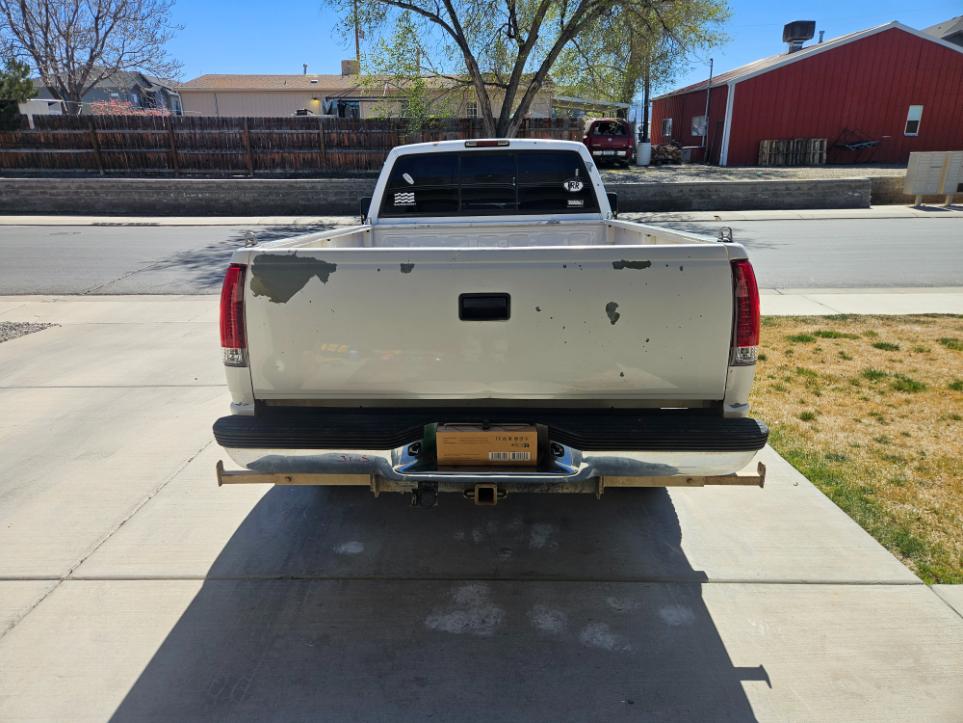
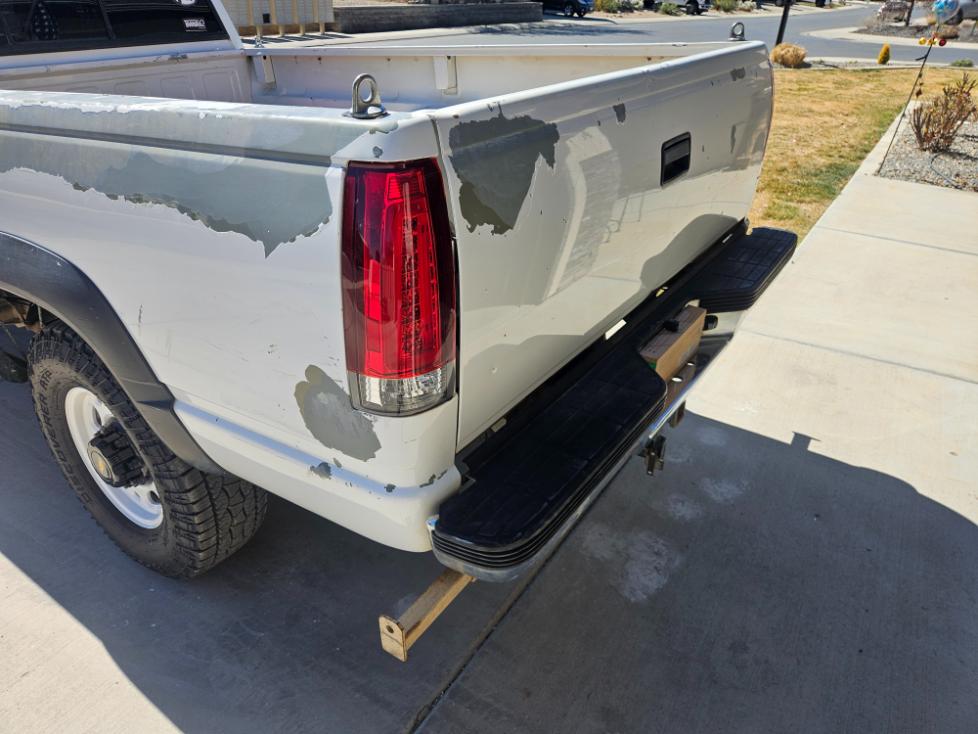
At one point when my truck was at a different mechanic’s shop, someone hit the bumper damaging it in a few places. The mechanic this time got me a new bumper and offered to put it on, knowing I had other things to do back here I just took the bumper. I ordered LED license plate lights but only one of them works. It’s so bright, I don’t know if I’m going to replace them though. I left a negative review and never heard back from the company. I installed them after the return point so it is what it is, they were cheap.
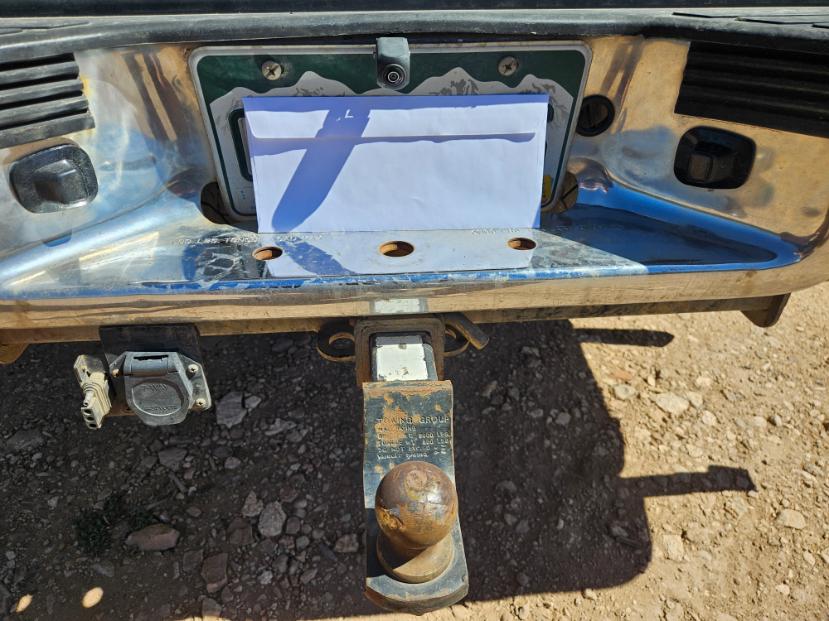
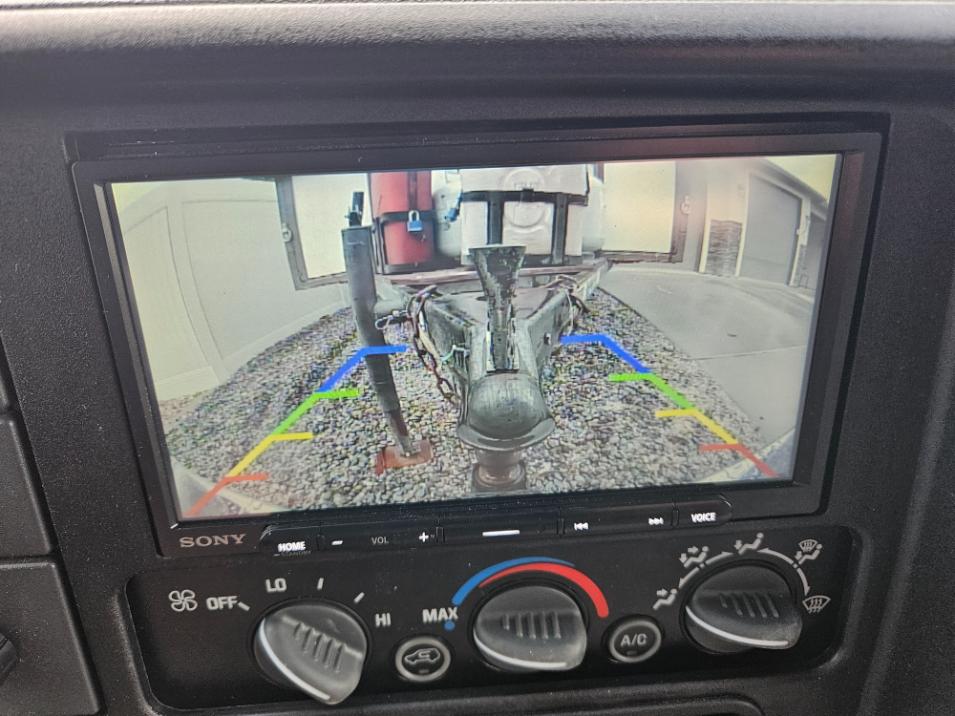
The stereo is part of the dash but the backup camera is in the rear, Idk this section could have gone in either. Wiring the backup camera was interesting. Not difficult, but I didn’t want to cut wires in my taillights or do some of the other mankey setups I saw in some videos. I found this video from Crutchfield that explained what all the wires did and I was able to extrapolate how I wanted to wire it. The main things are, you need power to the camera, you need a trigger wired to the radio, and you need the RCA cord. I already had a wire running down to the backup lights for the lights on my tow mirrors that cut into the loom right under the driver door, I tied into that for the trigger. The RCA comes with a “convenience wire”, as Crutchfield puts it, that I was able to tap into the power wire on the radio so when the radio comes on, so does the camera. I then just grounded to the frame back by the camera. I wrapped everything in Tesa tape and zip tied it to the rear wire loom. For a camera I ordered one that mounts just above the license plate and uses the plate holes.
Long post but that was a lot of projects, took around a month minus weekends but worth it. Fortunately, I get long periods of time off from time to time and while I don’t get paid when I’m not working I get enough overtime to make up for it. I ordered parts for a few more interior projects that I hope to get to over the next year or so. I’m going to dive back into the doors and fix a couple of things I didn’t do last time, sound deadening throughout the cab, amp and inverter, redoing the seats and adding seat heaters, and I’m sure a few other things along the way. For now I’m really happy with the progress and the new features. The backup camera is something I’ve really wanted for a long time now. I know how to hook up a trailer alone without one but it is so nice to only have to get out once. The new LED headlights are also really nice, I can actually see haha. My GF also really appreciates the dash not rattling.
0 Comments