
The 5150 hook is the latest piece of gear that I’ve been devloping. The idea came from the Alfifi and I would like to give credit to Skot Richards for coming up with a great idea and design. I think his hook design is great but when I looked at the picture of it, my head cocked to the side and I thought, why didn’t he do it like this, then my head cocked to the other side and I thought, why don’t I do this. I’m not trying to take anything away from Skot but I instead hope to encourage him to keep improving his design as I will with mine. My hope is that a little competition will continue to further the development of the product.
I started off with version 1.0, I went to the shop I used to work at in Grand Junction and had them water jet cut 6 hooks and bend legs to bolt into an NRS cam strap buckle. I bought NRS Loop Straps so I would have a strap I could girth hitch onto my harness. The hooks were cut and ready to pick up on a Friday so I headed up to GJ to pick them up and rig a couple to test. I gave out 4 V1.0s to some friends that are pretty active aid climbers and I tested out one myself.
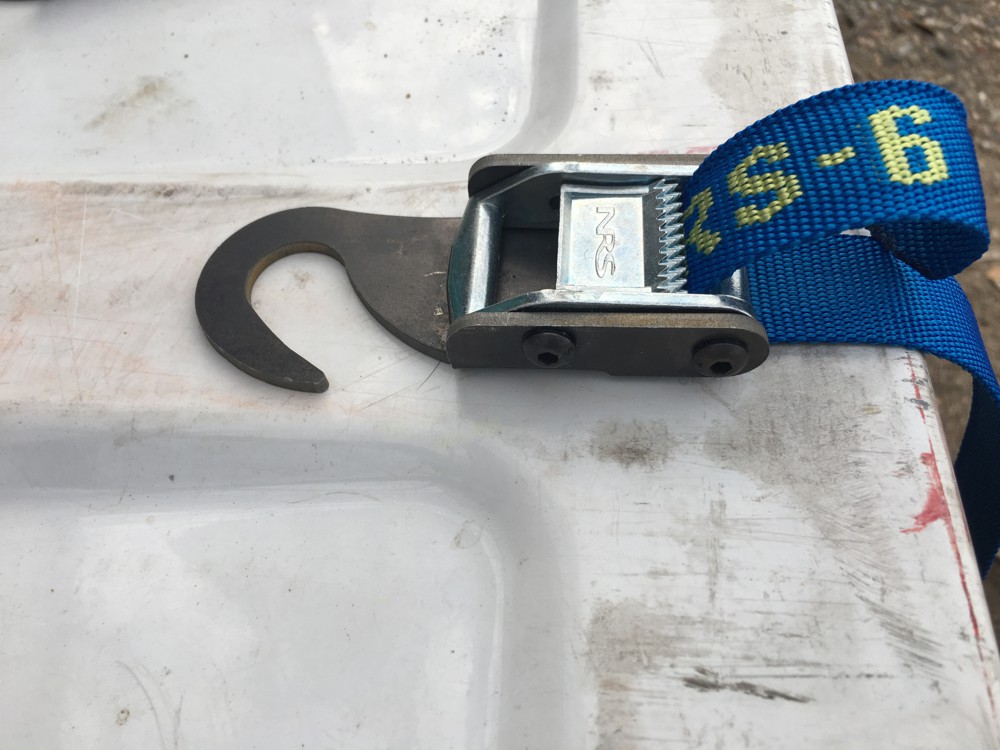
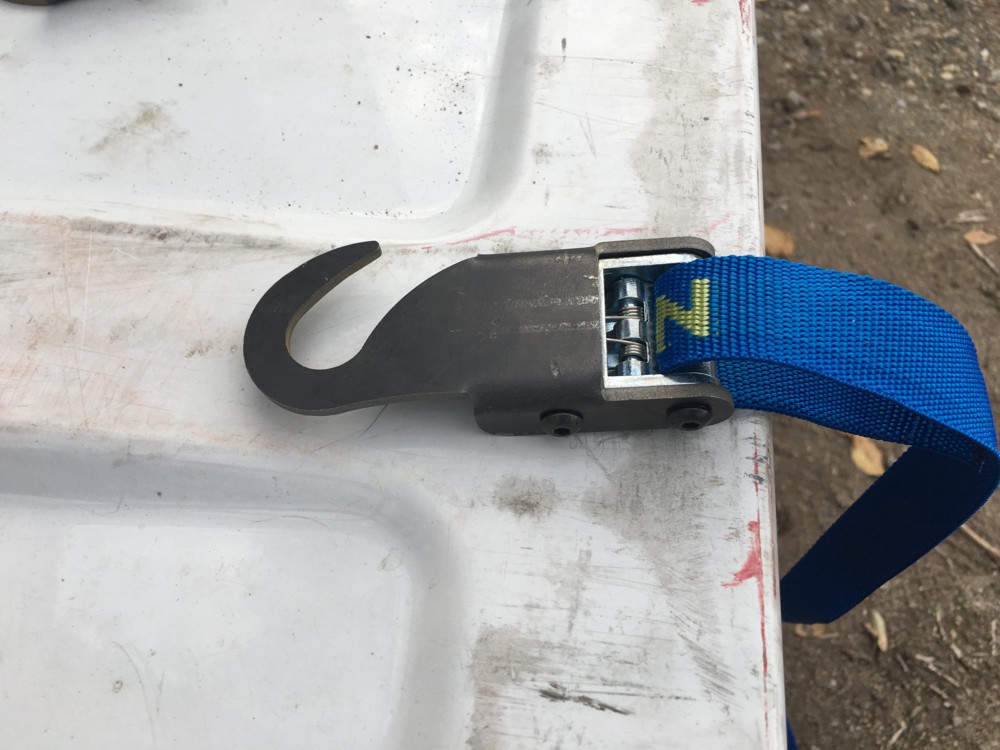
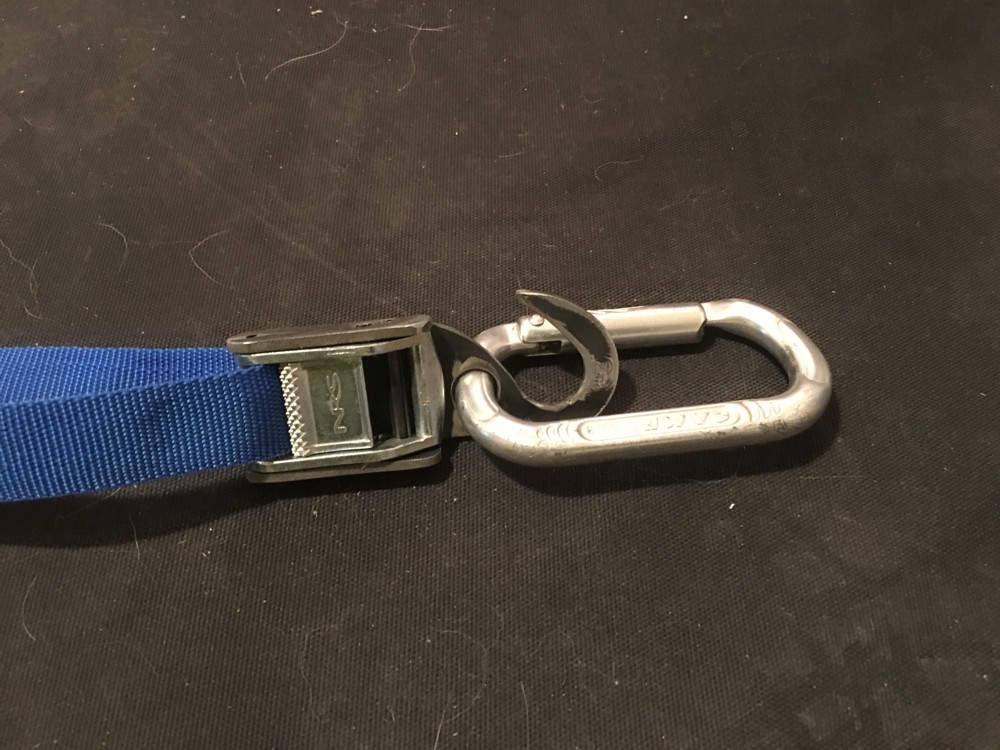
I took mine out the next day and as soon as I tied it into my harness, I saw it needed a hole to clip a carabiner through just to rack it on the harness. After leaving the ground and using it I also saw a need to clip a carabiner for a more solid attachment when at the anchors or to attach to my ascender. In V1.0 I drilled and taped into the buckle with #10-32 button heads to attach the hook to the buckle. It took forever, made it bulkier, gave something to get hung up, and I felt it wasn’t as strong. So V1.2 came about with roll pins instead of screws and I drilled a 5/8” hole to clip a carabiner. I used it the next weekend and felt that was the ticket for sure. I also started learning how to use a sewing machine to bar tack webbing. I bar tacked a grab loop on the loose end of the strap that also serves as a stop so you can’t pull the strap off the buckle, I’m calling this V1.5.
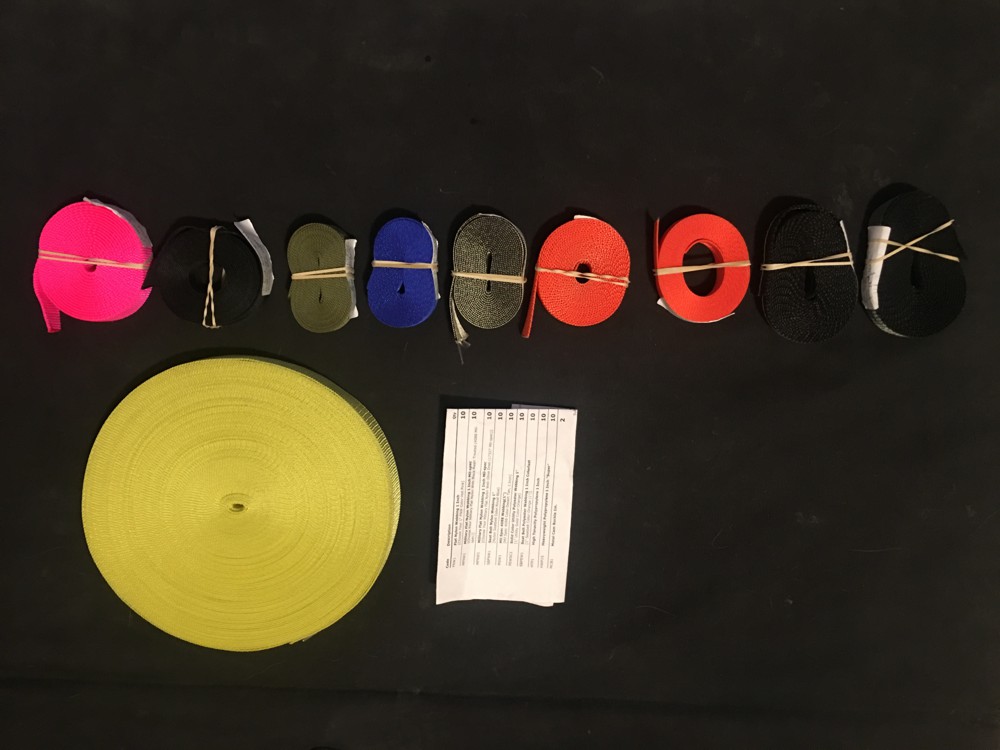
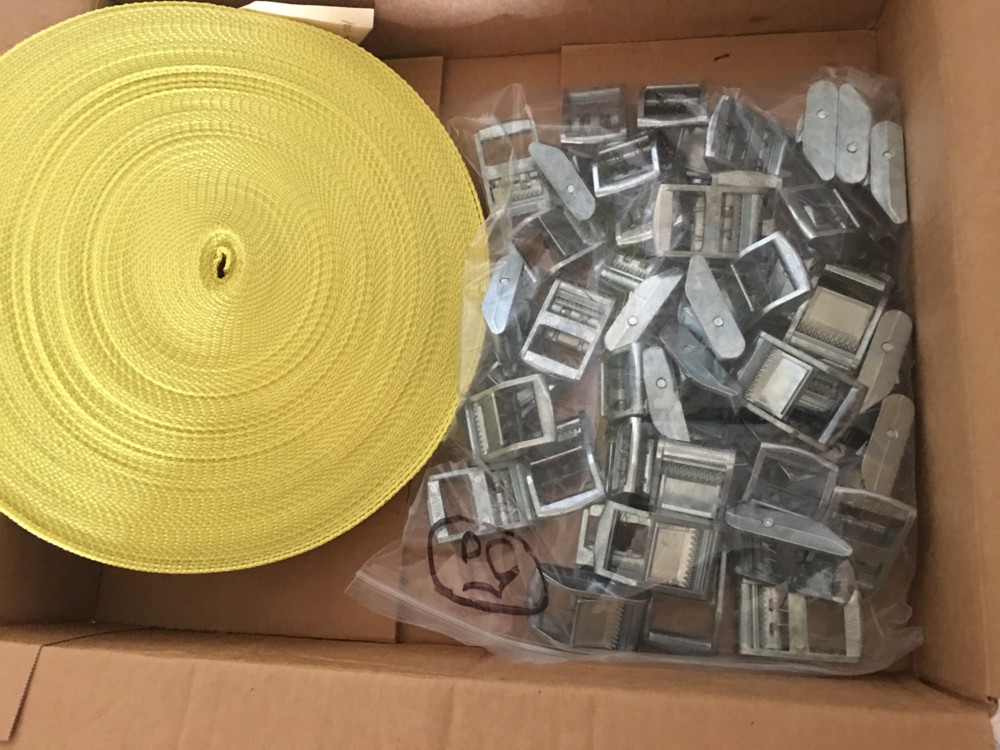
I redrew the hook to include the biner hole and sent it back over to the water jet. It takes a couple of weeks to get stuff back from them since they are so far backlogged with work. While waiting for the new hooks I started researching webbing and buckles. I was buying NRS Loop straps so I would have a loop to tie in but wanted to sew my own. On the NRS website they sell just the buckle without the straps sewn in so you can make your own, they also sell them without their logo. I bought some buckles and 100’ of their 1” polypropylene webbing so I could practice sewing and work out different designs. I also went to Strap Works and ordered 10’ samples of every 1” webbing they had with a minimum breaking strength of 1,500lbs, the buckles are only rated to 1,500 before I drill holes in them.
Upon receiving the webbing samples, I could see right away that several of them wouldn’t work for this product but one stood out, polyester utility webbing. This webbing has a breaking strength of 3,800lbs but that really doesn’t matter, buckles are still 1,500. It has 5 times the abrasion resistance of either polypro or nylon and it feels good in the hand. It has the right texture to grab well in the cam strap and it sews great. I ordered some more of this to make a few V2.0s for friends I ordered enough to make some aid ladders out of this same material as well.
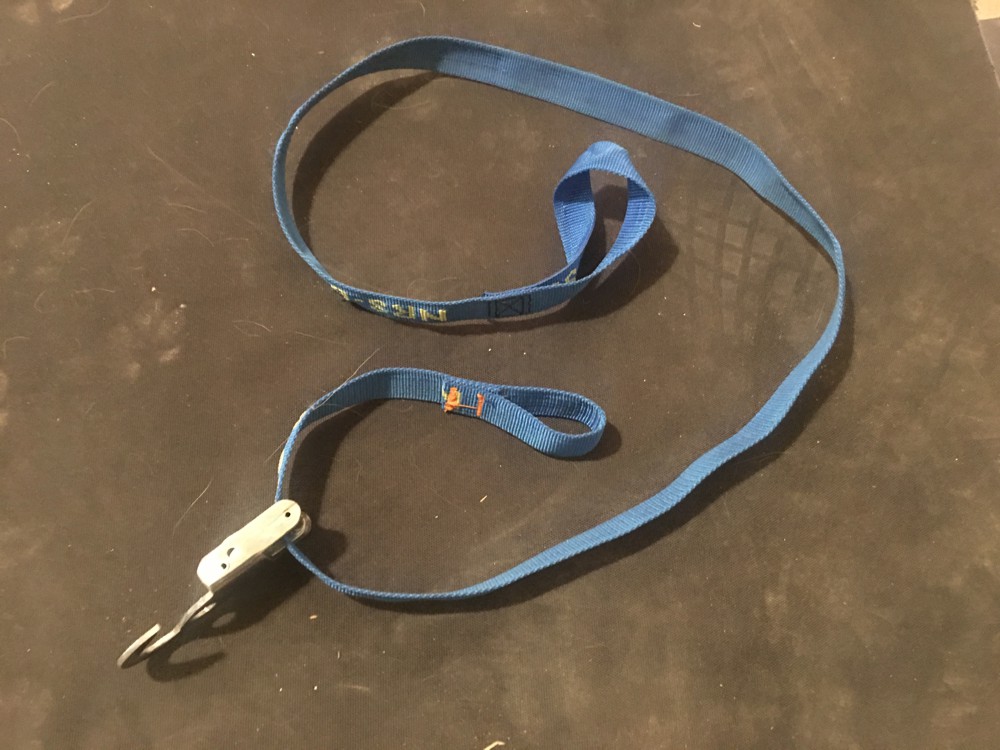
I started to play around with the 100’ ft of polypro I got from NRS. I went to the local fabric store and bought some polyester canvas with a DWR treatment to be sewn over the tie in loop. This will act as a rash guard for the tie in loop and make it last a little longer. I sewed one up and threaded it through a V1.5 hook, we’ll call this V1.7. I have a lot of practice to make my stitches pretty but I’ll get there.

V2.0
I’ve been waiting a while for the V2.0 hooks to be cut. They cut the wrong ones the first time so I drove up to GJ for nothing once already. I have some other parts I’m waiting on though so I told them to just call me when everything is ready. They ran out of material for the other project so it’s a matter of waiting for the material to come in from their supplier. Anyways, I’ll post some pictures when I get the hooks in but in the mean time here’s an Auto Cad drawing of the new hook. I plan on using the same roll pins and strap configuration as the V1.7 when they come in.

Update:
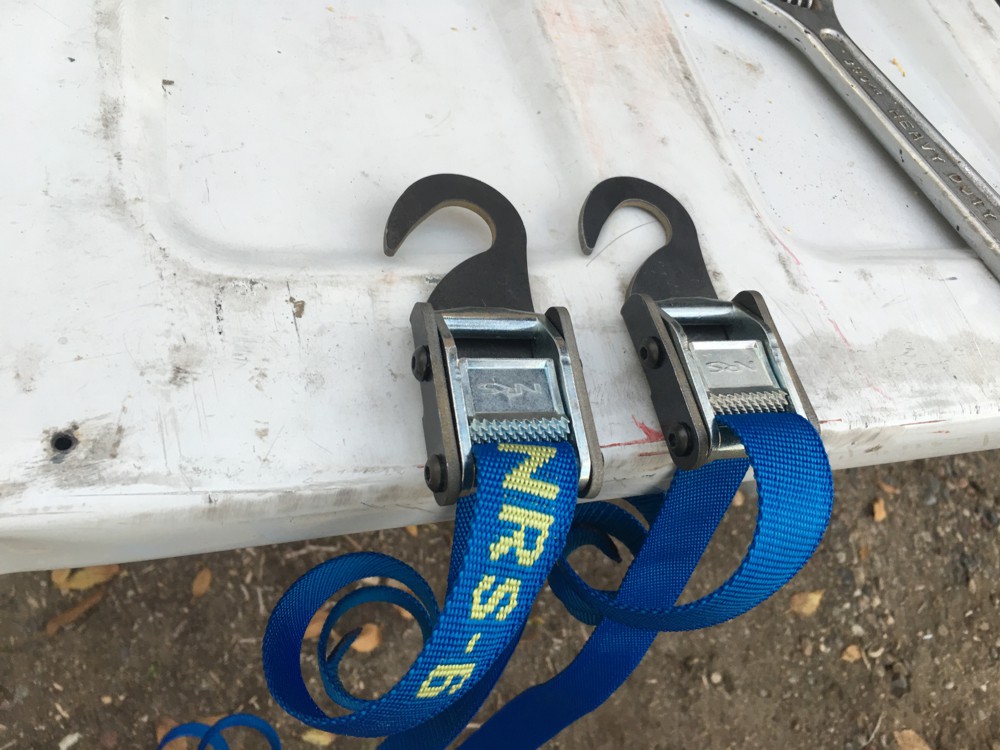
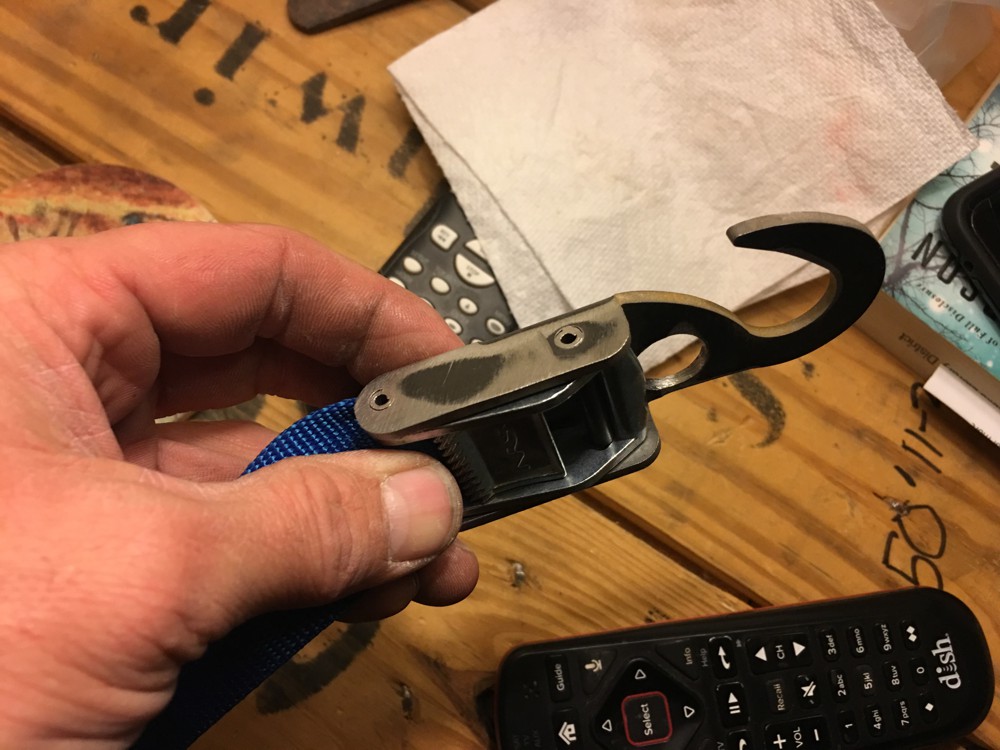
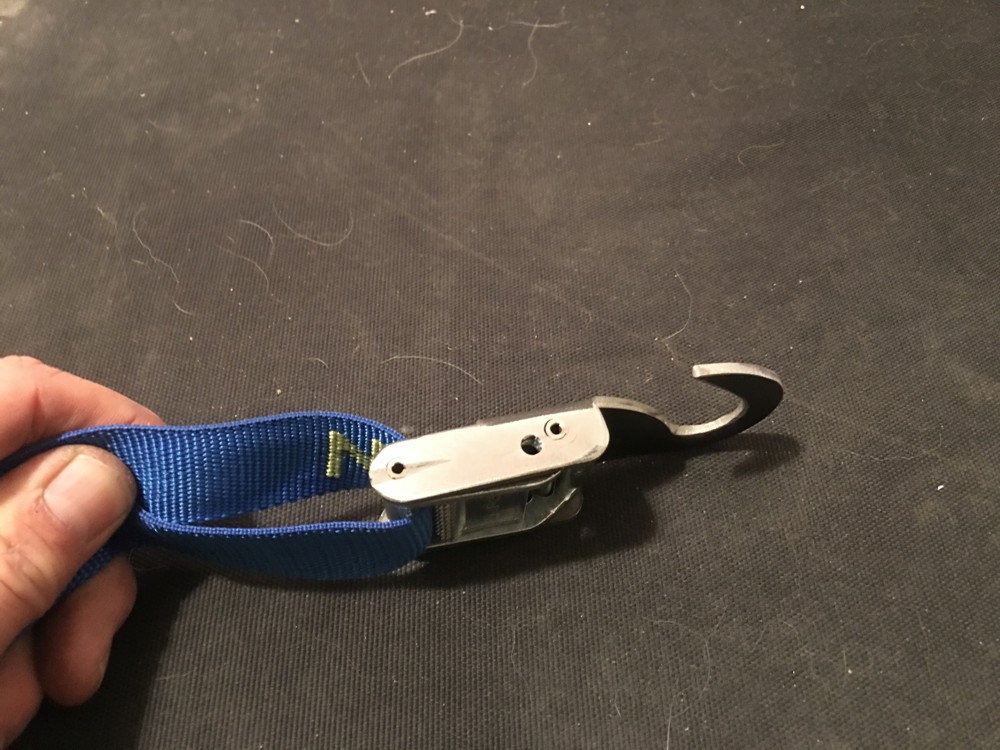
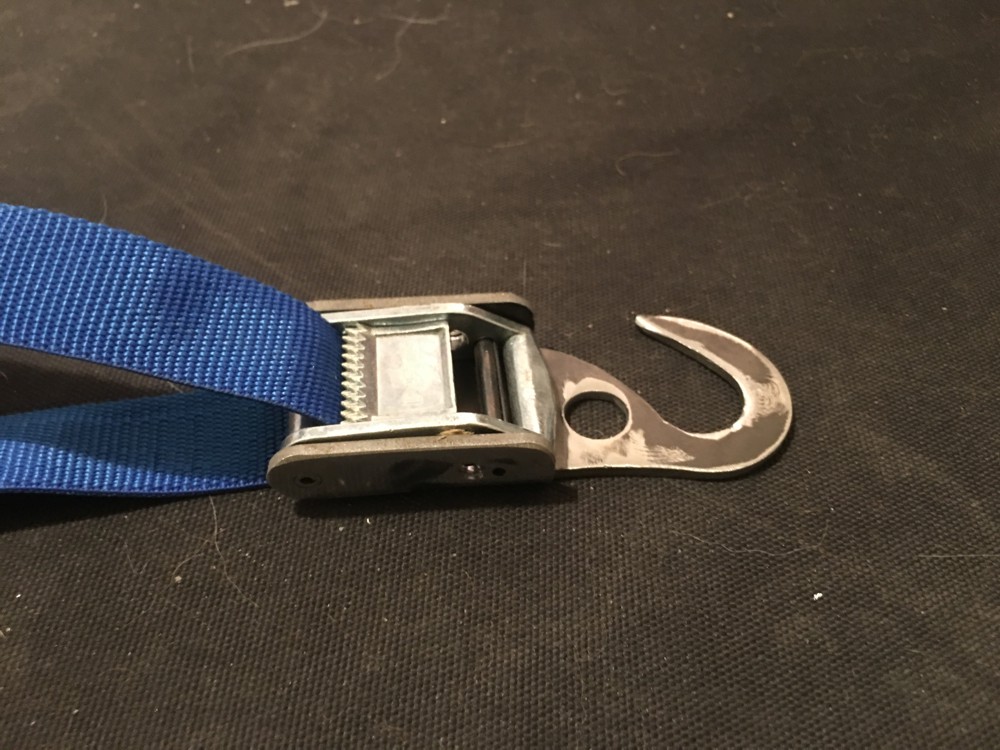
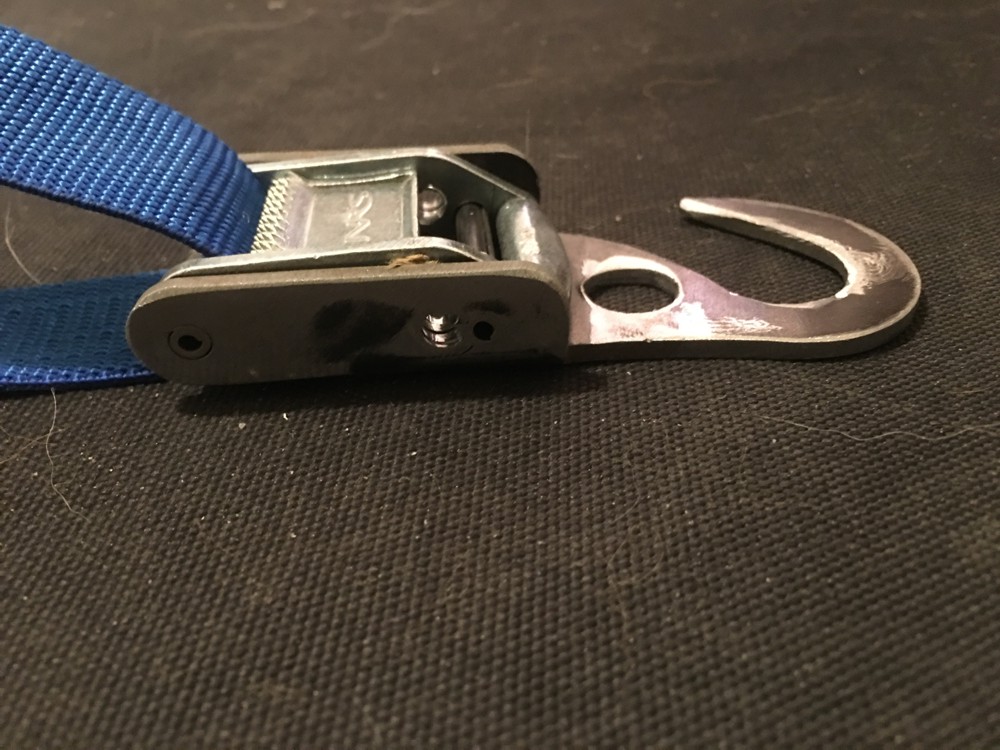
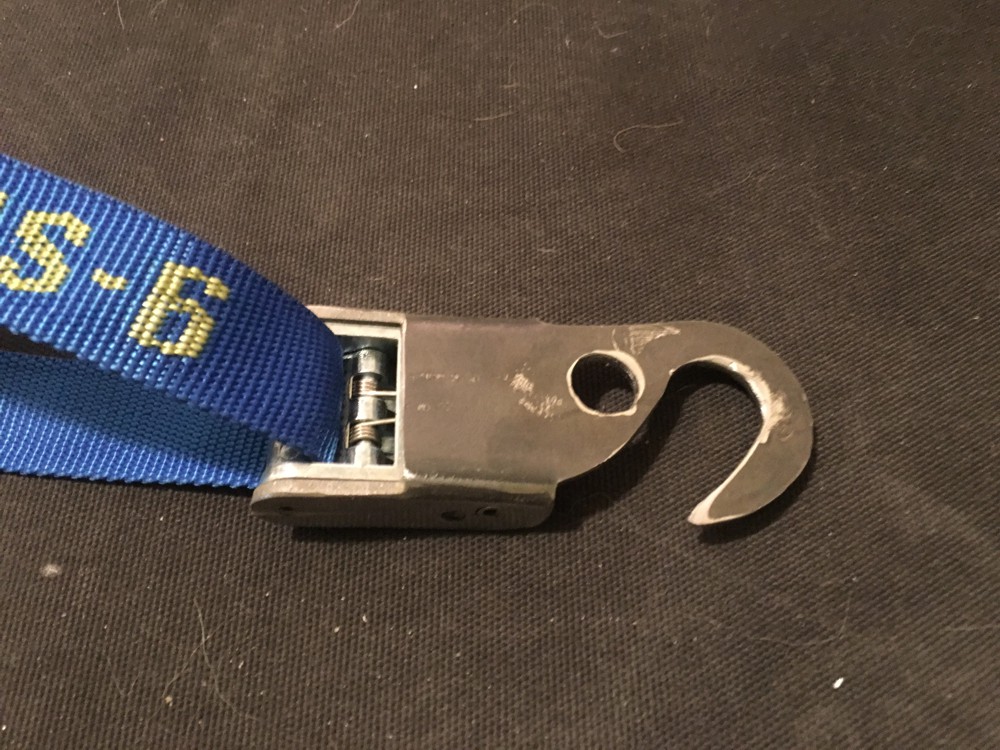
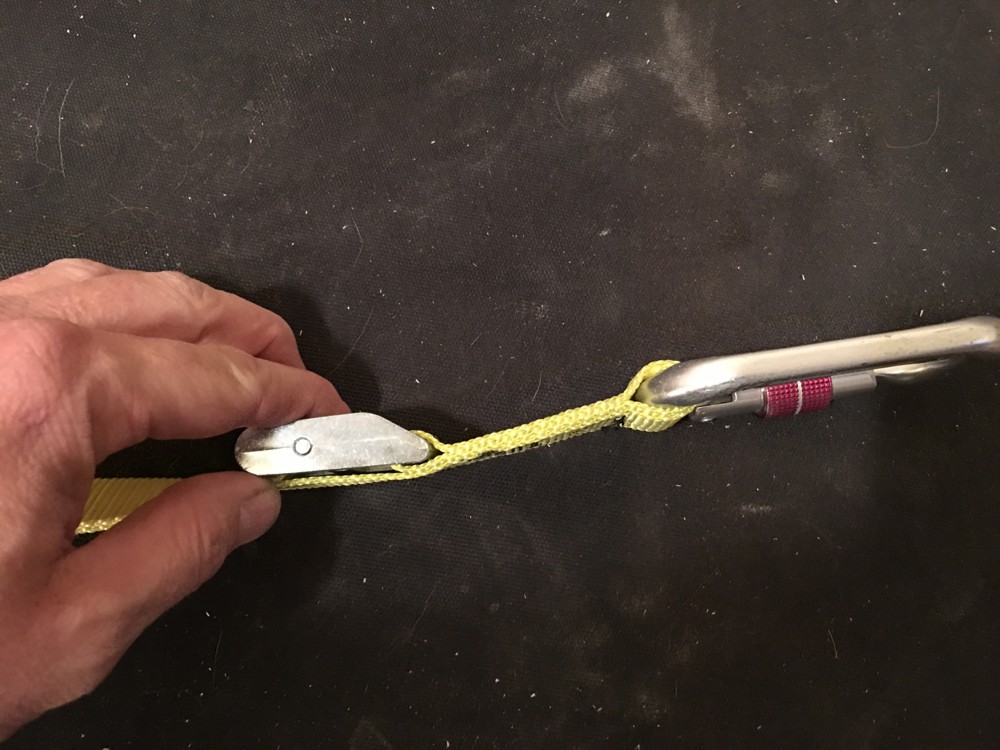
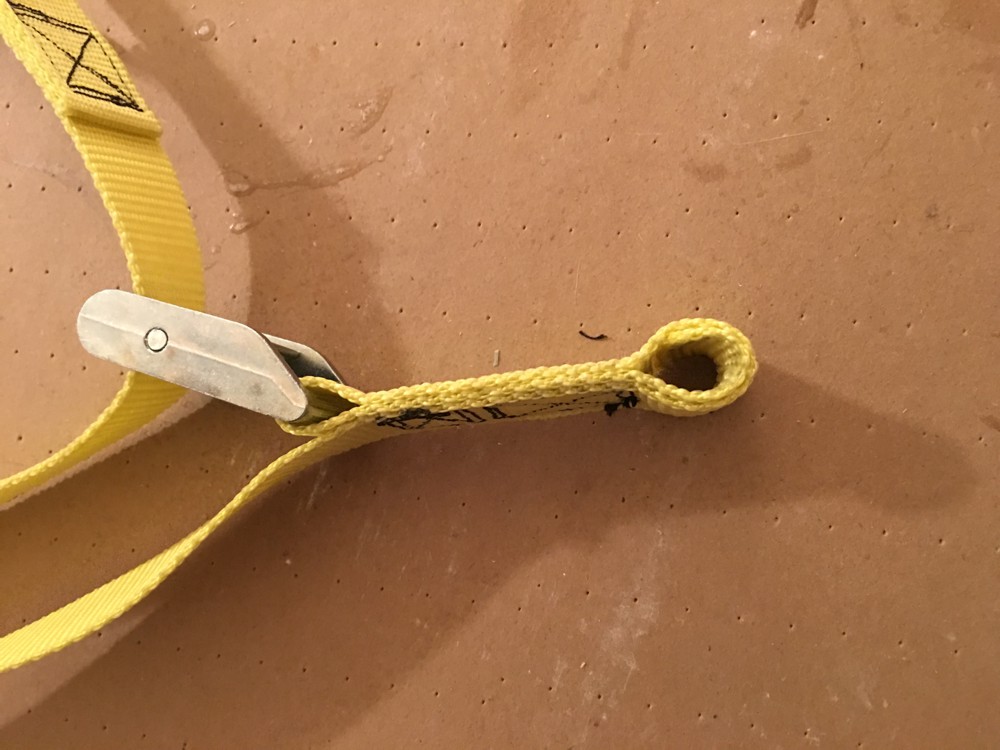
I finally got the hooks in from the water jet and put a couple together, these are both going out to friends of mine. I painted these but as it is winter it took forever for the paint to set up, even though I kept them inside with the heat turned up to 65, normally the thermostat is set at 50. I don’t think I’ll paint the hooks again, I might switch to stainless steel to not worry about corrosion but it will depend on cost. I had a hell of a time getting the pins in without damaging the paint and in the end had to accept a little bit of paint damage. That said, I’m pretty happy with the V2.0, I think they’re pretty close to ready. I sewed the slings two different ways, one to girth on to the harness and the other to clip in with a locking carabinner. I’ll probably go with the girth version for the final as it ties off closer to the harness but I wanted to try it both ways. The carabinner loop is sewn tight so the binner won’t move around.


Adjustable Daisy
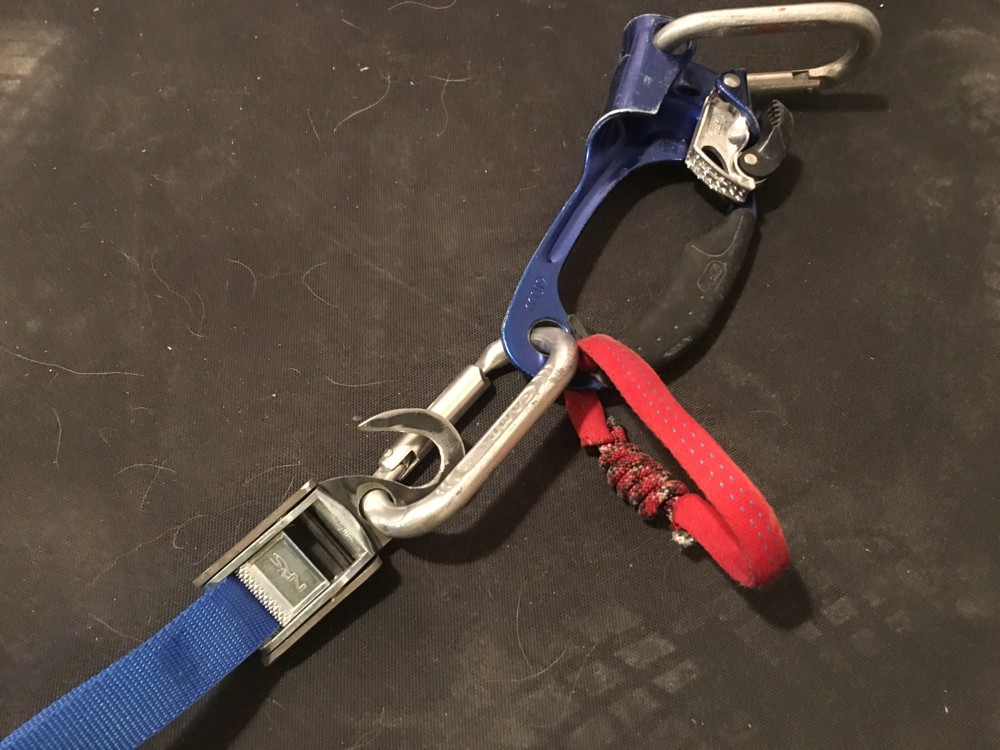
The 5150 hook works well for aid climbing but as I started researching hauling systems I came across the adjustable daisy that Yates makes in the Supertopo how to big wall climb book. In the book Chris describes using the adjustable daisy to attach the haul bag to the anchor after hauling. It seems like a good system but he talked about needing to back the daisy up with quickdraw back to the anchor. Not that adding a quickdraw to the system is a big deal but it got me thinking, what if the daisy had a back up built into it. Now, for all of my years of free climbing I have mostly theoretic knowledge when it comes to aid and big wall so this could be completely unnecessary but it was fun to make a quick mock up. If you have some big wall experience I’d love to hear your thoughts on this.
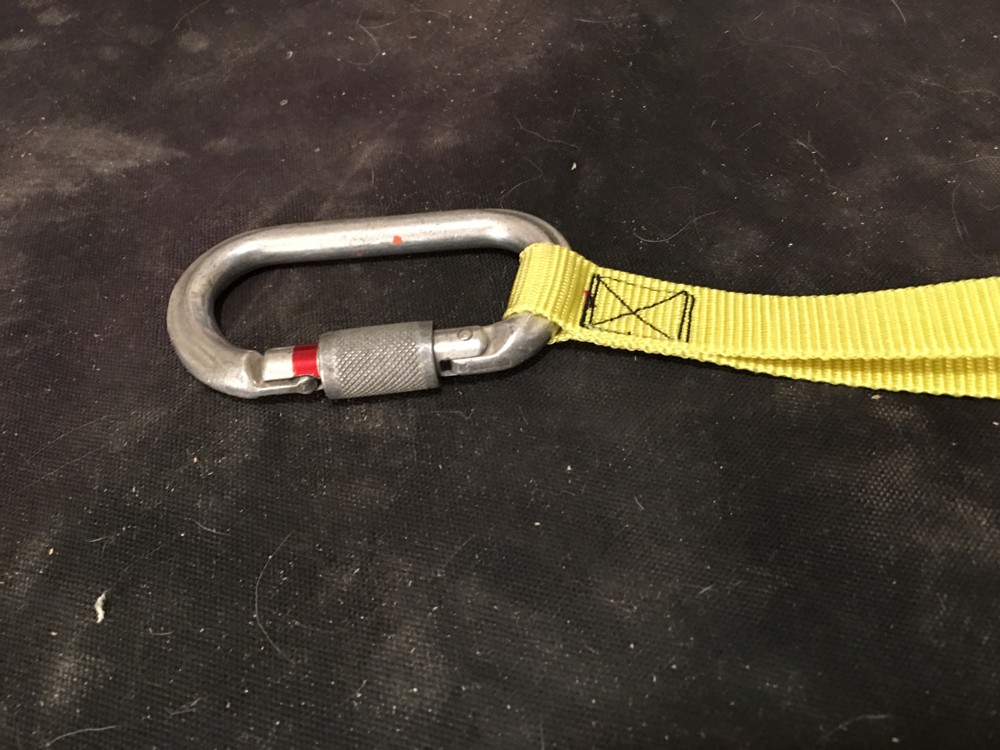
This is all made from a singular piece of webbing, I started by running through the fixed side of the buckle then wrapped a carabiner loop and stitched it all together. I stitched the carabiner loop with the tail of the strap going over the carabiner similar to how BD sews their cams. I also stitched it pretty tight so the carabiner would stay put.

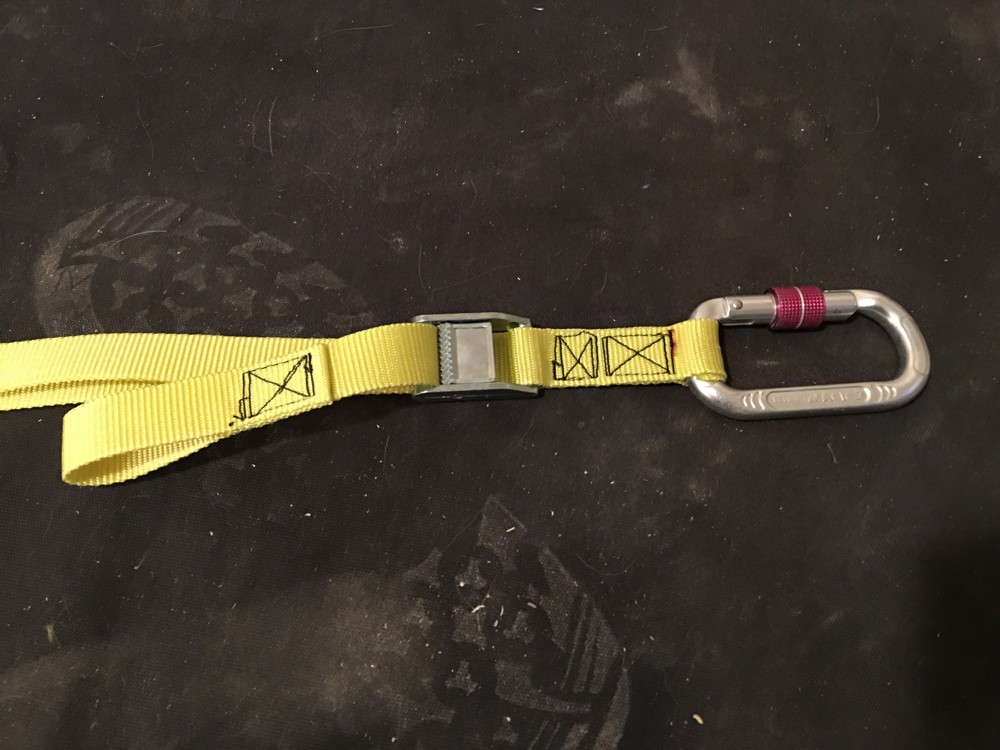
From here, down the back side of the buckle I continued down to another carabiner loop before returning back up to the buckle. After feeding though the buckle I sewed a loop in the end so you can’t lower off the strap.
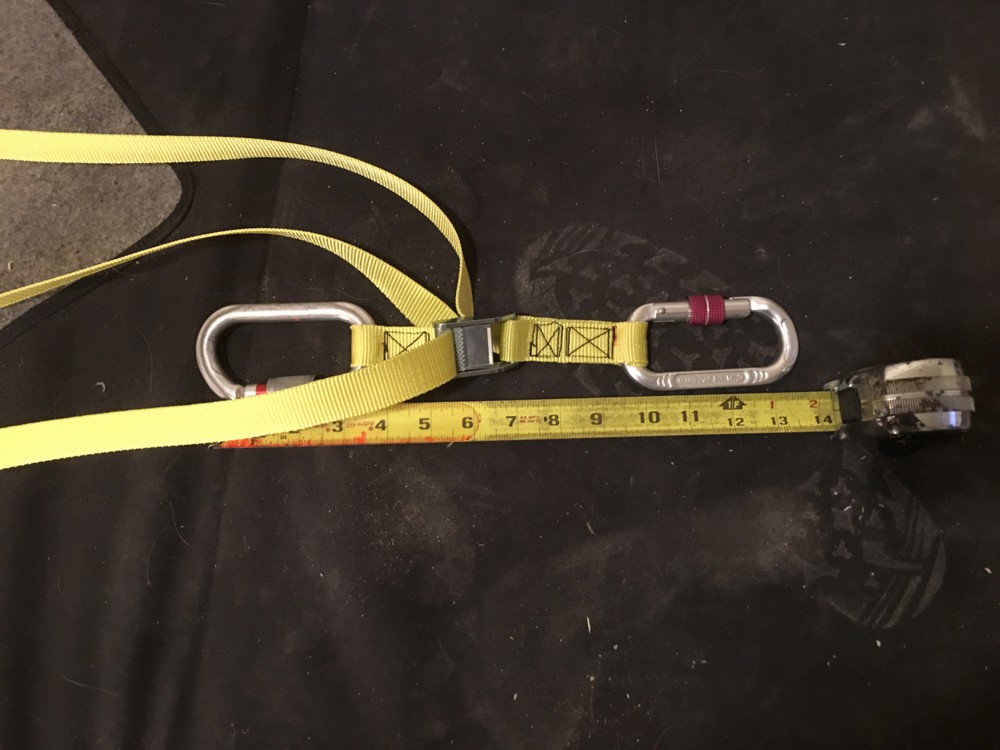
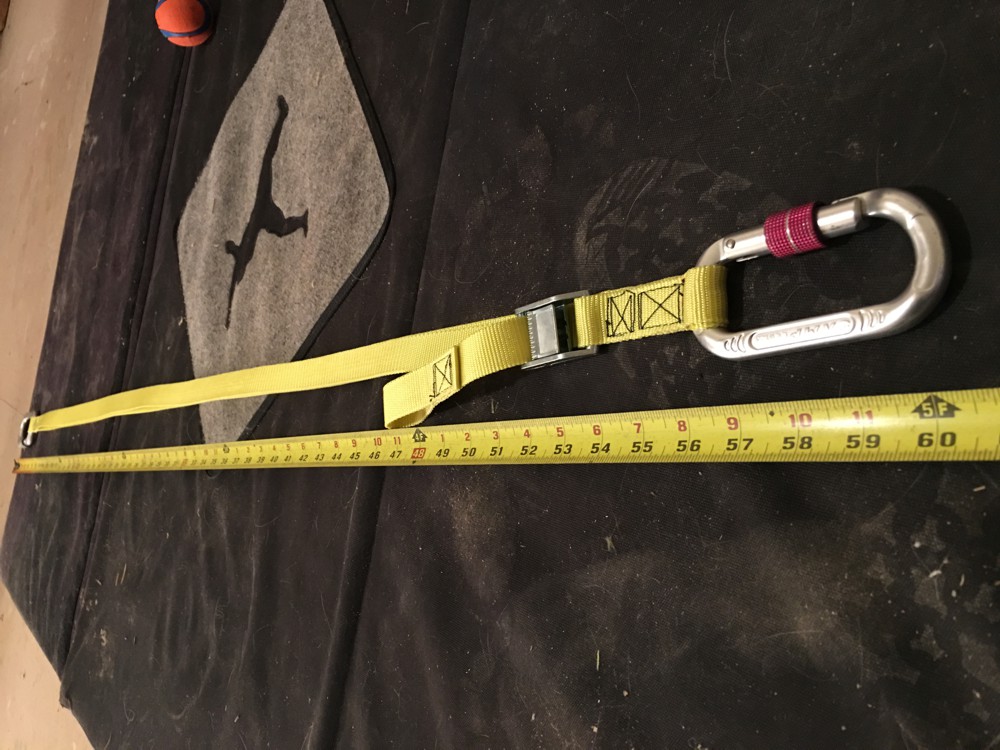
Fully extended it runs 60″ overall and retracted it’s about 13″.
So my thinking is that the strap that runs up to the top carabiner will act as a back up and nothing more would be needed. If the buckle failed or someone accidentally hit the release; it would shock load the back up strap but the most it could fall is 4′. Asuming a haul bag of 200 lbs that would generate 10.8kN according to this calculater. This is a mock up with 1,100lb webbing but the final product would be made with the same 3,800lb (roughly 17kN) polyester webbing that I’ll use on the 5150 hooks. I think this should be enough to catch a haul bag if needed. Mostly just tinkering at this point, I’m sure I’ll change things up as I start getting up some big walls.

Side Note:
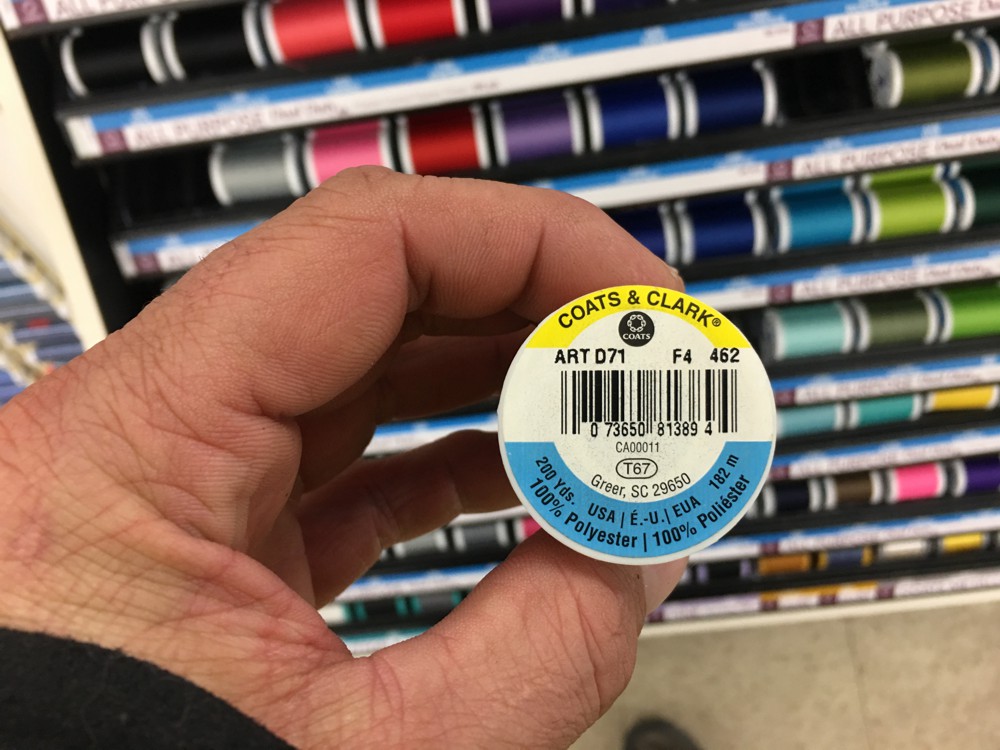
I bought a sewing machine 6 years ago and never even plugged it in until recently. I finally pulled it out of storage and started playing around with-it using YouTube videos and the user manual to figure things out. I’ve long believed you can learn anything on YouTube and it’s holding true here as well. For figuring out what stitches and thread to use I consulted a friend of mine that works for a company making outdoor gear though I can’t say who or the company. It’s been a fun but frustrating process learning this new skill, as it usually is. I was really struggling for a while there, the machine I bought is a home machine but it is one of the more heavy-duty home machines. That said it seemed to be really struggling and I was starting to think I would need to step up to an industrial machine (I really want one but can’t afford one right now). Finally one day, the machine stopped working. I could turn it by hand but the motor just hummed and struggled to turn. I went and bought some sewing machine lube and lubed everything according to the book then cycled it by hand several times but this didn’t help. I took every cover off and looked for anything jammed, nothing. I spent an hour looking this thing over then I hit the peddle one more time and it started working better than ever. Ever since it seems to be working perfectly and has plenty of power. It must have just taken a bit for the oil to soak in. Looking back on it I should have just lubed it right off the bat, and as it started to struggle, I should have realized sooner. When I’m learning a new skill, I get so focused on what I’m trying to learn I miss the obvious things, I guess. Works great now and things I was struggling to get are coming easy.

I like your revision on the design for the 5150 hook
Thanks, it’s been a fun project.
If someone wants one of your 5150 hooks, how would they go about purchasing from you?
Skot Richards makes and sales the Alfifi for $50 and I can’t really compete with that price. The water jet costs are too high and with the time that goes into assembley if I sold at $50 I’d be making $3-$5 an hour. If one were willing to pay $75 plus shipping I’d consider it but it wouldn’t be worth my time at $50. If there was enough of a market to make and sell 1,000, I have a place I could have them made a lot cheaper but I don’t think there’s enough of a market. It’s really just a hobby for me, but my time is valuable to me.
All of that said, if you’re willing to pay $75 plus shipping, I think USPS flat rate is $6.70 right now, send me an email at rock2rapid@gmail.com and we can work out the details on how you want the sling sewn and where you want it sent. I can take payment through Venmo or there’s a donate link to pay through PayPal on the right hand side of this page. I currently have two hooks ready to assemble but once those go it takes about two-three weeks to have more cut.
Thank you for your interest.