
The vehicle repairs continue, at some point I’m bound to run out of things to fix haha. I know I’ll always have something to work on but it would be nice to go like a year without having to do an emergency repair. The latest fix, that put me down for a little over a week, is the fuel pump went out. It used to be easy to find parts for chevy trucks but lately it seems to be more difficult. I checked every auto parts store within a 3 hr drive and couldn’t find one so I had to order it in and it took a week to get here. Once it came in, it only took a few hours to install but the week of waiting for the part was no fun. I need to get a motorcycle or scooter to get around when these things happen. Of course a big snow storm hit during that week so it wouldn’t have been a fun ride even if I had one.

I watched a few videos on replacing the fuel pump with suggestions of removing the bed or jacking it up on one side to access the tank. Some even cut a hole in their bed to access, but really it wasn’t that difficult to drop the tank, replace the pump and put the tank back up. It helped that I only had ¼ tank of gas in it. This was the most helpful video I watched.
Ever since I got the truck back on the road, after the tranny and T case rebuilds, I have noticed that it has run kind of sluggish, just a general lack of power when hauling the camper and trailer. After replacing the fuel pump and filter, I seem to have my power back and the truck doesn’t struggle as bad anymore.
Transmission Cooler
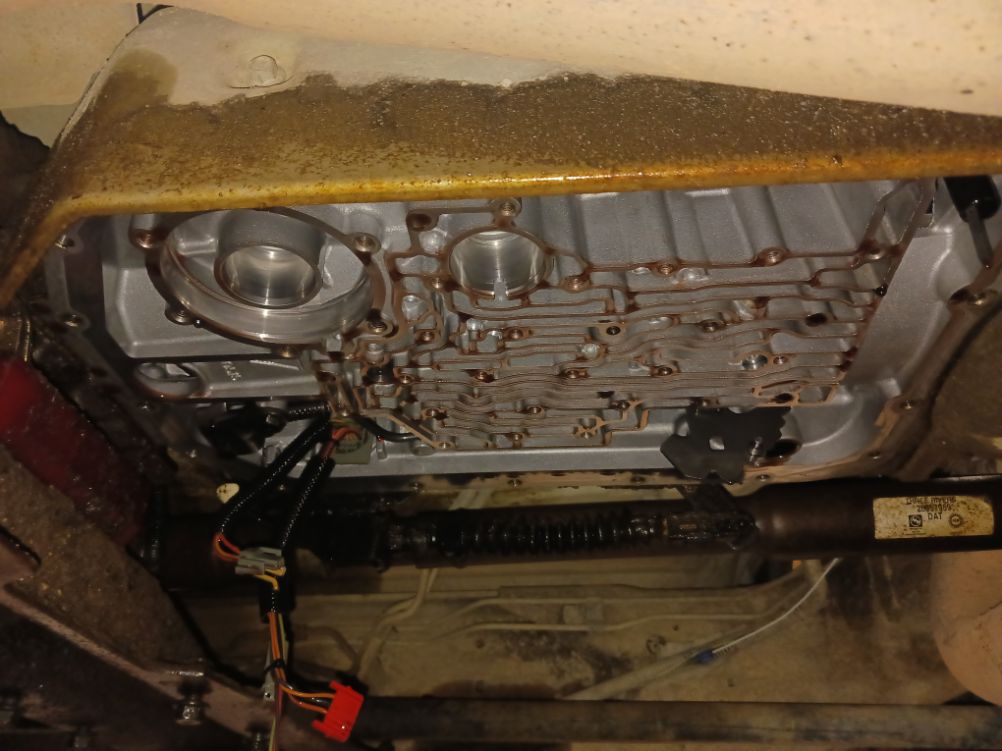
When I rebuilt the tranny, I installed a gauge to keep an eye on the temp to hopefully avoid having to rebuild it again due to overheating. I’ve been watching it as I travel around with the camper. For the most part it does ok, if anything, it has been running cold, accept for getting to one place I like to camp. When I head up to Unaweep traveling through the Nine Mile Hill section there is a hill that is only 7 miles but gains 1,700 ft in elevation with some sections having over a 6% grade. If I have the camper and trailer, I have to pull over at least once to let the tranny cool down. The one time I tried to push it, the temp gauge hit 230° so the stock cooler just isn’t cutting it. I haven’t had the opportunity to take it over a mountain pass yet, I’d rather not find out while going up one that I wouldn’t make it. Since I had to drain the fluid to fix my reverse issue this seamed like a good time to put the new cooler in.
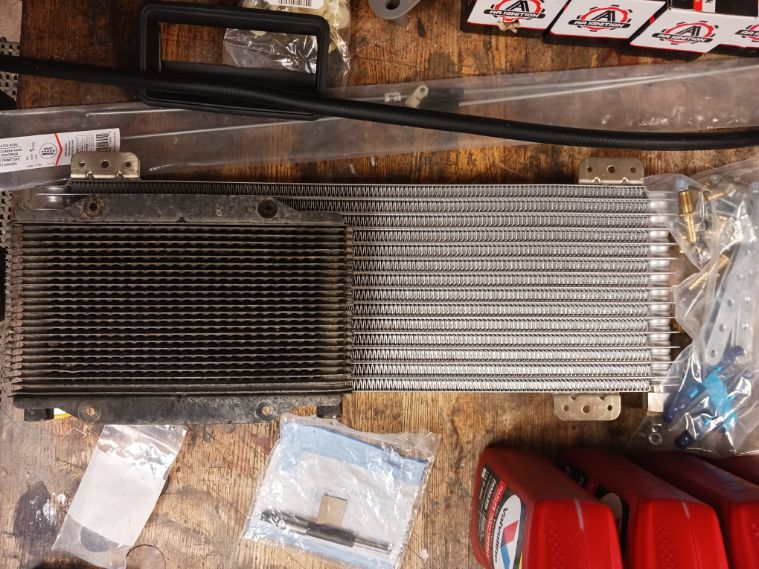
I did a lot of research and settled in on the Tru-Cool 40K with a thermal bypass. It gets cold here in the winter and as I’ve been driving around without the camper it has been floating around 100-110 with the stock cooler over the winter. Transmissions perform better when they are not too hot or too cold so if I’m going to put a bigger cooler in, it also need some sort of bypass or thermostat. The Tru-Cool is a good 2-2.5 times bigger and has better airflow so overheating should no longer be an issue, I hope.
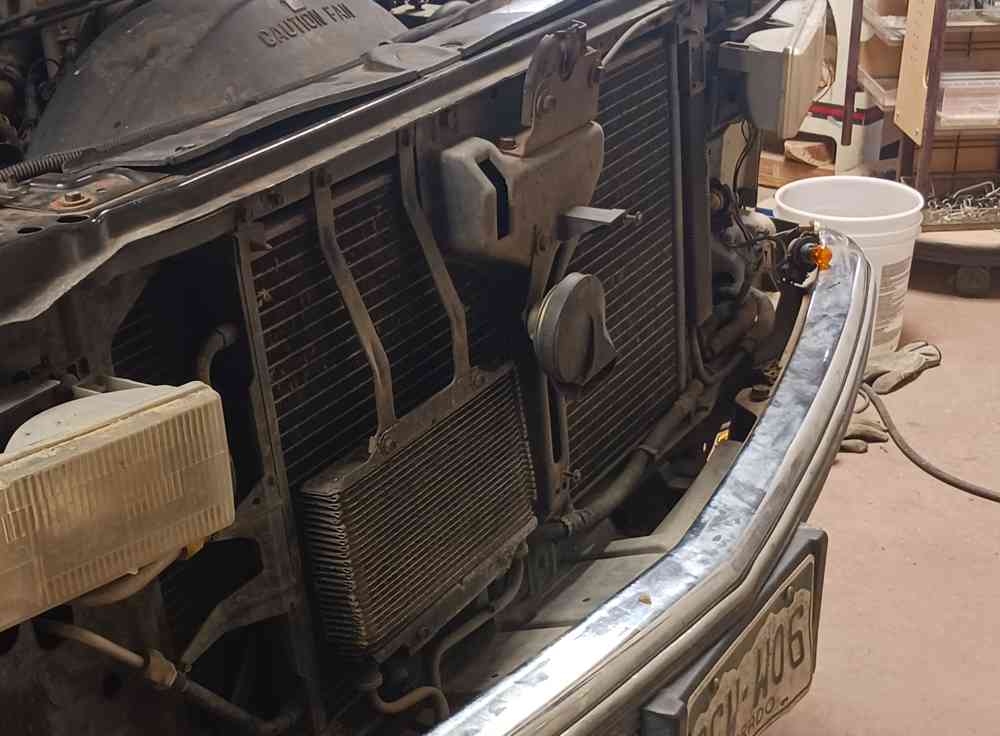
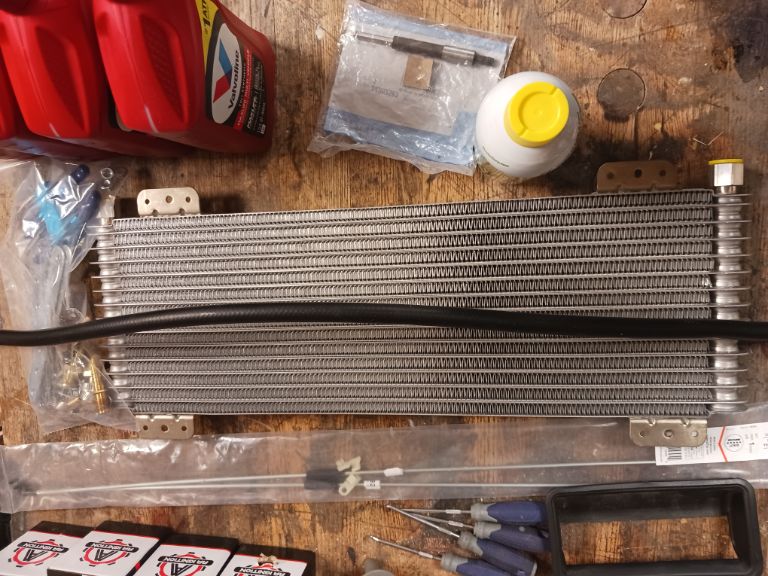
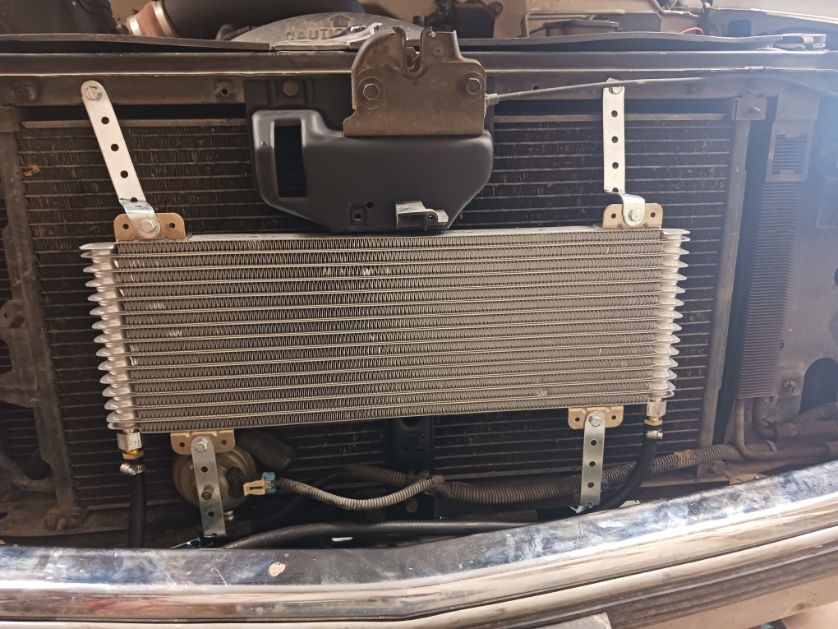
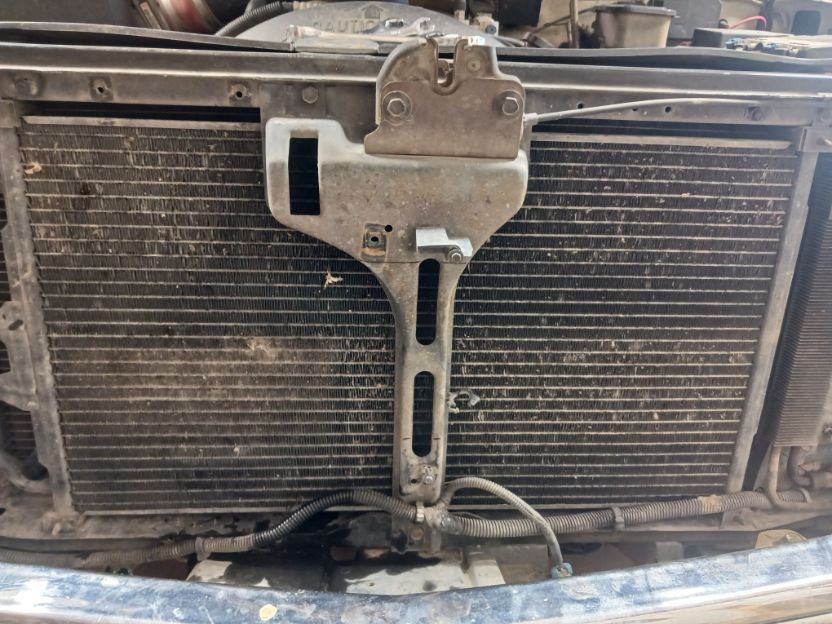
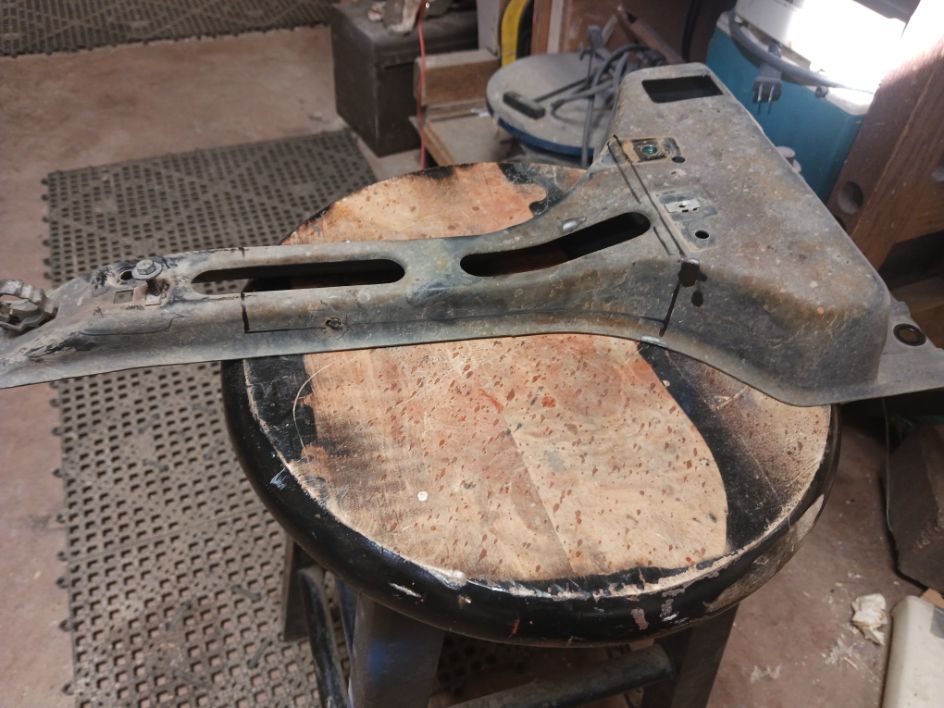
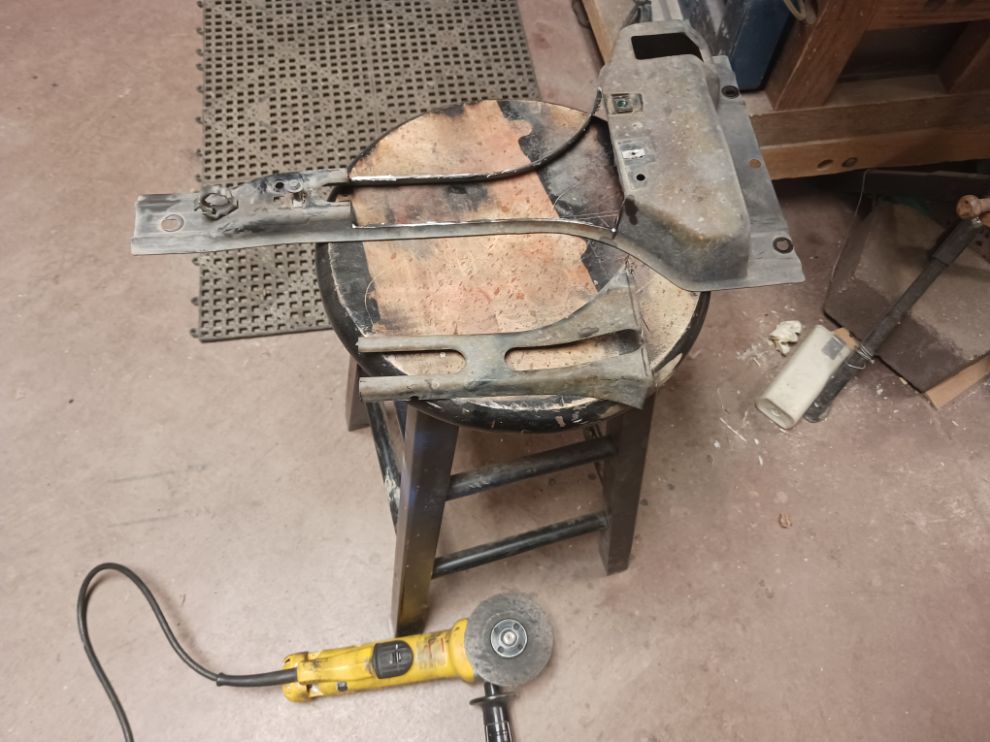
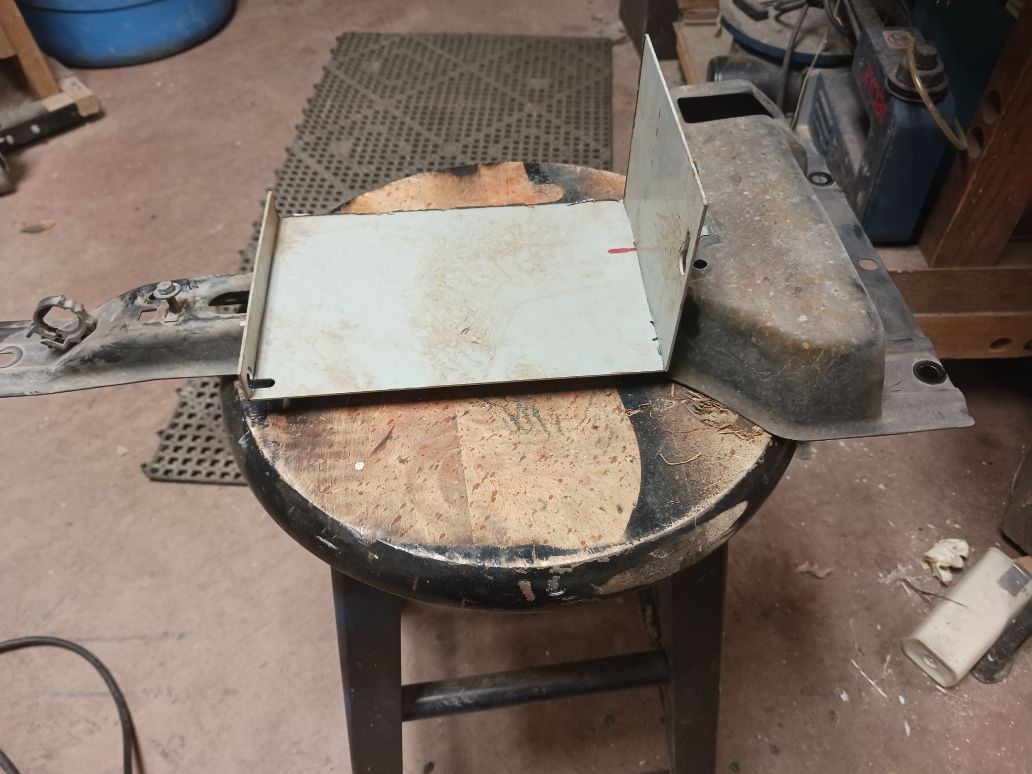
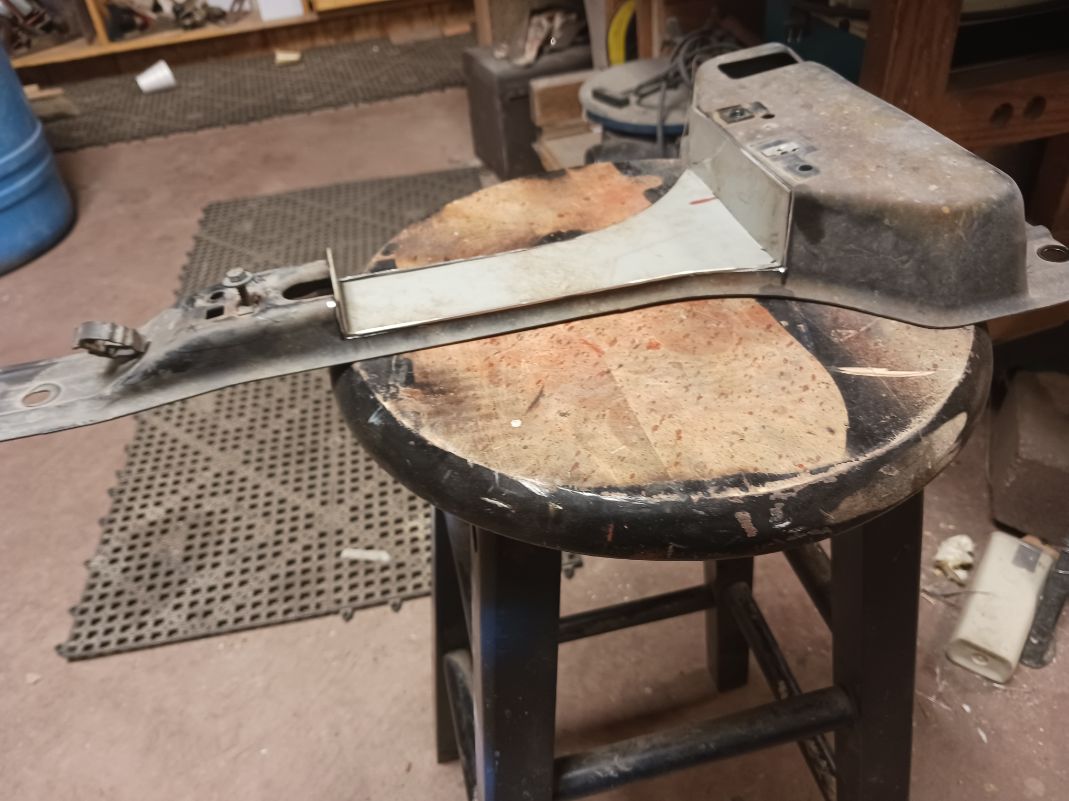
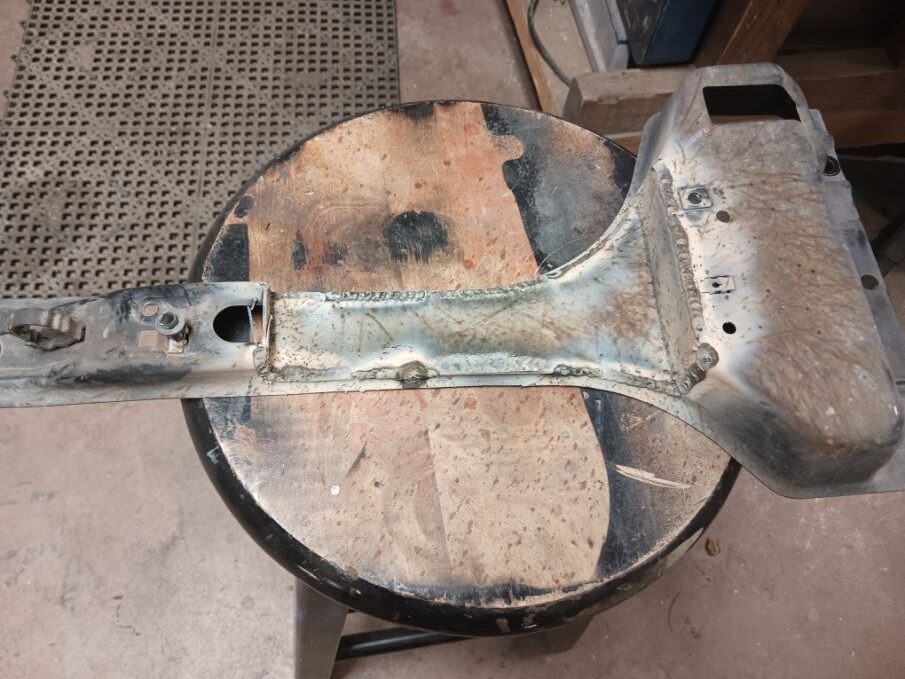
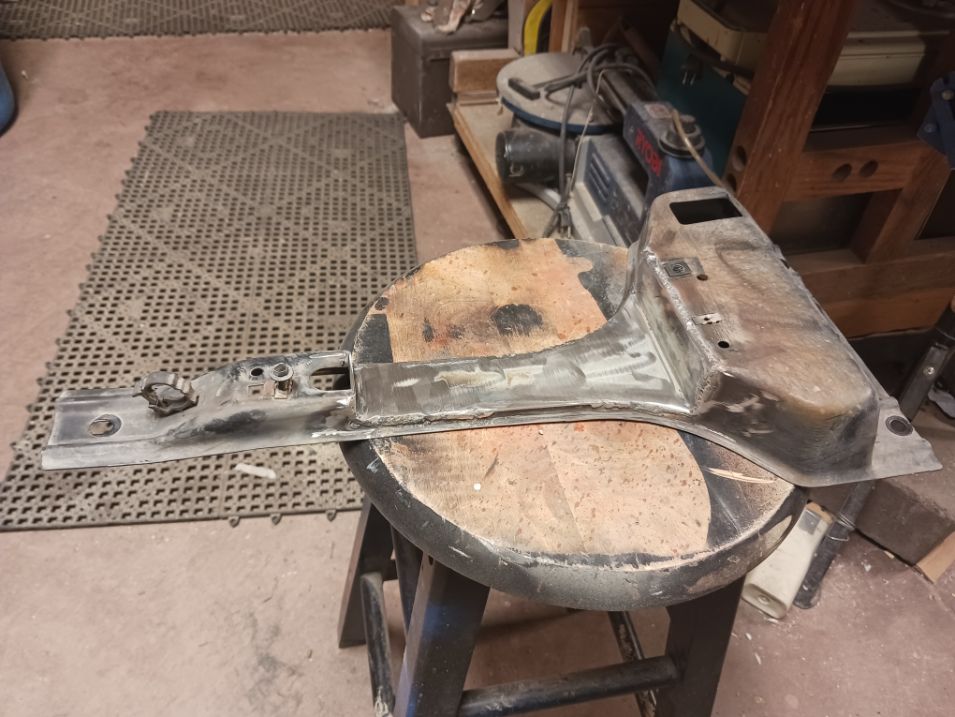

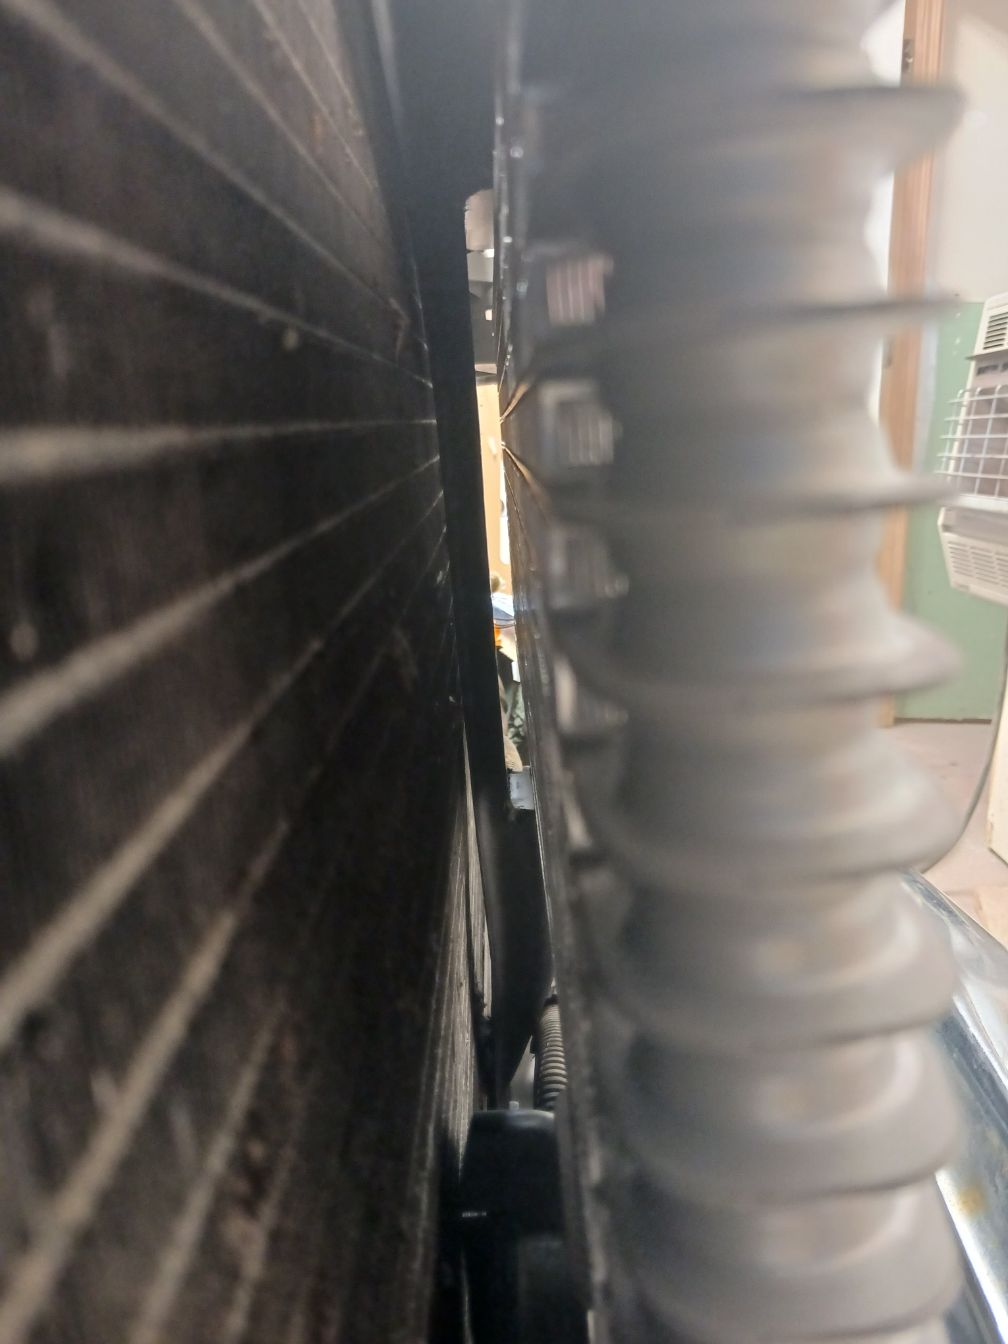
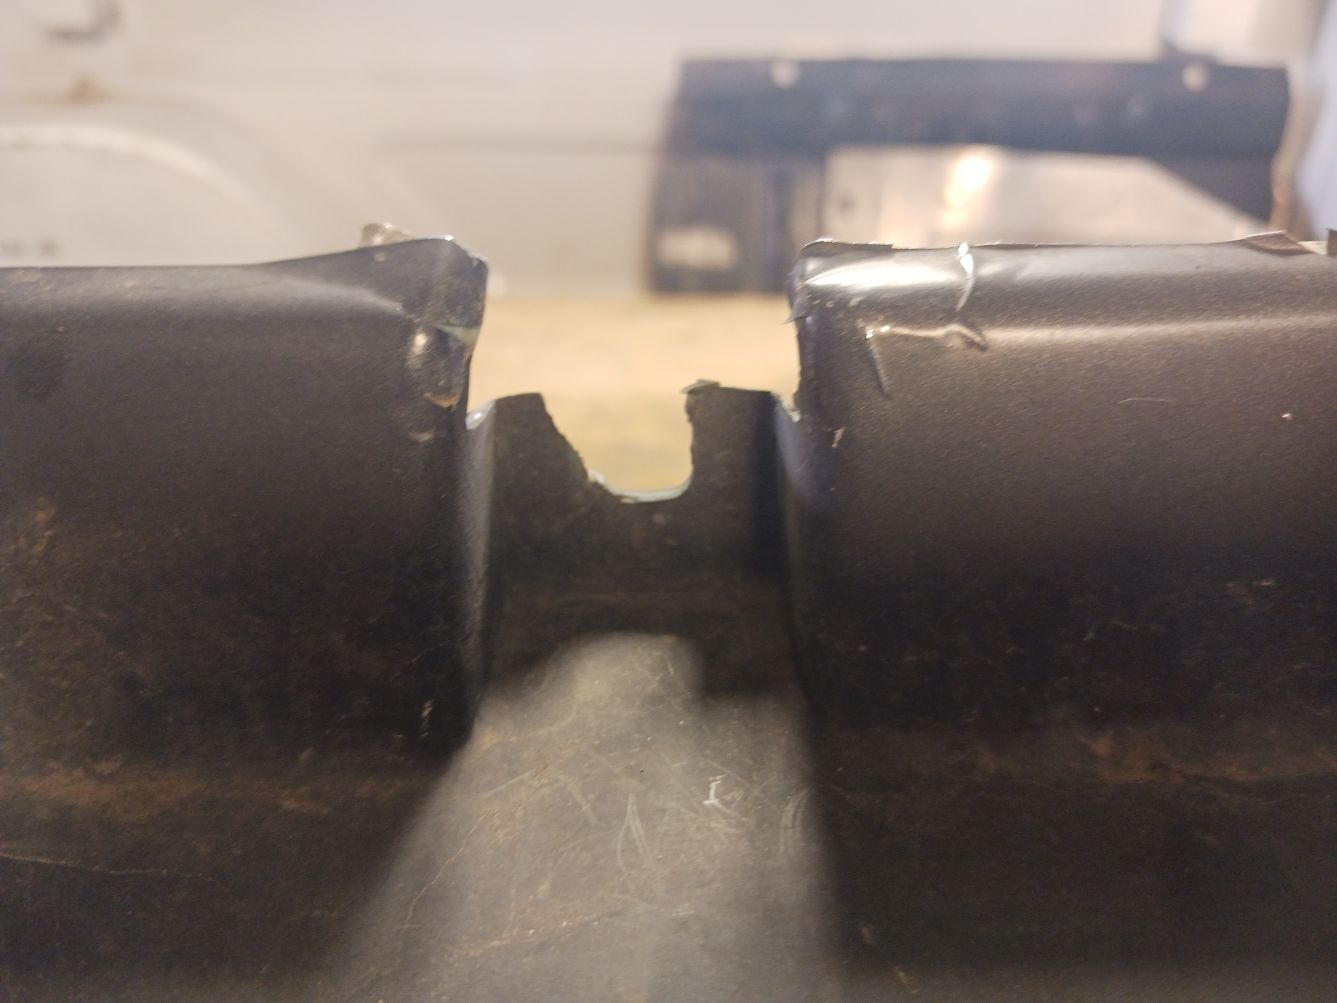
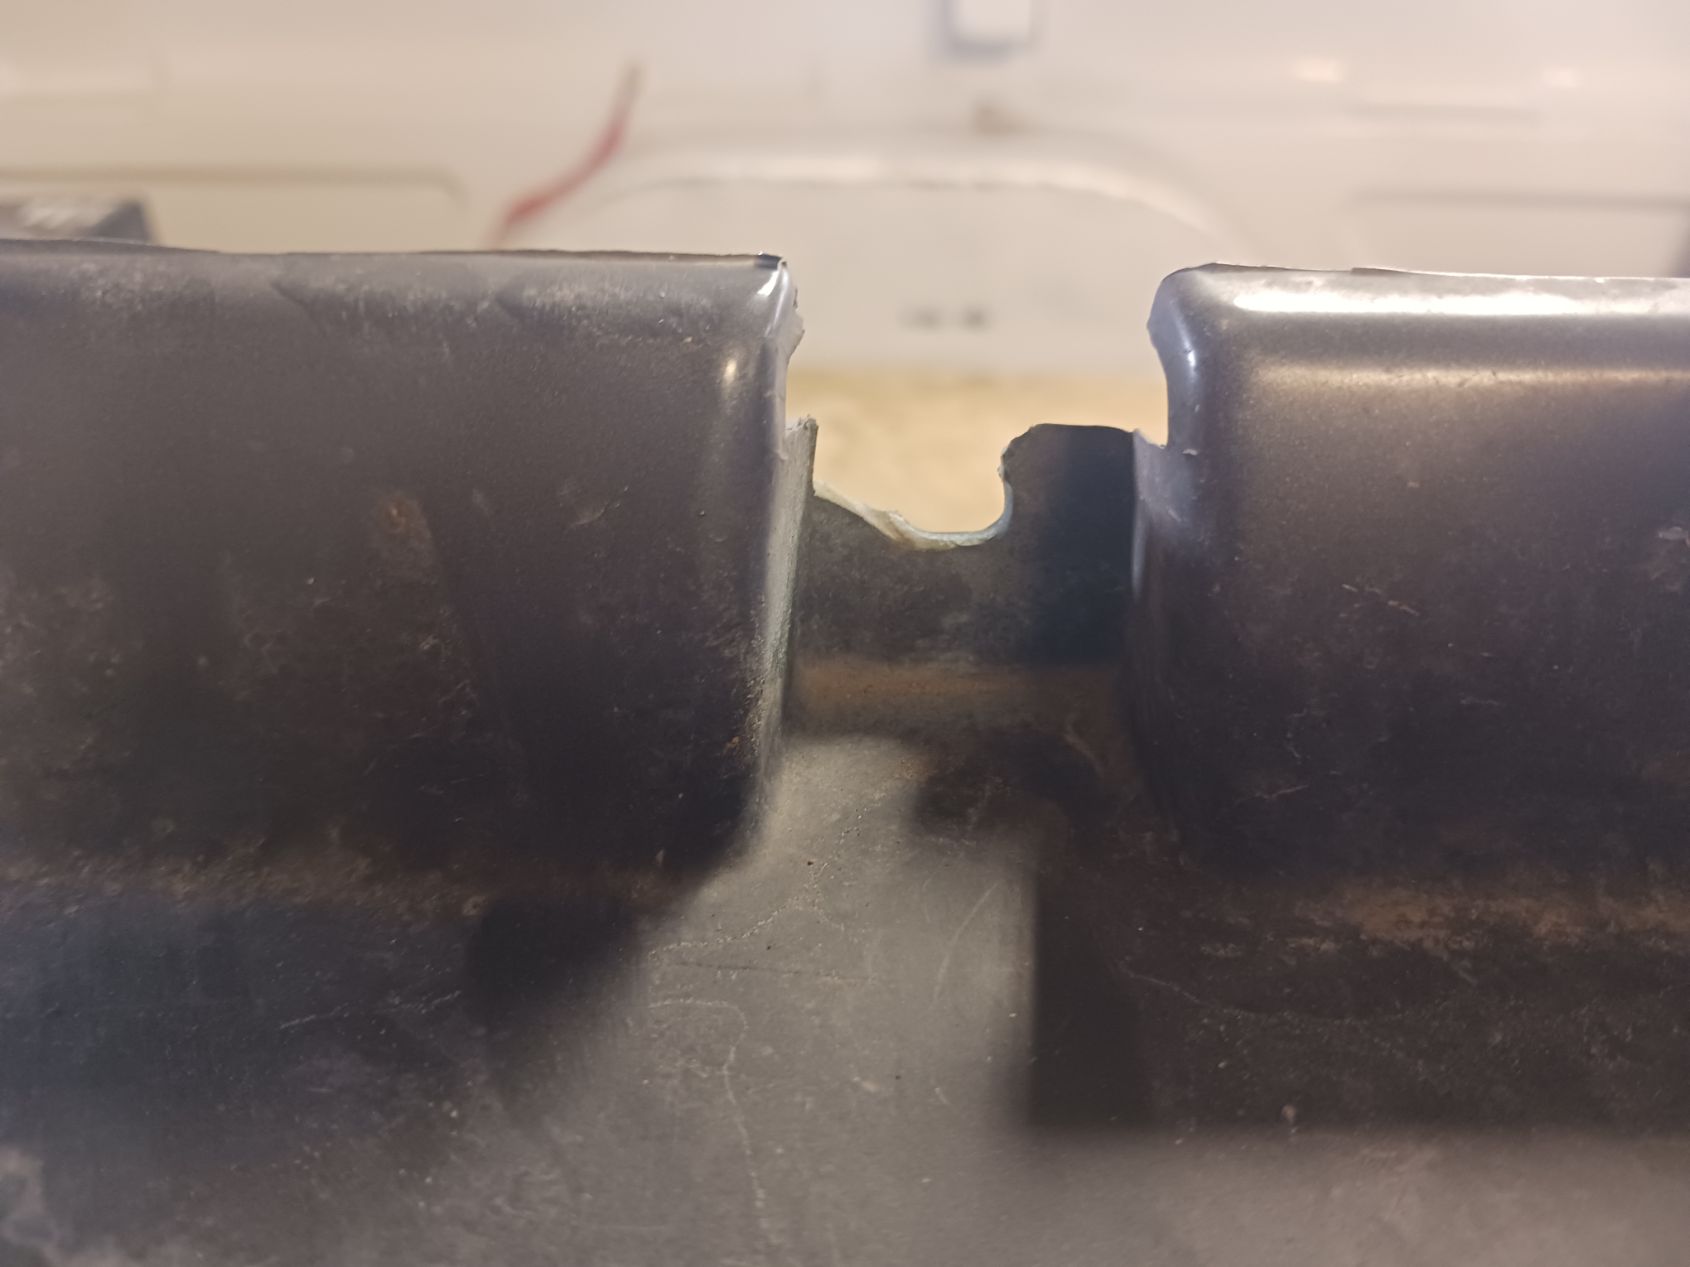
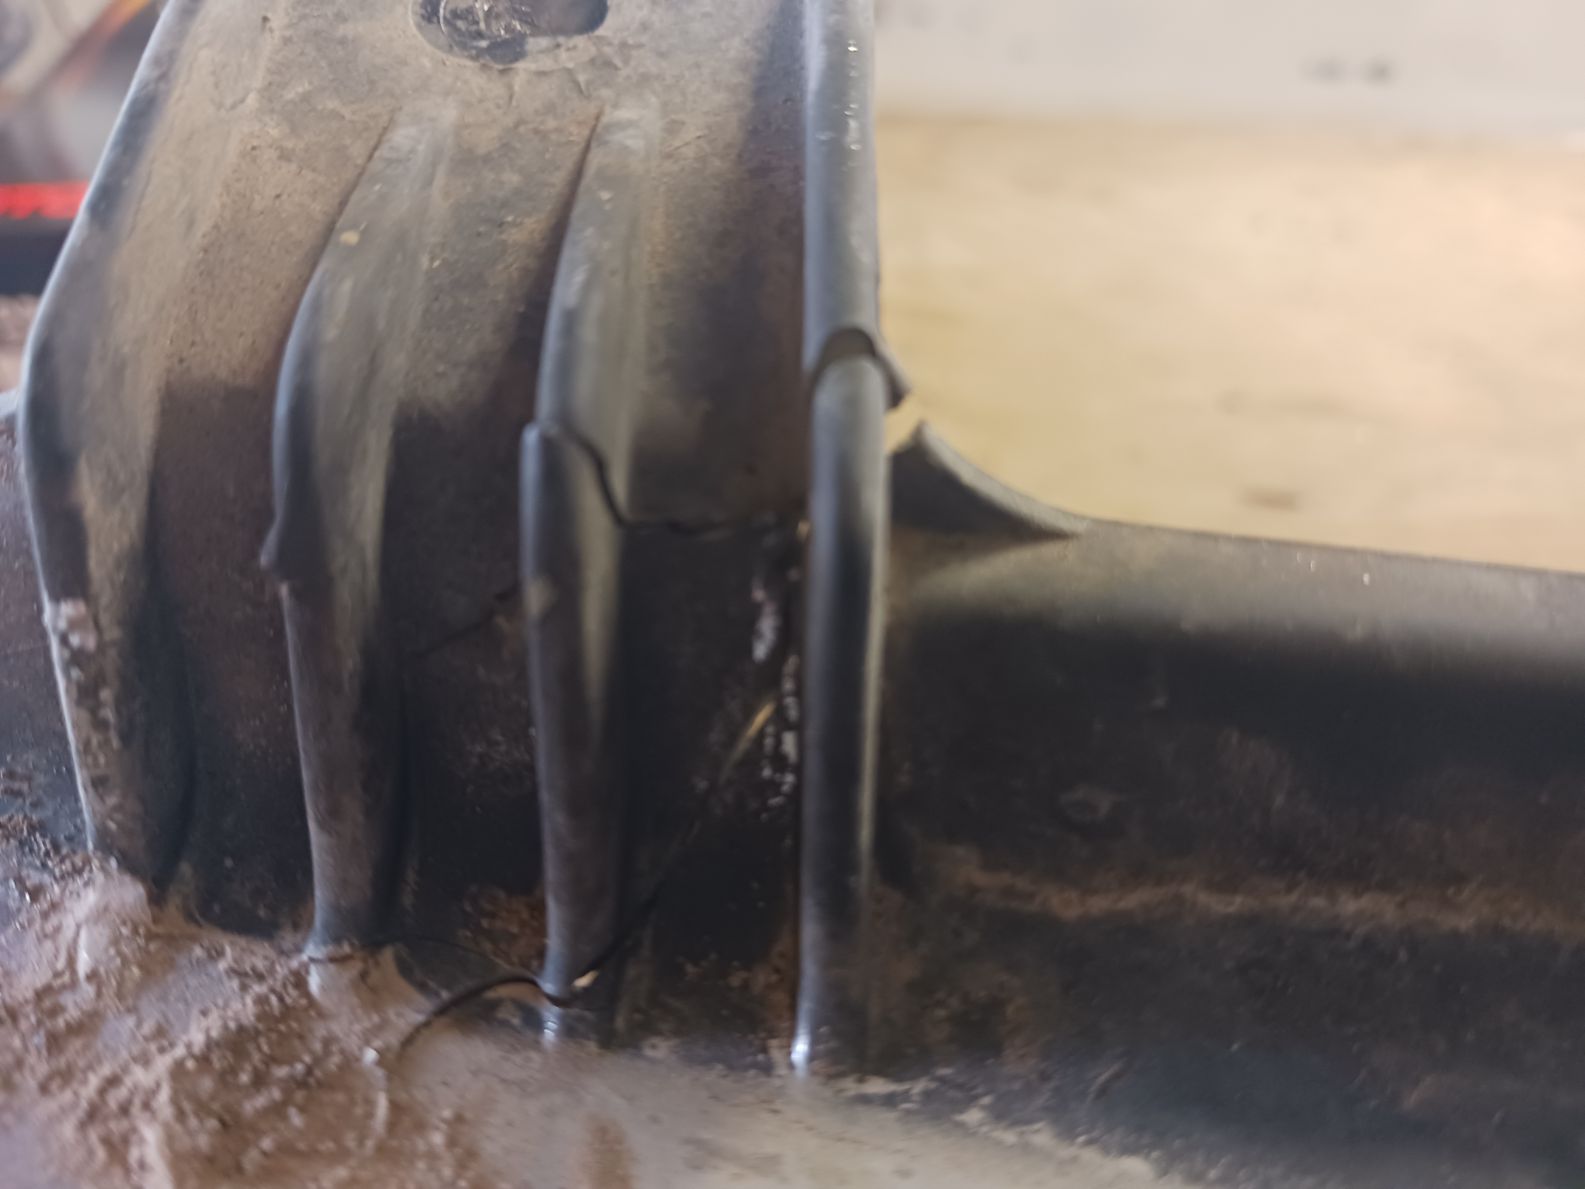
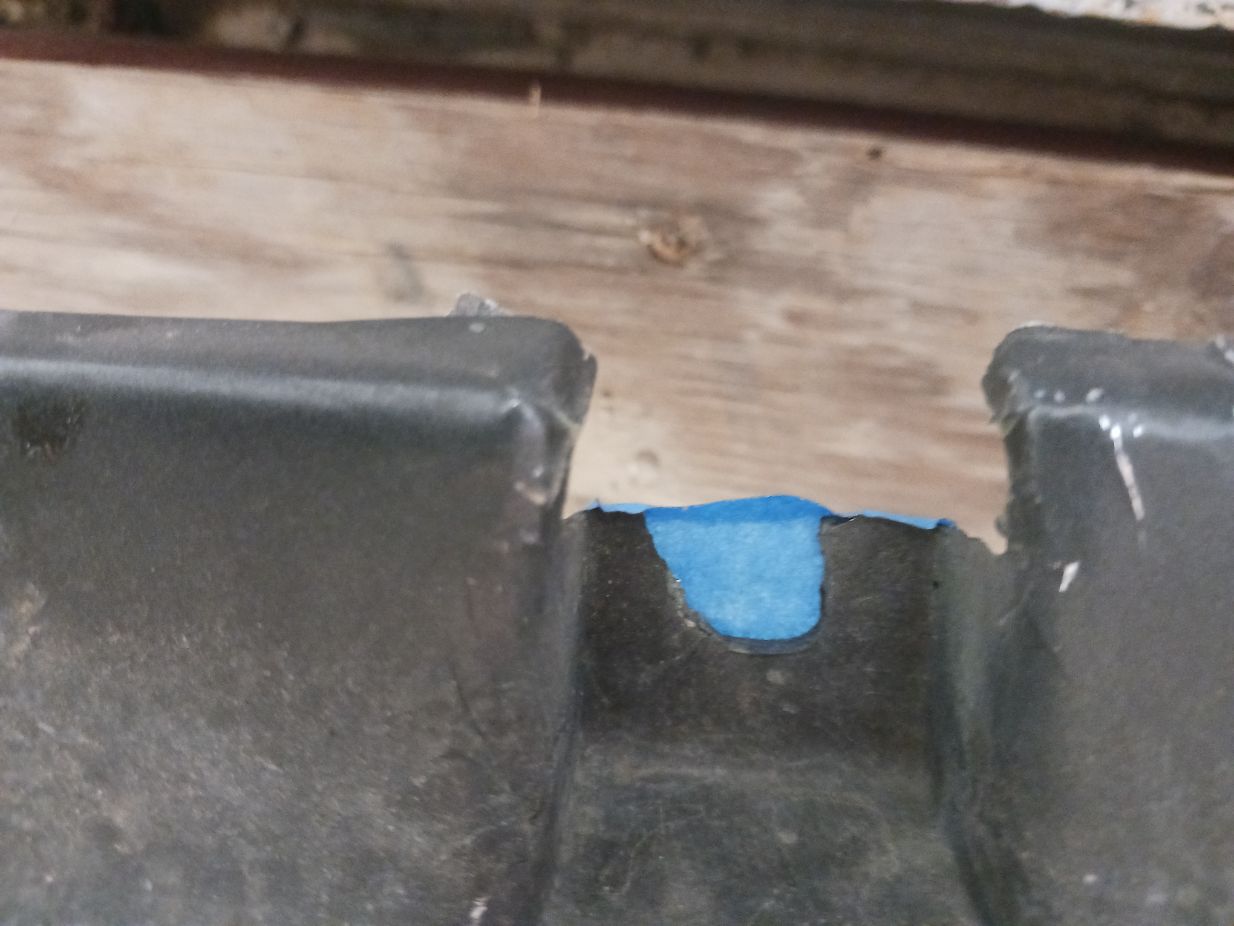
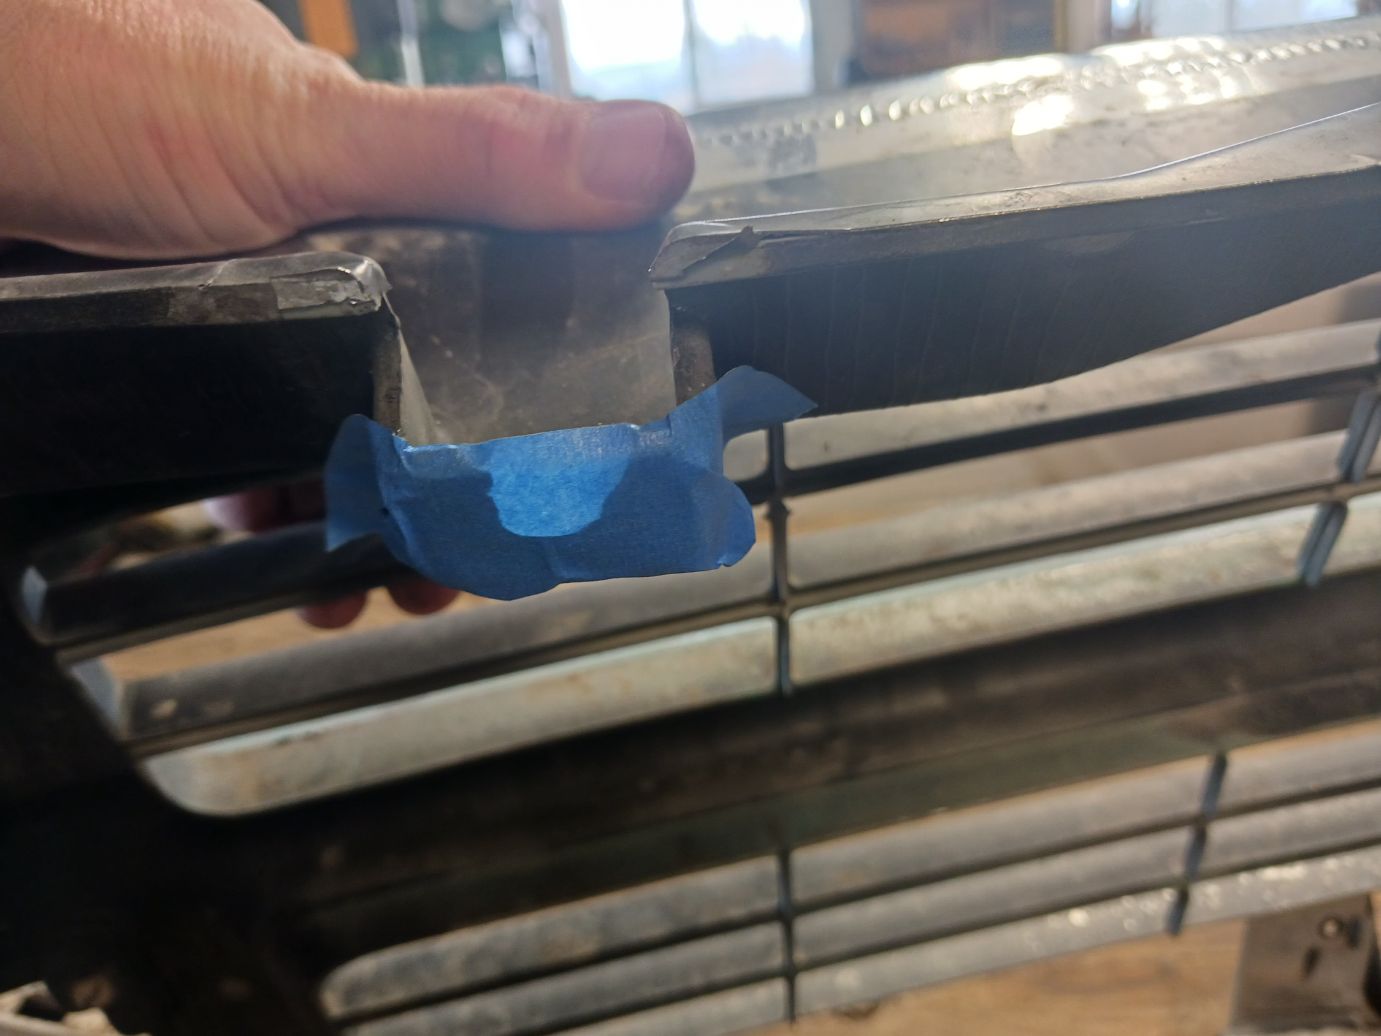
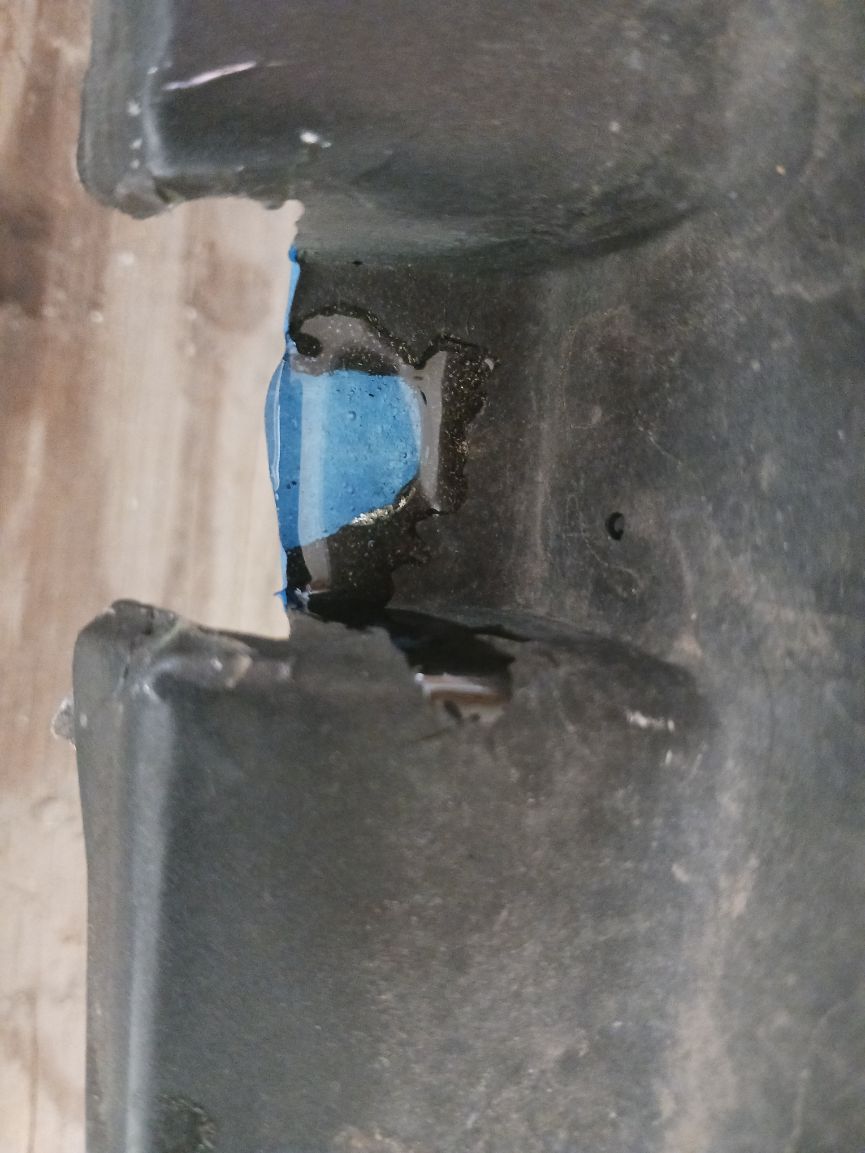
To get the cooler to fit under the grill I decided to make some modifications to the center support. I got the idea for the modification from this video. There’s a link to where you can buy one already modified in his description but for me it was easier to just modify what I have. I marked it out then cut a notch a little bigger than the cooler. I then cut some 16ga sheet metal to fill the notch and welded it in. A few coats of spray paint to keep it from rusting and it was reinstalled.
The bigger cooler and modification of the center support meant relocating the horn but I was able to keep all of the mounting points for the grill.
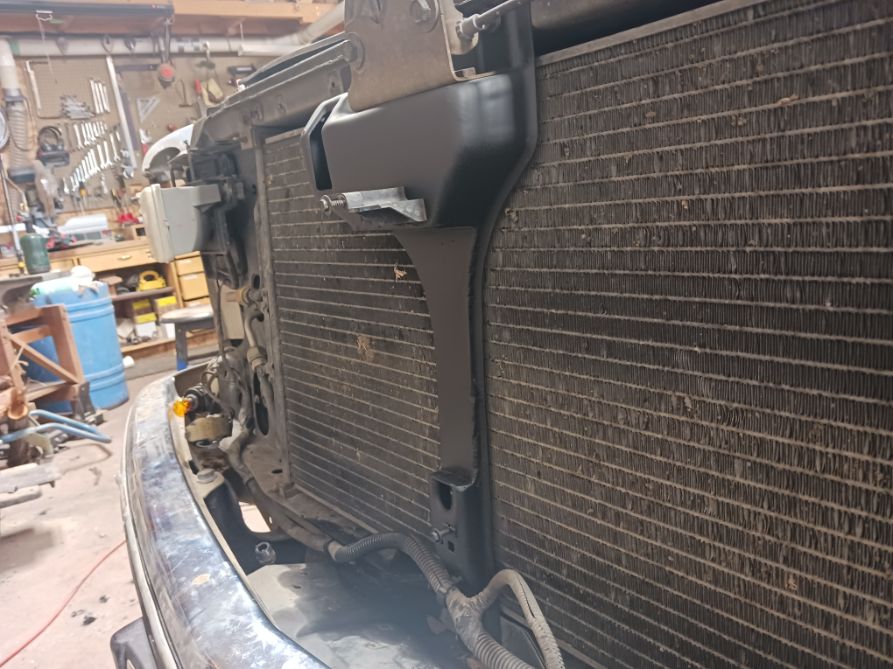
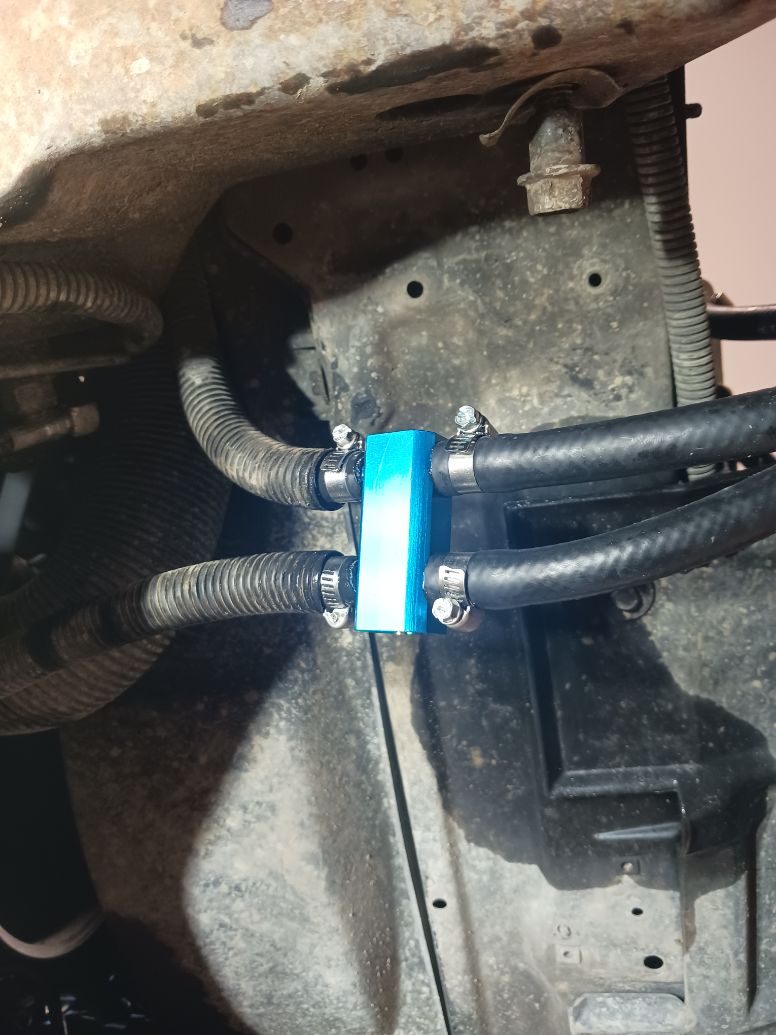
From here I took the mounting straps that came with the cooler and bent them to attach back to the radiator support making sure to hold the cooler off the center support and not touch anything else. When reinstalling the grill the lower apron rubbed up against the lower straps but a couple of taps with a hammer moved them enough for a good fit without the cooler touching the center support.
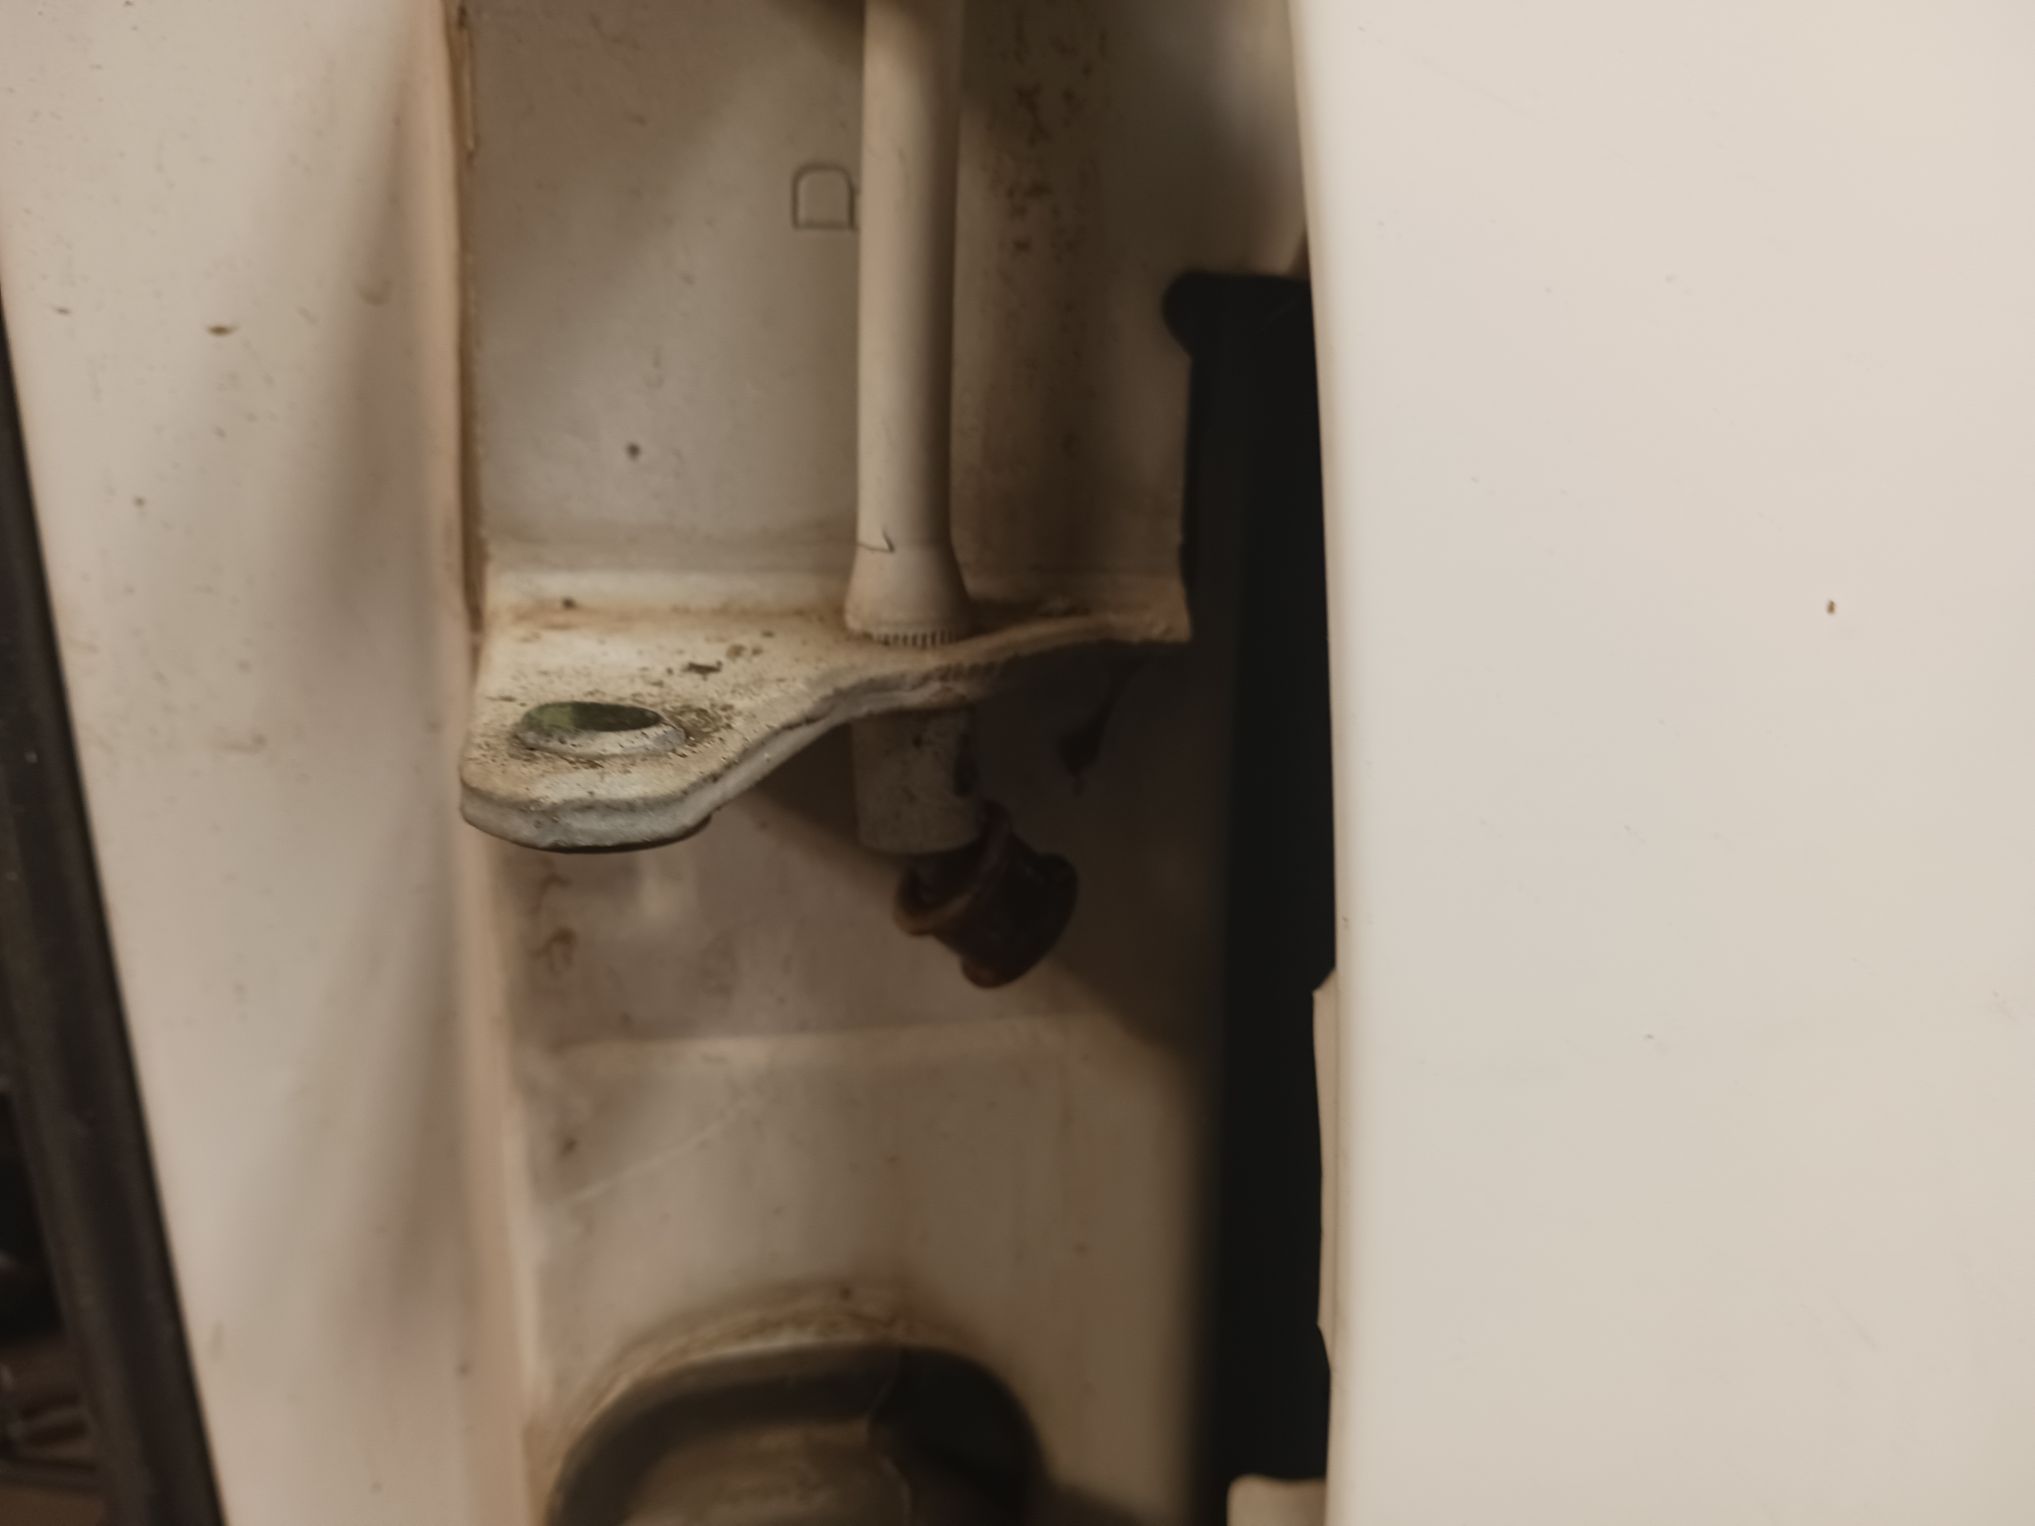
Doors and Mirrors
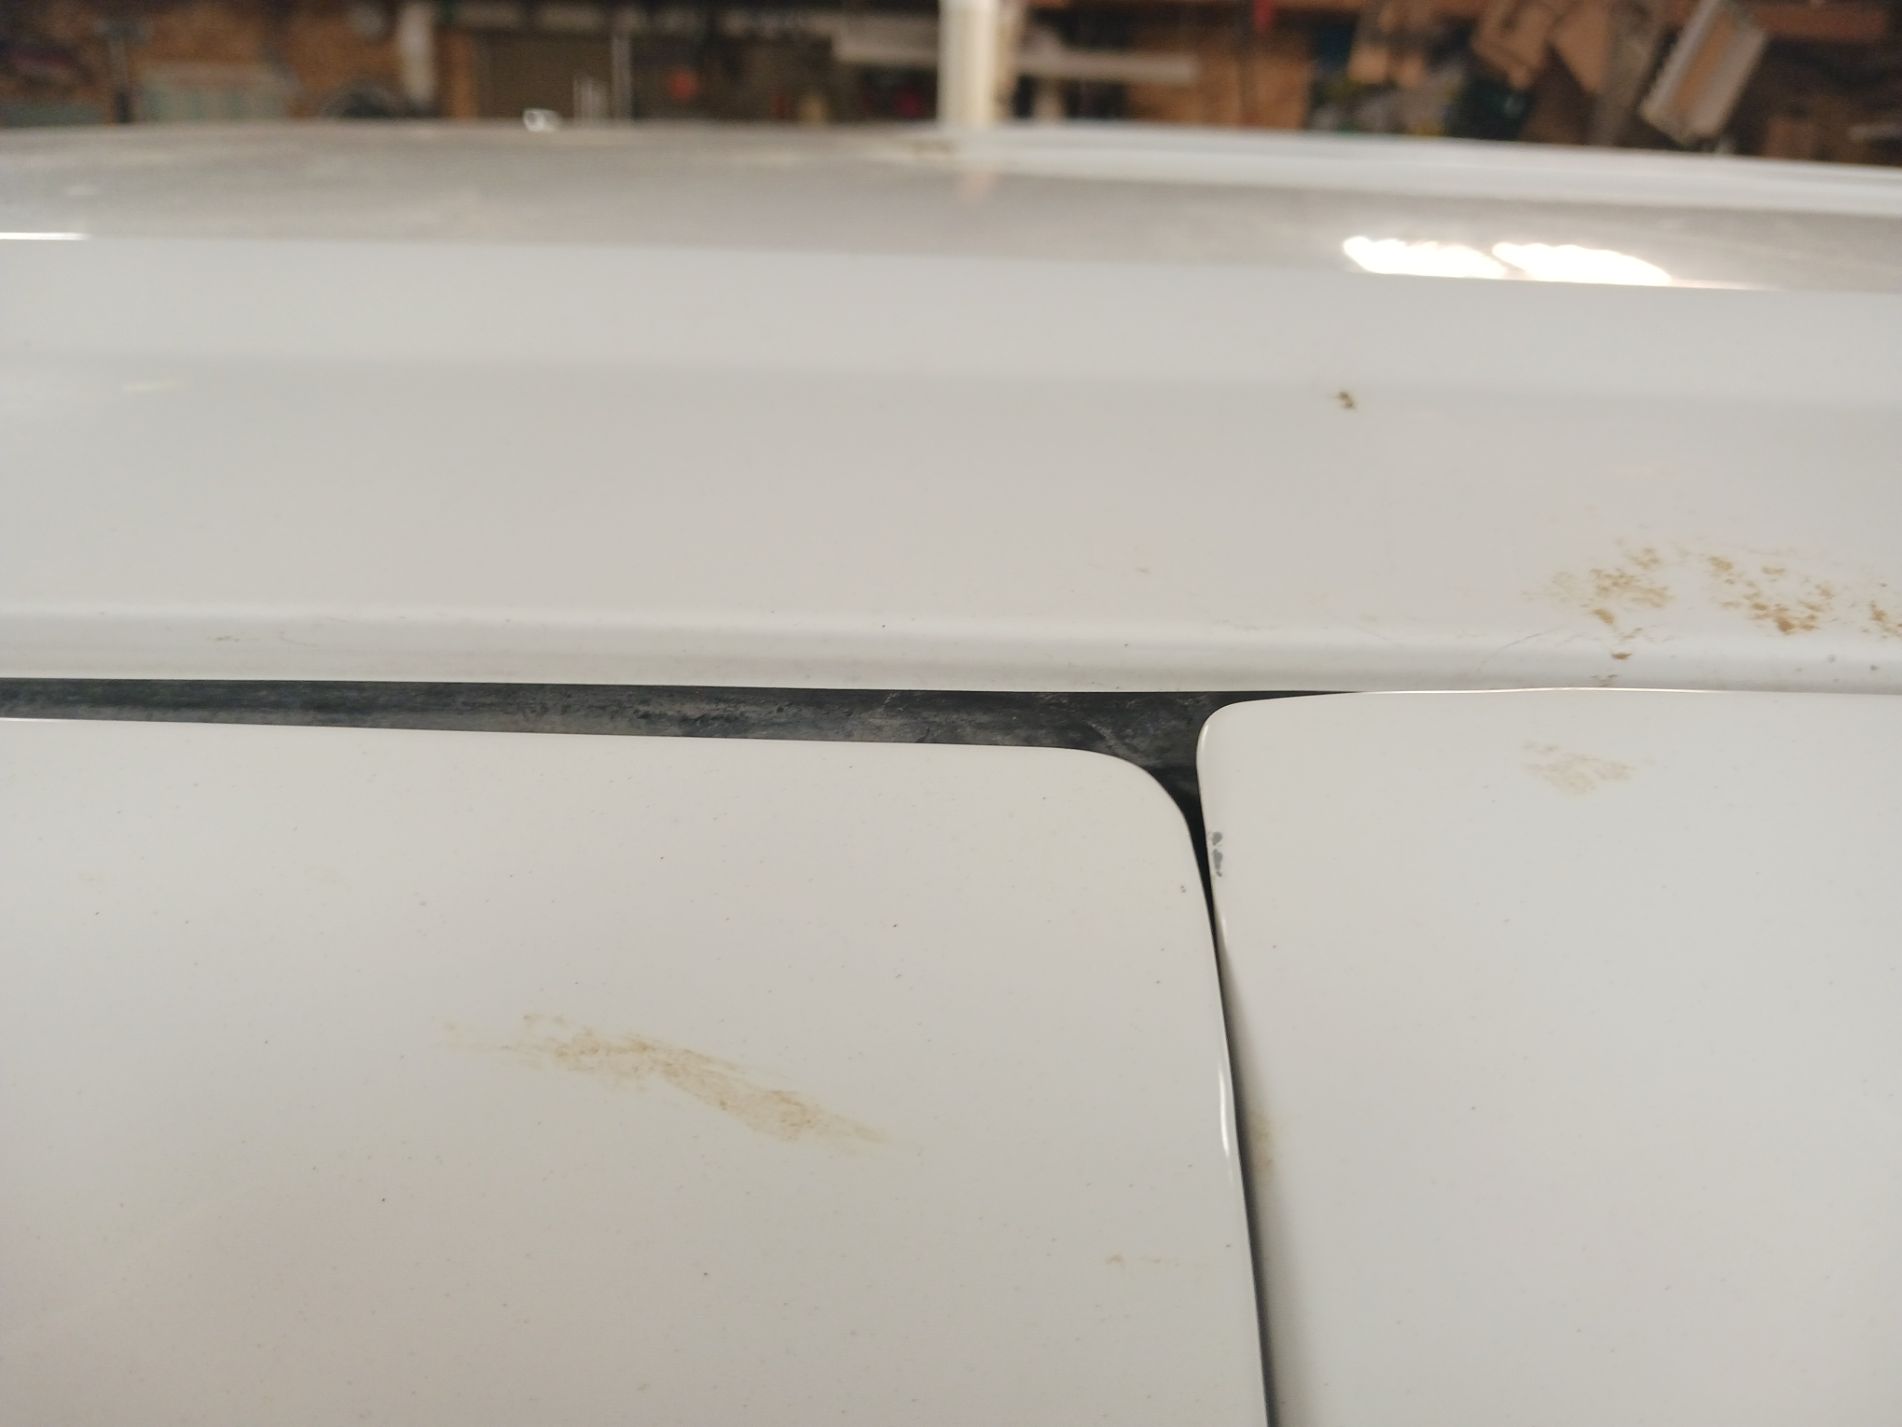
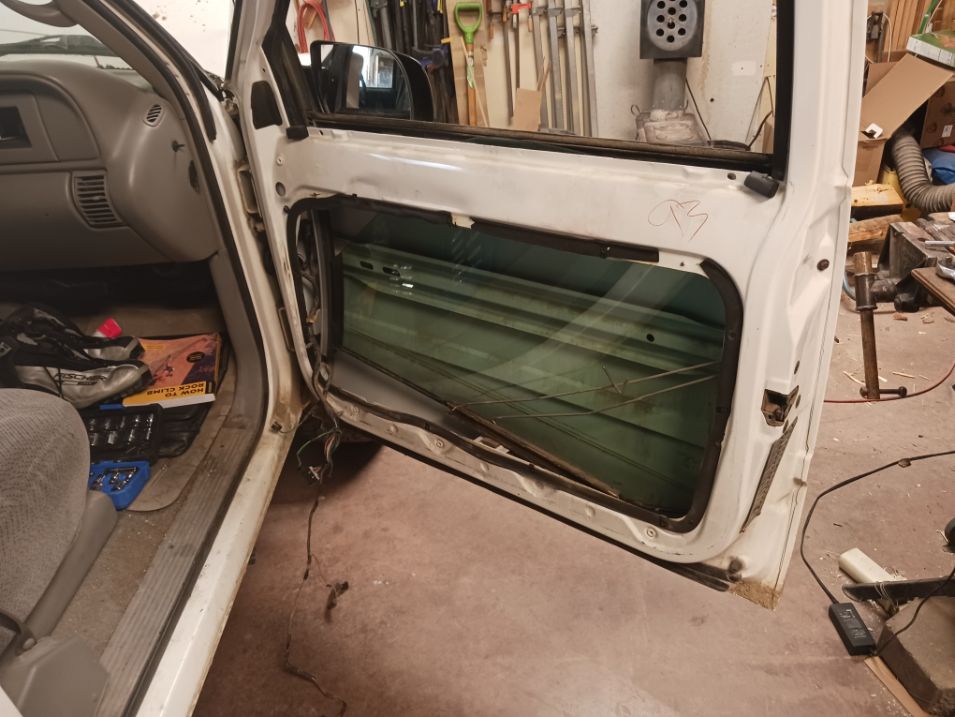
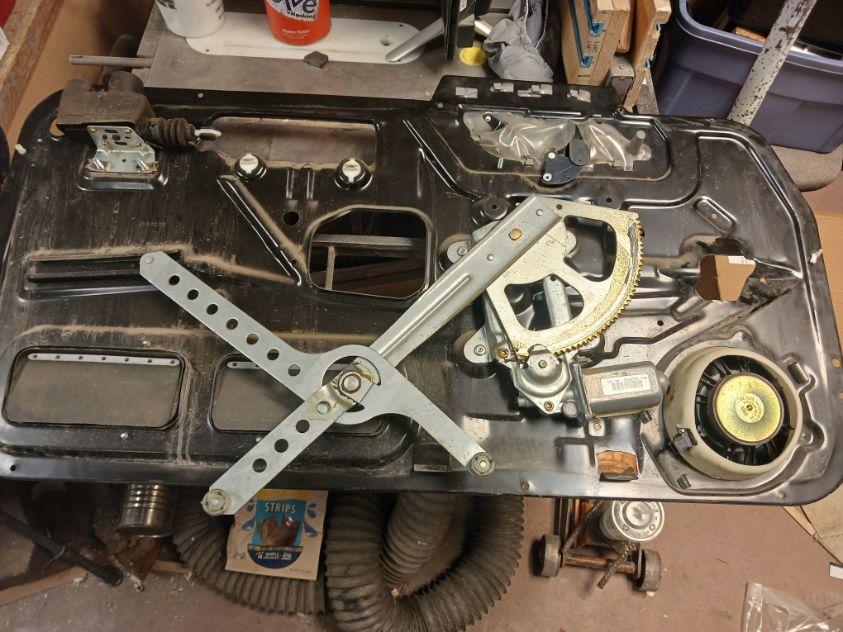
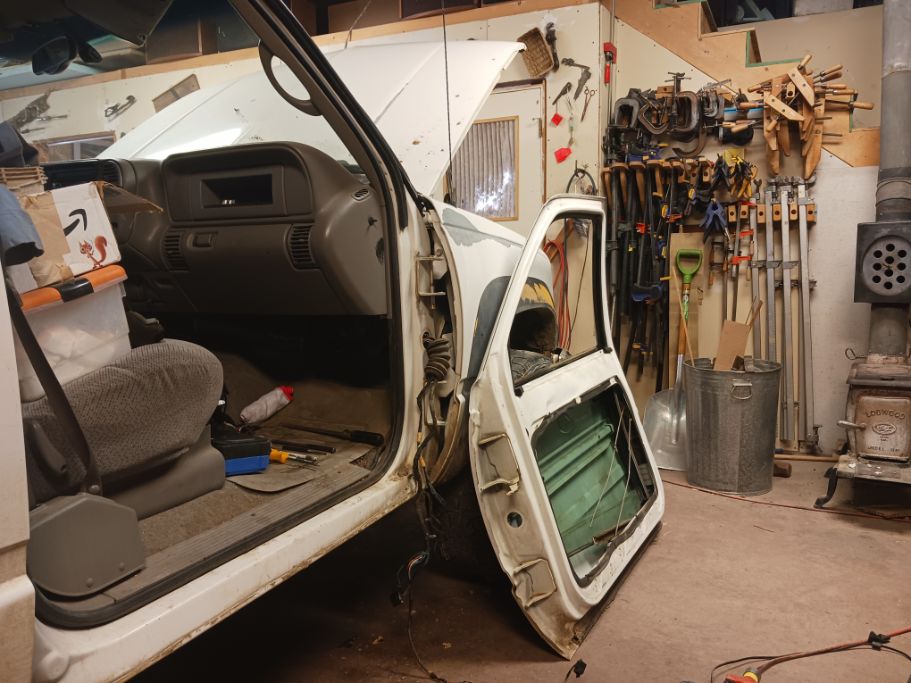
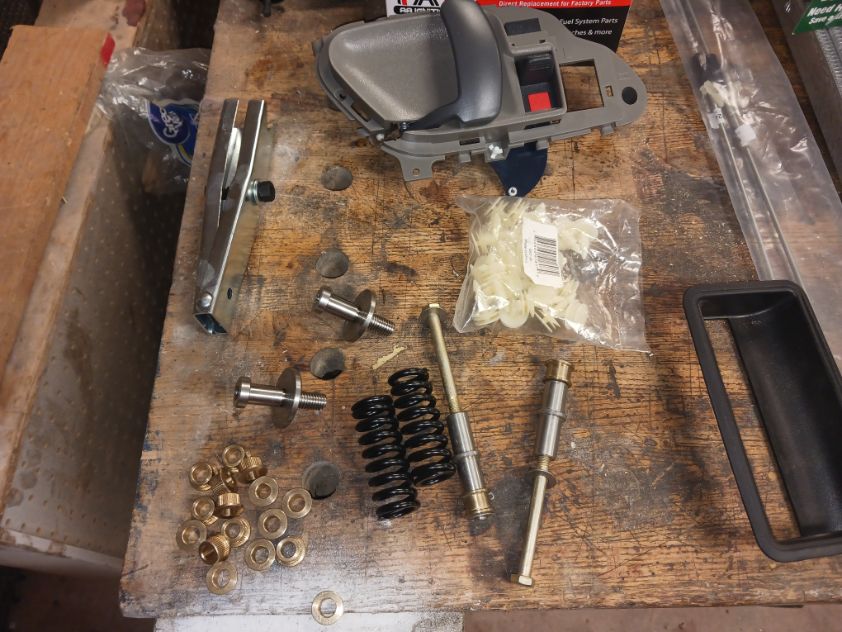
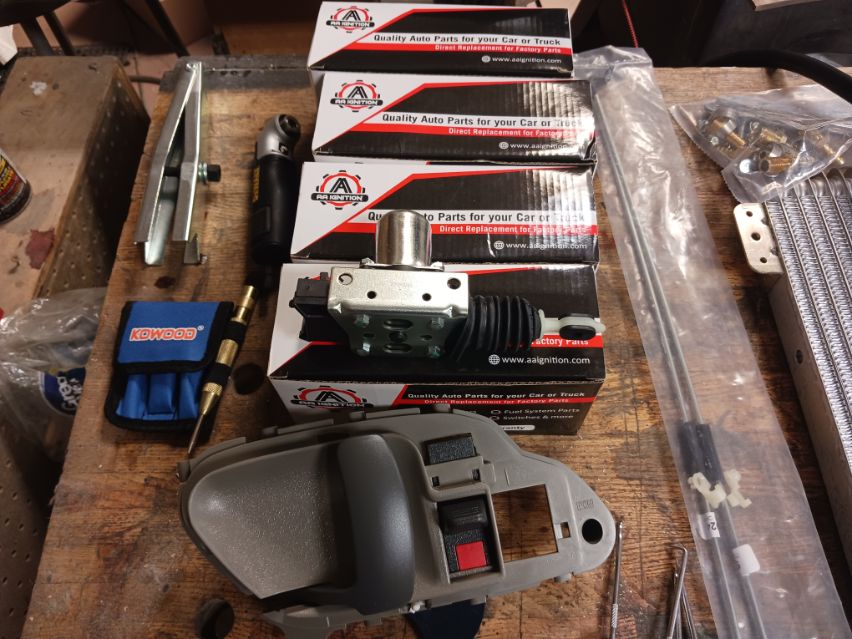
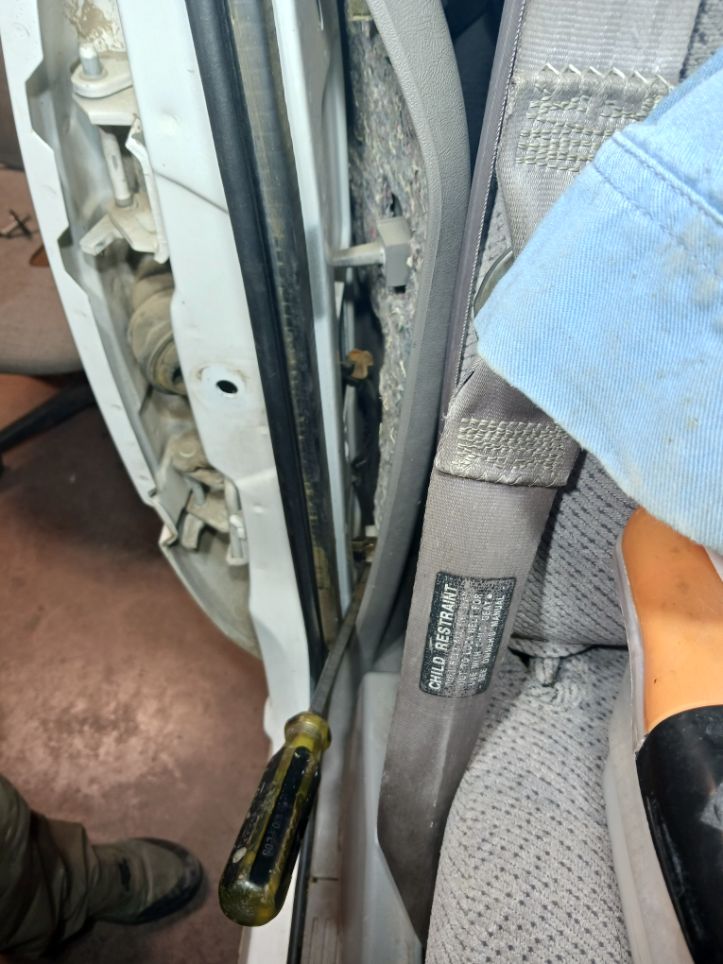
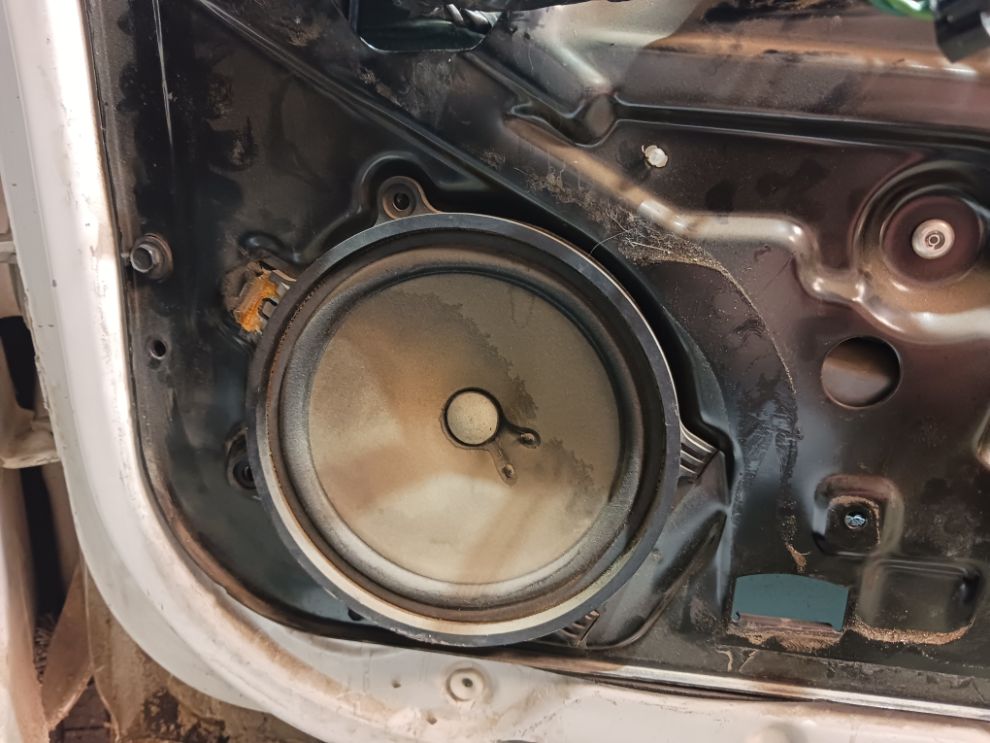
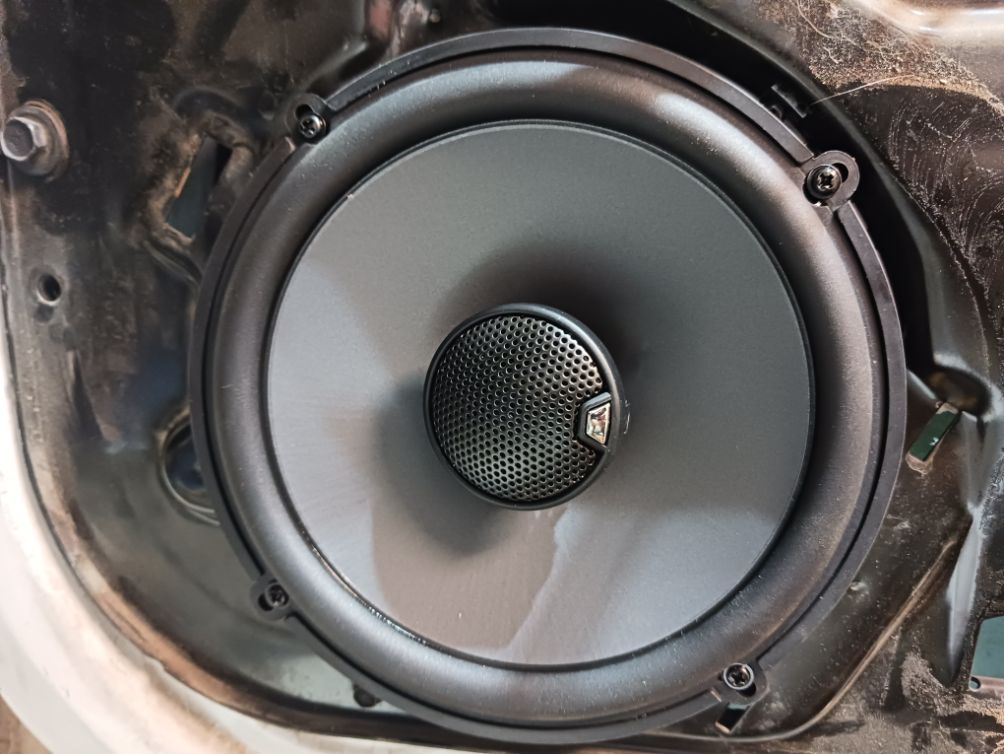
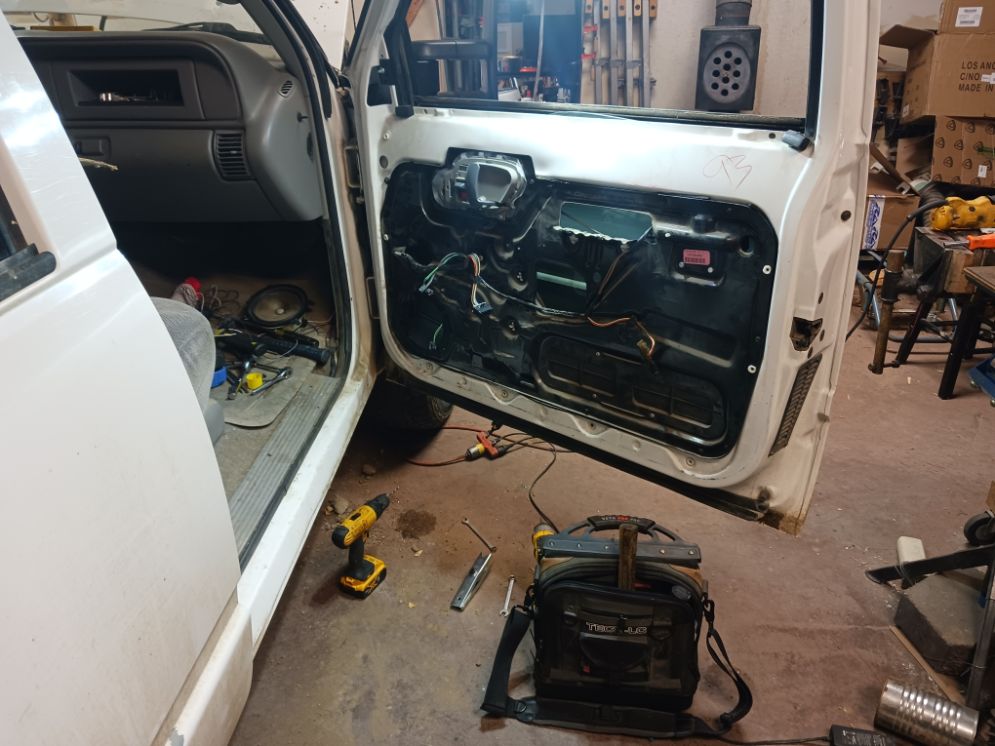
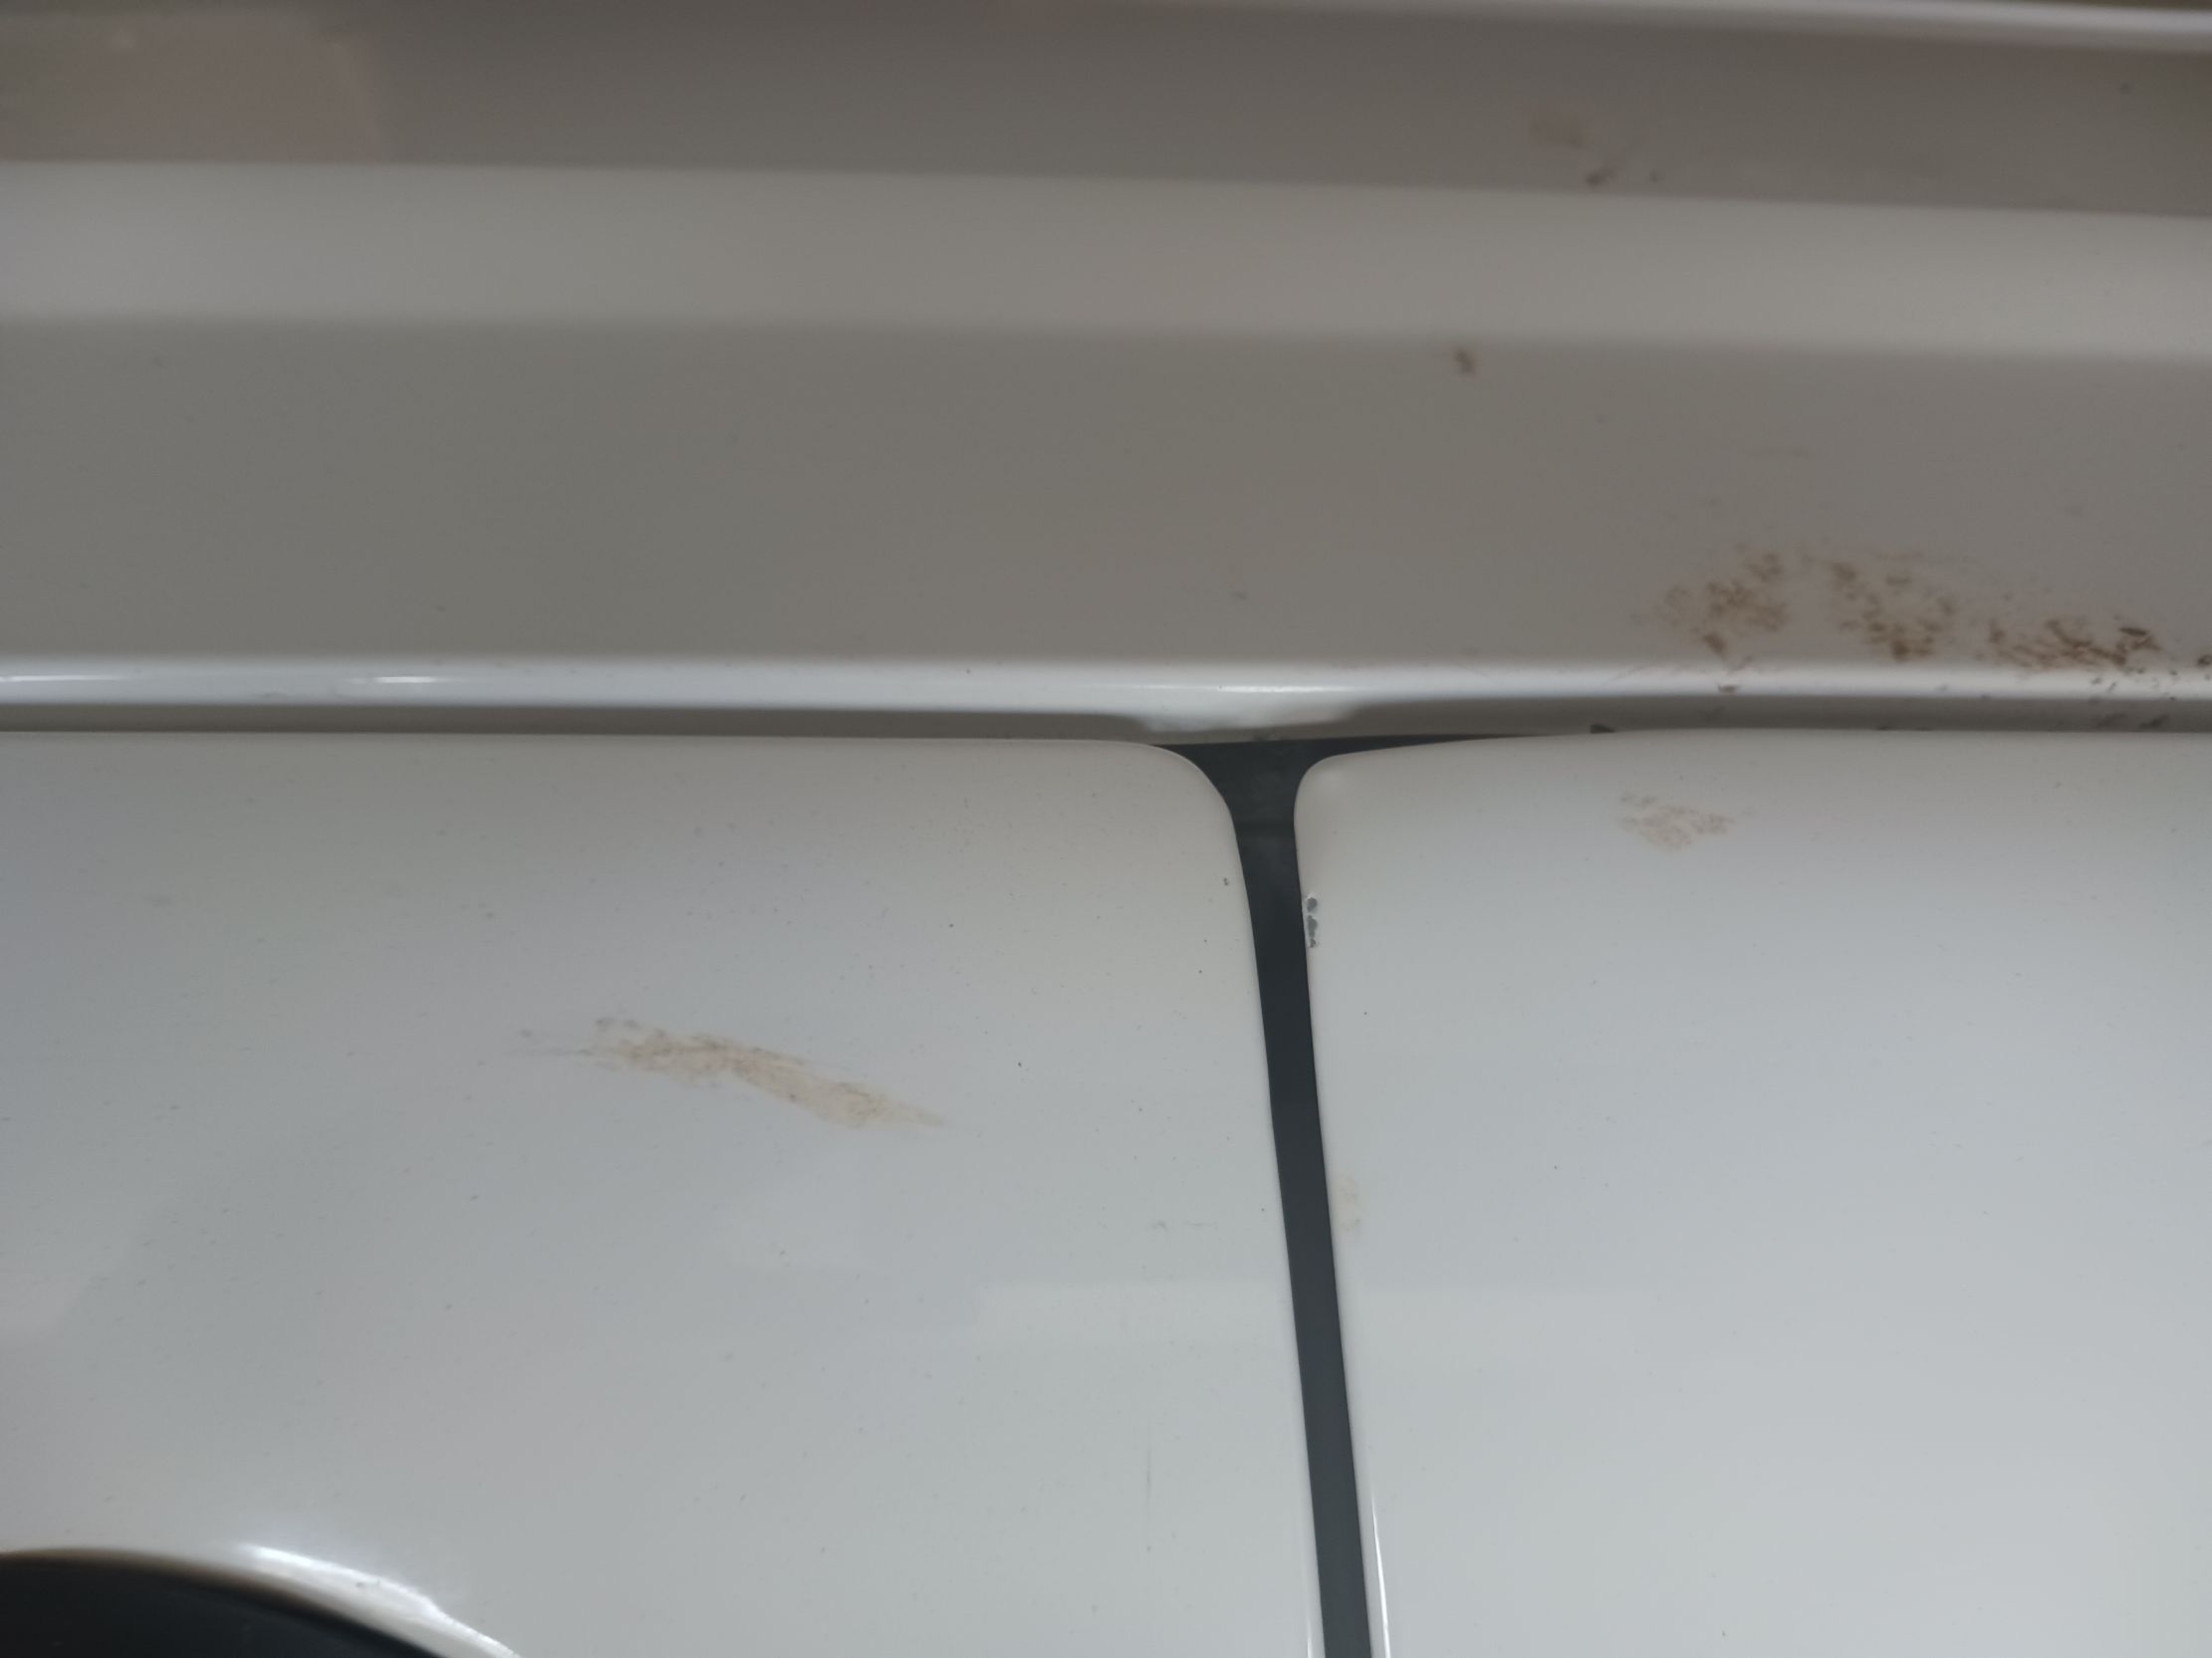
When I first bought the truck the front driver and passenger doors had a little sag to them and it had gotten worse, especially on the driver side. I also clipped a tree with the passenger side mirror but I wanted to replace the stock mirrors with more modern style tow mirrors anyways. Clipping the mirror meant selling the stock mirrors would be harder and not worth as much but it is what it is. While I was in there fixing these two issues, I decided to grease the window tracks and mechanisms and tighten up some of the looseness in the doors to make them operate like new again. I also upgraded the door speakers and replaced all of the door lock actuators so my key fob works like it should again.
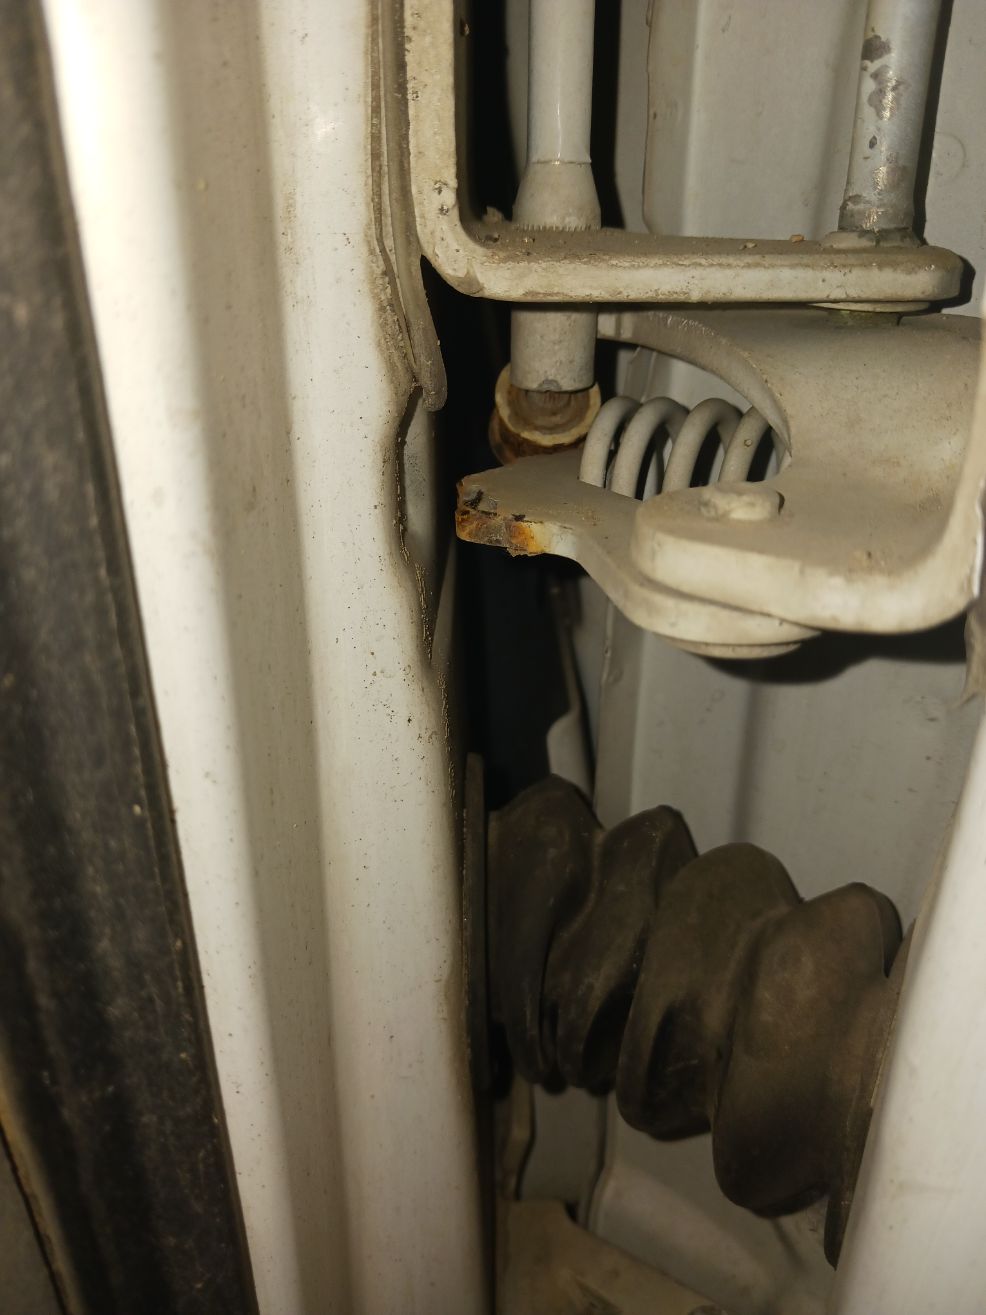
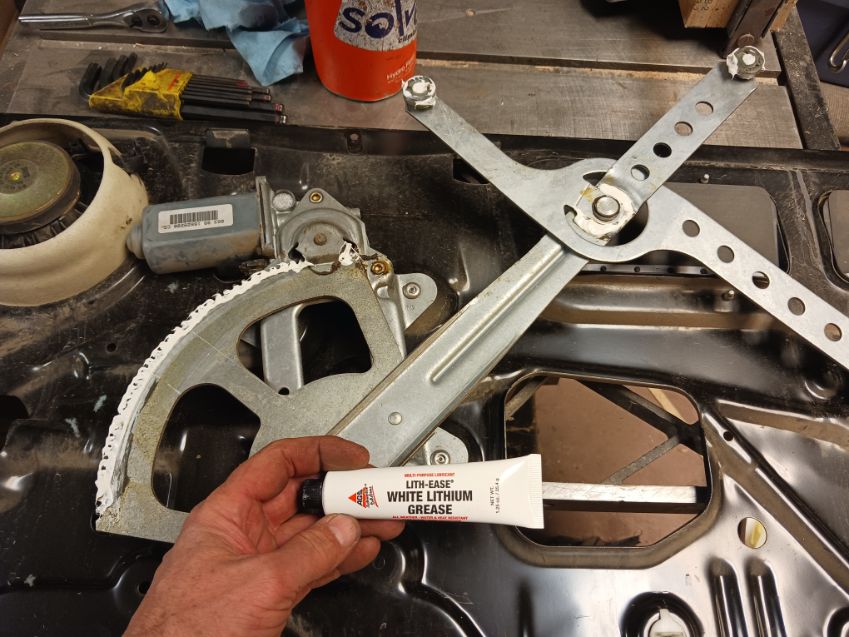
For all of the hinge components I went with Cunningham Machine. From them I got bushings, pin roller, spring, and door strikers. I am not affiliated with CM in any way but I have been supper happy with all of the products I have purchased from them so far. As a former machinist and welder, I appreciate the quality of the craftsmanship and the superior materials they use when making them. I have installed parts store bushings in the past that were complete garbage and broke while installing them or shortly after but these are definitely made from a higher-grade brass. I bought all of this stuff back when I did the steering in October last year and at the time, they didn’t offer bushings specific to my year truck so I got the oversized. This meant I had to drill the sockets out but given how bad the door sag was it’s probably better I did. I kinda regret not buying the bushing install tool from Cunningham but was able to make it work with a bolt and socket. They do offer bushings for 1999 to 2001 K3500s now.
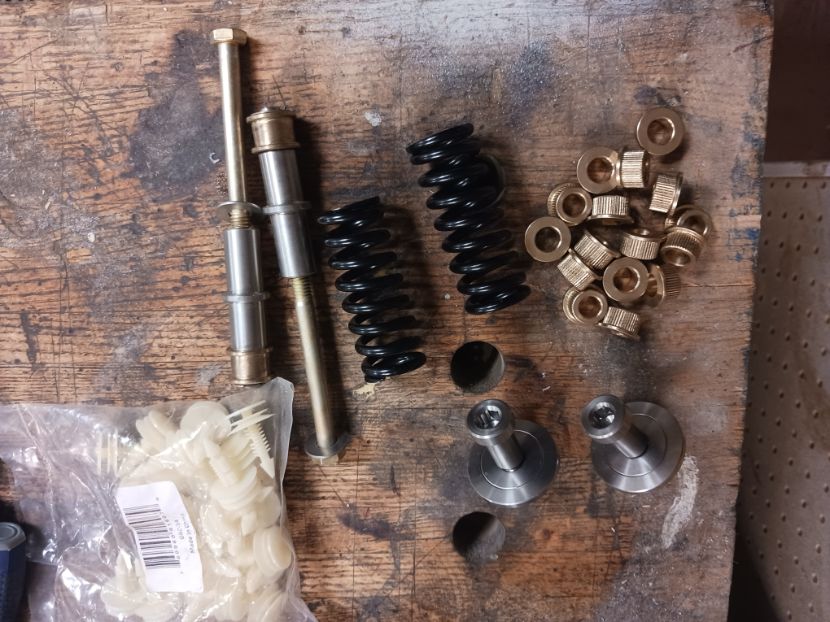
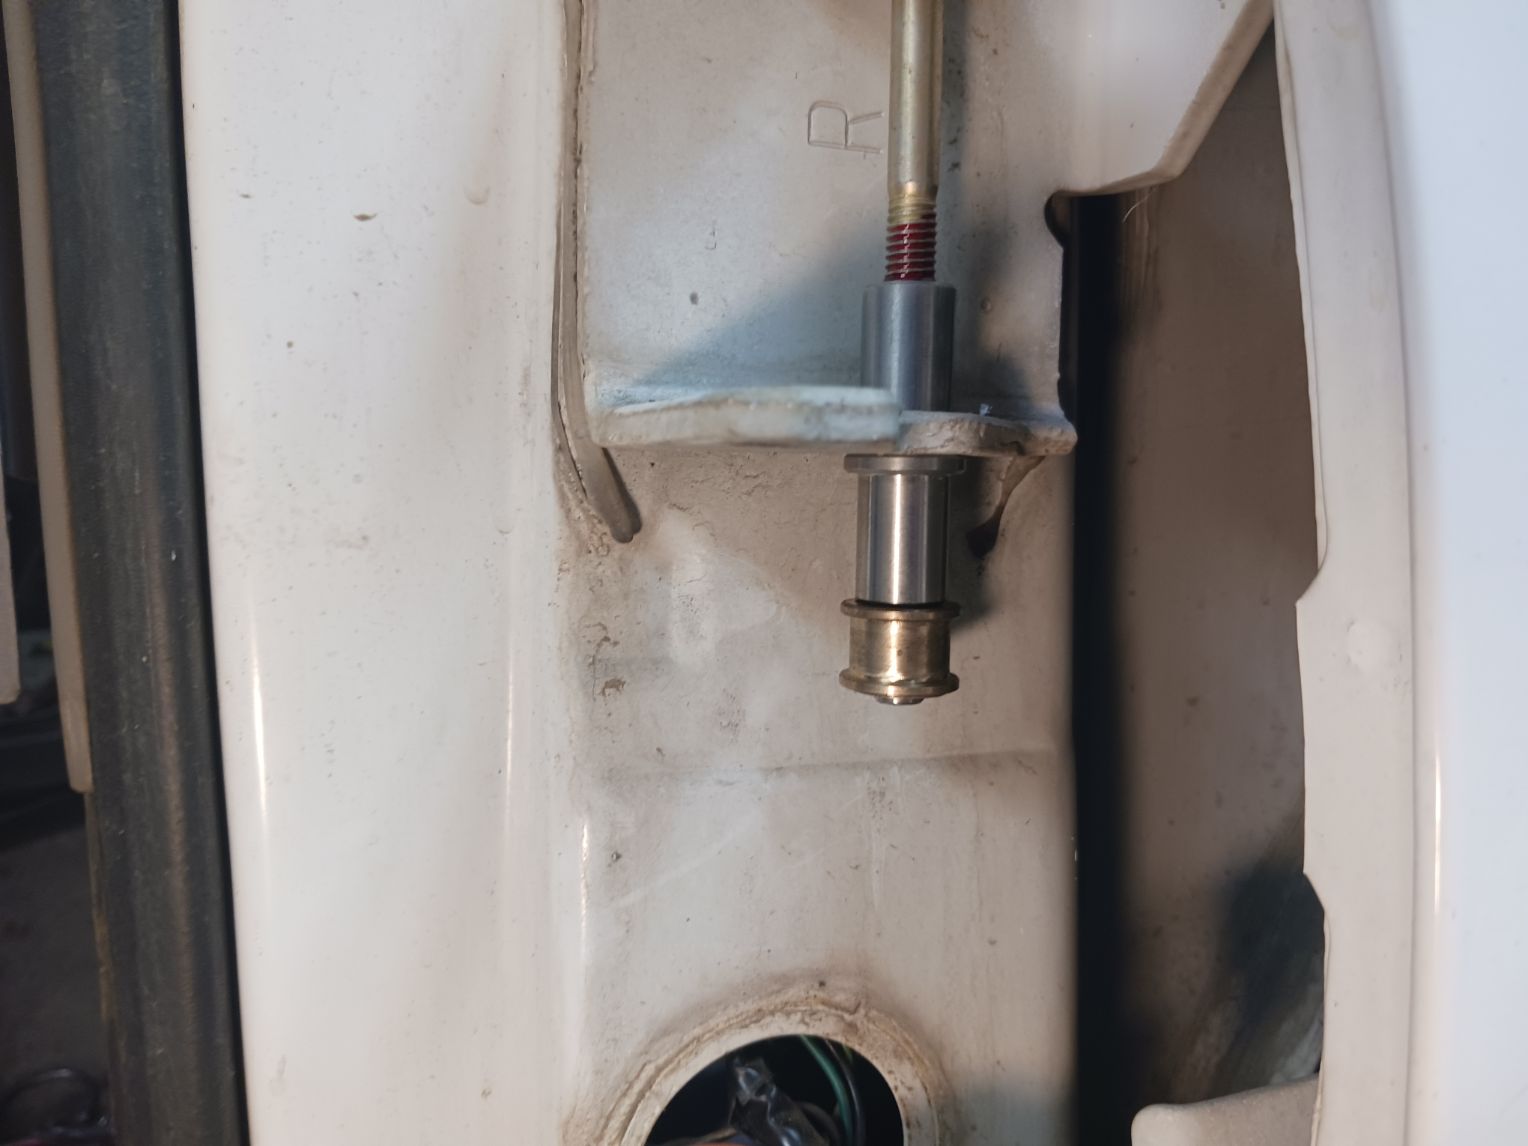
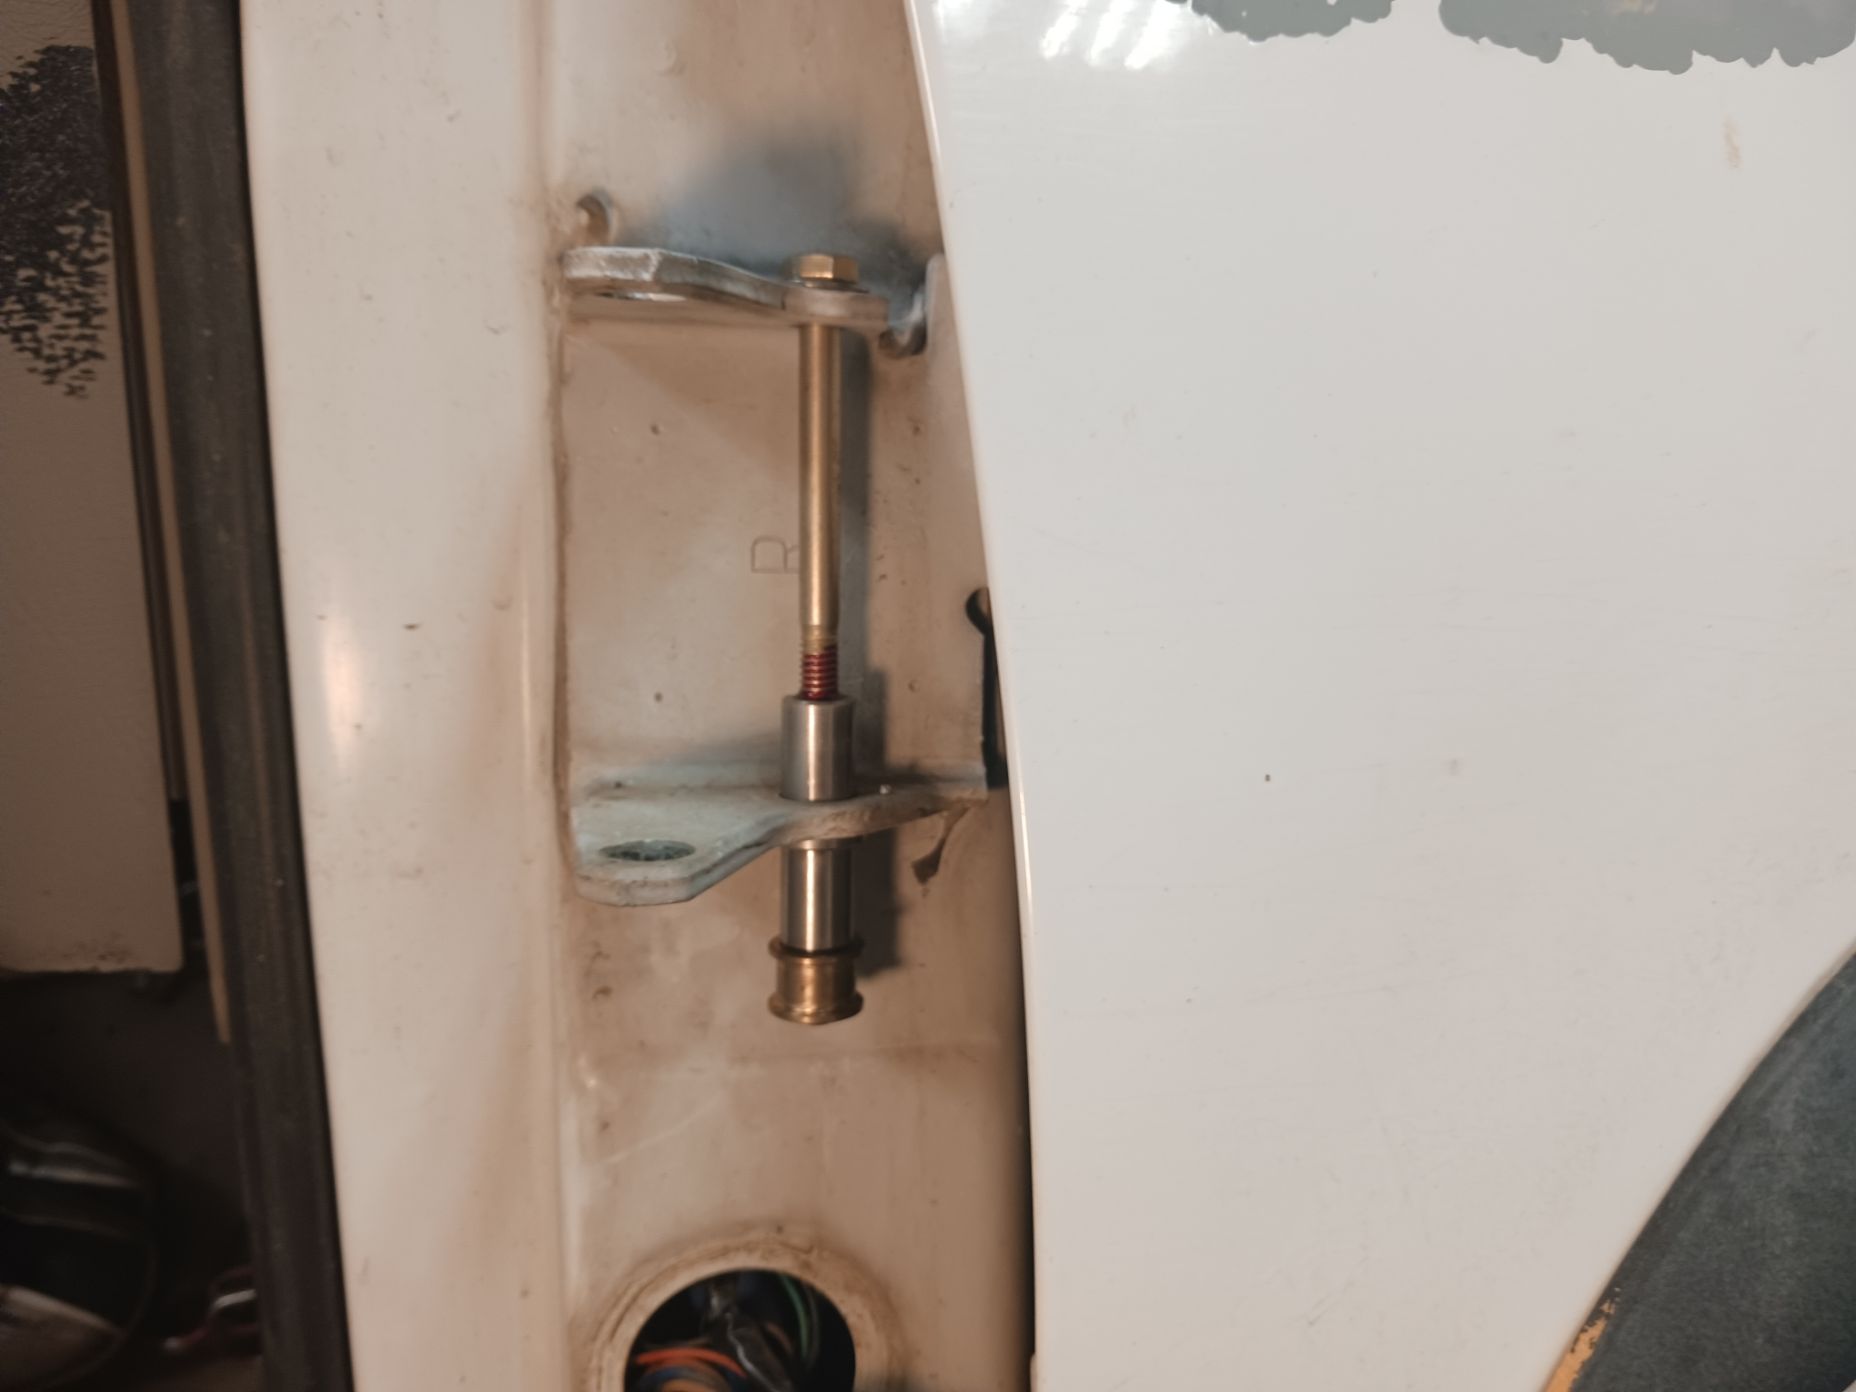
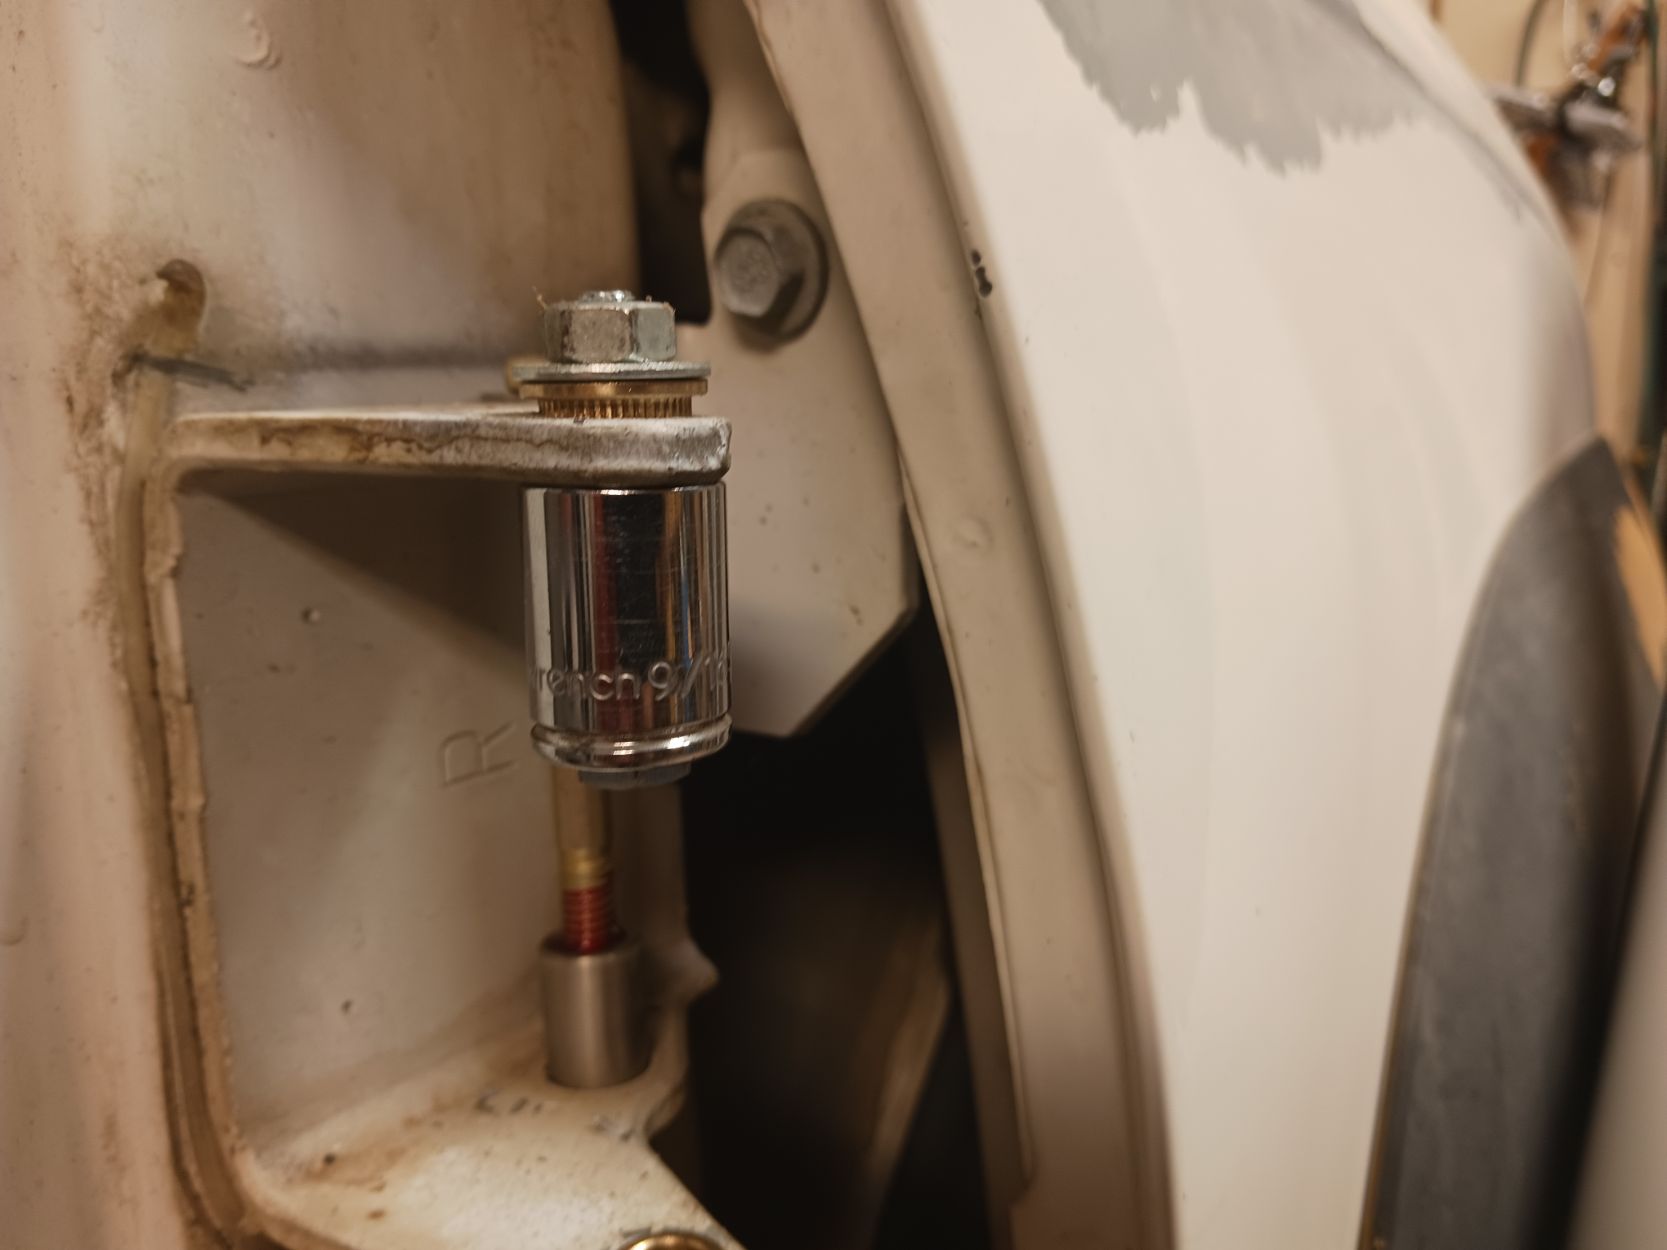
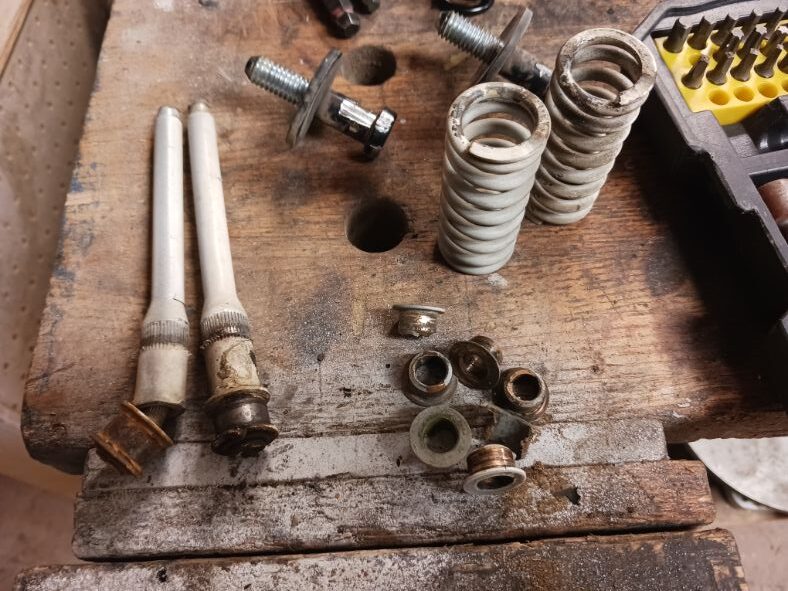
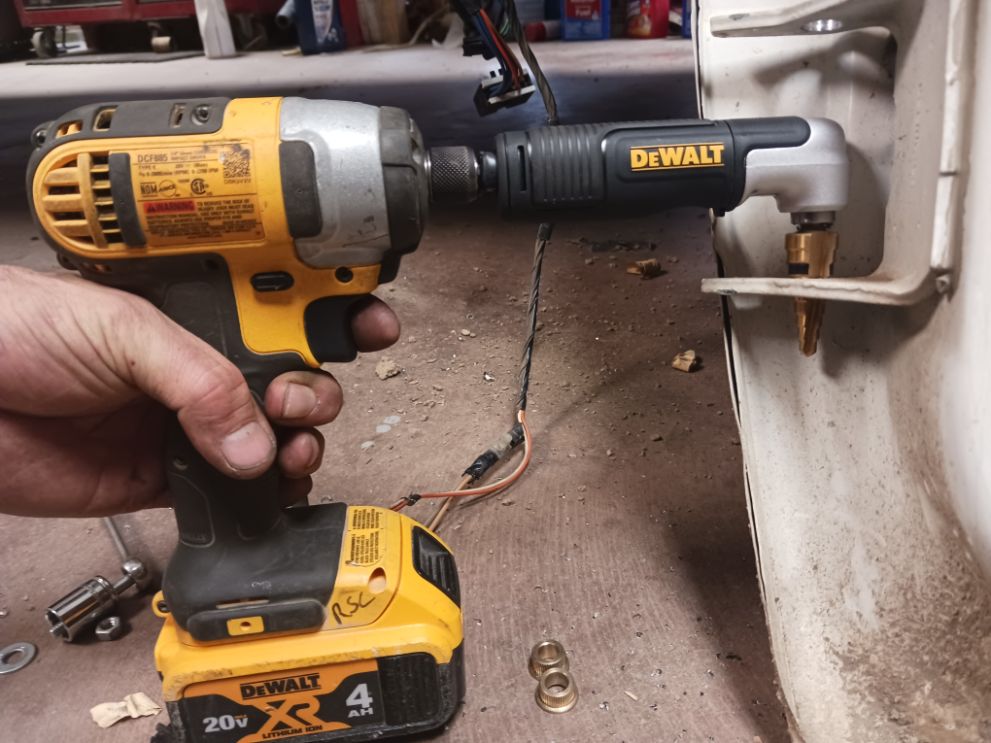
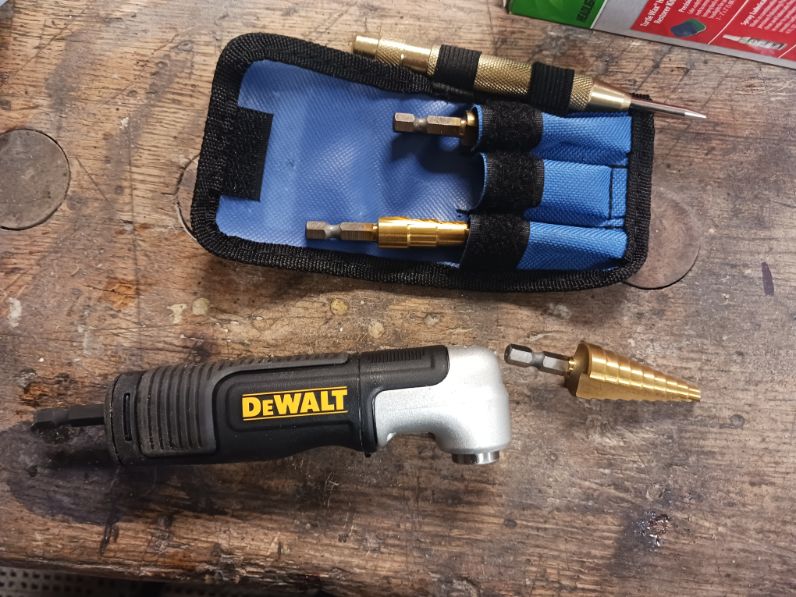

Drilling out the sockets was a little bit of a challenge. I don’t own a 90° drill and didn’t want to buy one just for this, that’s why I hadn’t installed these yet. I tried to borrow one and finding a stubby 9/16 drill bit was not working out but then I though of a step drill and 90° adapter which ended up working out great and cost a lot less than a quality 90° drill.
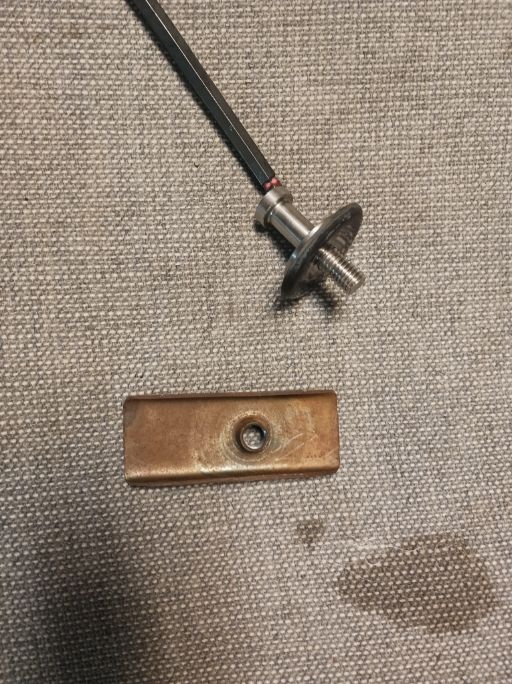
When I replaced the fist door strike I made the mistake of just taking the old one off and watching the inside bracket drop. I had to pull the panel back to access a hole and contort my hand to get it back up in place. On the next one I wised up and popped the electrical boot for the rear door and held the inside bracket till I go the new strike in. I put some lock tight on them just to be safe.
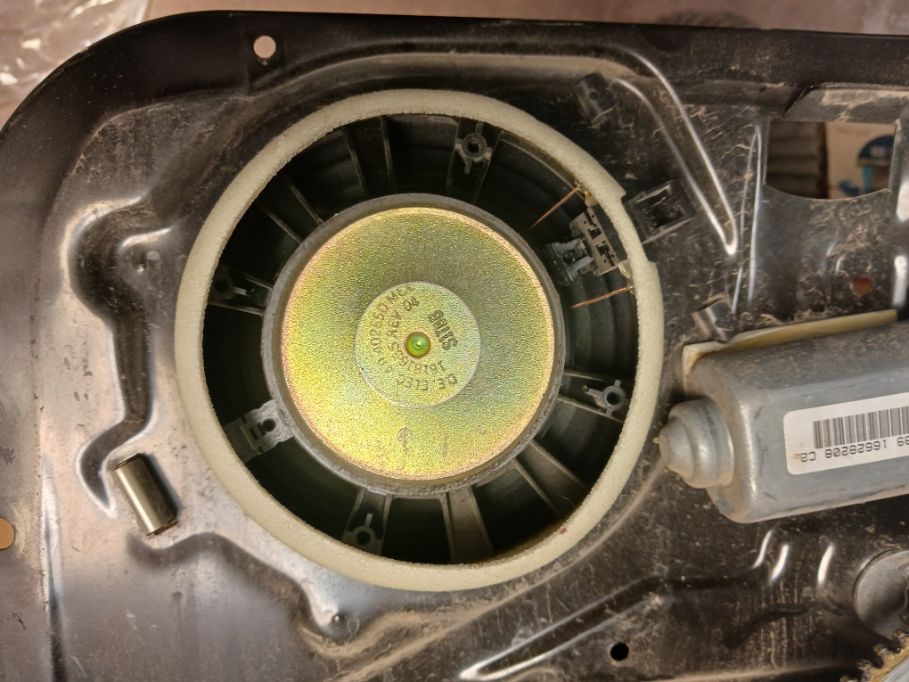
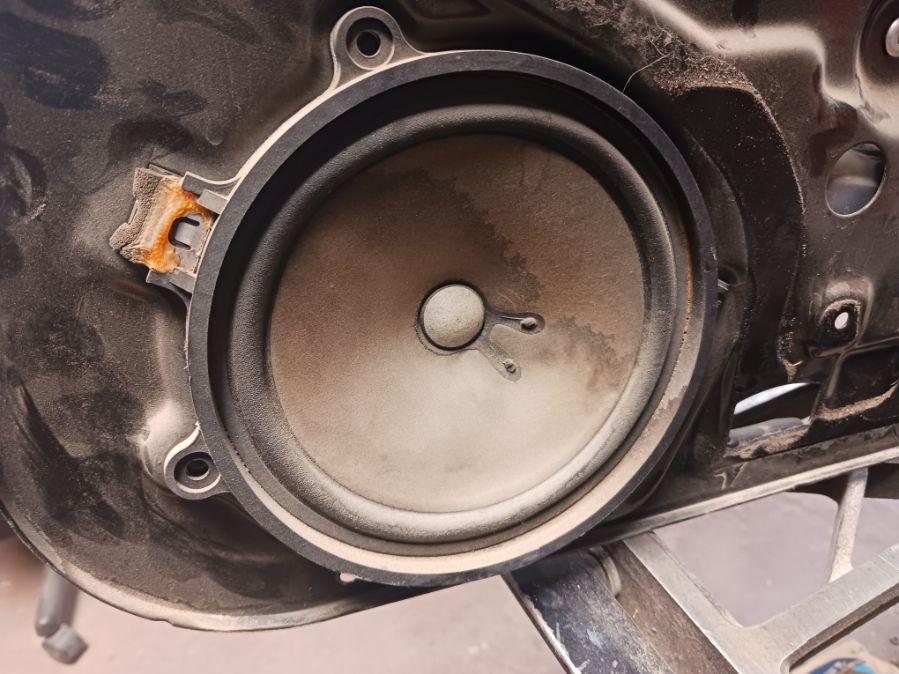
While I had the door all apart, I took the time to lube up the window components, replace the door lock actuators, replace the door speakers and do some general maintenance and tightening of all the door components. The outside driver door handle was loose and causing some issues with the lock and latch mechanism. I was able to tighten up everything and get it working right again. The new door speakers are JBLs that are better than the stock speakers but nothing fancy.

I had bought bushings for all 4 doors but after going through everything I decided not to swap them out on the back doors, they are holding up just fine. I’ll hold on to the bushings incase I need to swap them later. I did go through and lube the window tracks and tighten up anything loose on the back doors though, I also replaced the door lock actuators. I’m pretty stoked on how all the doors and windows are operating now, I’ve been needing to do this for a while.
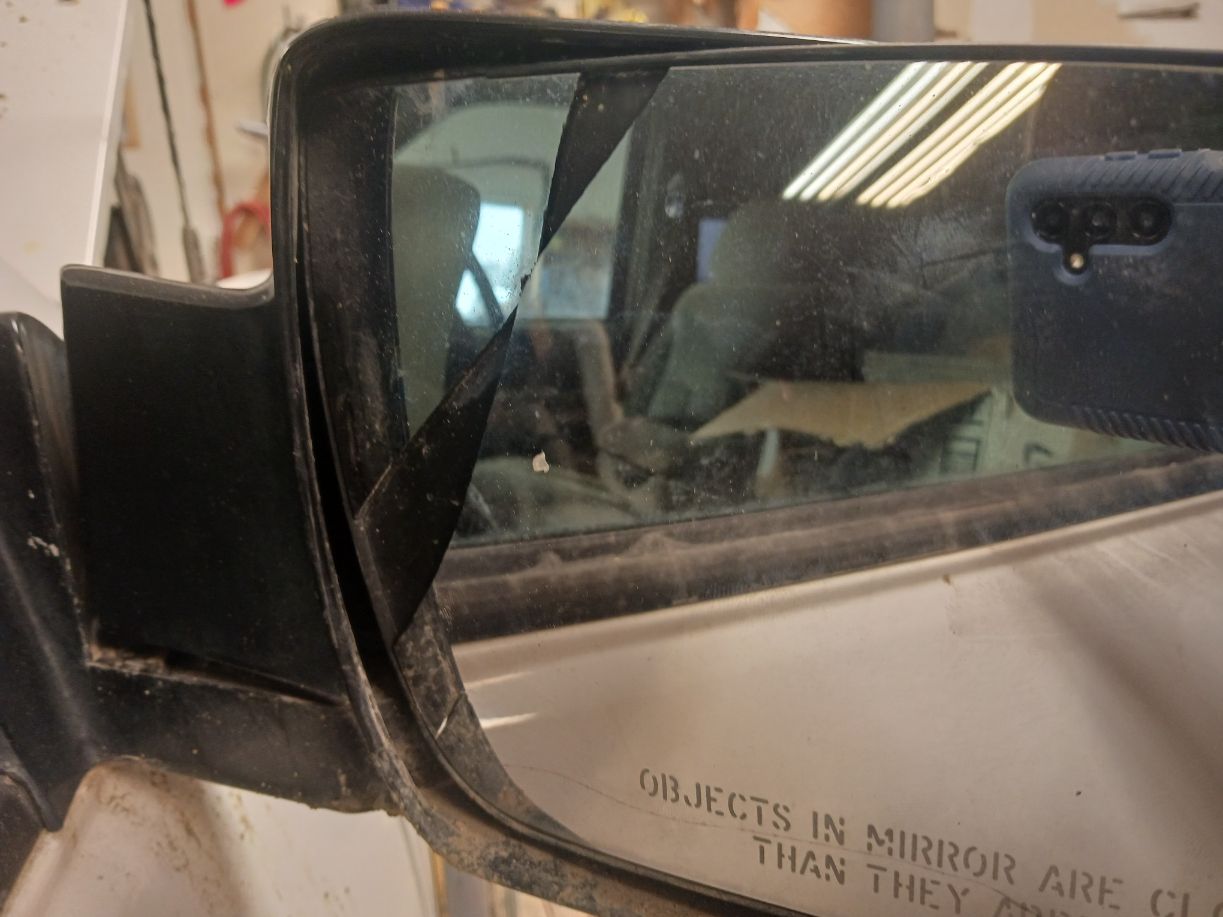
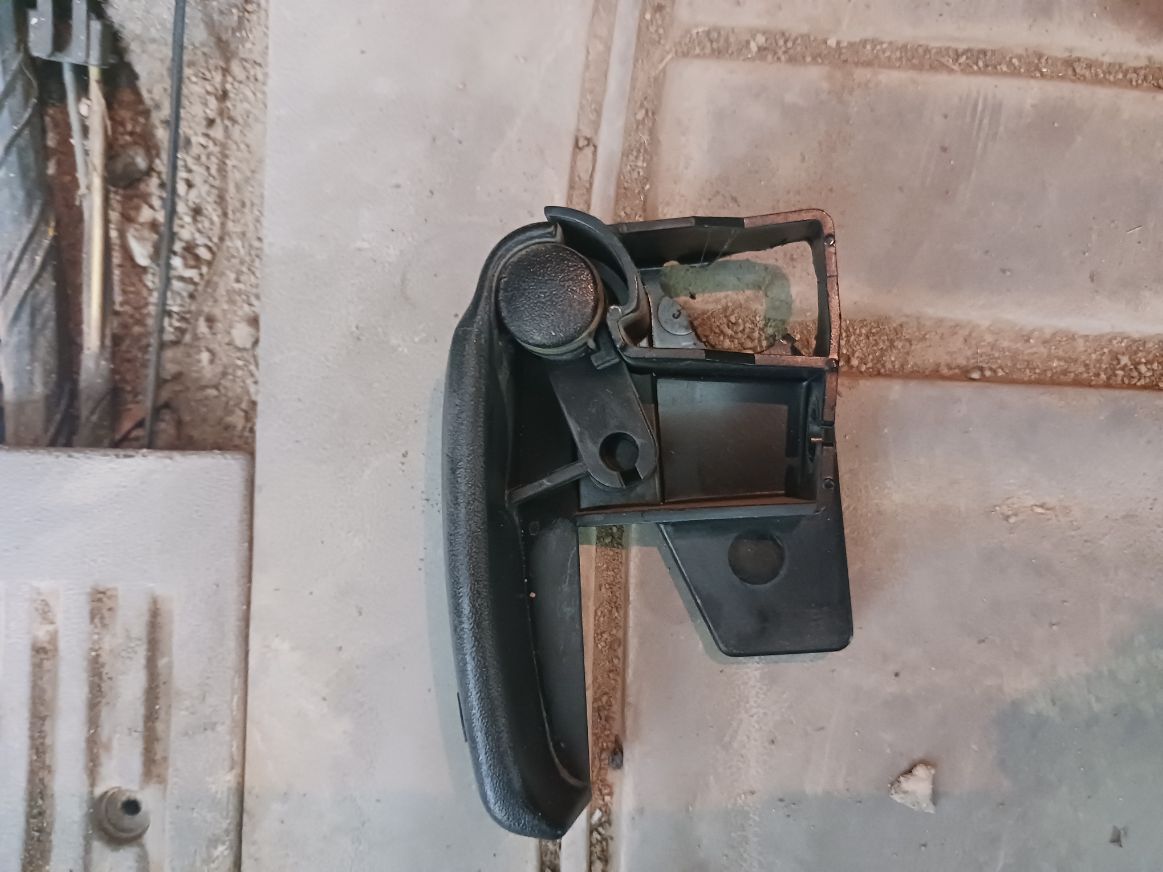
Stock mirrors on these trucks are nice and sleek but with the camper and trailer they left a lot to be desired. I really could not see past the trailer to know what was going on behind me and the glass is small making it less convenient or even practical for my purposes. I’ve wanted the tow mirrors for a while now but needed to tag a tree and crack one of my stock mirrors to motivate me to pull the trigger. I got the tow mirrors from Amazon and spent a decent amount on them so the quality is pretty good. That said there are some quarks that make me a little less than completely satisfied but I’m not disappointed either.
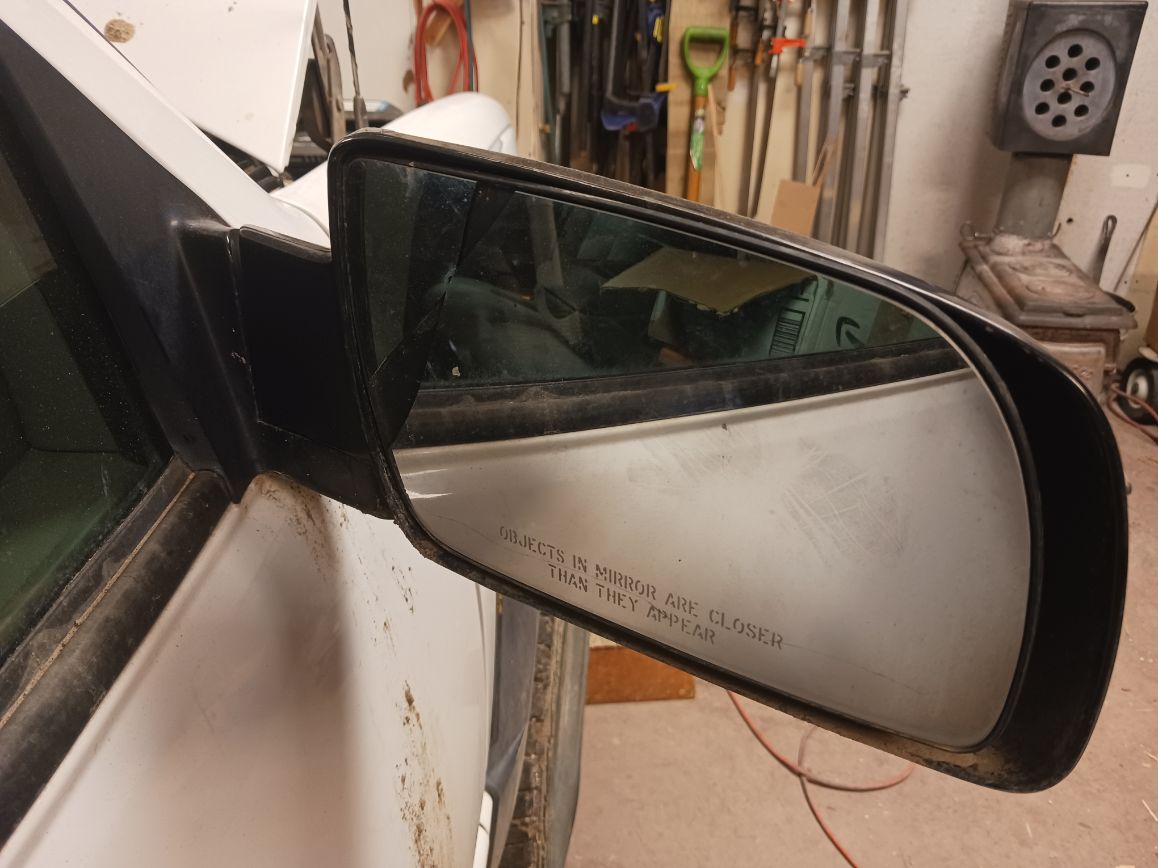
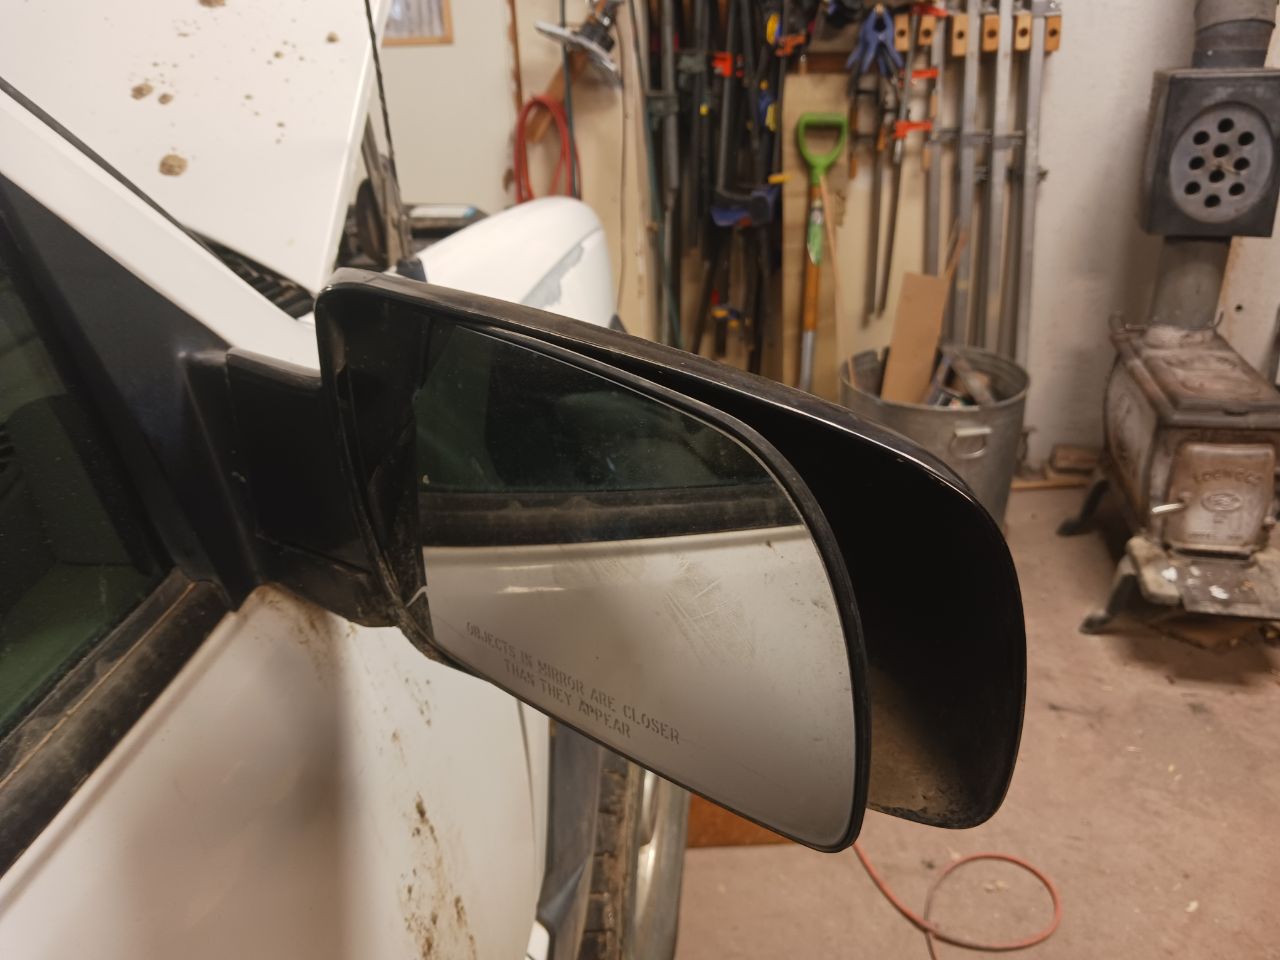
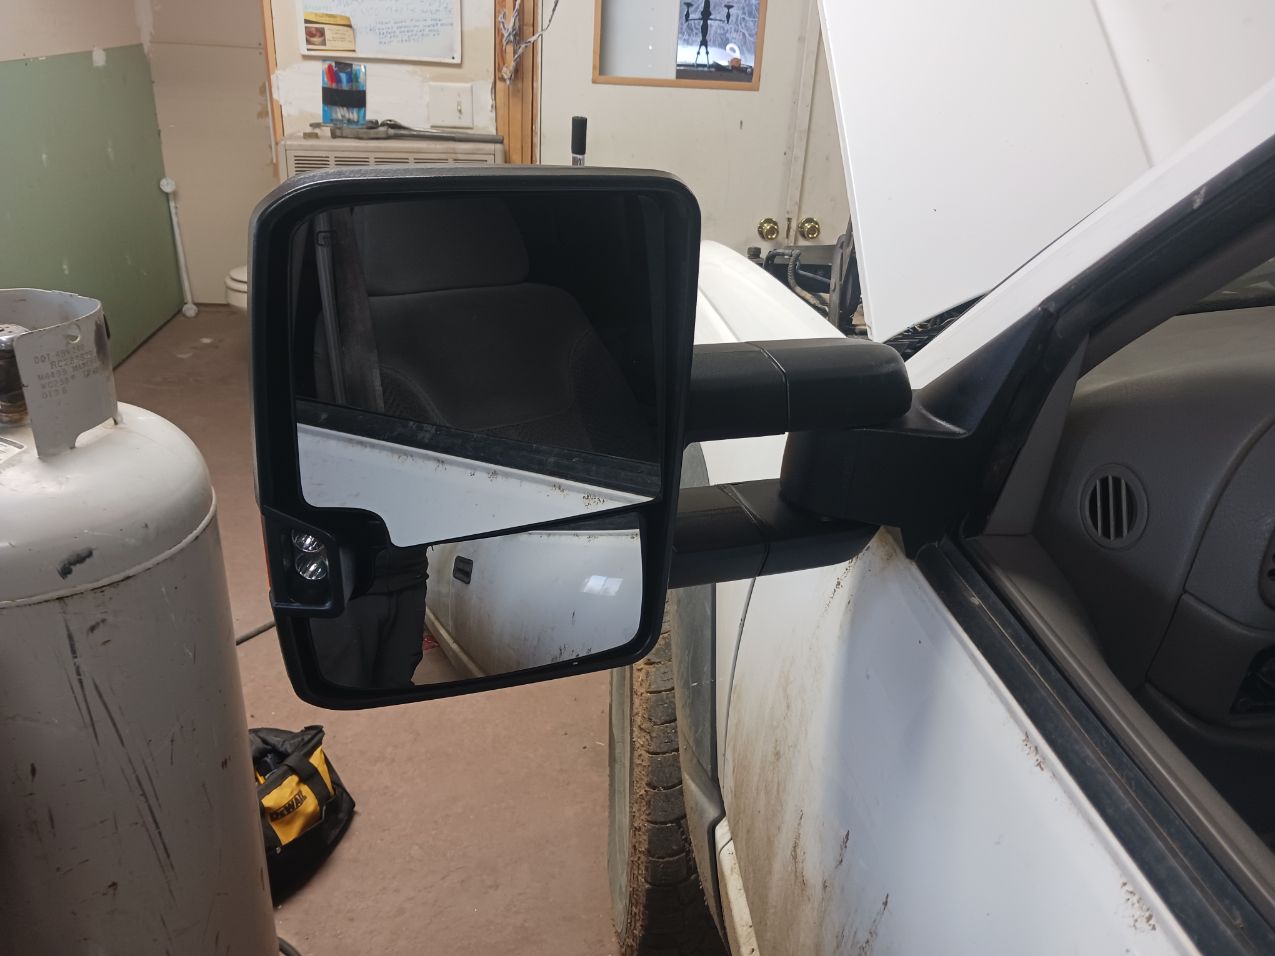
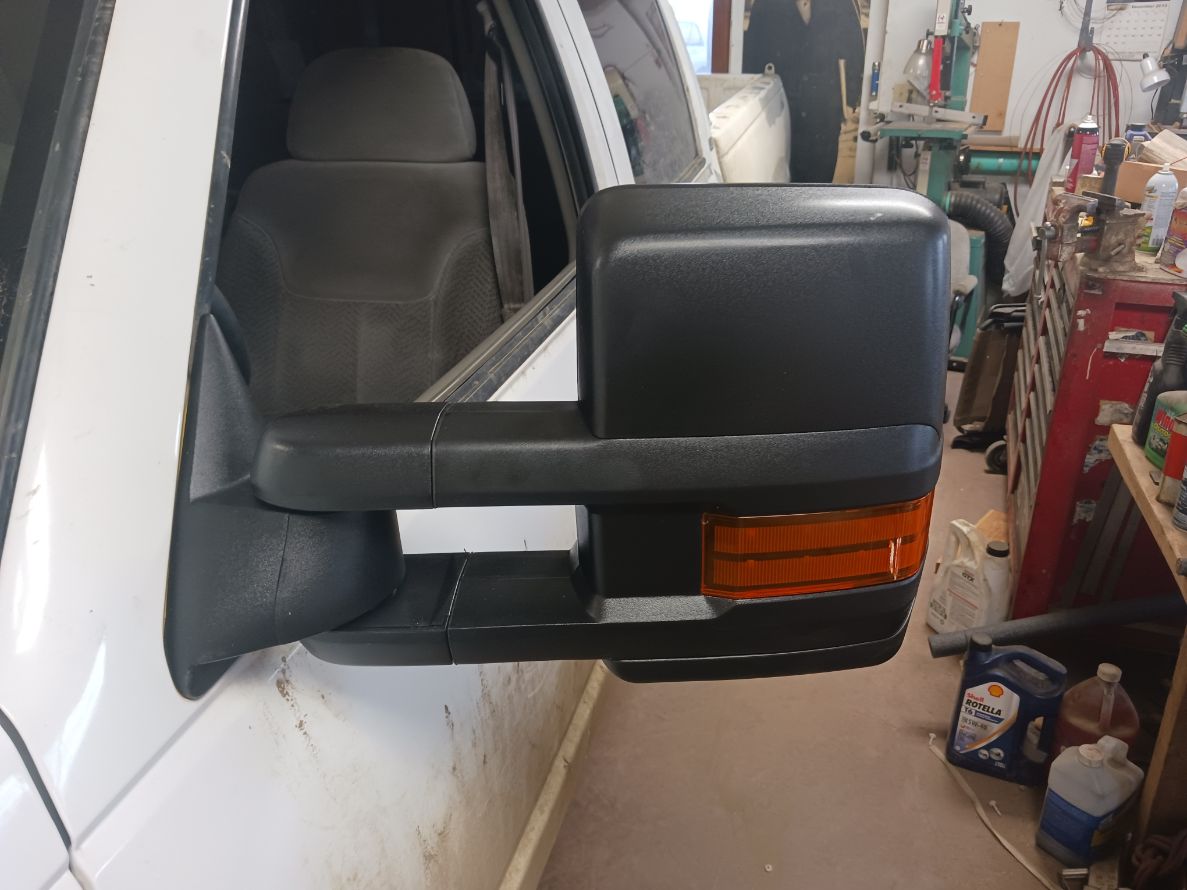
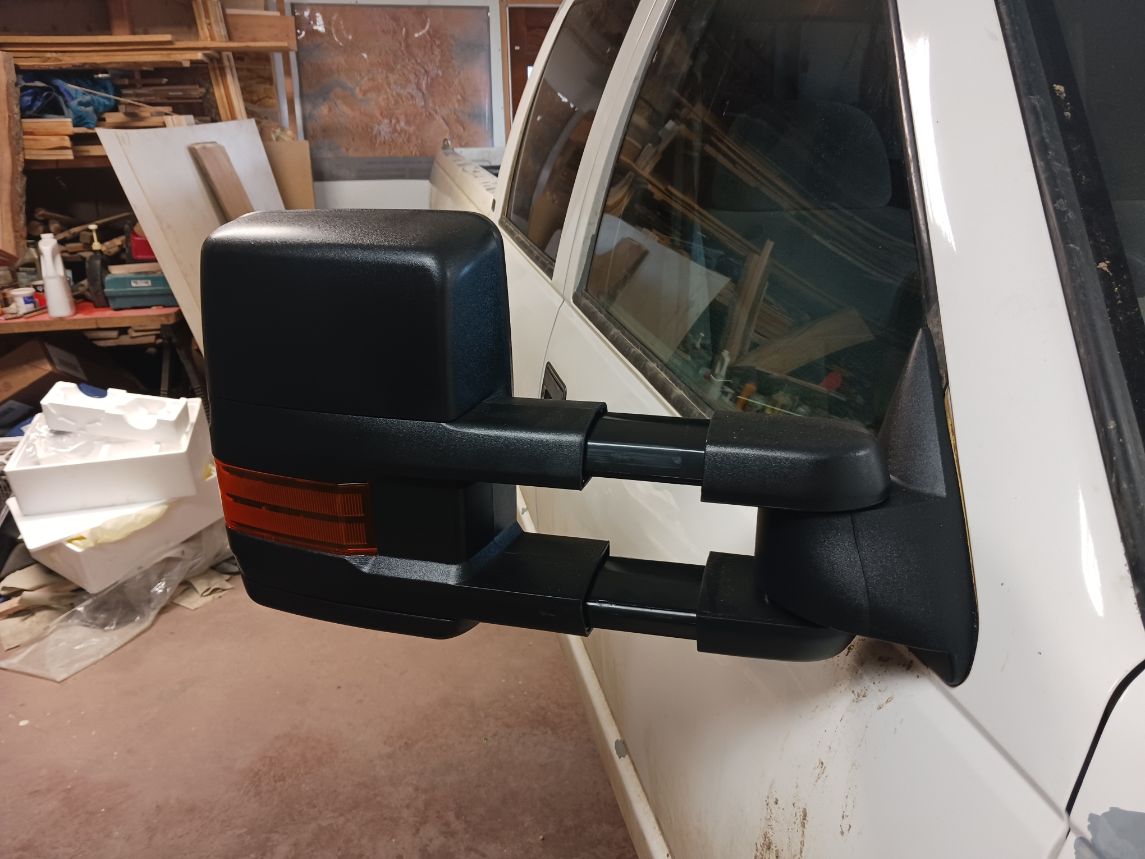
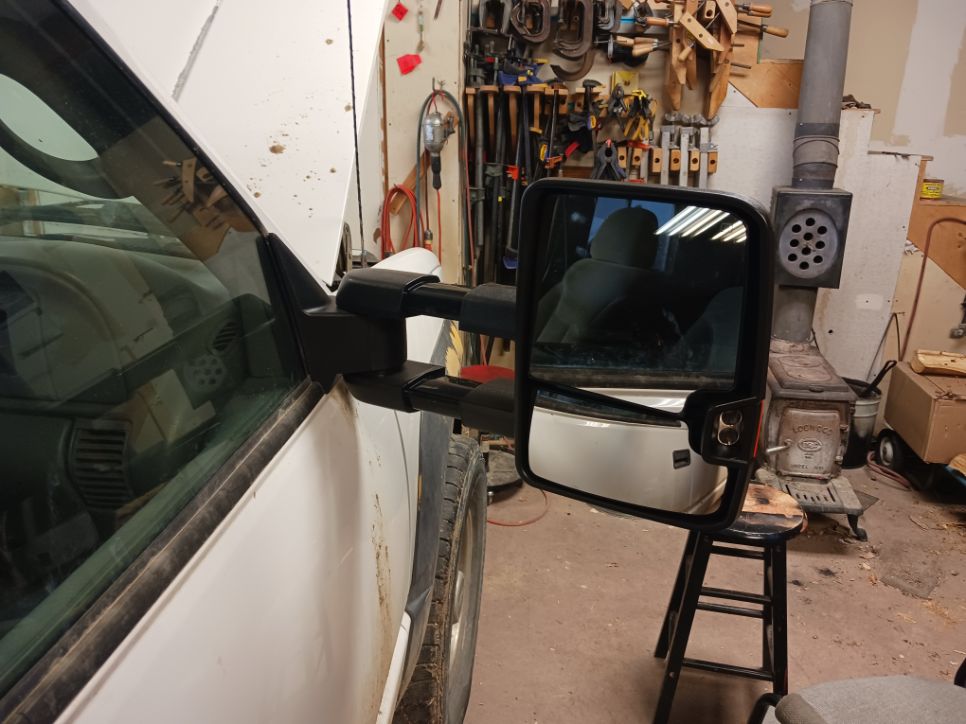
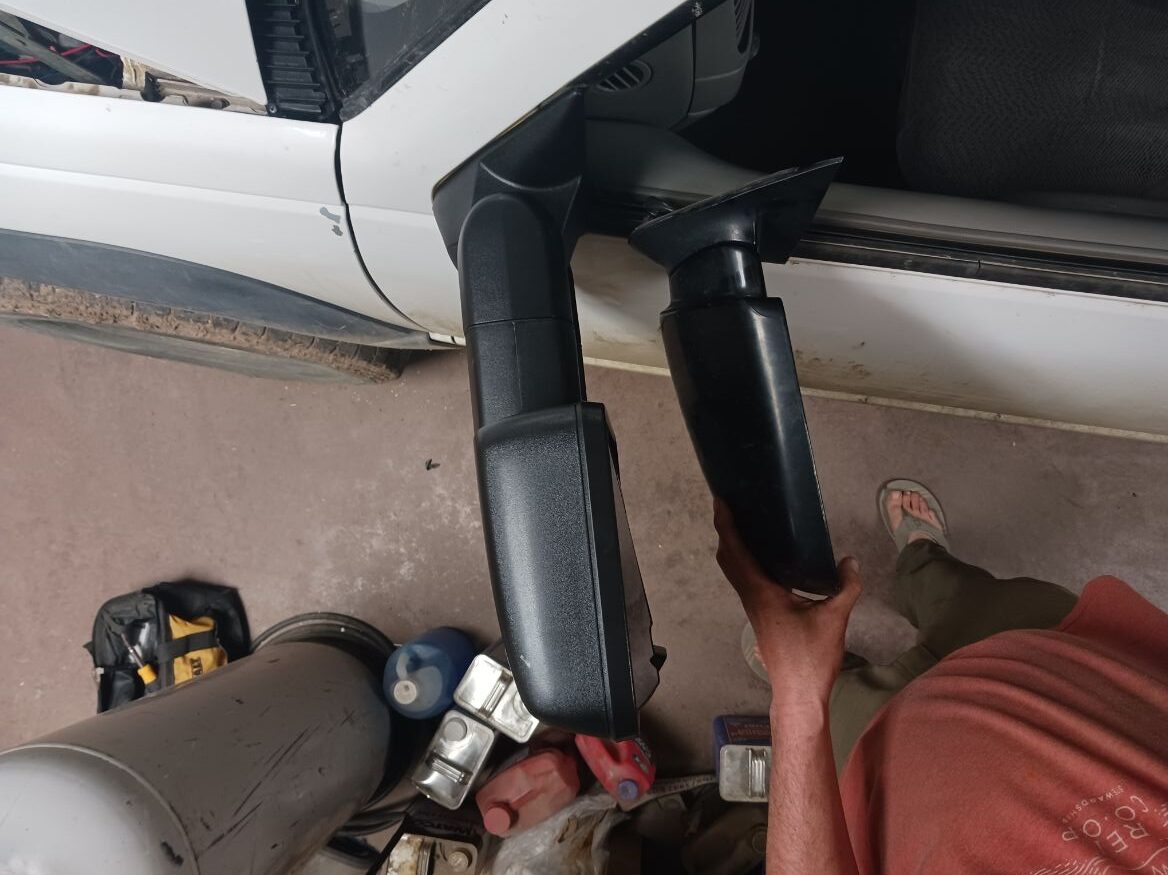
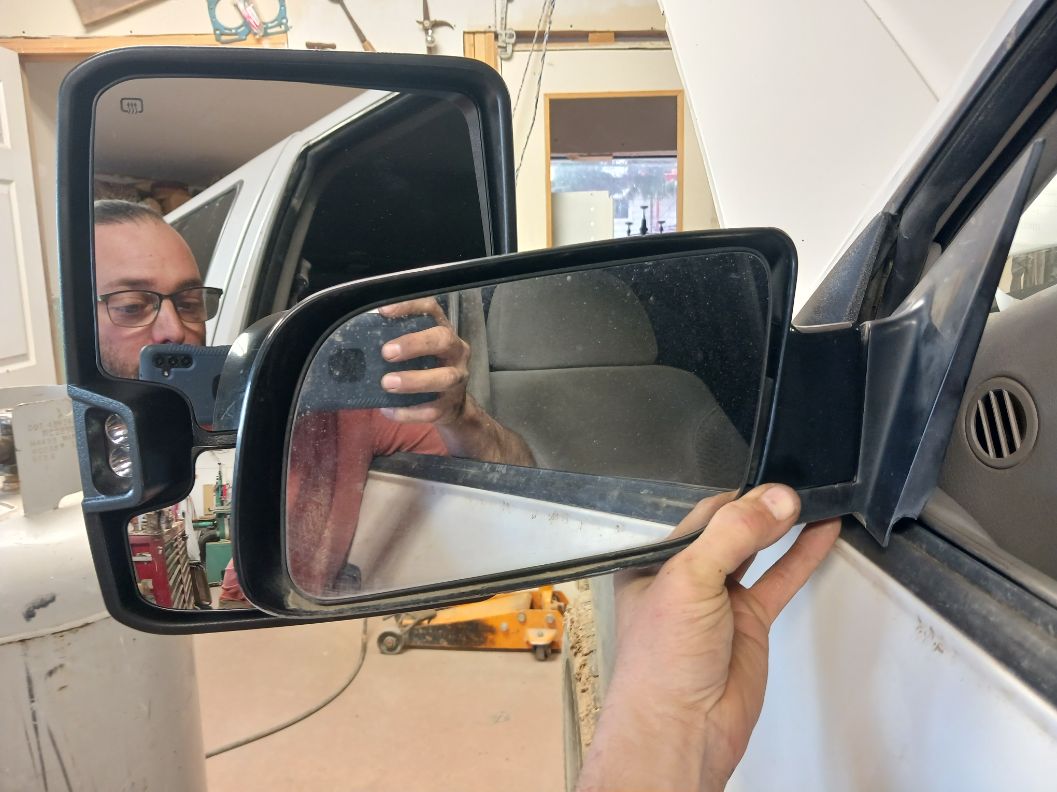
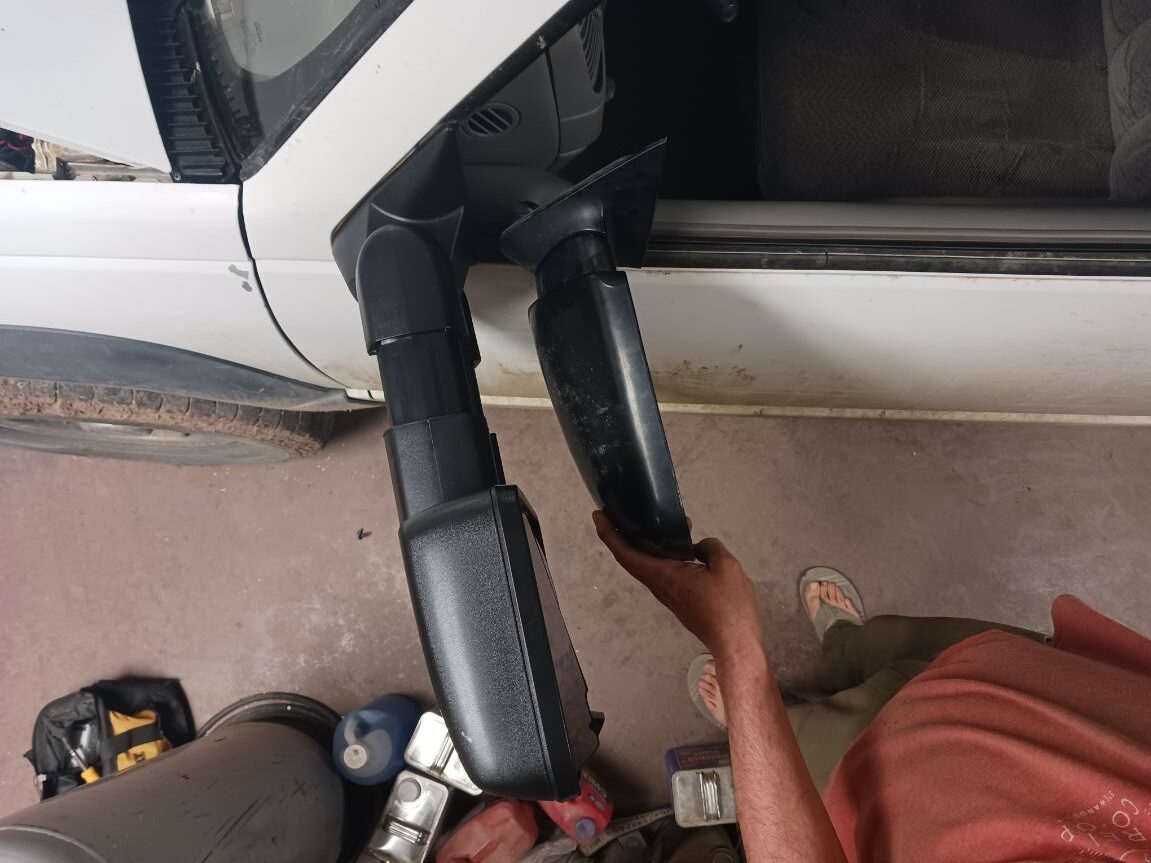

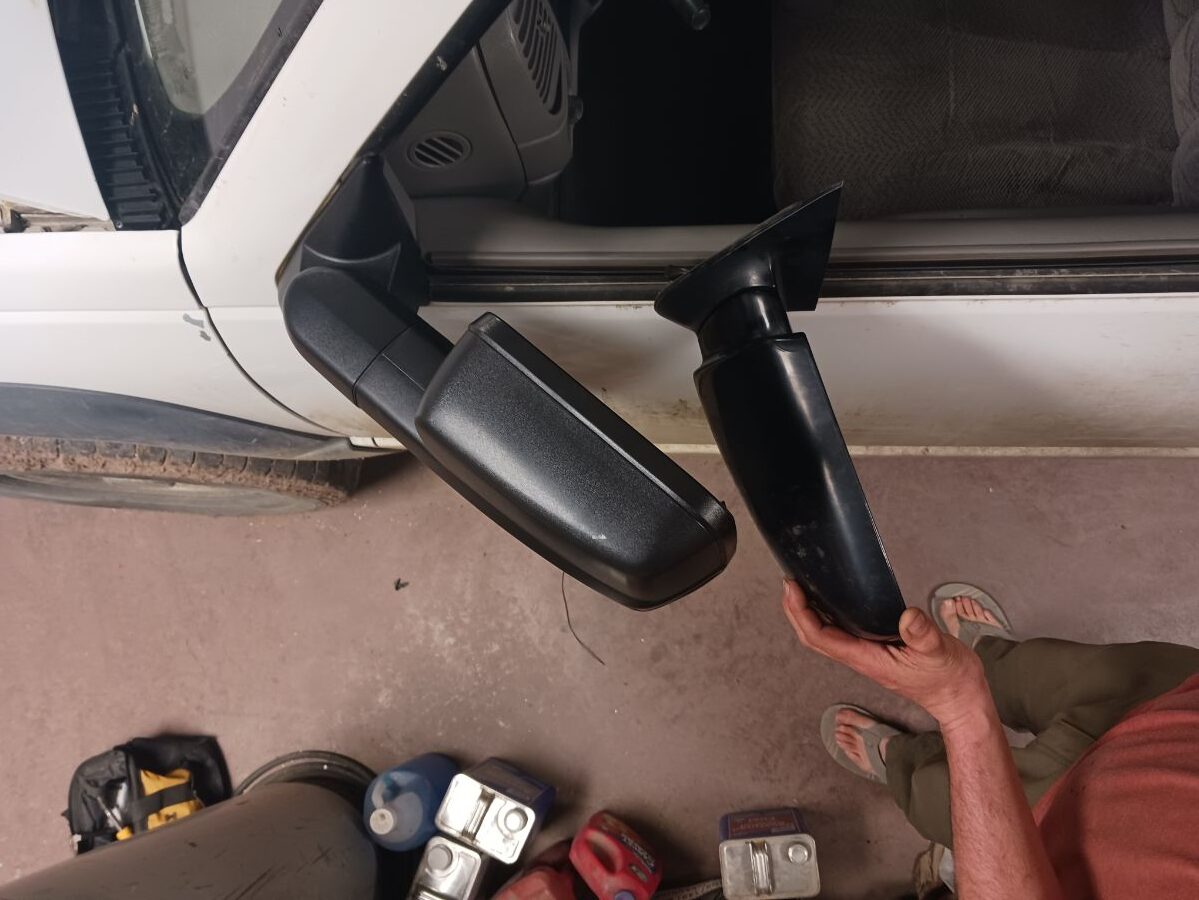

The new tow mirrors have over twice the amount of glass just in the upper part but then add a convex lower that helps see more of what is around you. They also extend out and give you a wider angle for seeing behind you. They also have some safety features that are standard on most modern mirrors like blinkers and back up lights and they even have a defrost. Without being extended they stick out several inches past the stock mirrors already and then they can extend several more. One minor complaint I do have is when they fold in to protect them, they don’t fold in very far, they stick out as far as the stock mirrors did not folded in. There is plenty of room for them to swing more but the manufacture appears to have put a stop in too far out for them to fold all the way in.
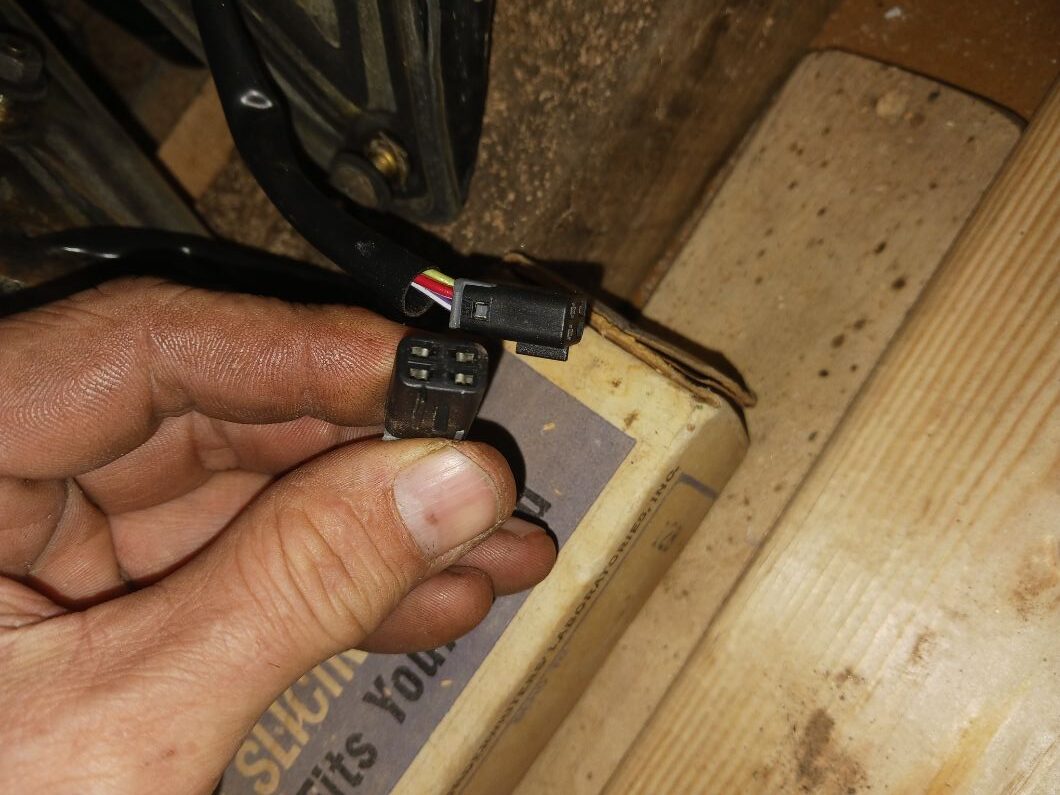
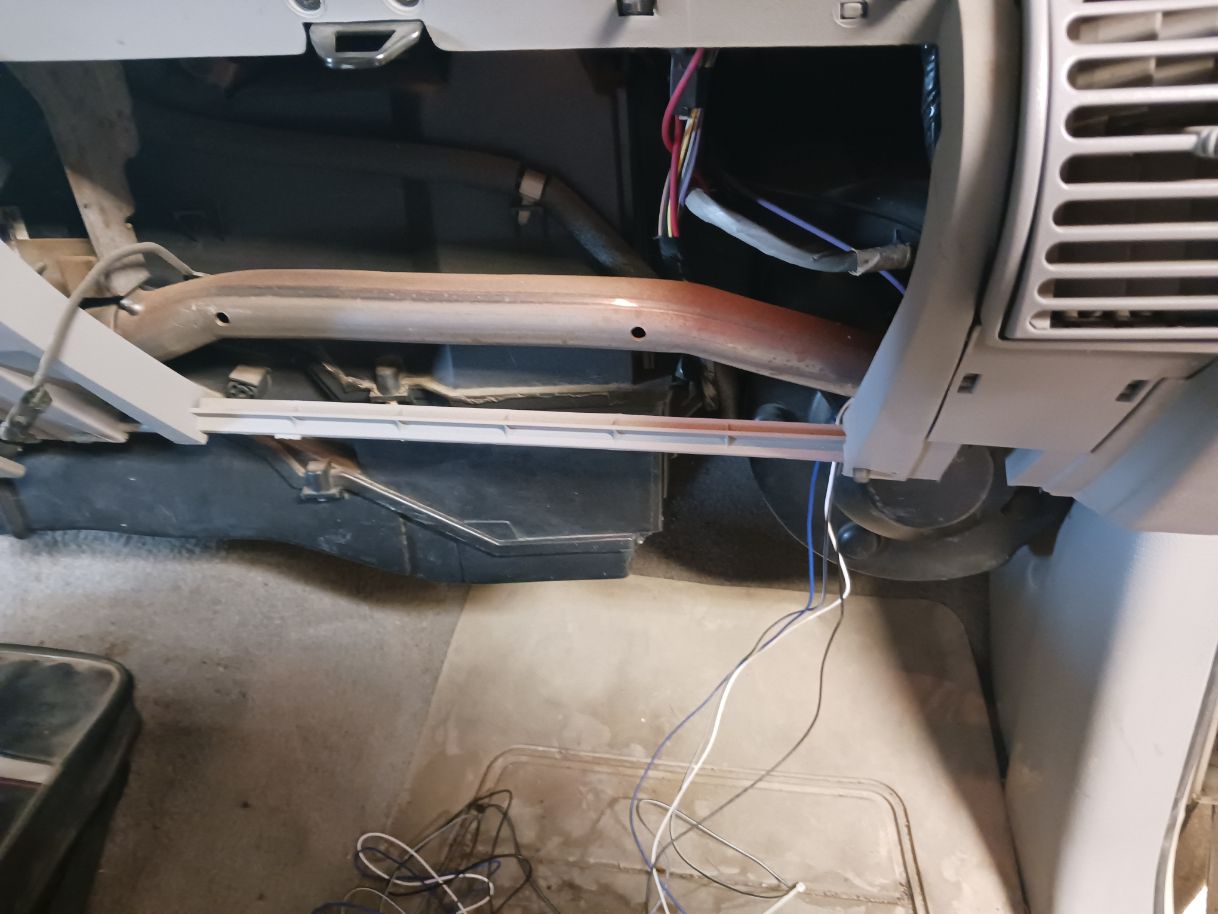
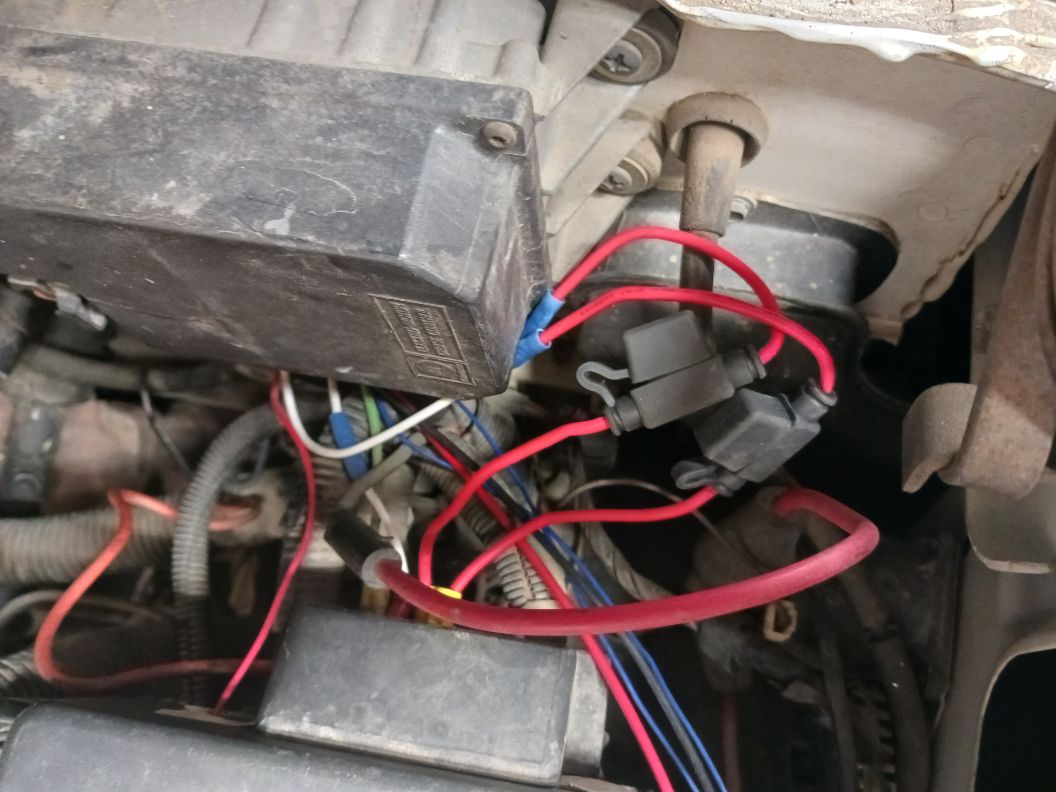
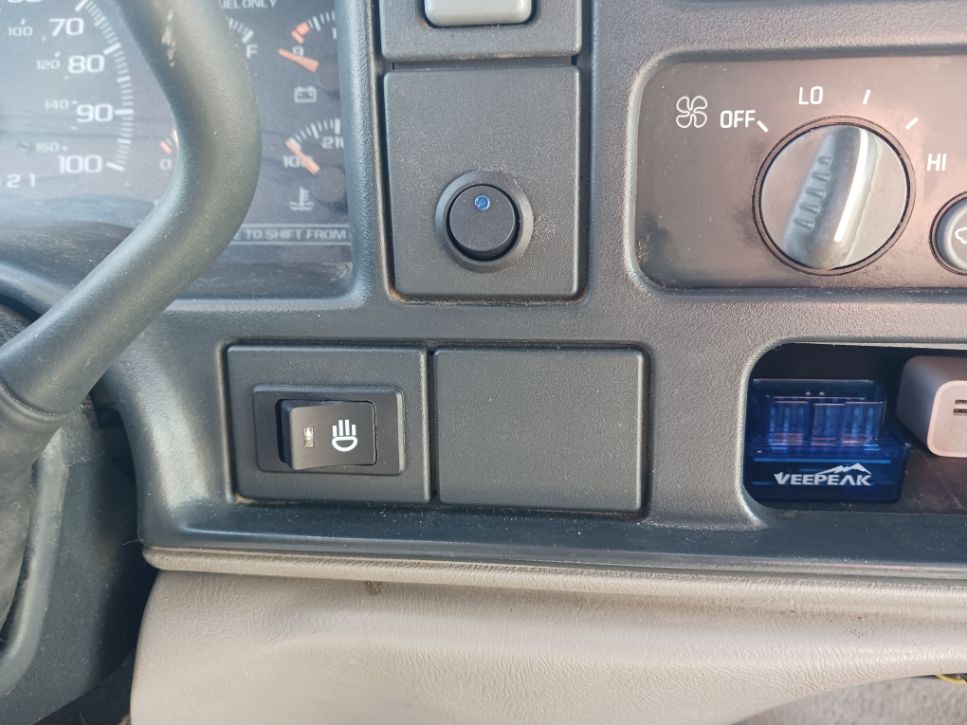
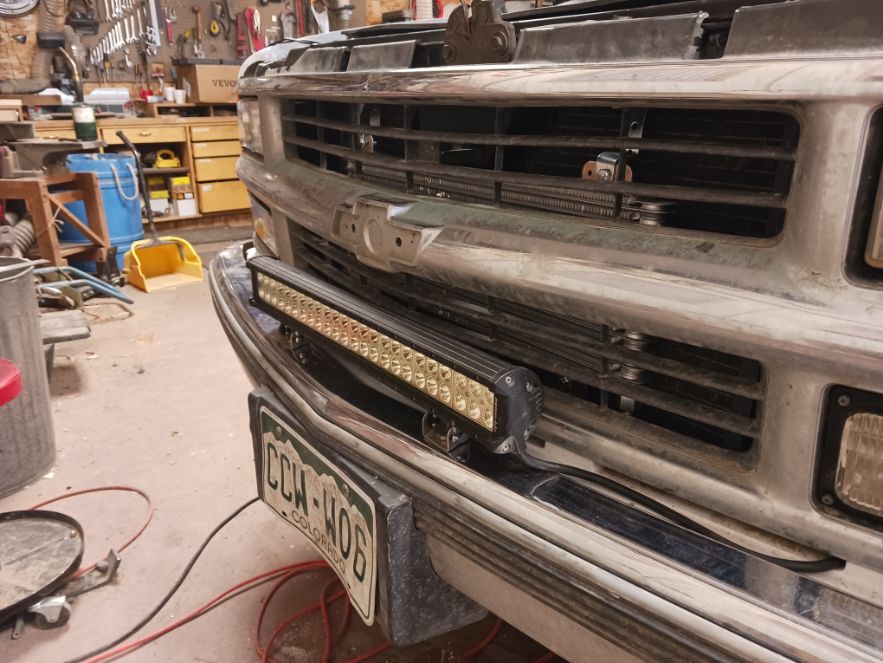
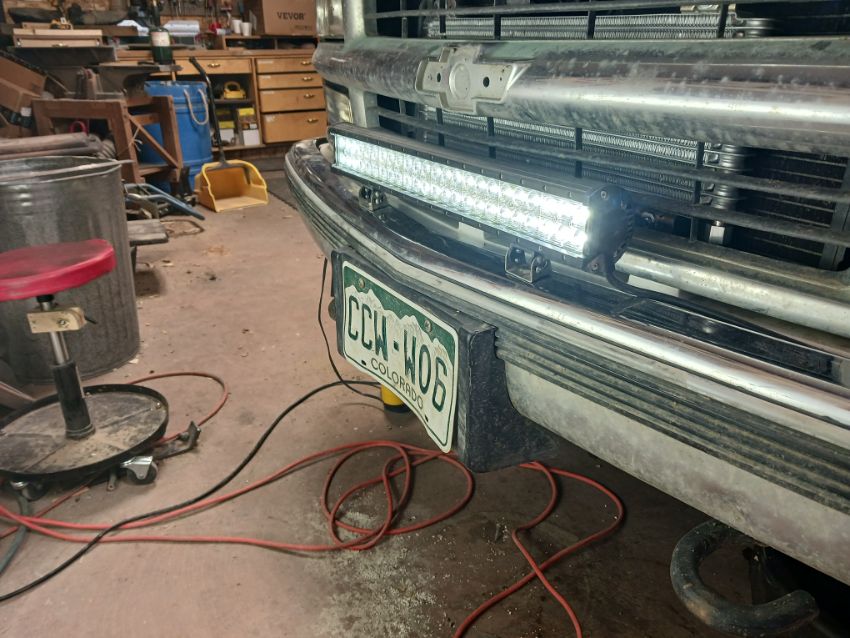
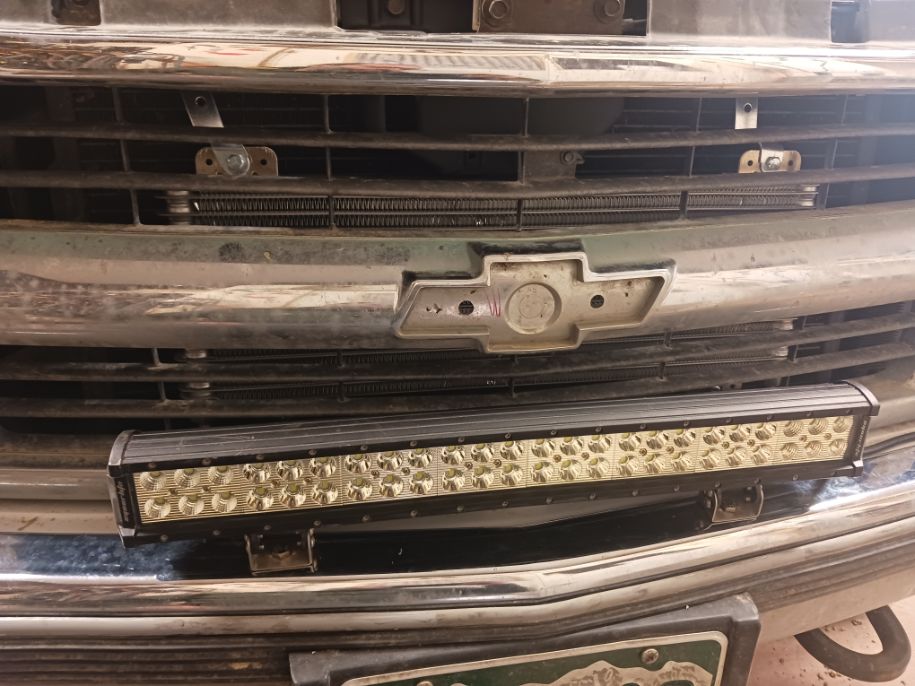
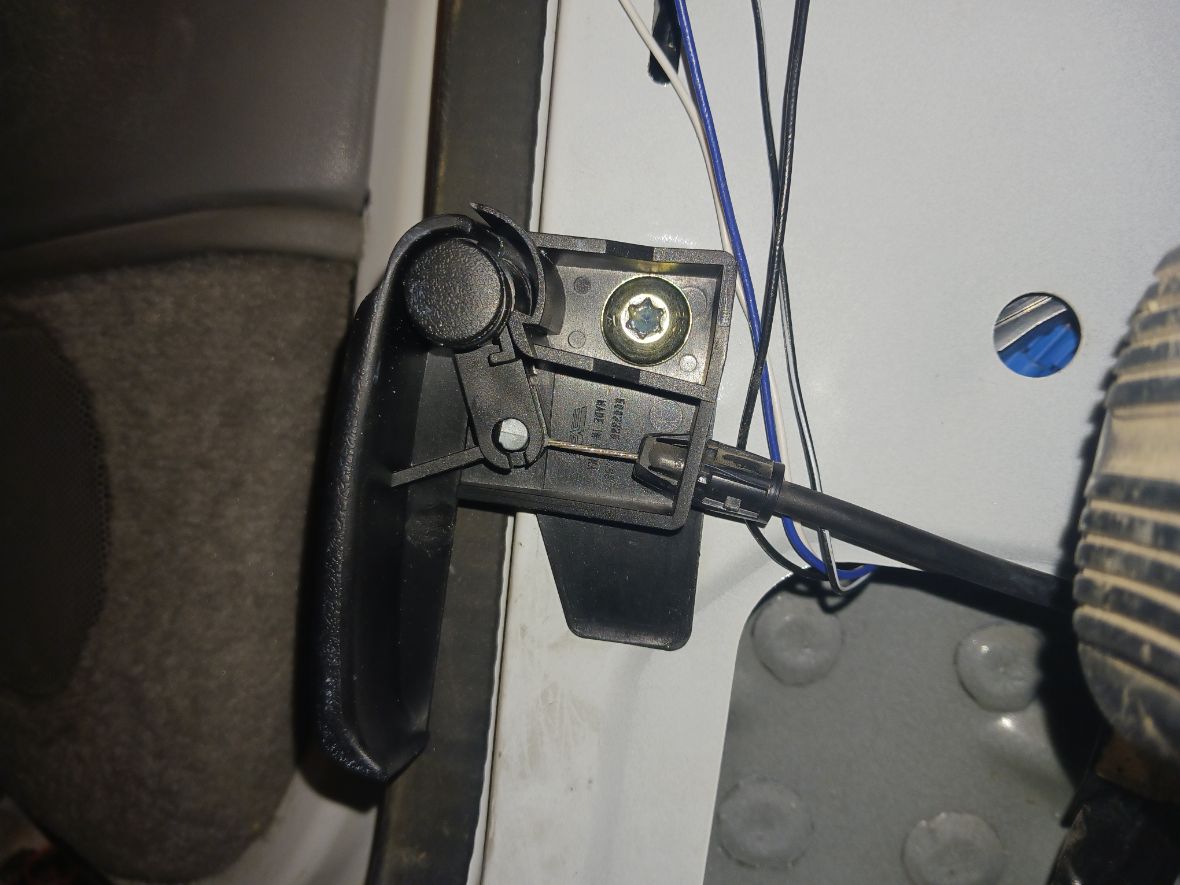
Wiring these in is pretty simple, the motor controls for adjustment are supposed to be plug and play but unfortunately mine were wired backwards so left and right on both sides are opposite. It’s annoying but not enough to rewire or return the mirrors. My stock mirrors didn’t have any lights or heat so that all had to be wired. I found a couple of videos (here and here) that helped me figure out where to hook the wires for the lights. For the heat I had to wire in a switch on the dash and while I was at it, I finally wired in the LED bar light I bought for my old Tacoma and never hooked up. I got two in line fuses and wired them to the auxiliary studs on the fuse/relay box under the hood and wired them into each of the switches. I was going to wire the bar light through a relay but it is only 144w, so 12amp, which really isn’t worth the extra steps. If I decide to add more lights later I’ll rewire it through the relay.
Reverse
Just before Christmas reverse gave out on me. Looking back on it, it was a slow process, and when it finally gave out, I was backing my trailer into a spot to park it. As I was backing in, I needed to pull forward to reset, and when I shifted back into reverse it didn’t work. It started a few months before that, when I put it in reverse it would take a few seconds to engage, as if it had to build pressure. Manually downshifting into 3rd was still working but like before I rebuilt the tranny manual 1st and 2nd stopped working. When in Drive, all forward gears were working fine and other than reverse and the leak, that I still need to track down, the transmission was operating like normal.
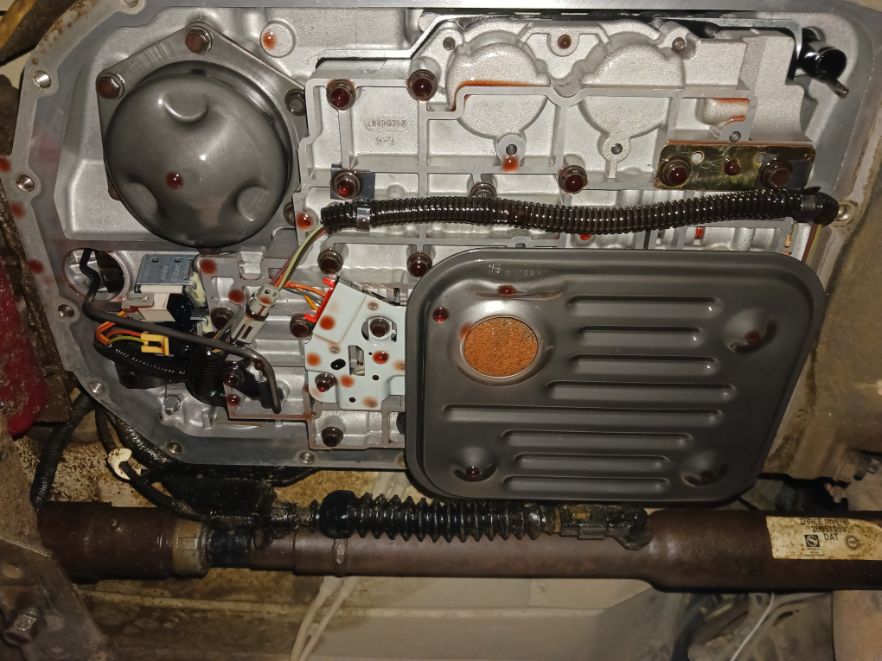
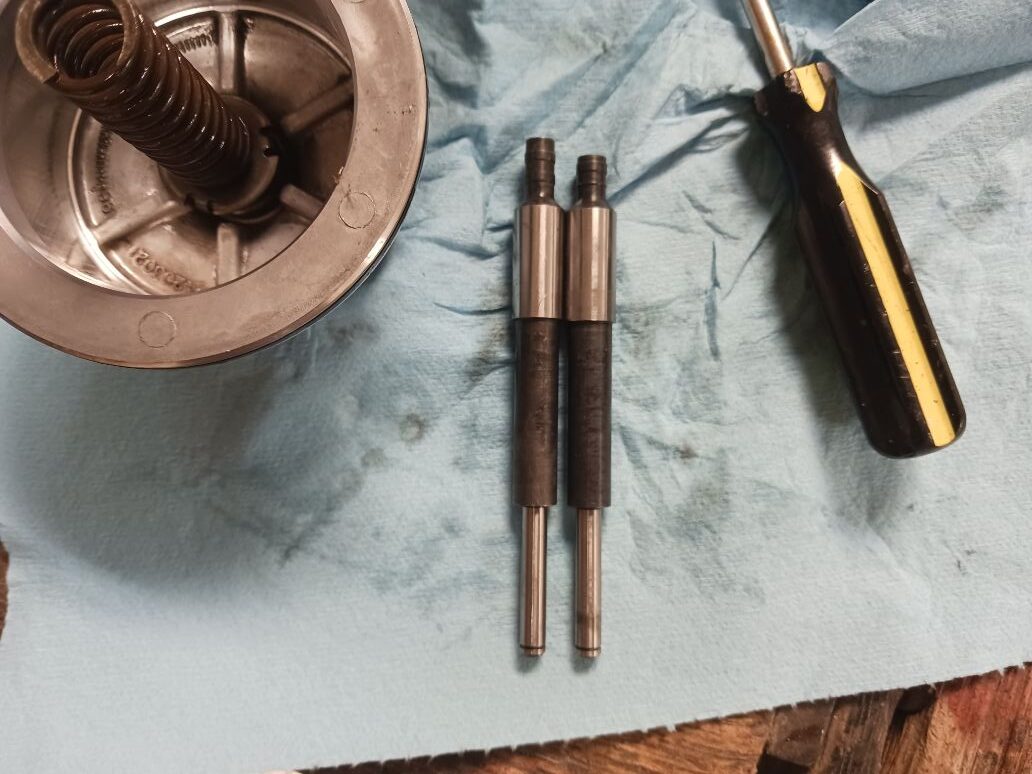
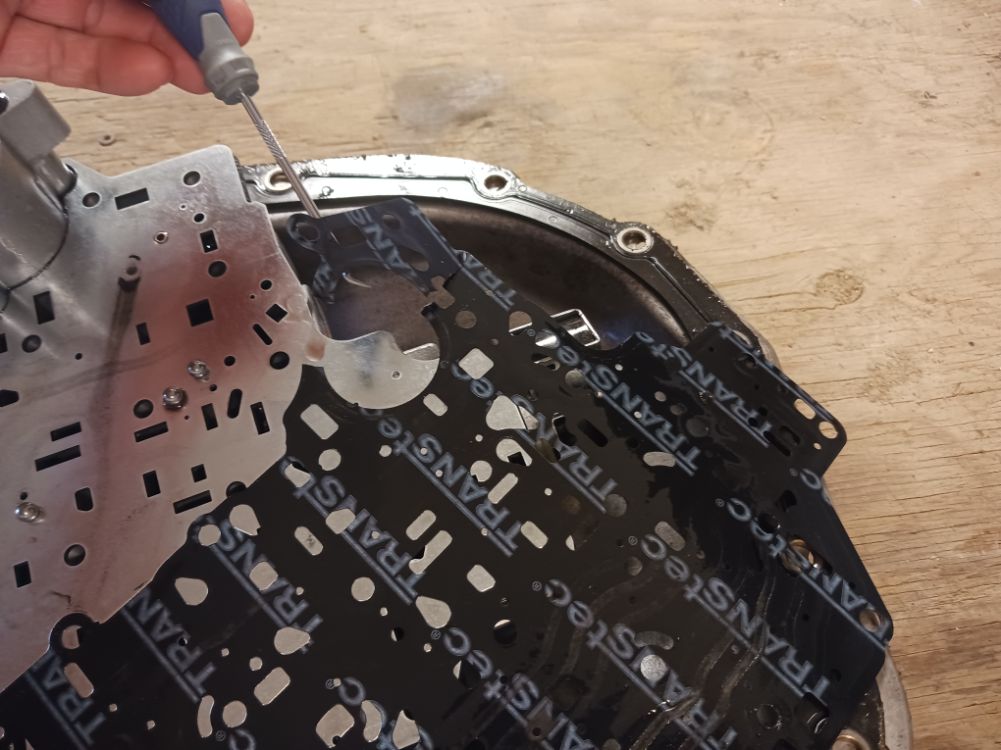
Apparently, reverse going out is a common issue with the 4L80E. It seems to be its Achilles Heel in an otherwise reliable transmission. I found multiple forum posts talking about issues with reverse and I even found this page put out by Sonnax to help people trouble shoot. When I pulled the reverse servo piston out and compared it to the new one it was pretty obvious that it was warn short and that this was most likely my issue. I watched a few videos on fixing this issue with some people welding on the end to add material, some people adding a cap to the end, it was even suggested that I take the e-clip off and put a washer in the end of the cap to space it more but really the new longer rod was only $25 and it made more sense to me to just drop a longer rod in.
Unfortunately, when I was taking it apart I tore the valve body gasket and this meant waiting till Monday to get a new one so I could put it back together, I took it apart on a Saturday. After getting the new gasket I got it back together and reverse now works. Unfortunatally, this didn’t fix my manual downshift issue so I may have yet another fix in my future.
Tune Up
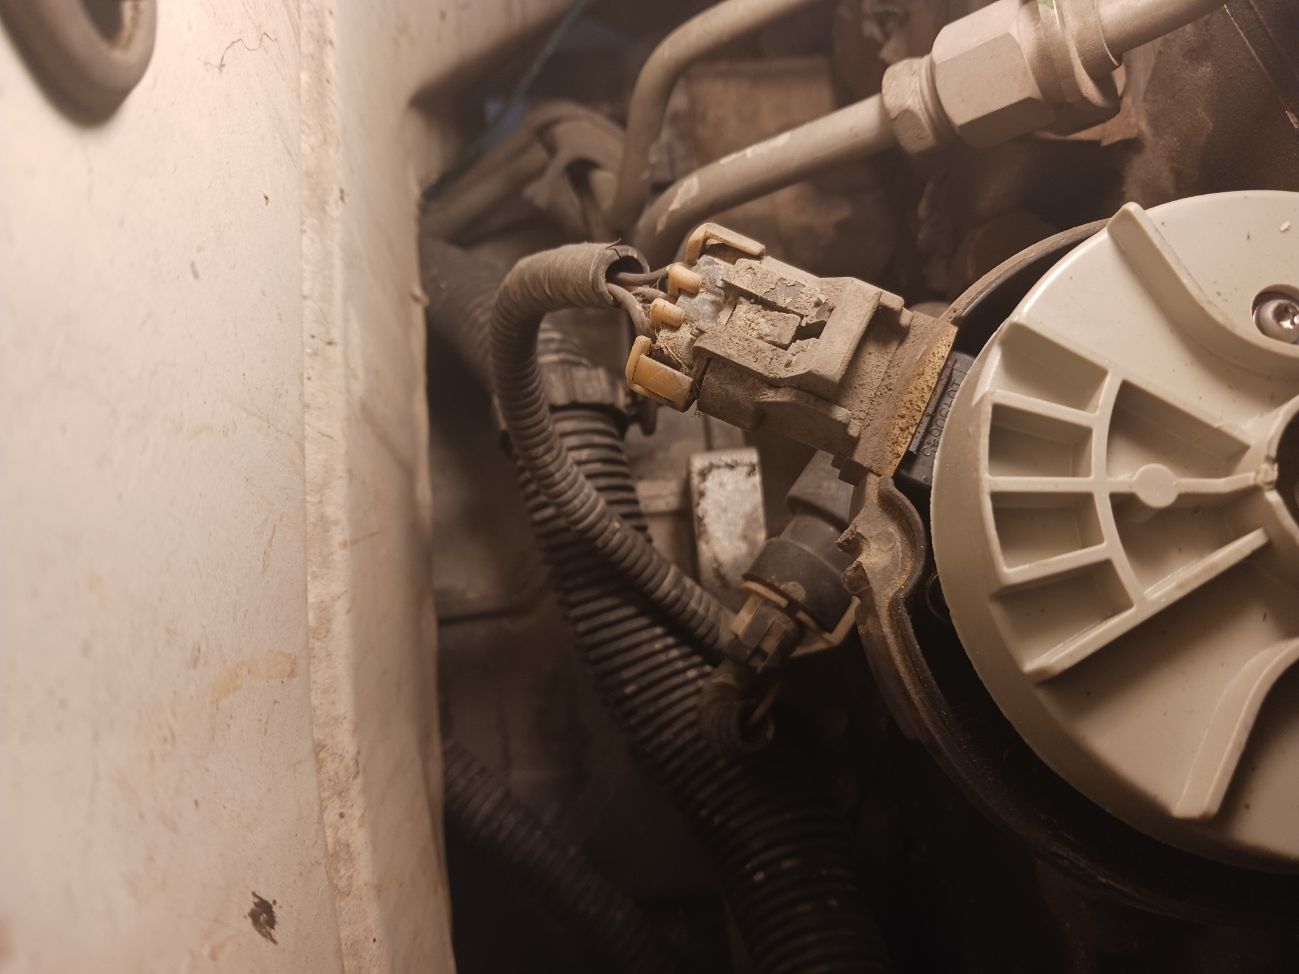
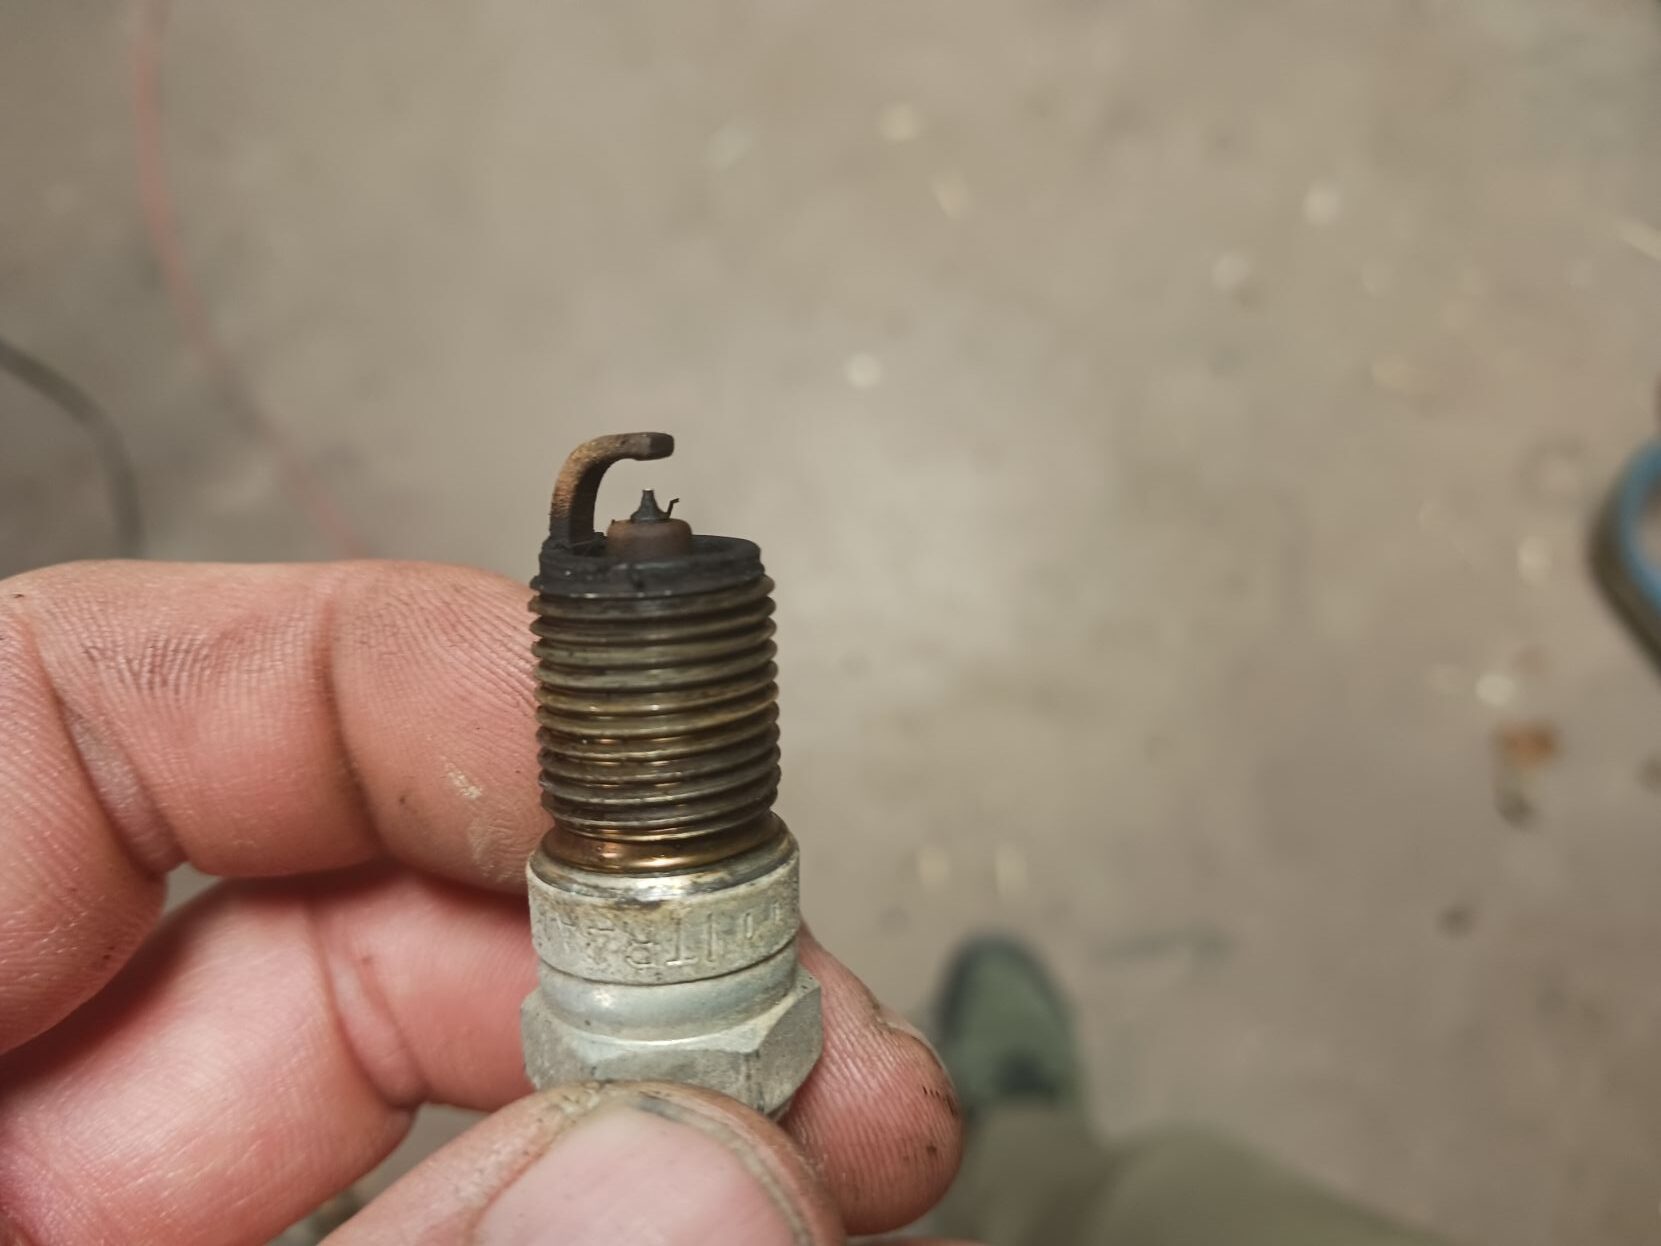
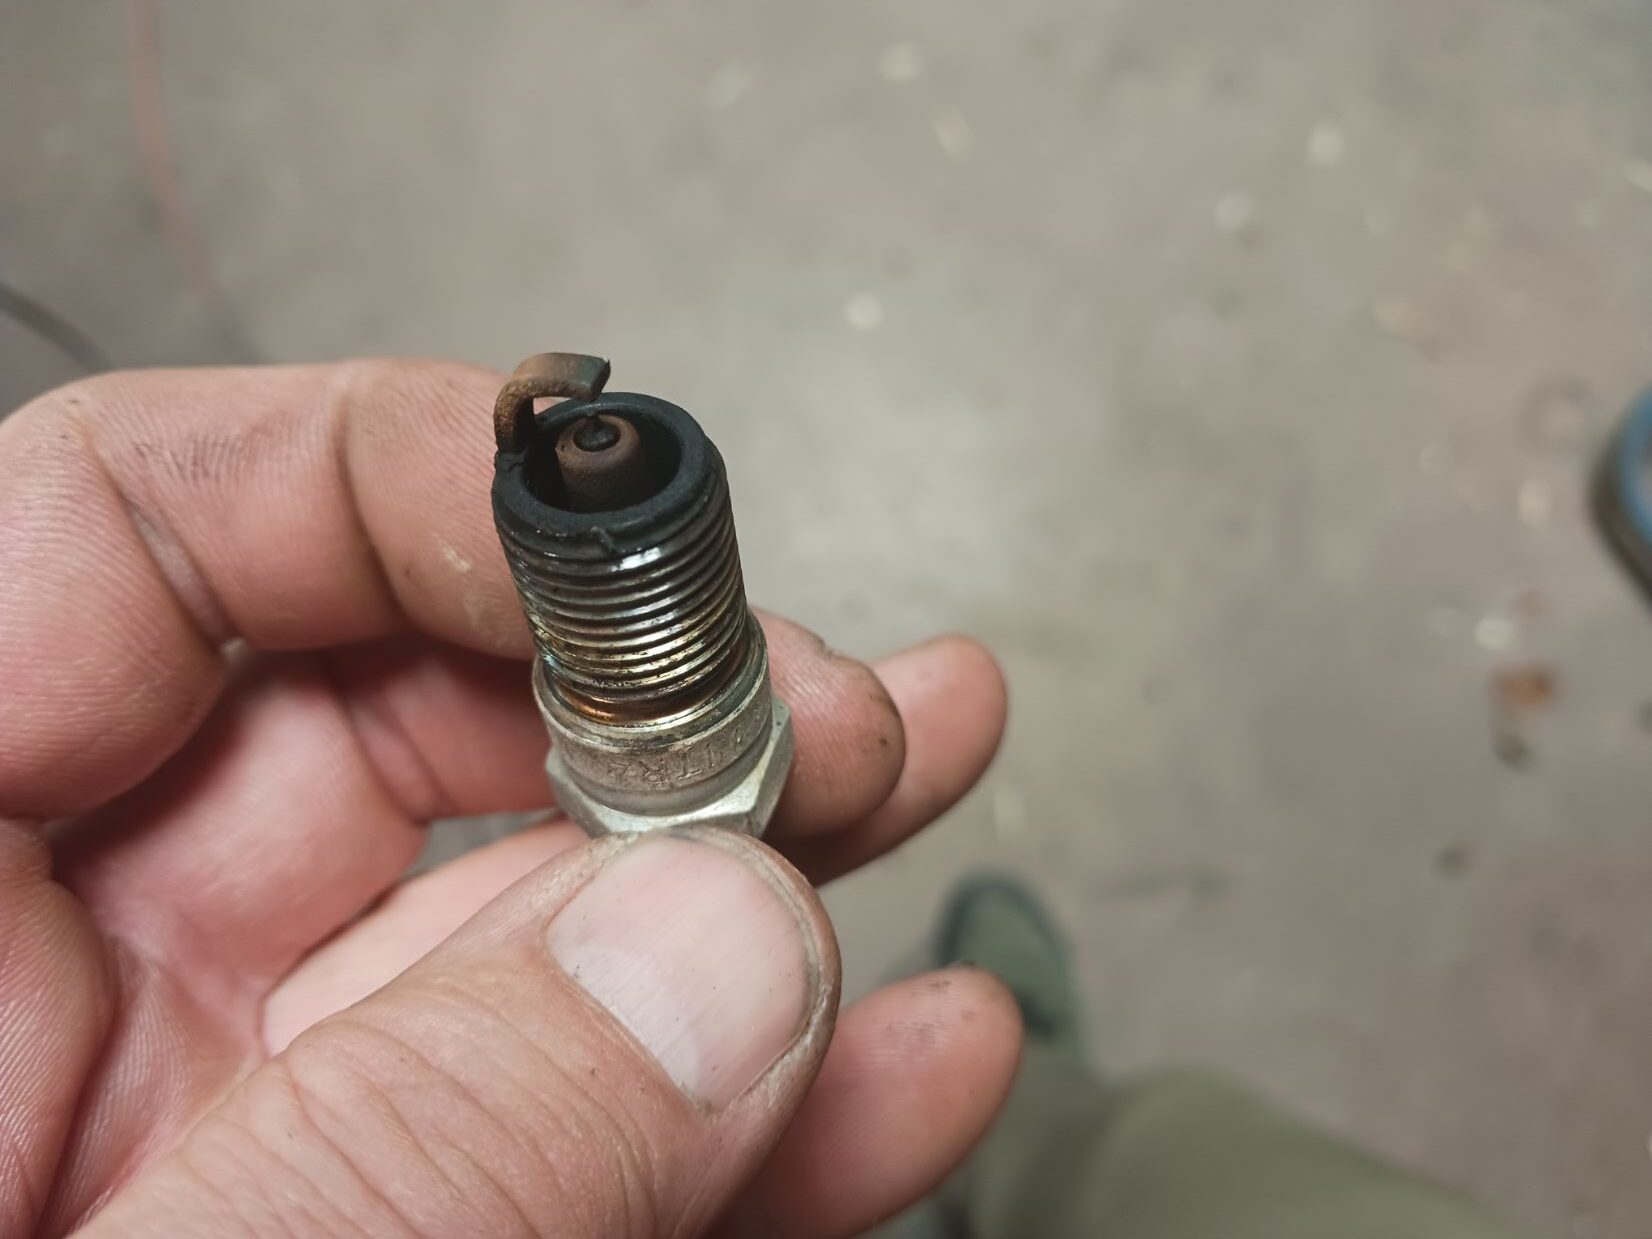
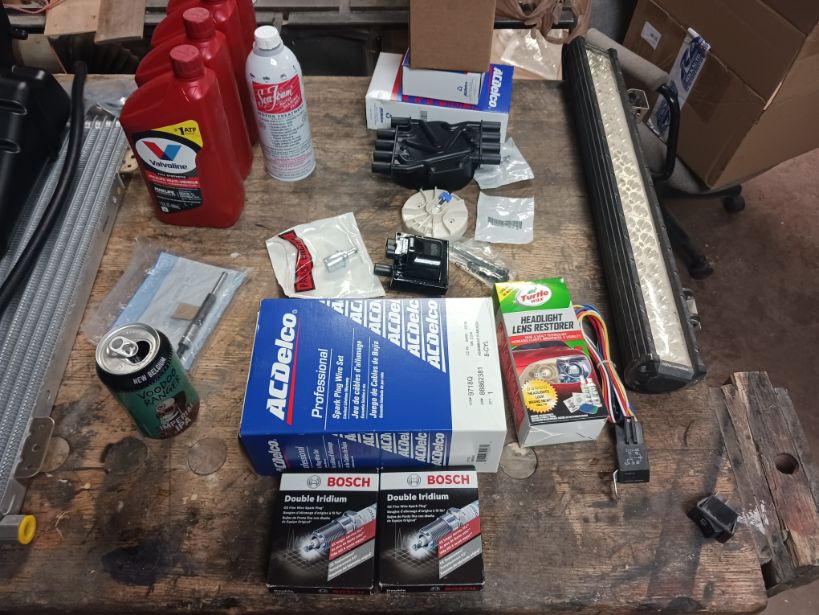
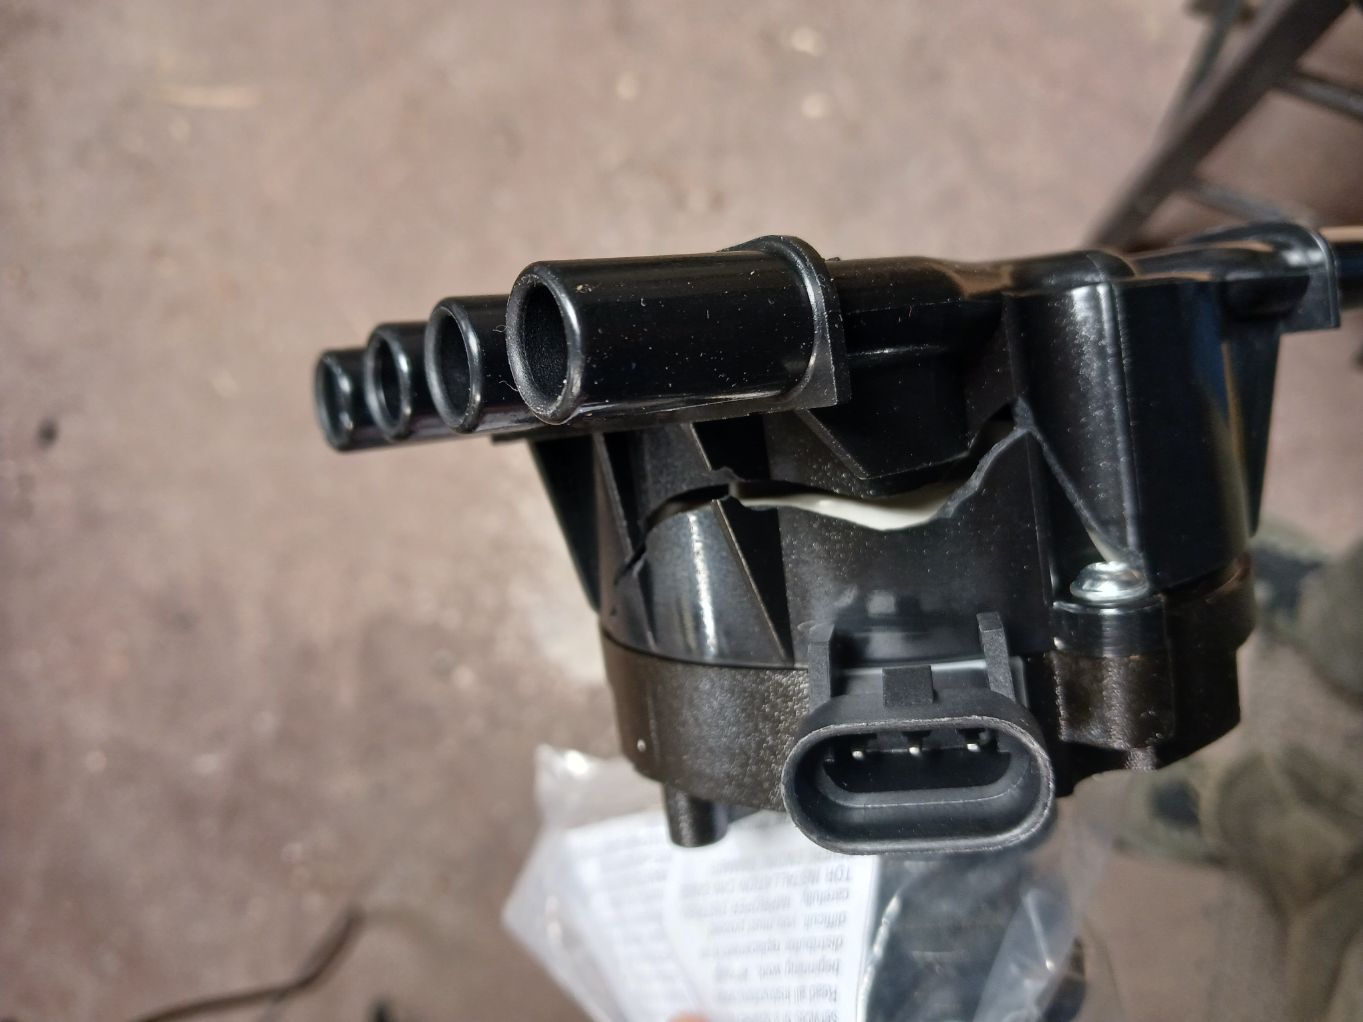
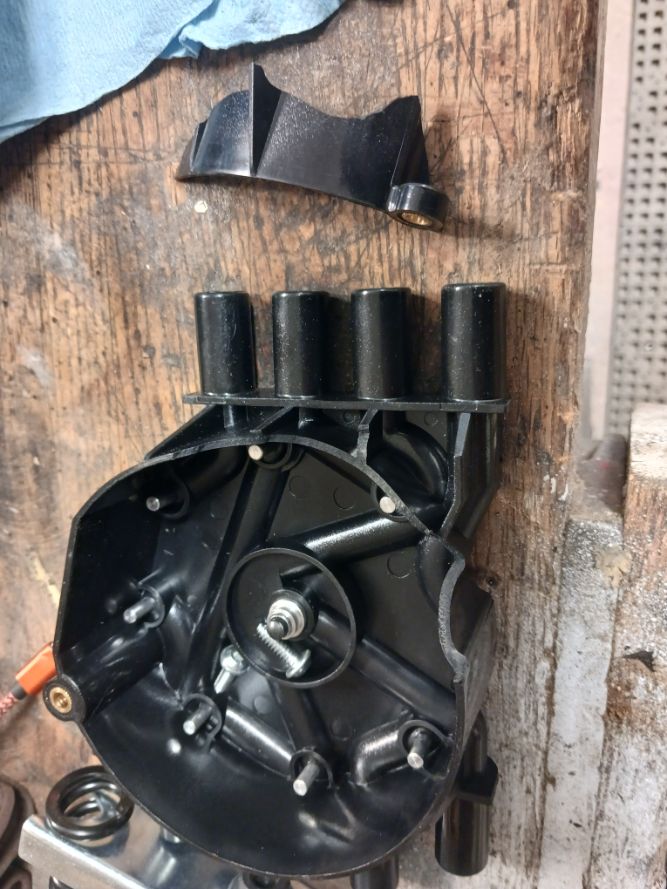
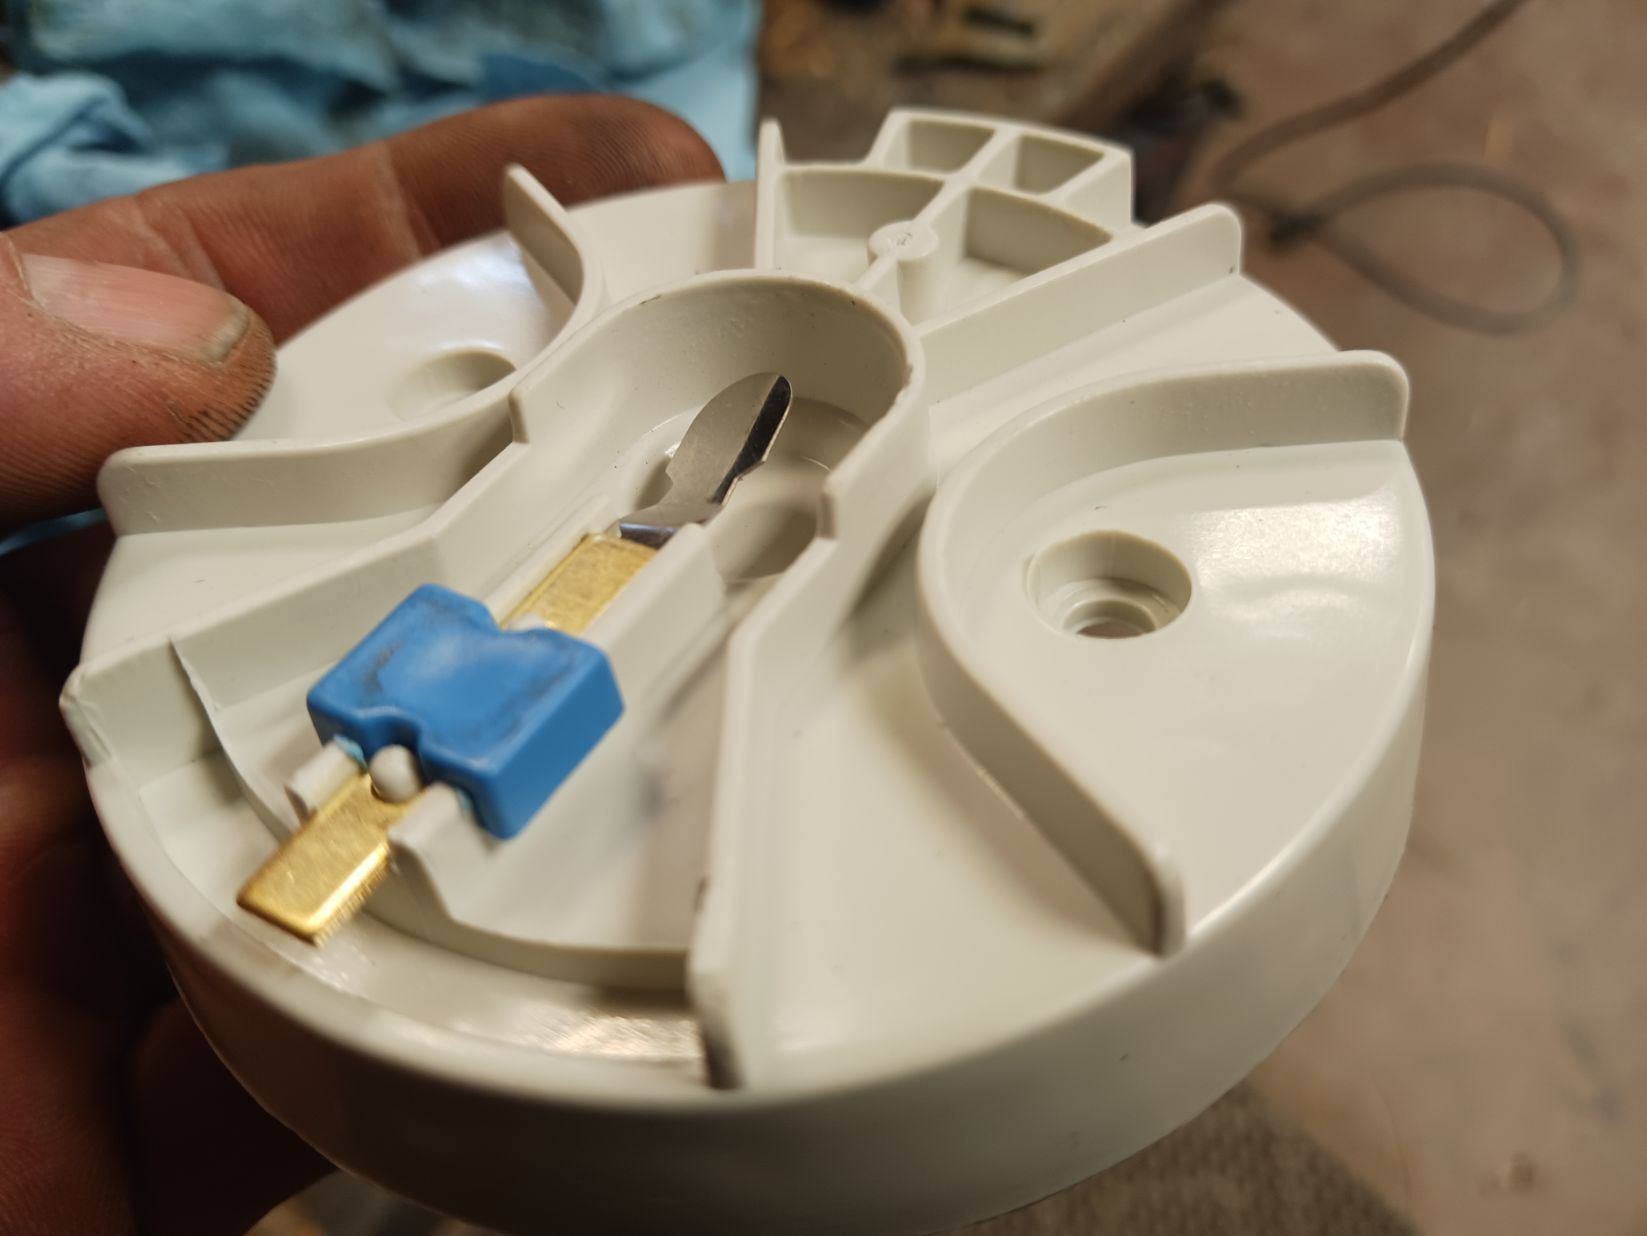
I finally bought a code reader. With all of the problems I’ve been having lately my check engine light has been on permanently. When I plugged it in this time, it read a misfire code on multiple cylinders. Not knowing when the last tune up was, I decided to do a full tune up with plugs, wires, cap, rotor, coil, and PCV valve. I believe I found the issue when I pulled the cap off, someone that worked on the truck before me decided to use a bigger screw to hold the cap on and it broke the ear off the distributor. The old cap shows signs to arcing from the cap bouncing around which is likely the cause of my misfires. I sourced a new distributor from Cardone which wasn’t too expensive, but it sucks.
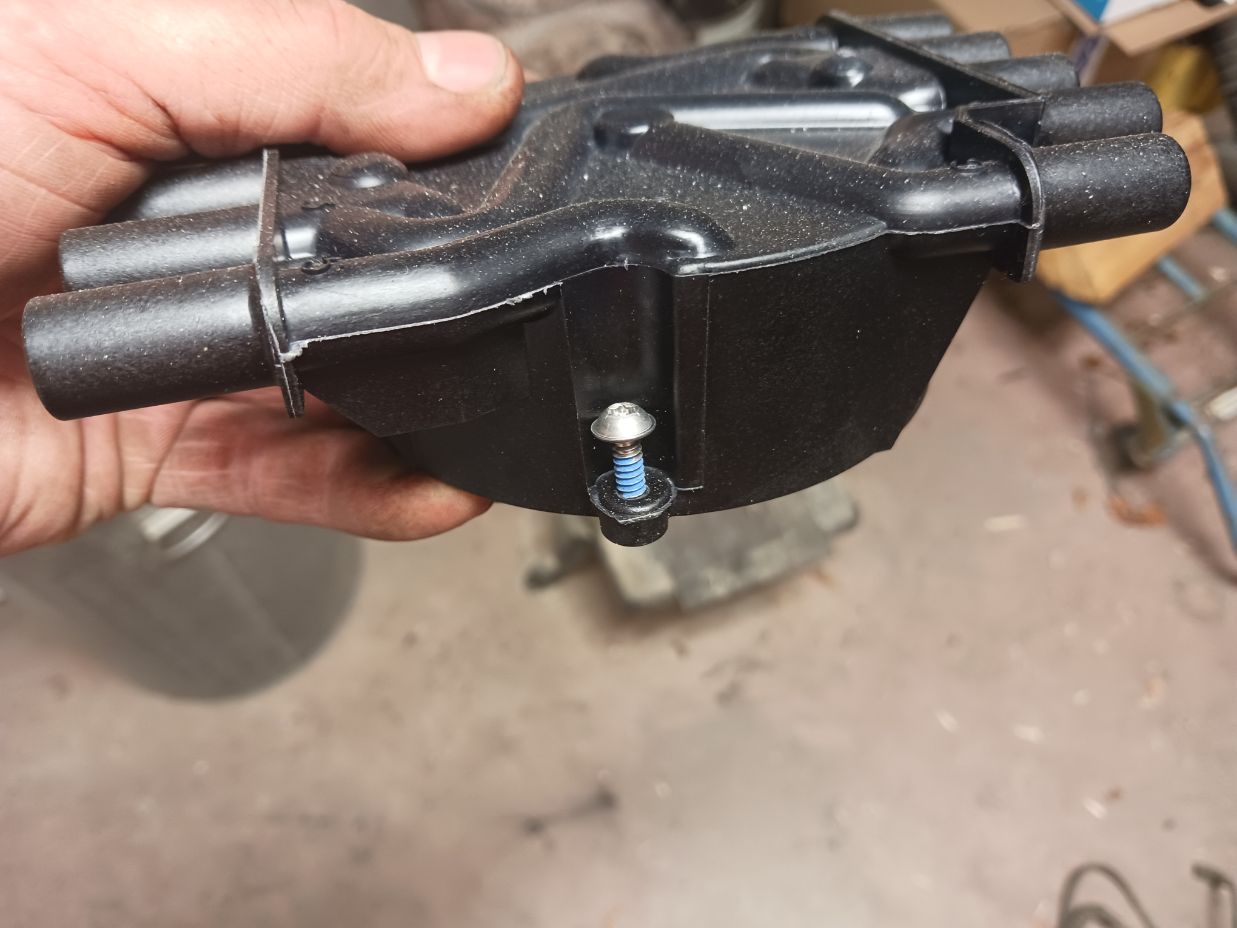
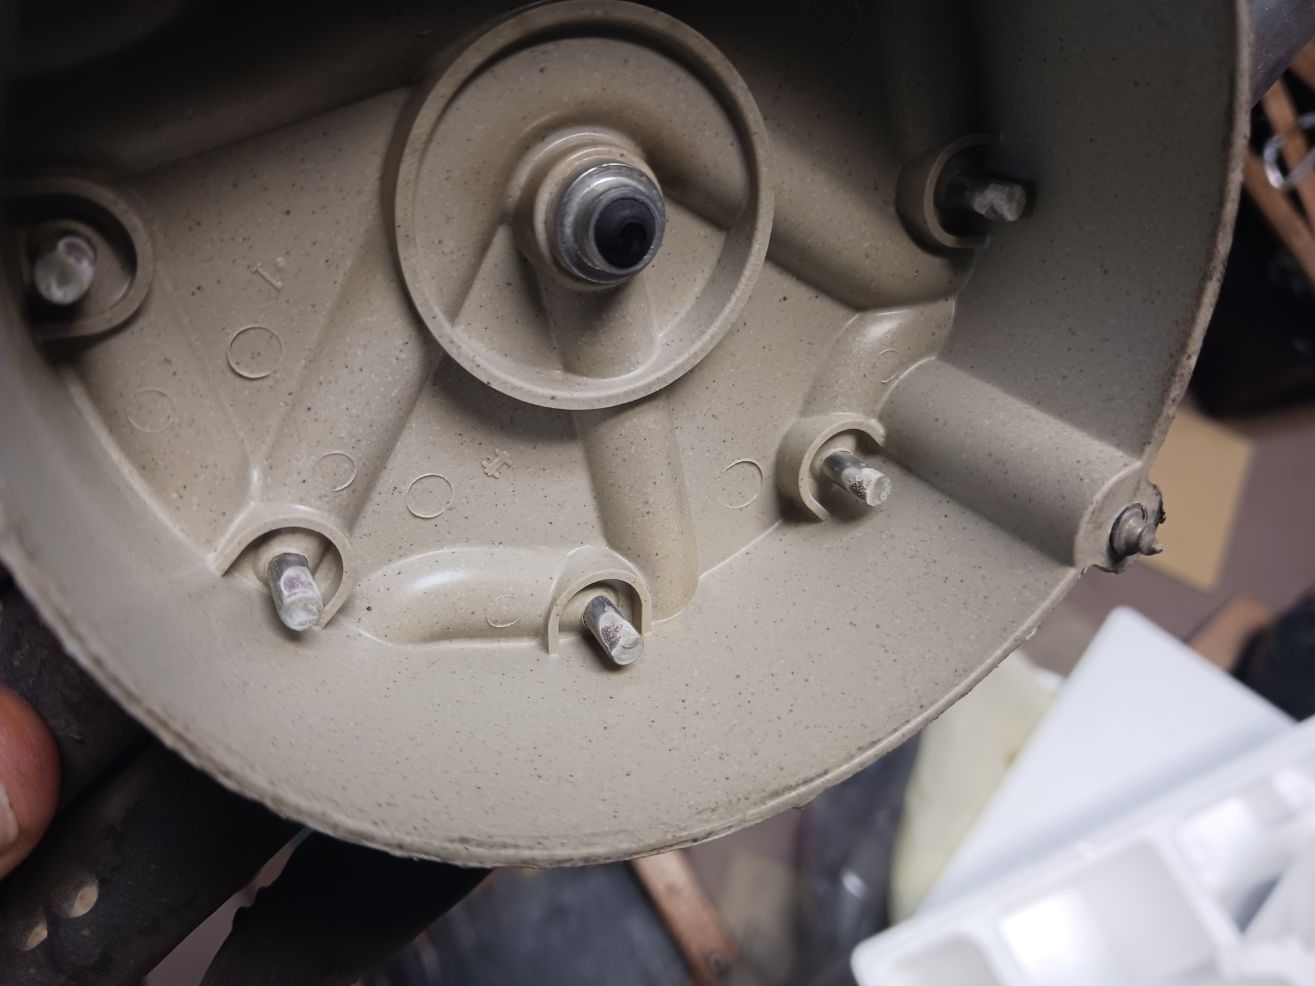
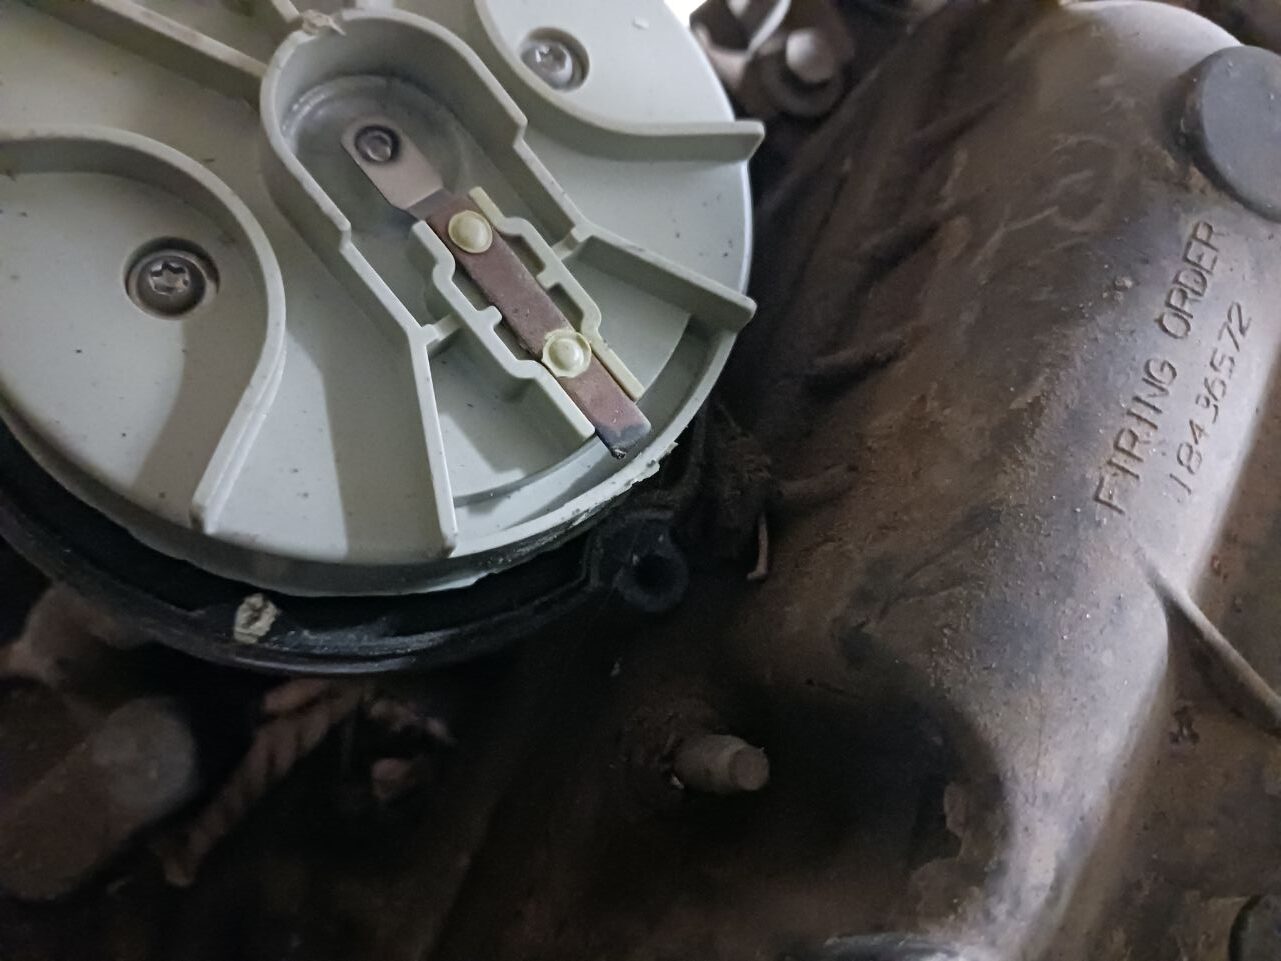

One thing that had me a little baffled was someone wrote different numbers on the cap as though they changed the firing order. Unfortunately, I didn’t pay attention when I pulled the wires so I’m not sure if the numbers actually meant anything. I posted in a FB Group for OBS Chevy lovers and it was suggested by a couple people that the distributer was put in with the gear clocked 180° off and rather than resetting the gear they renumbered the firing order. Which, props for knowing how to do that, but, WTF, just reset the damn thing. IDK, it’s all conjecture at this point, I just watched this video on how to set it properly and installed the new one correctly.
I had ordered a new AC Delco cap and rotor before I started this project. I thought about returning these but waited till the new distributor came in and I’m glad I did. When the new distributor arrived the cap was completely broken and the rotor was tweaked but honestly they weren’t that high of quality anyways. After seeing them I didn’t want to send it back just to get the same quality cap and rotor so I just used the ones from AC Delco.
I hemmed and hawed about either cleaning or replacing the injectors during this tune-up. I have no idea if it’s ever been done before but decided that I’m not going to at this time. I priced out sending them off to Mr Injector or upgrading to the new style injectors from SMP and couldn’t decide which way to go. So for now I gave the truck the Seafoam treatment and we’ll see if I end up with new or cleaned injectors in the future.
Rear of the Vehicle
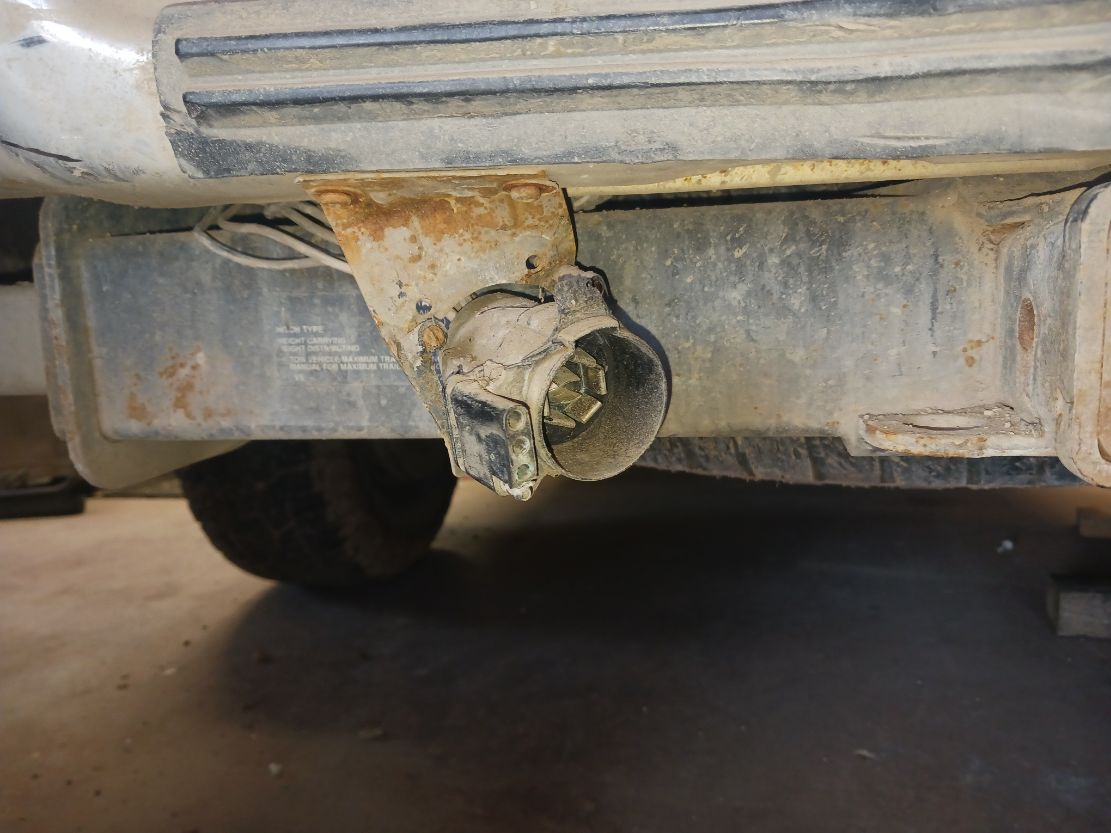
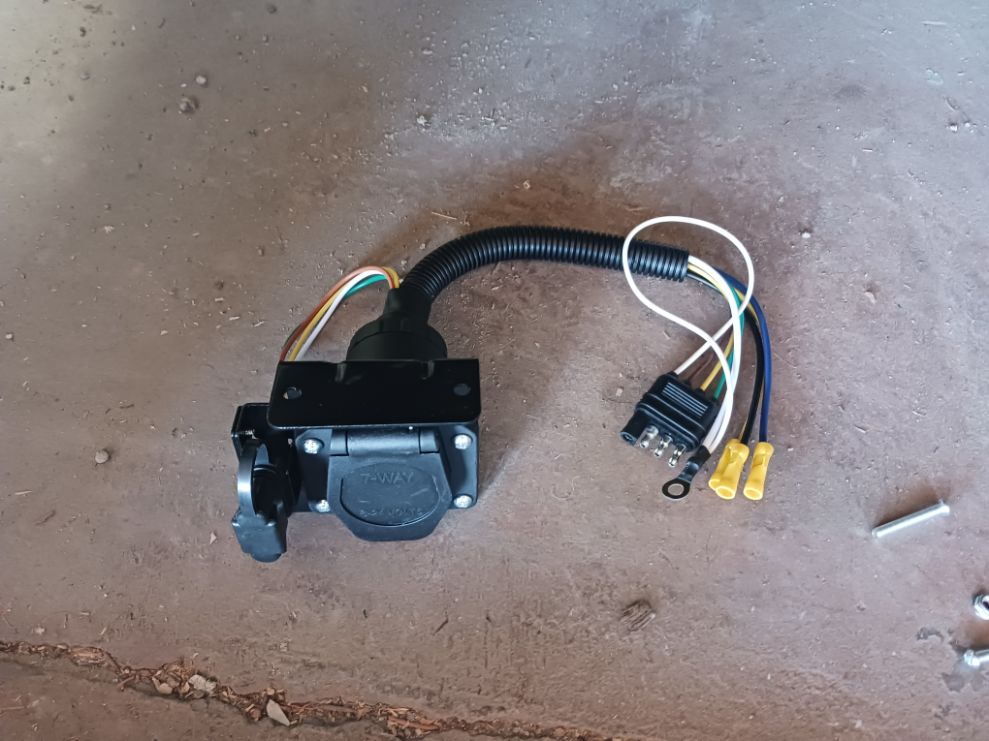
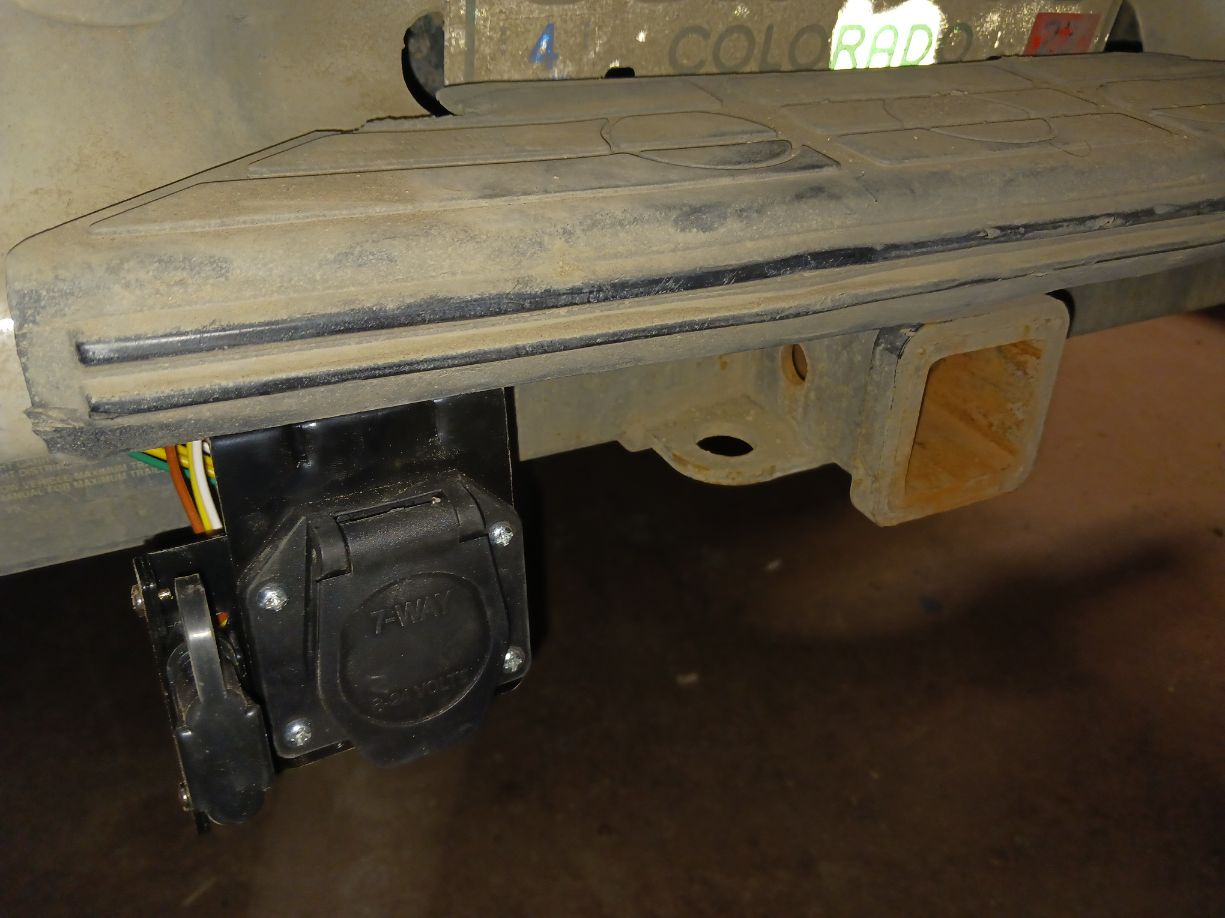
When the fuel pump went out I needed to be pushed from behind with another vehicle and it jacked up my trailer connector. My personal trailer is a four pin, but from time to time I need to pull a trailer with a seven pin so I need both. I’m not a fan of adapters so I found a replacement that had both.
The tailgate latch stopped working a little while back. I ordered new linkage rods and took it all apart lubing everything. I straightened out a couple of bent parts in the handle and along with the new rods the tailgate is working great.
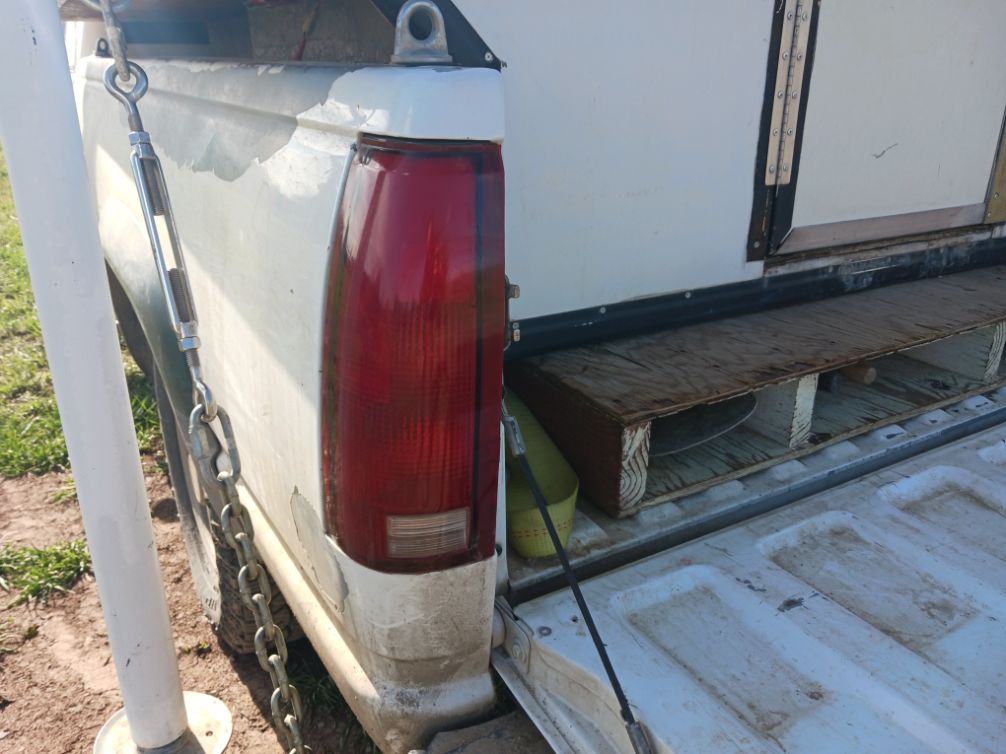
I’ve had issues with the tail lights for a few months now. Neither blinker worked and the brake lights gave up one day. I bought replacement circuit boards and that fixed the driver side and the brake lights on the passenger but the passenger side still wasn’t flashing. I started moving bulbs around and discovered that the bulbs were an issue even though none of them were burned out. Each of the bulbs were different, one even amber. I bought all new bulbs and everything works great now. I used the Turtle Wax Headlight Restorer on the taillights as well but I didn’t have any more of the sealer as the kit just comes with one wipe. I bought some Meguiar’s Headlight Coating to seal them. I plan to just polish and coat all my lights every March from now on as the coating says it lasts a bout a year.
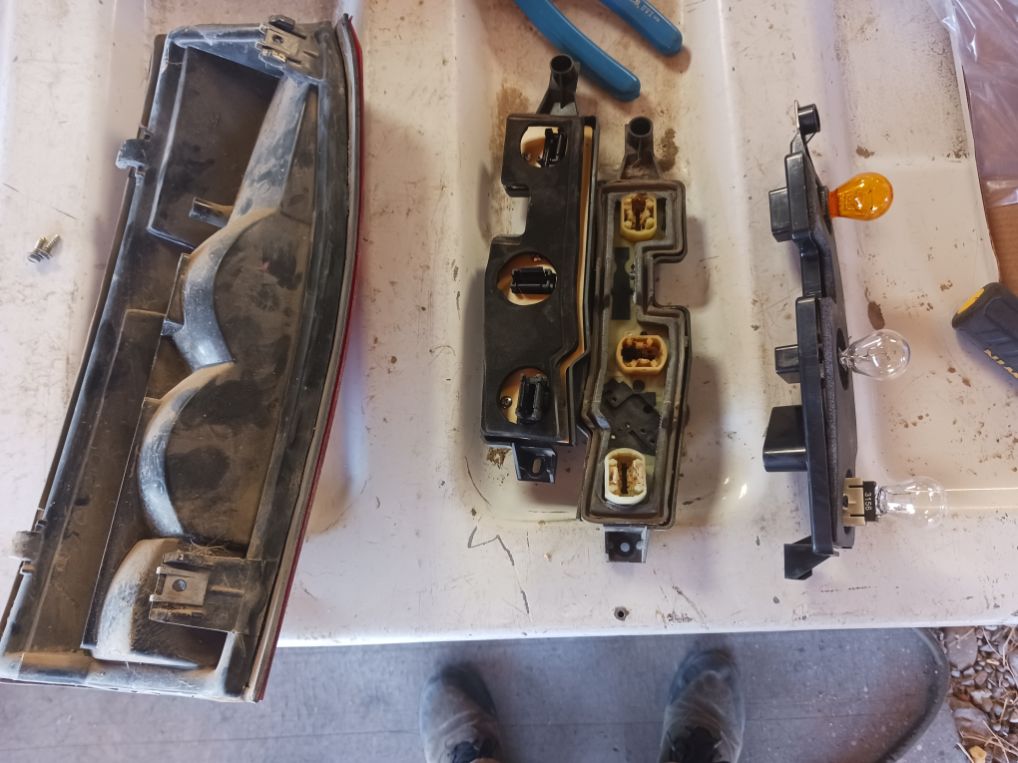
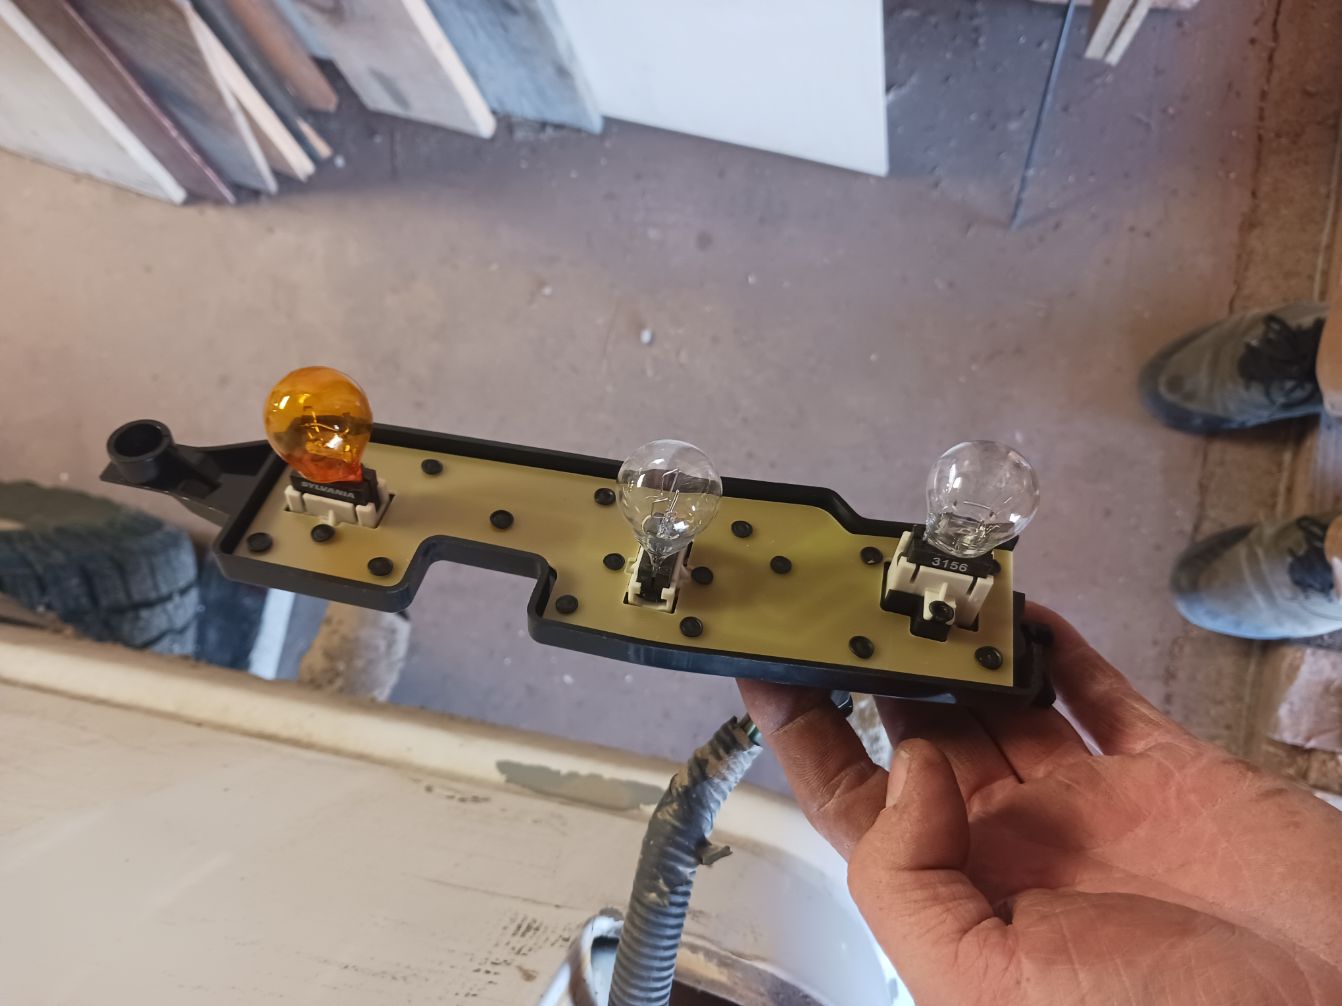
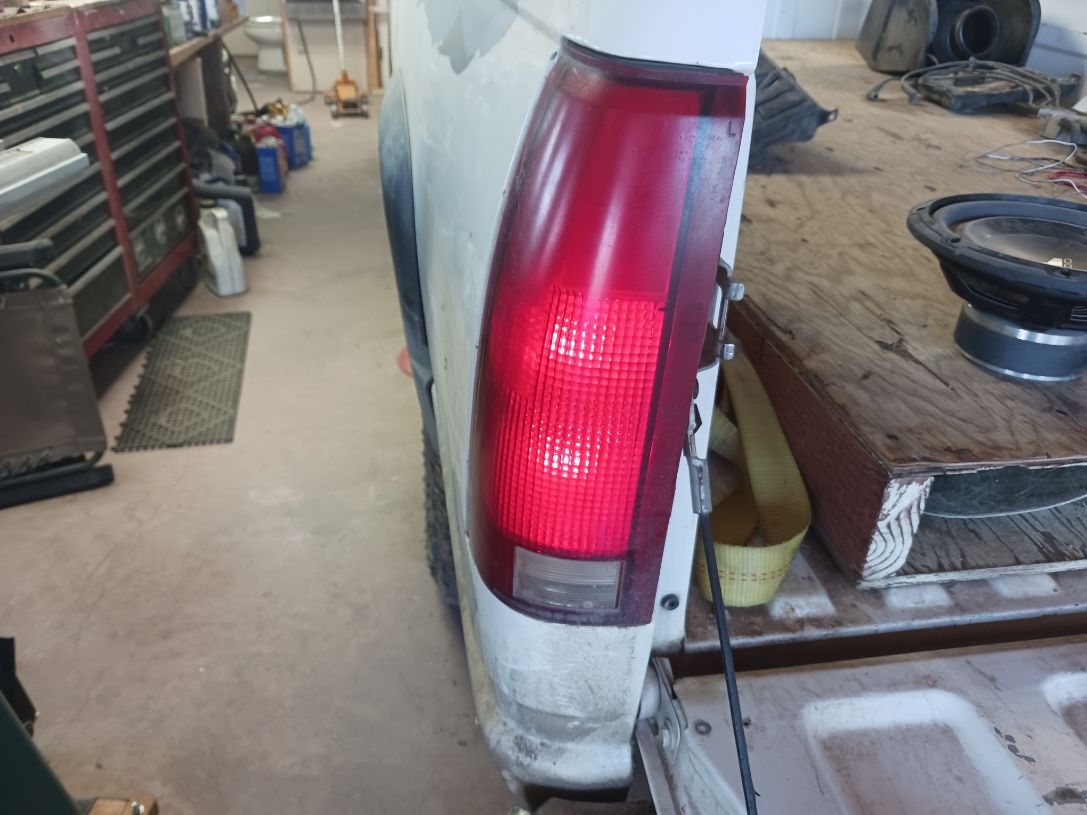

Figuring out which bulbs were the correct ones was way more hassle than it should have been. I looked it up in a few places online and couldn’t get straight answers but after quite a bit of research I came up with 3057 for the top two bulbs (breaks, blinker, running) and 3156 for the bottom one (reverse). This bulb thing is kinda weird, the top and bottom sockets are both single filament but won’t take the same bulb. I found a number for the bottom bulb but every parts site I checked for the top one comes up with the same number as the middle bulb, it does work but why put a double filament in a single slot? It looks like the middle bulb would actually work in all three but once again why use a double in a single? It really doesn’t matter that much as it now works, I just found it odd and I spent way more time than I really cared to looking up bulbs. Hopefully this saves someone else from also searching for this other bulb.
Windshield Washer Reservoir
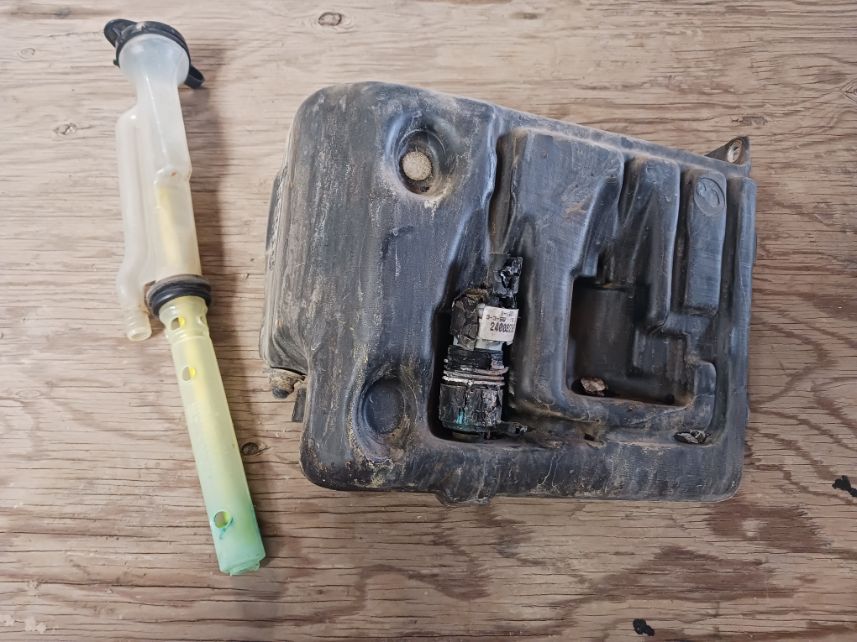
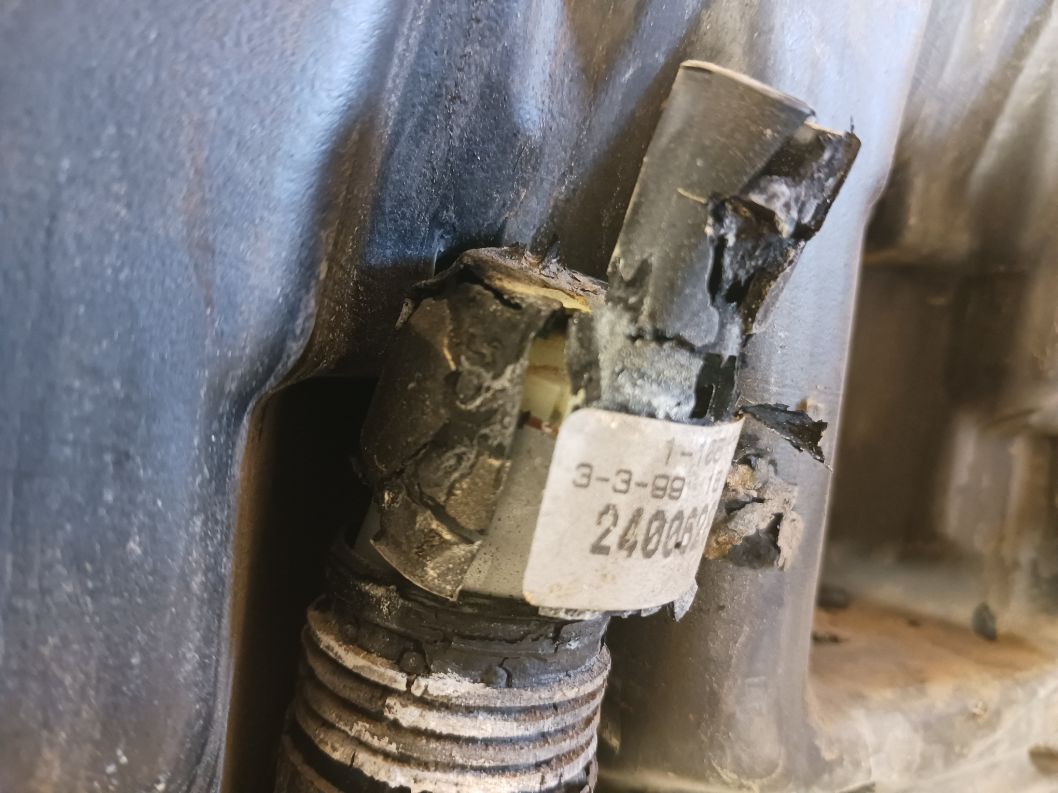
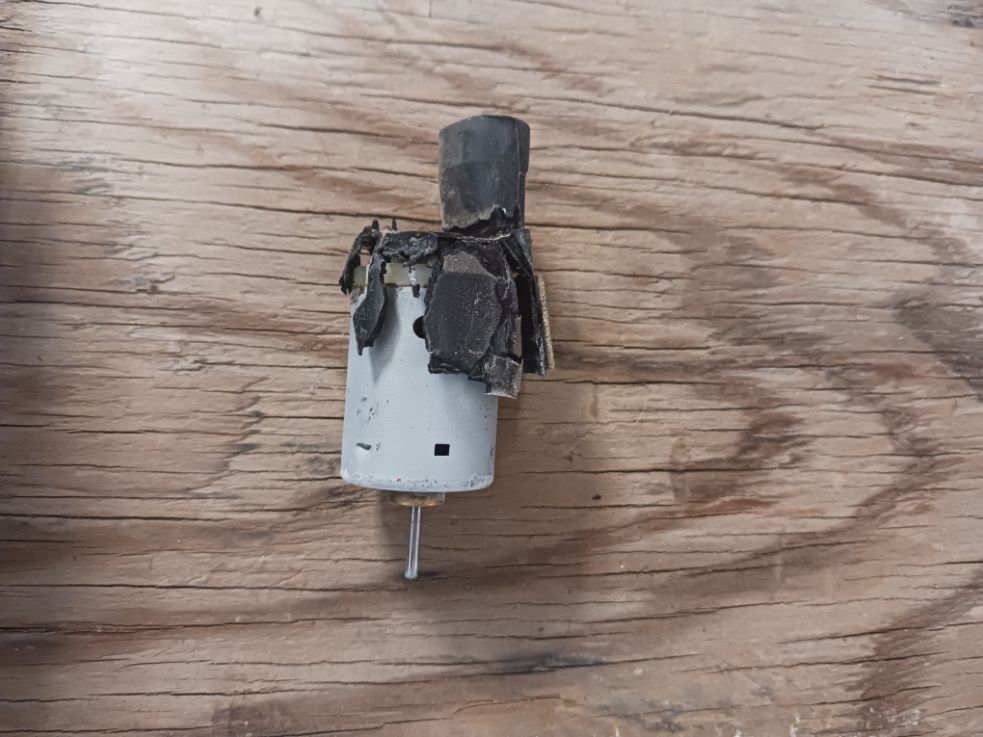
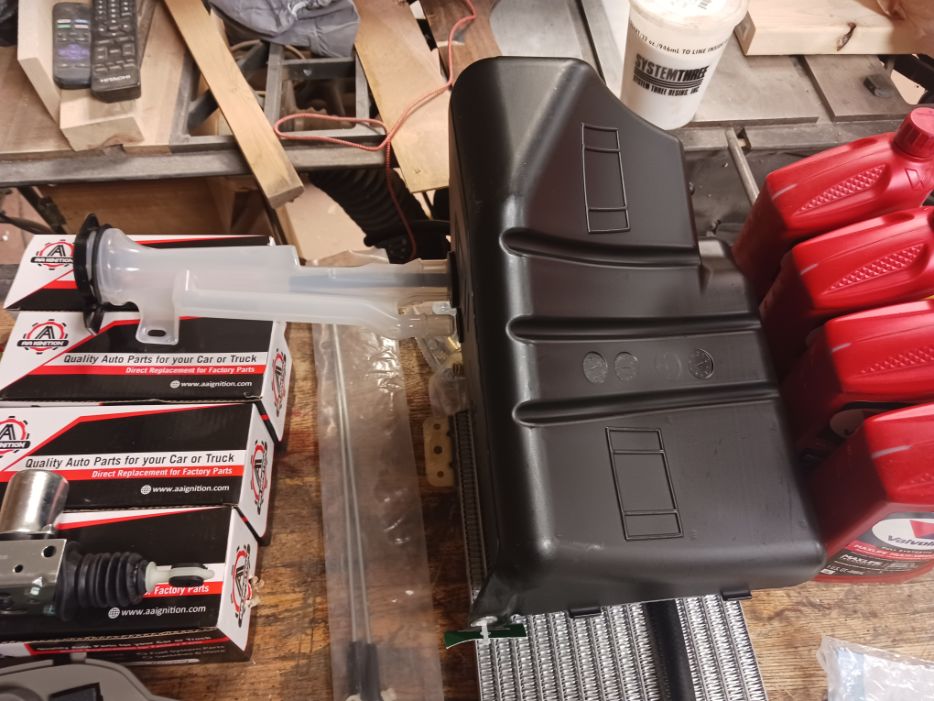
I have known that I have a leak in my reservoir since I bought the truck. I figured with all of the other work I might as well replace this as well. It wasn’t hard to see the issue once I got it out of the truck, the pump had pretty well disintegrated and the hose that went to the sprayers was in pieces. The old reservoir wasn’t in that good of shape either, I had already purchased a new reservoir but had to order a new pump and line. It’s nice being able to clean my windshield again.
Grill & Lights & Other Random Things
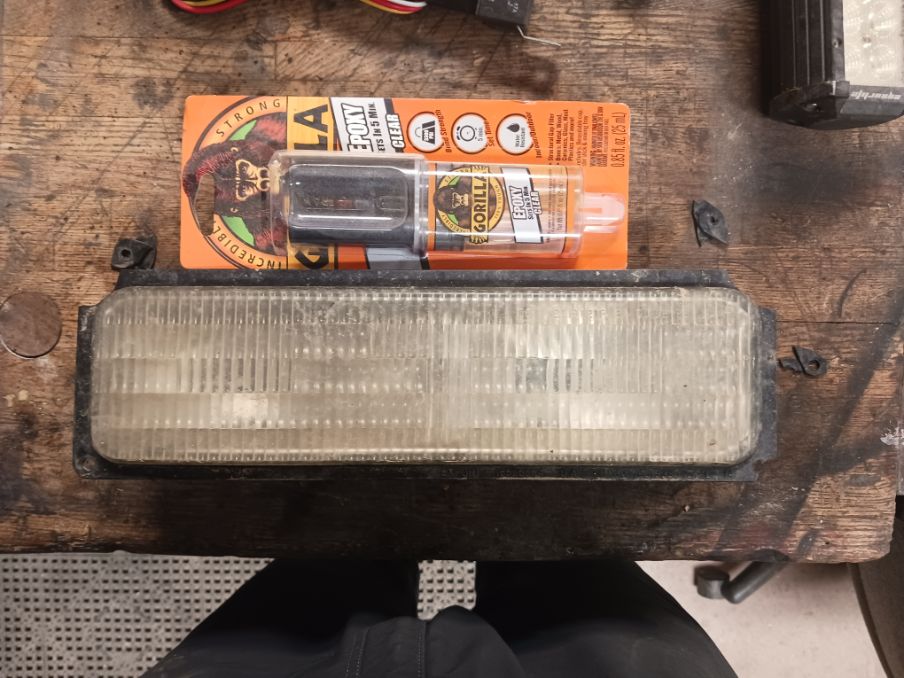
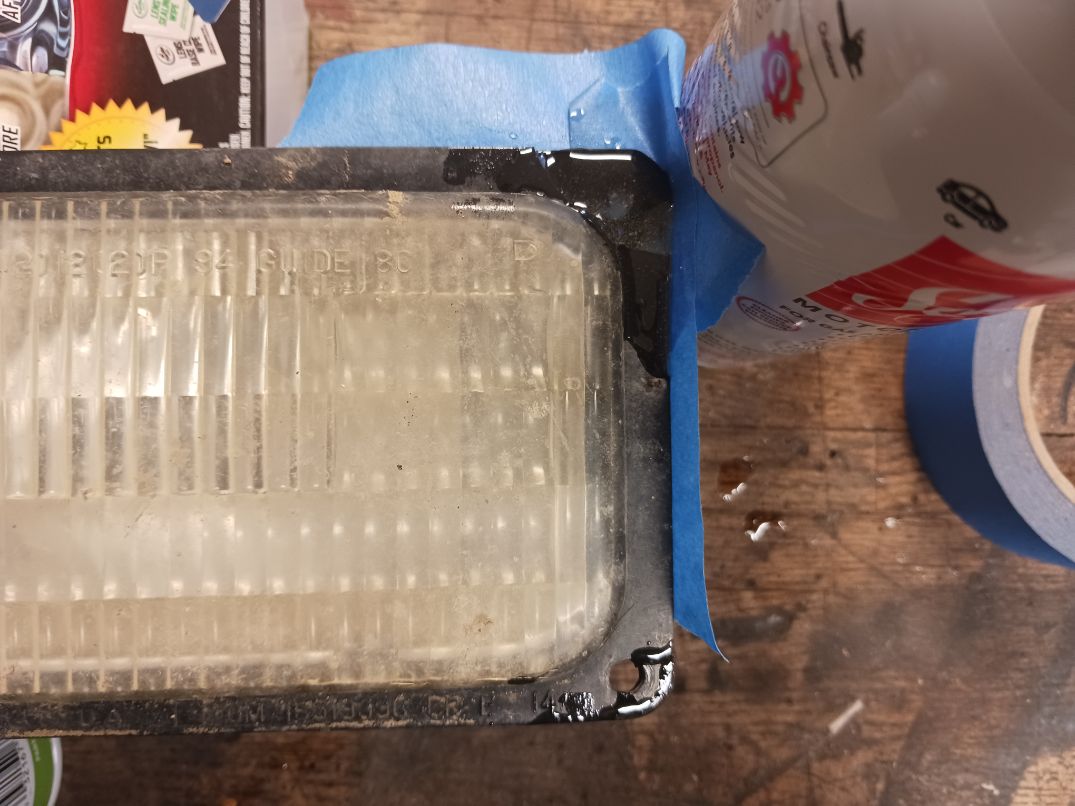
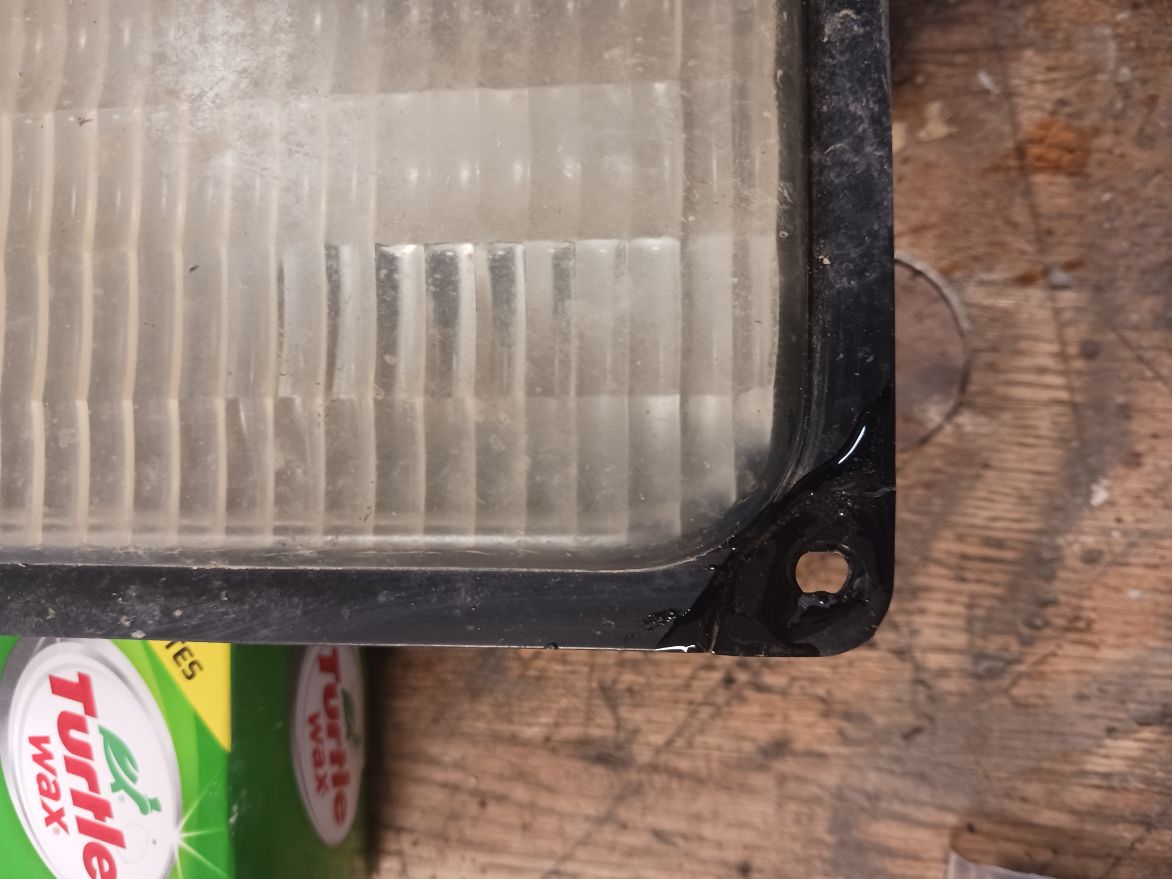
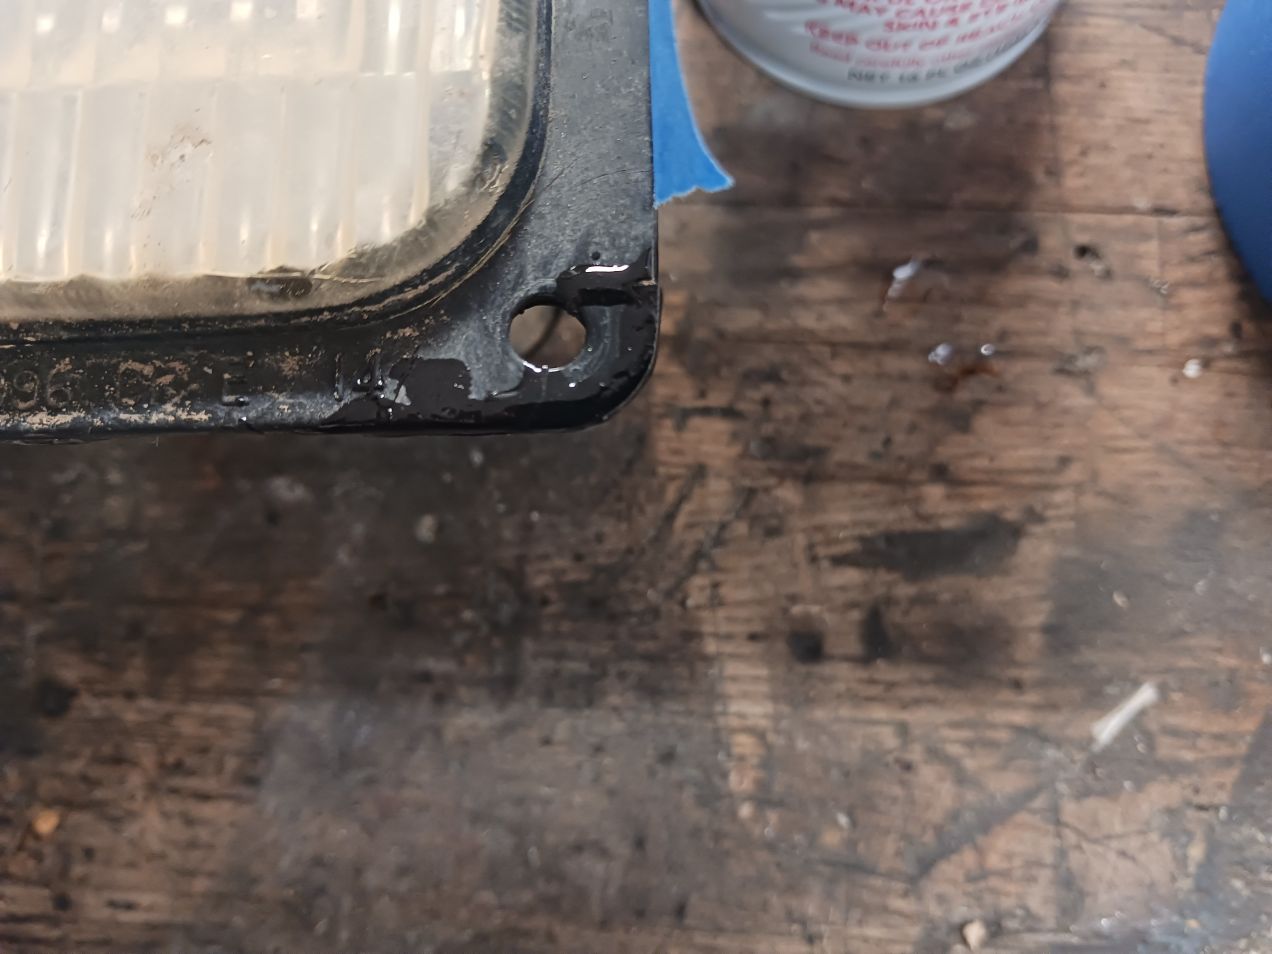
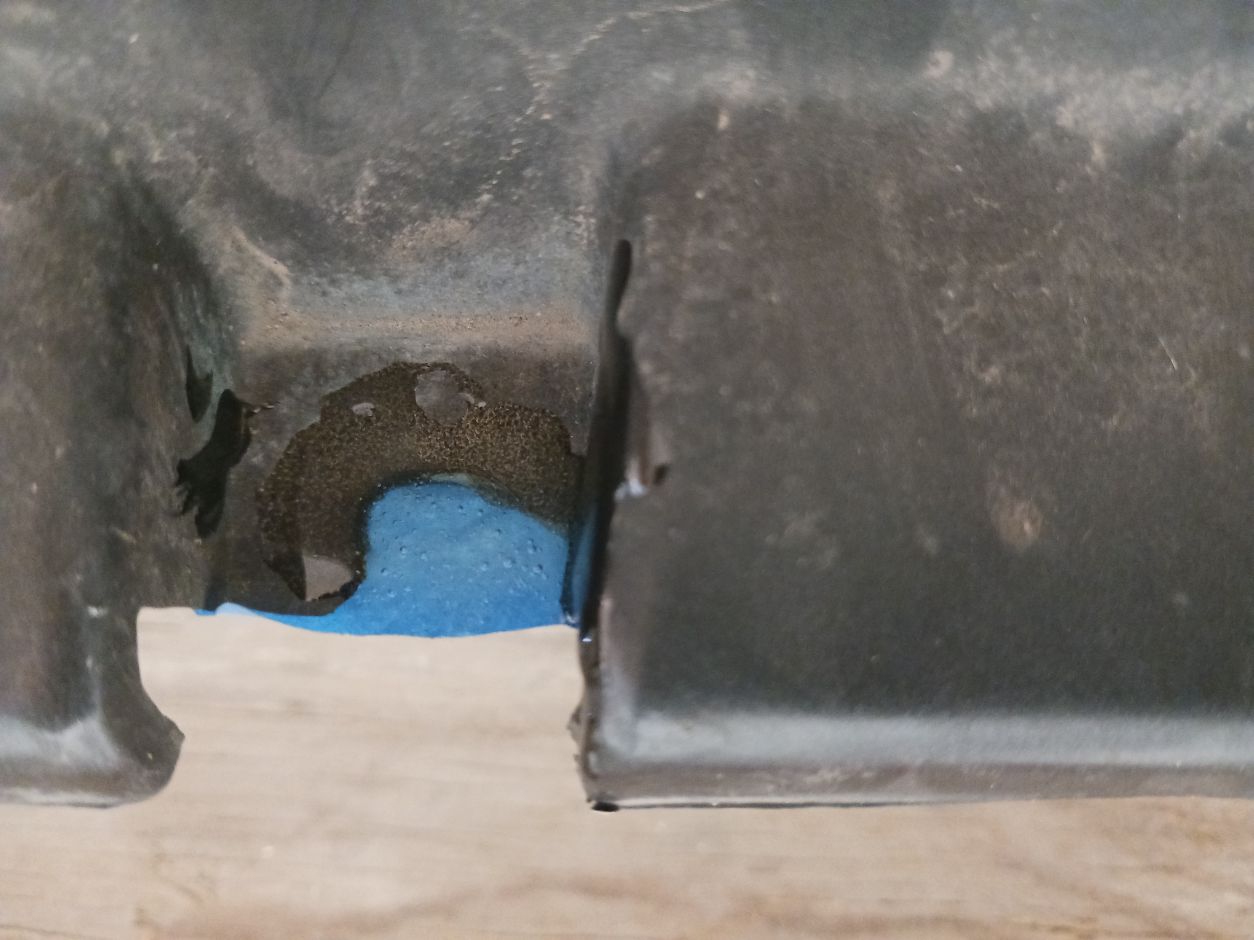
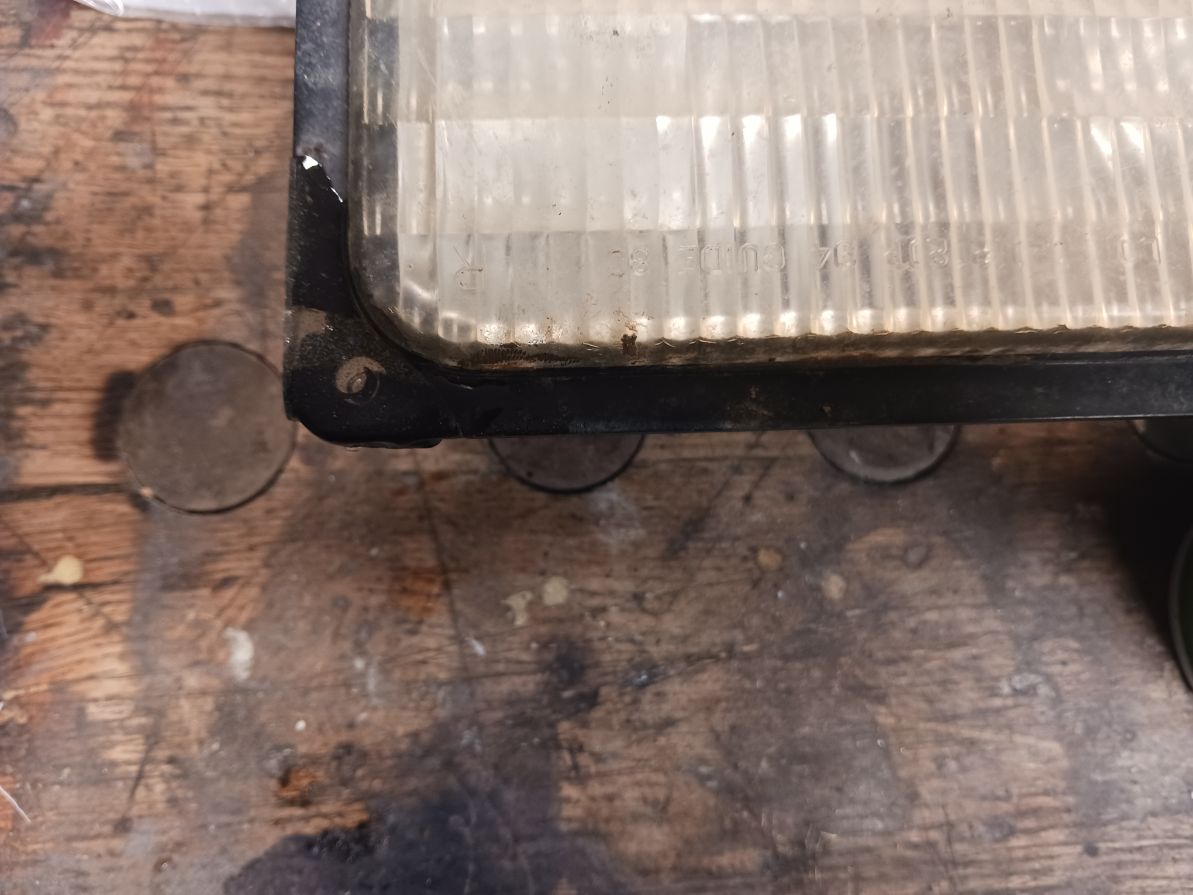
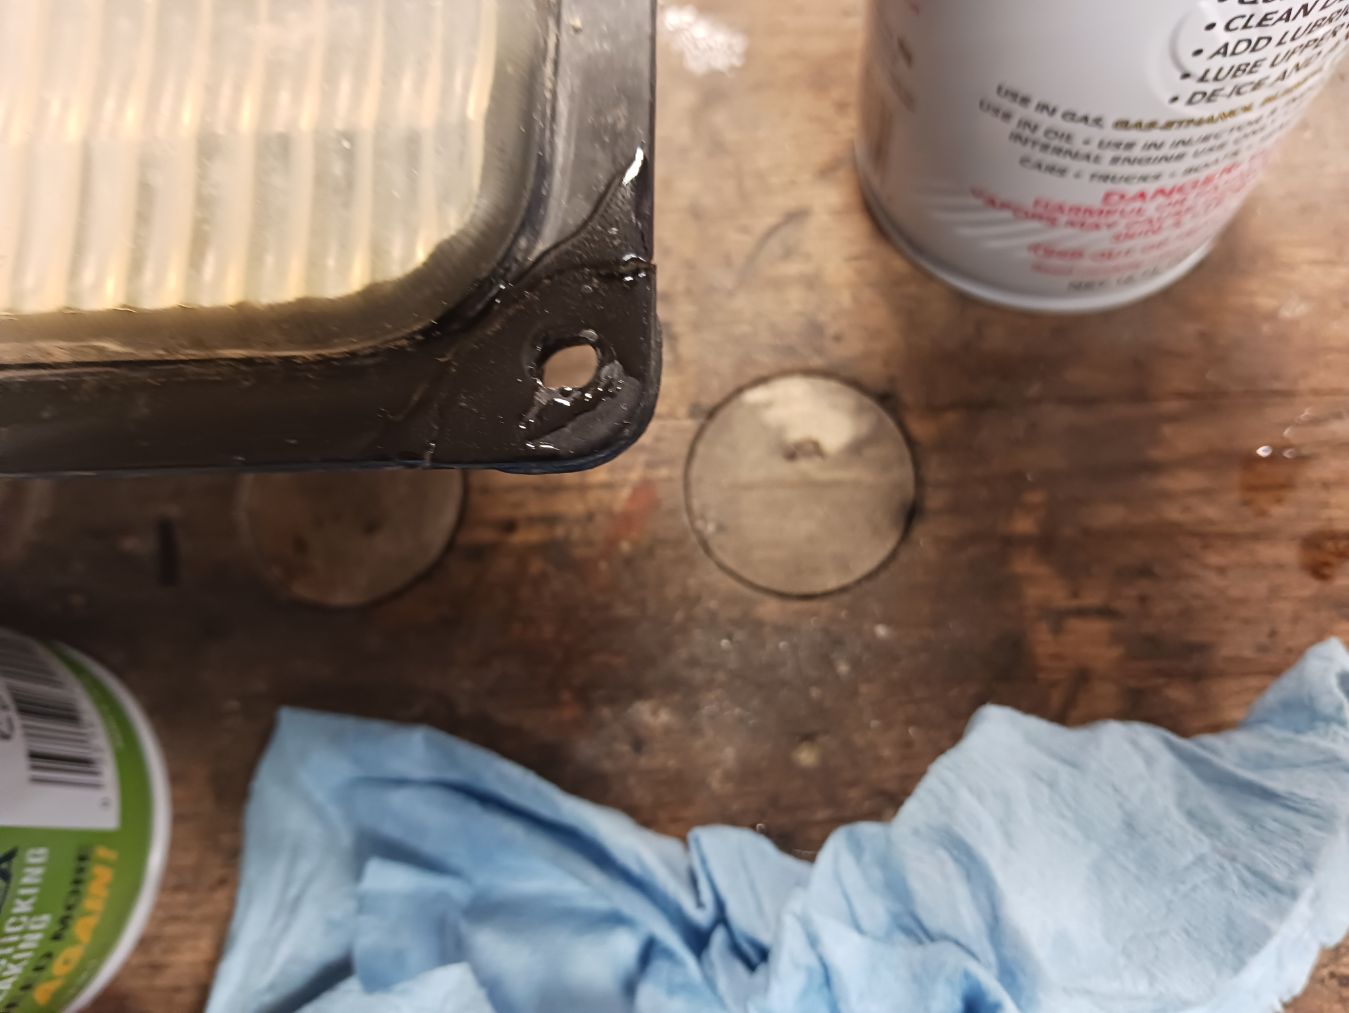
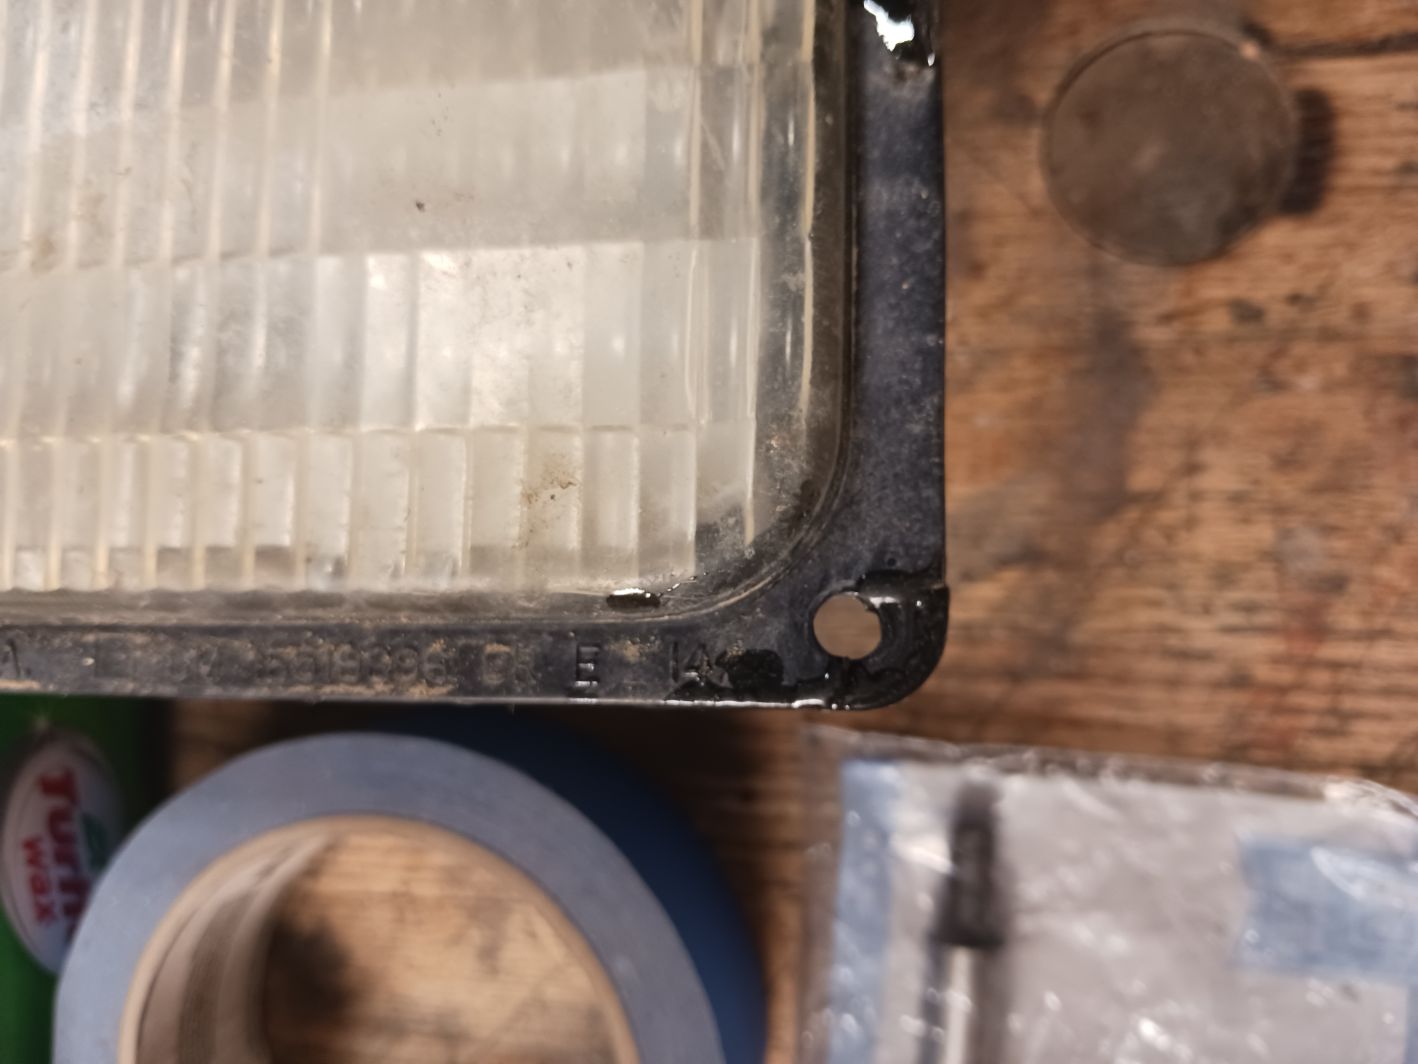
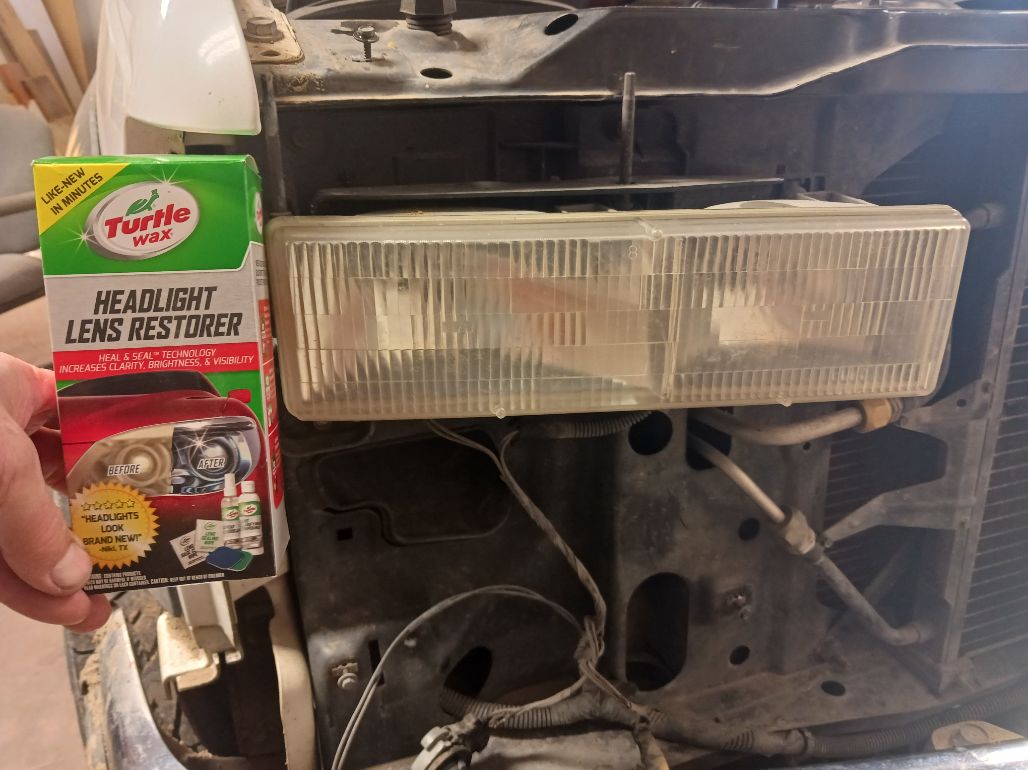
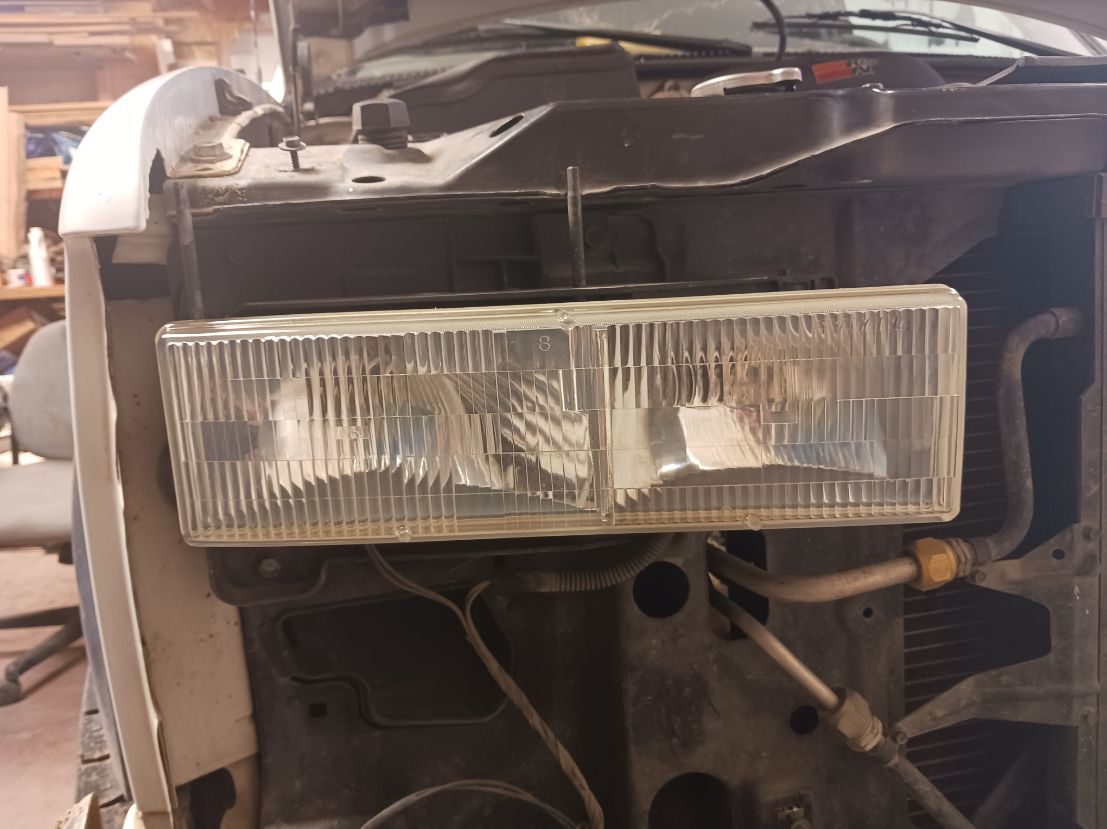
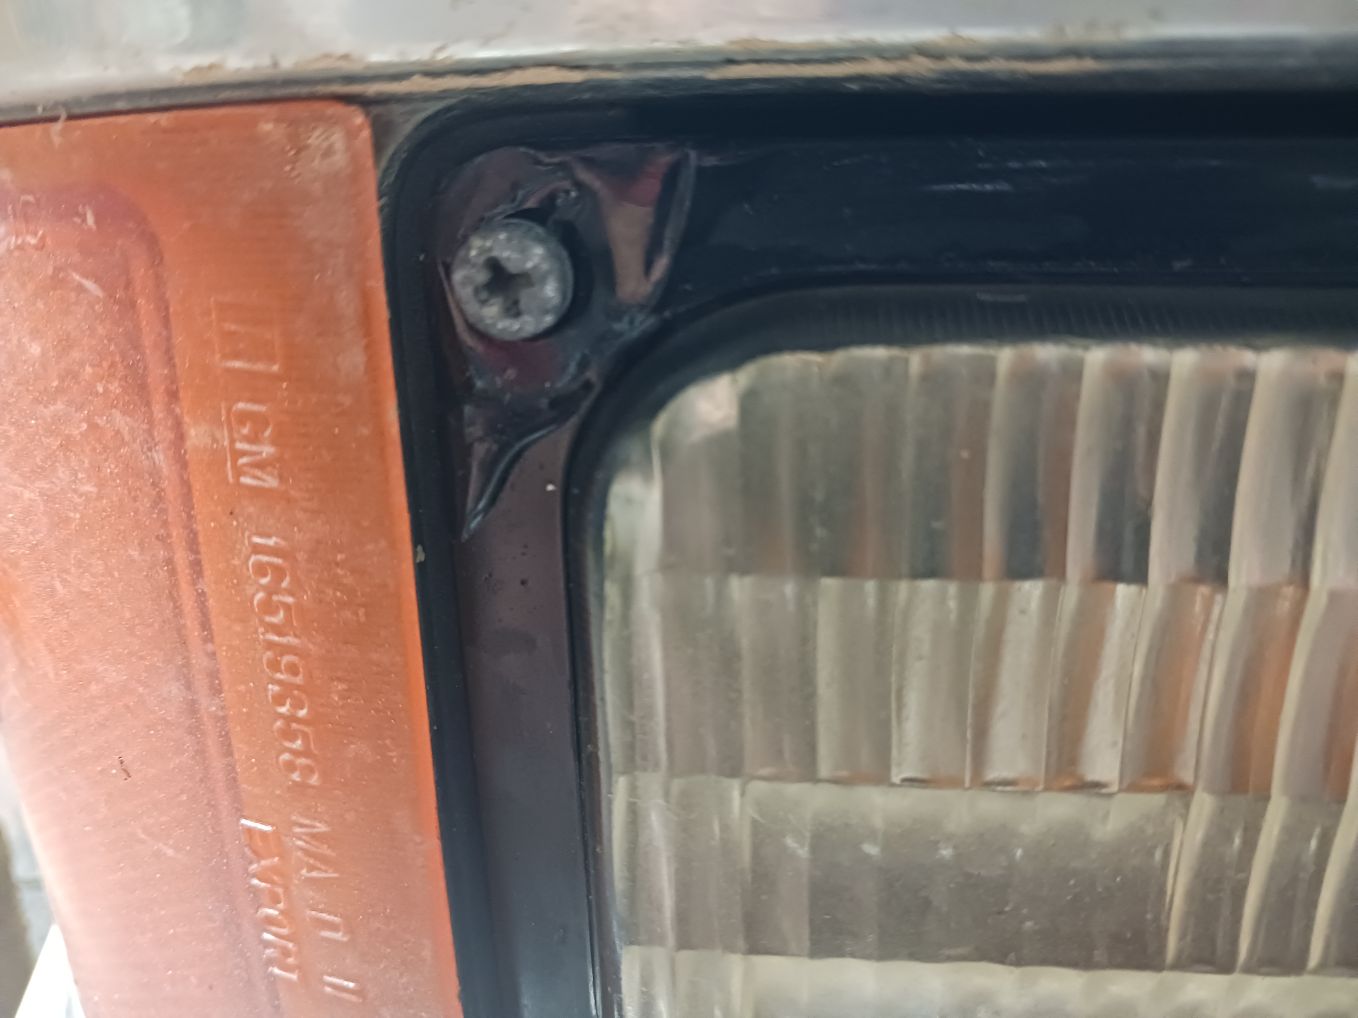
Last fall I hit my first deer, 17 years in the mountains and that was my first. Fortunately, it wasn’t even a yearling yet so it didn’t do a lot of damage to the truck but there was some. The center Chevy emblem is now missing and two mounting points were broken on the grill, along with the passenger marker light mounting tabs. At some point I may replace these but for now I rebuilt the tabs out of epoxy. While I had everything apart I also used Turtle Wax Headlight Restorer to polish the lenses so hopefully I can see the road again.
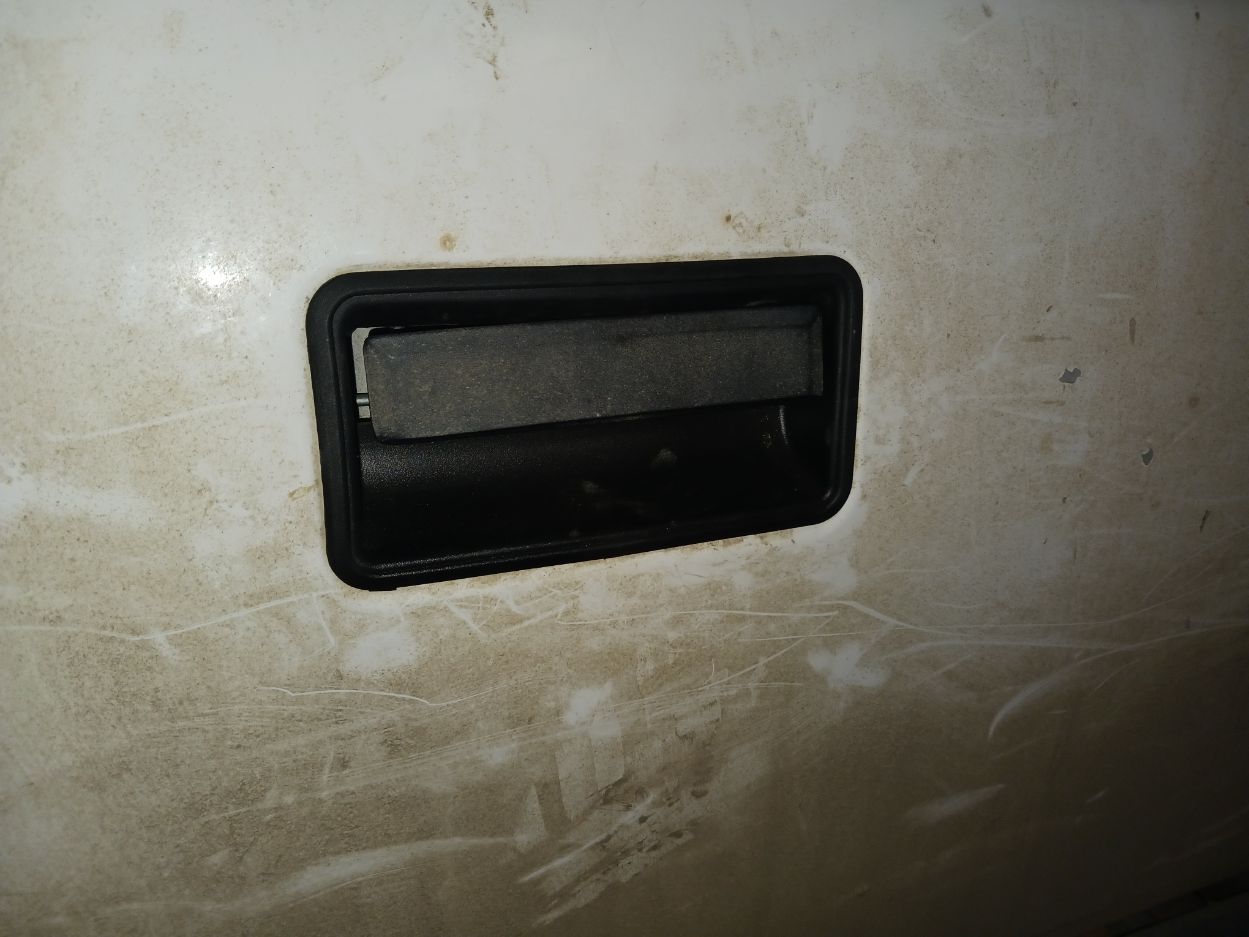
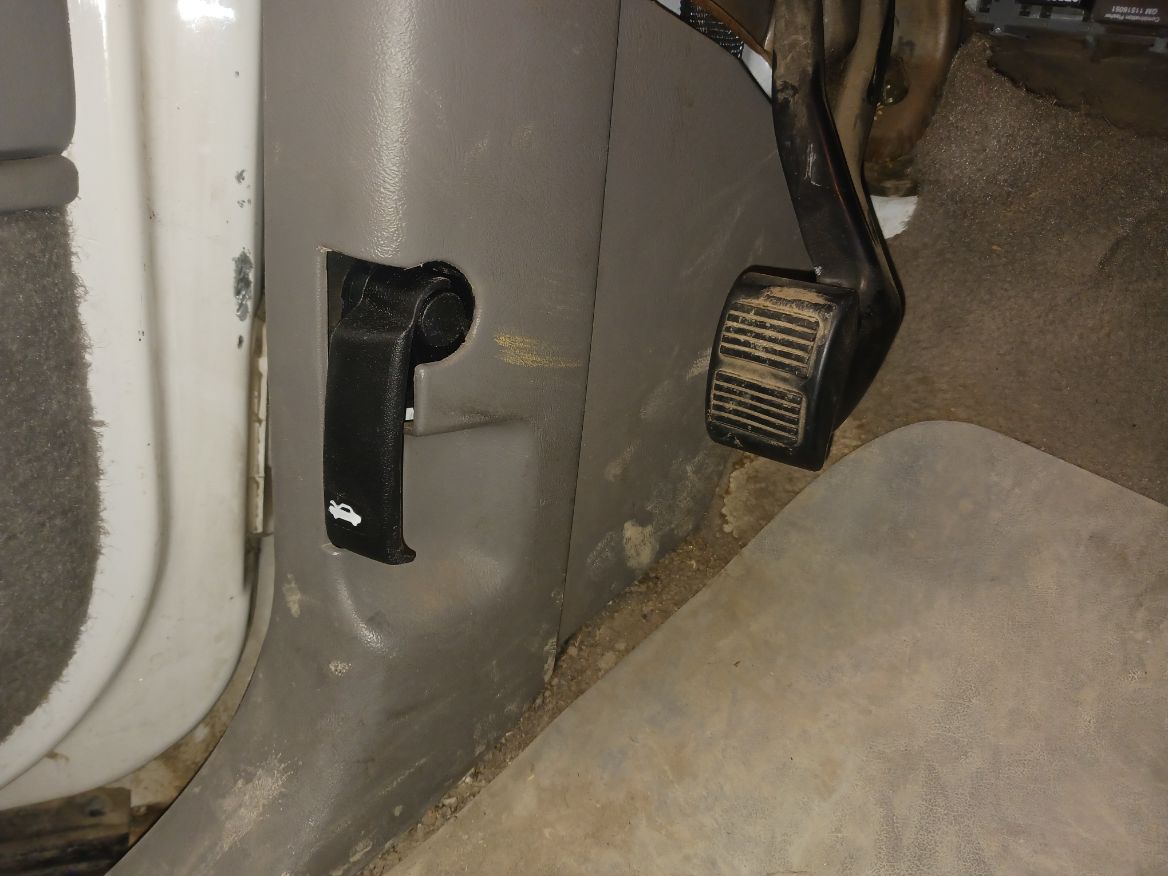
My hood release inside the cab had broken at the bolt so it was a challenge to pop the hood. I had to pull it in just the right way to get it to pop. A few bucks from Amazon and the new one works great.
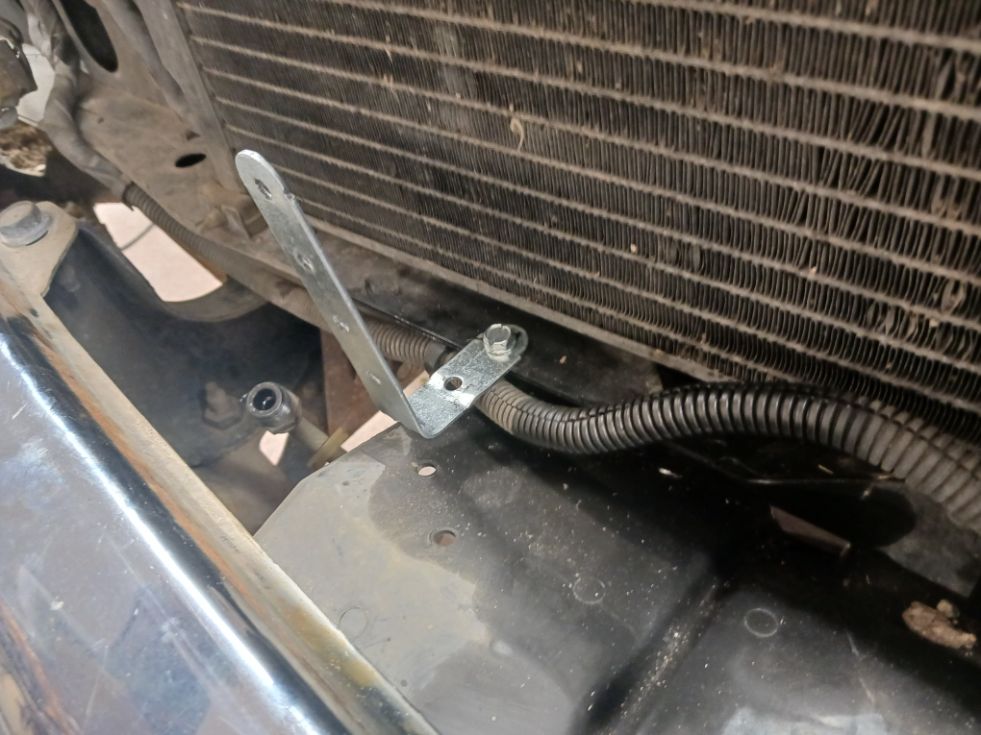
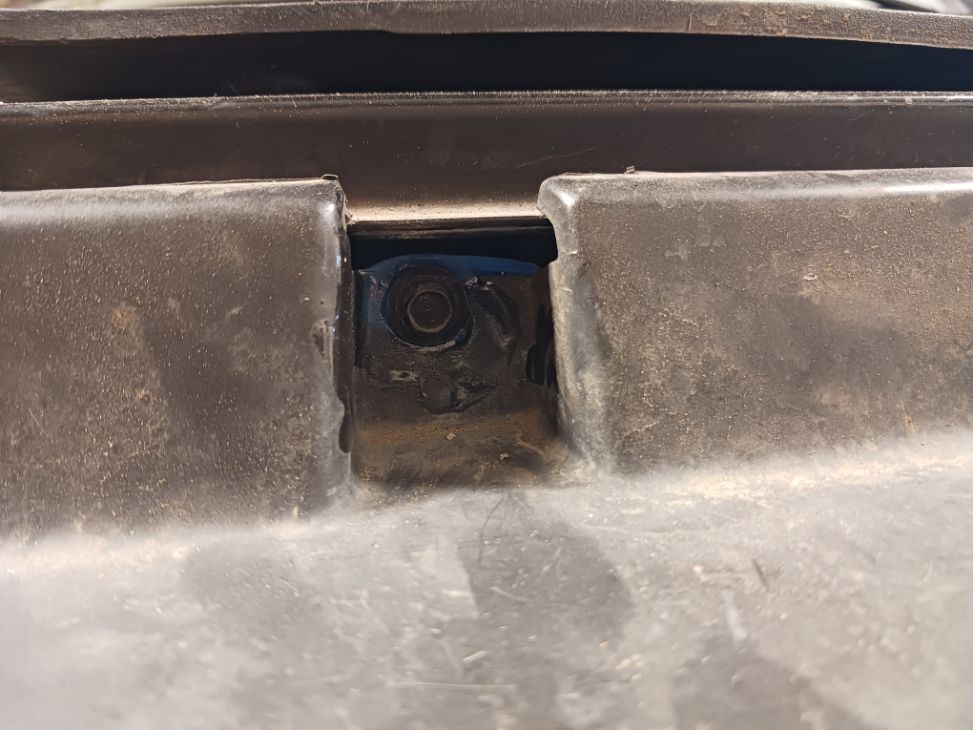
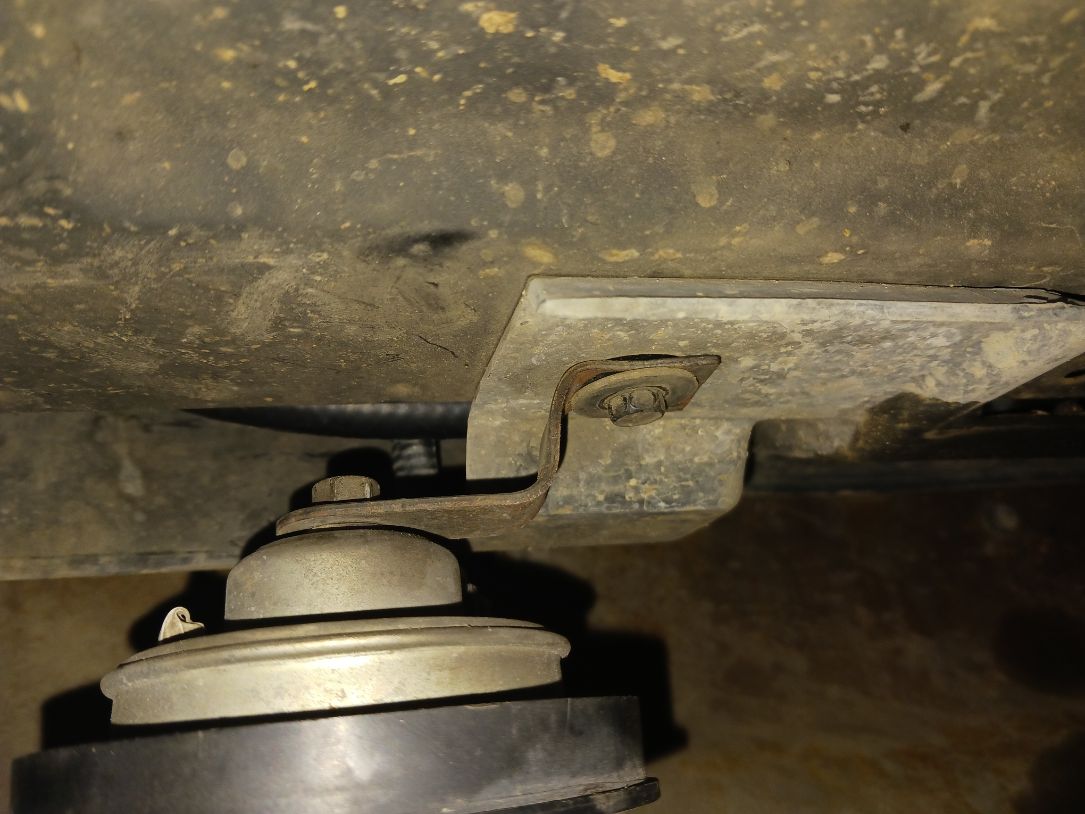
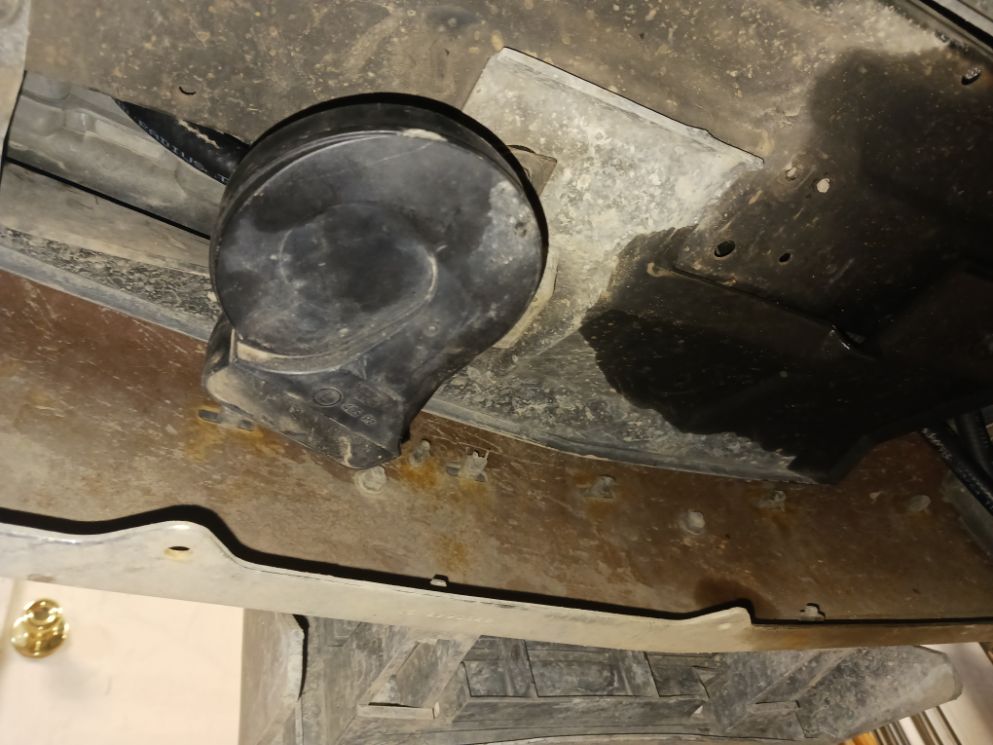
I messed around with a few different horn placements since I had to move it when I installed the new cooler and settled on tucking it under the radiator. I had the front skid plate off so it was easy to search around for a place to loosen a bolt and mount the bracket. I did have to bend a joggle into the bracket to get it to work with out parts hitting.
This is one of my longest posts so far. A lot of little projects but a lot of things I’ve been wanting to get to for a while now. The doors and mirrors were on my list but not enough of a priority for a while now and I’m so glad I got those done. Having reverse working again is huge. Hopefully the bigger tranny cooler fixes my overheat issue and it’s great having all of my lights working again. Took me about a month to complete everything but I’m so much happier with the truck now. I’m grateful to the people that I house sit for that they let me use the shop whenever I’m here. I just found out that they need me to sit for them for about 6 months starting this summer so we’ll have to see which projects I can get done in that time. Maybe install that sub and amp I’ve had sitting around for a couple of years, maybe new suspension and sway bars. We’ll have to see what my budget will allow and if anything else breaks down in the mean time haha.
0 Comments