It’s been a little while since I’ve made any progress on the camper but I finally have some more to post about. I originally started building this thing when I was in LA for a job that was only supposed to go for a couple of months but we stretched it out for almost 2 years. While I loved my boss, the people I worked with and the work we did I really just couldn’t stand being in LA any longer. I grew up there and hated it the entire time I lived there before but after spending 11 years in rural Colorado, big city life was really just too much. I got the shell of the camper constructed and hit the road but never got to the cabinets or really anything interior, until now.
When I first hit the road, I was living in the camper full time for about 8 months before I took a job remodeling a house and moved into the house for a couple of years. That house is now finished and I’m moving back into the camper again. I had access to my friend’s wood shop for a few weeks so I started building my cabinets and made other improvements to the inside. My friend is a master woodworker and has a great shop with all of the tools. He’s taught me a lot about carpentry over the last couple of years (it was his house I was working on) and I got to use a lot of the new skills I learned on this project.
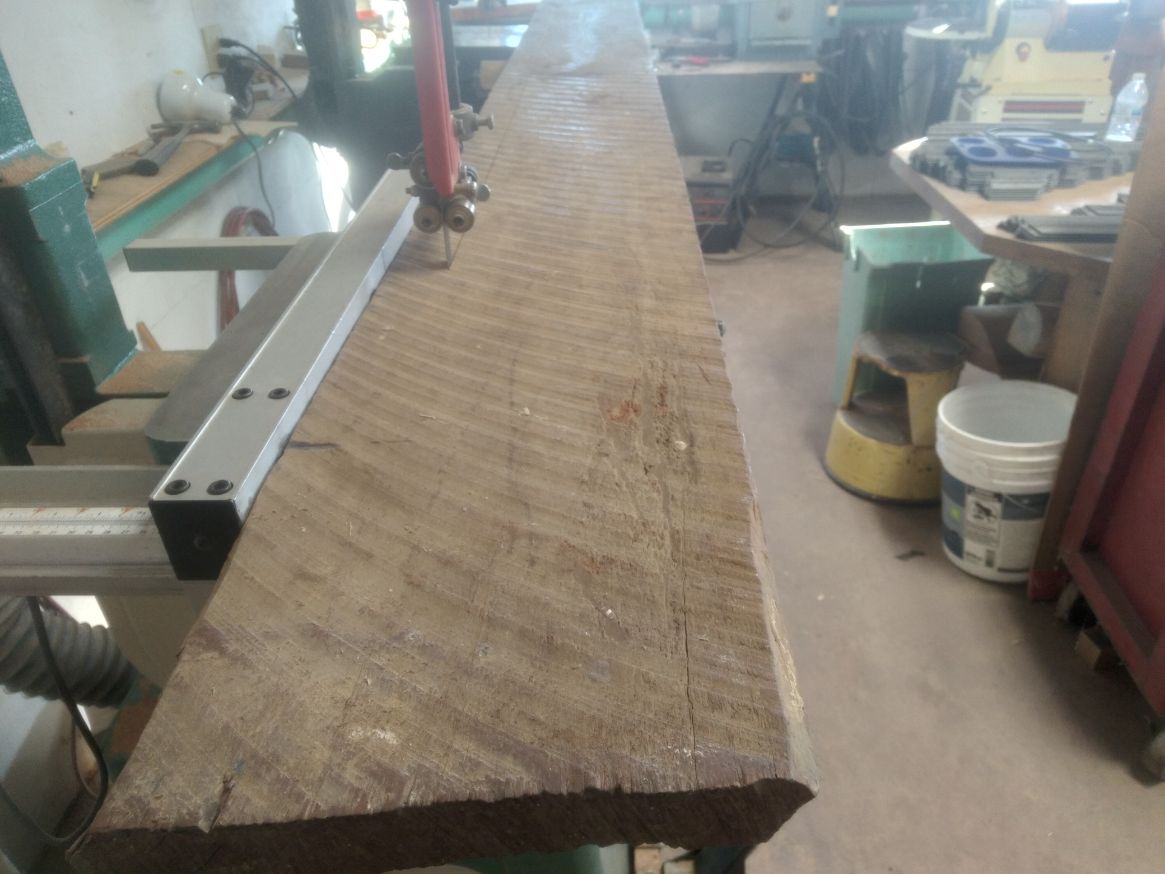
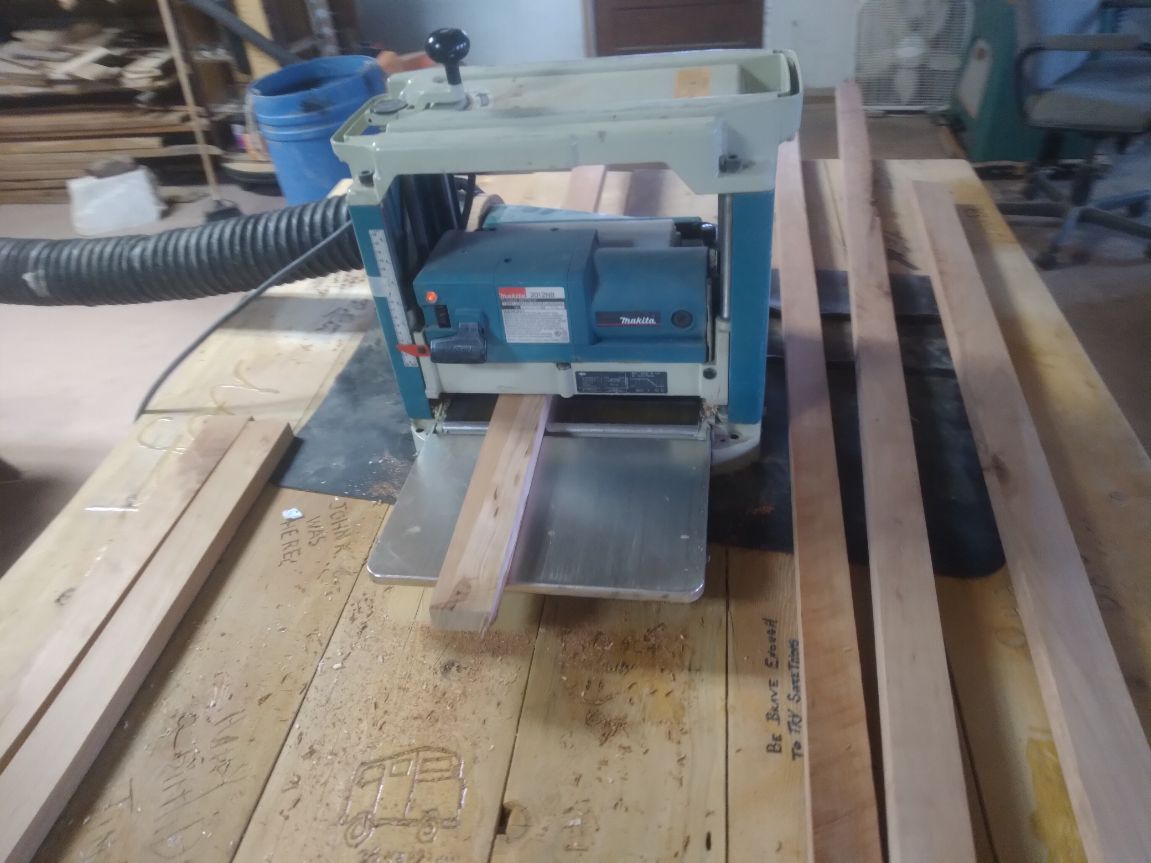
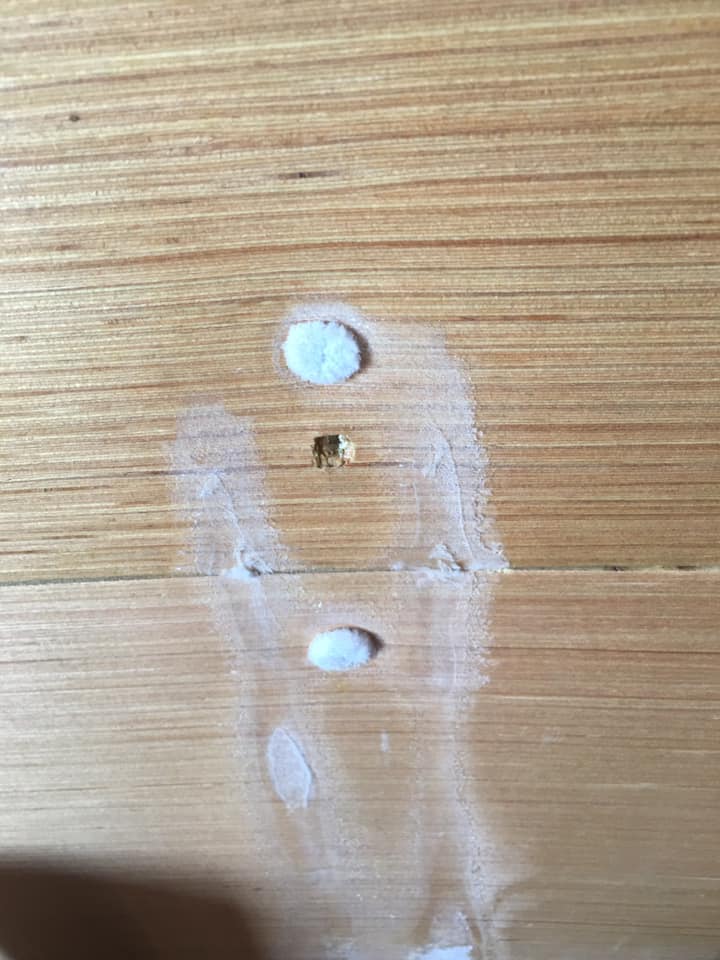
My friend also had a pile of mill cut cherry wood and he was kind enough to share some of the planks with me to do my build. The rough cuts were around 10” wide by 1-1/8” thick and 10’ long. Some of it was punky and had splits and other imperfections I had to cut around but the majority of the wood was in really good shape. I milled everything down to the sizes I needed and went to work building. This was a fun process, I love learning a new skill and incorparating it into a big project.
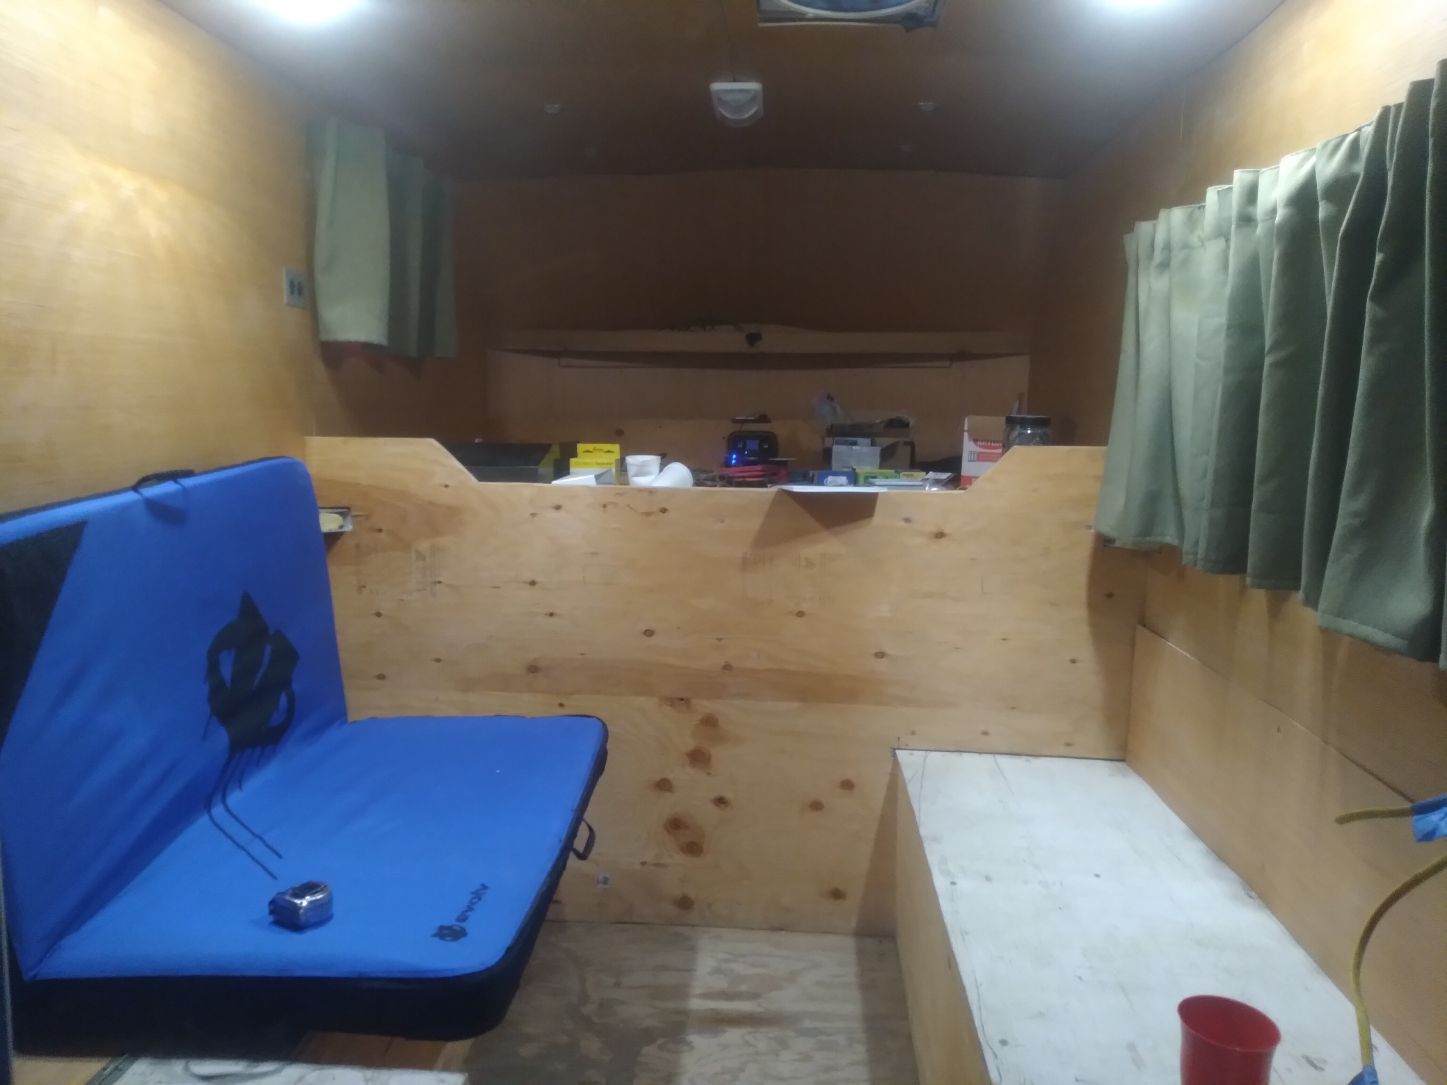
As I said, the camper was just a shell when I left LA. I had a bed and a couple of shelves up in the cabover, but otherwise it was pretty baron. I made it work by using storing my non-refrigerated food in the trailer and cooking outside, even in the rain. The fridge sat up on one of the side benches while parked but I had to drop it onto the floor every time I moved. I also had stuff piled up on the side benches and all of my dishes were in a big tote. The tote doubled as a wash basin which was kind of nice. It worked, but it wasn’t home. (sorry about the blurry photo but it was the only one I had pre cabinets).
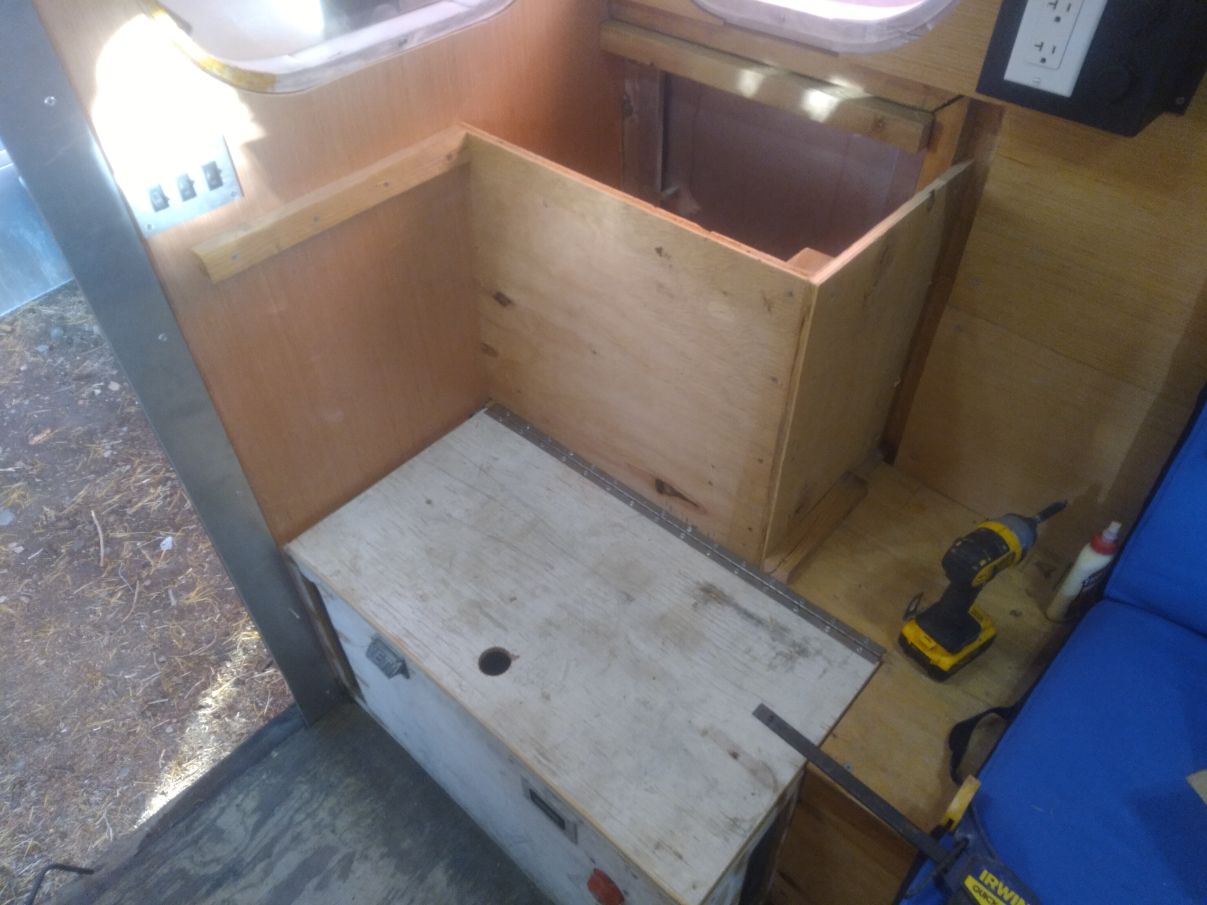
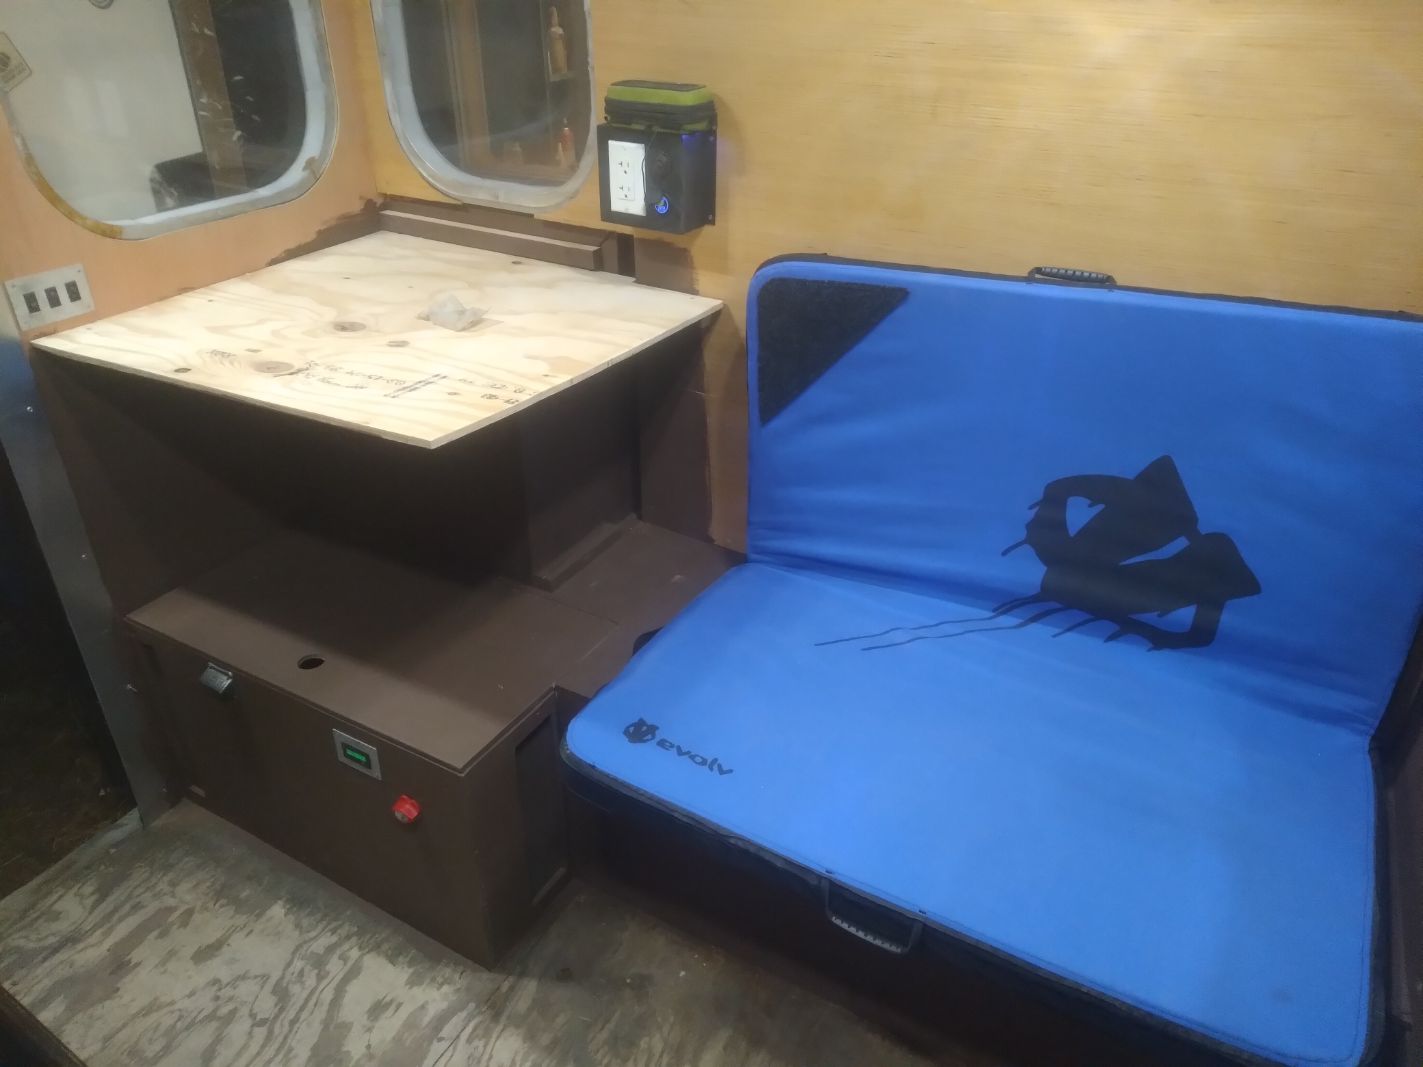
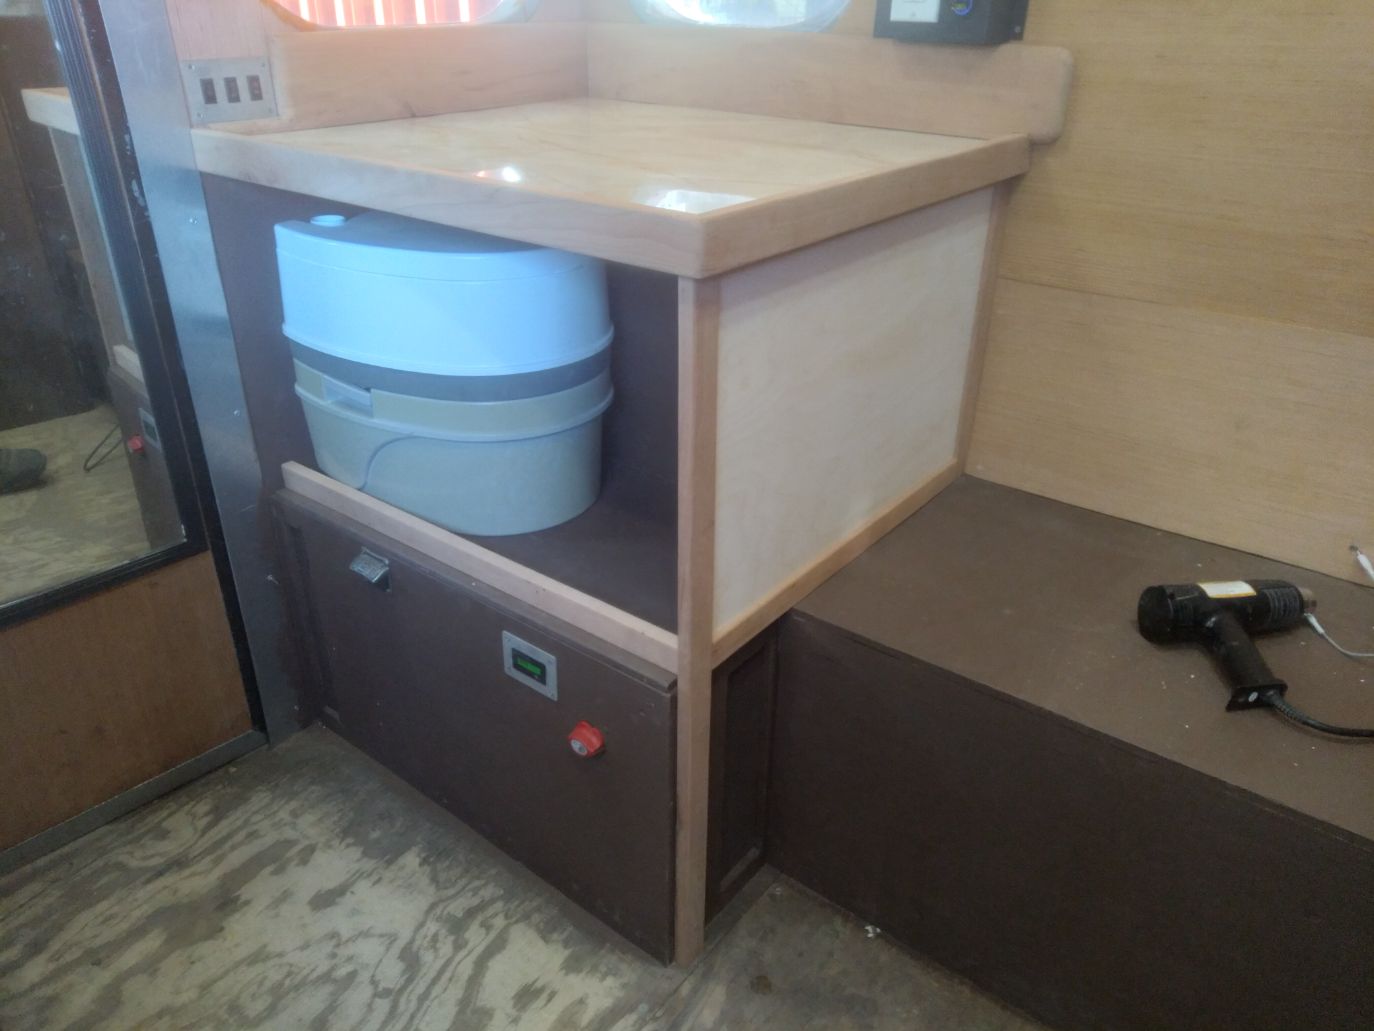
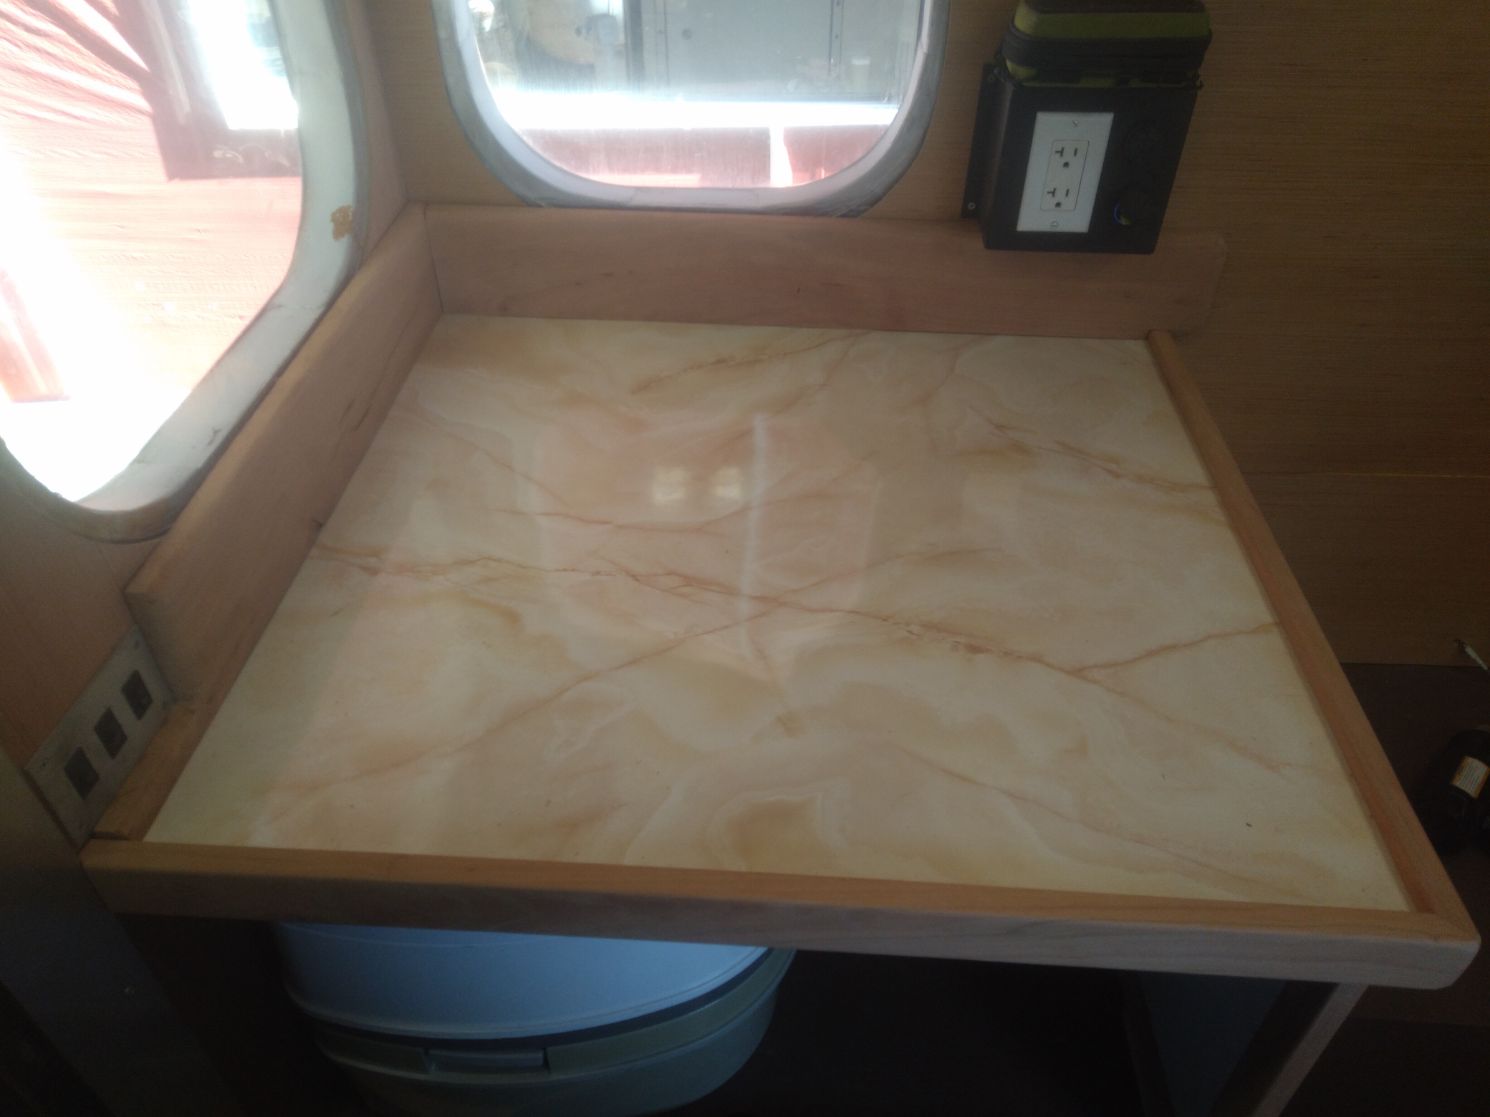
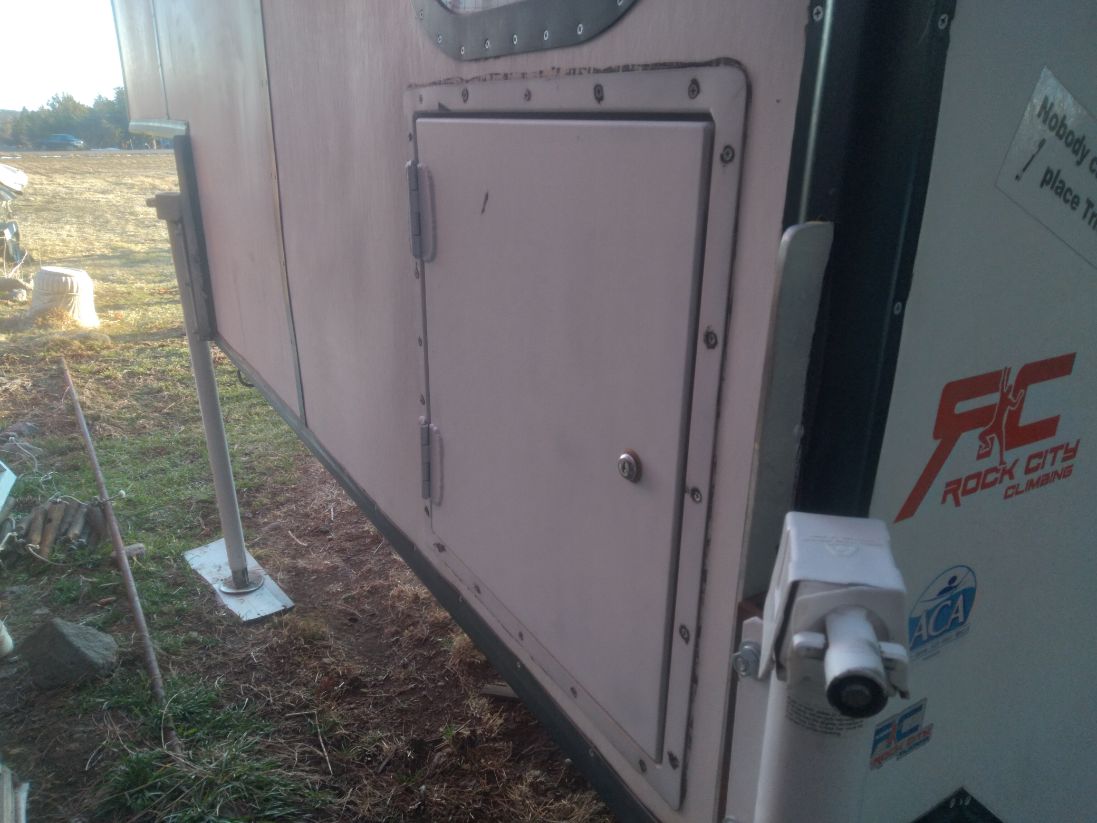
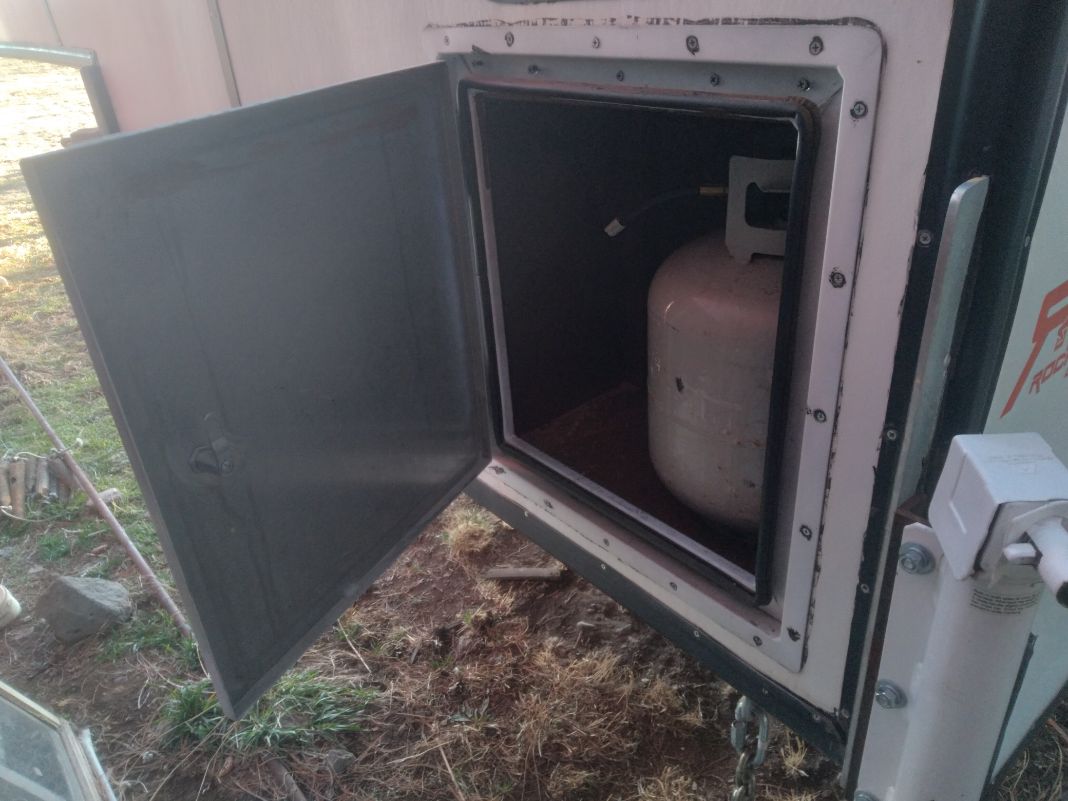
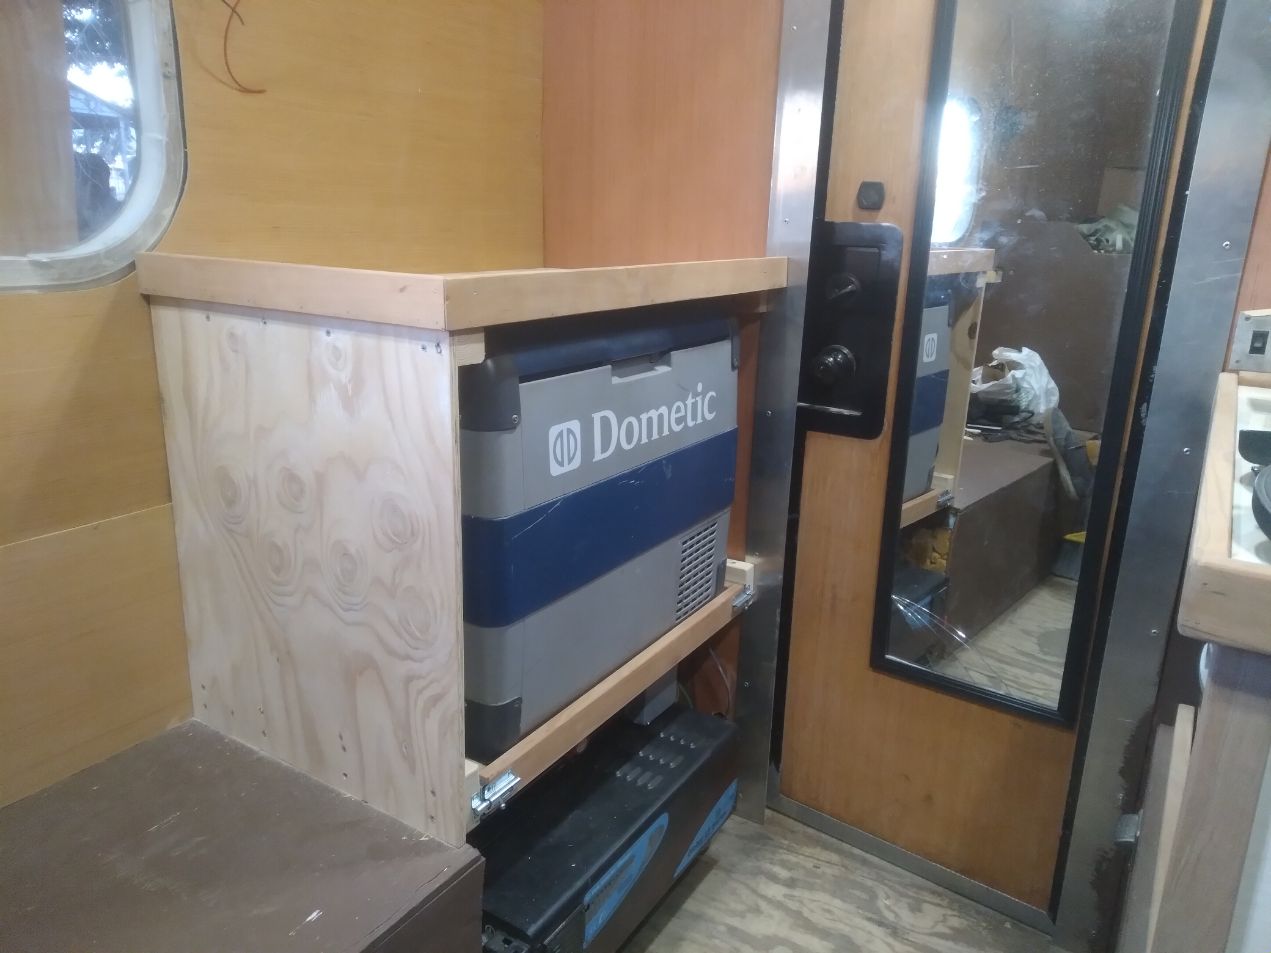
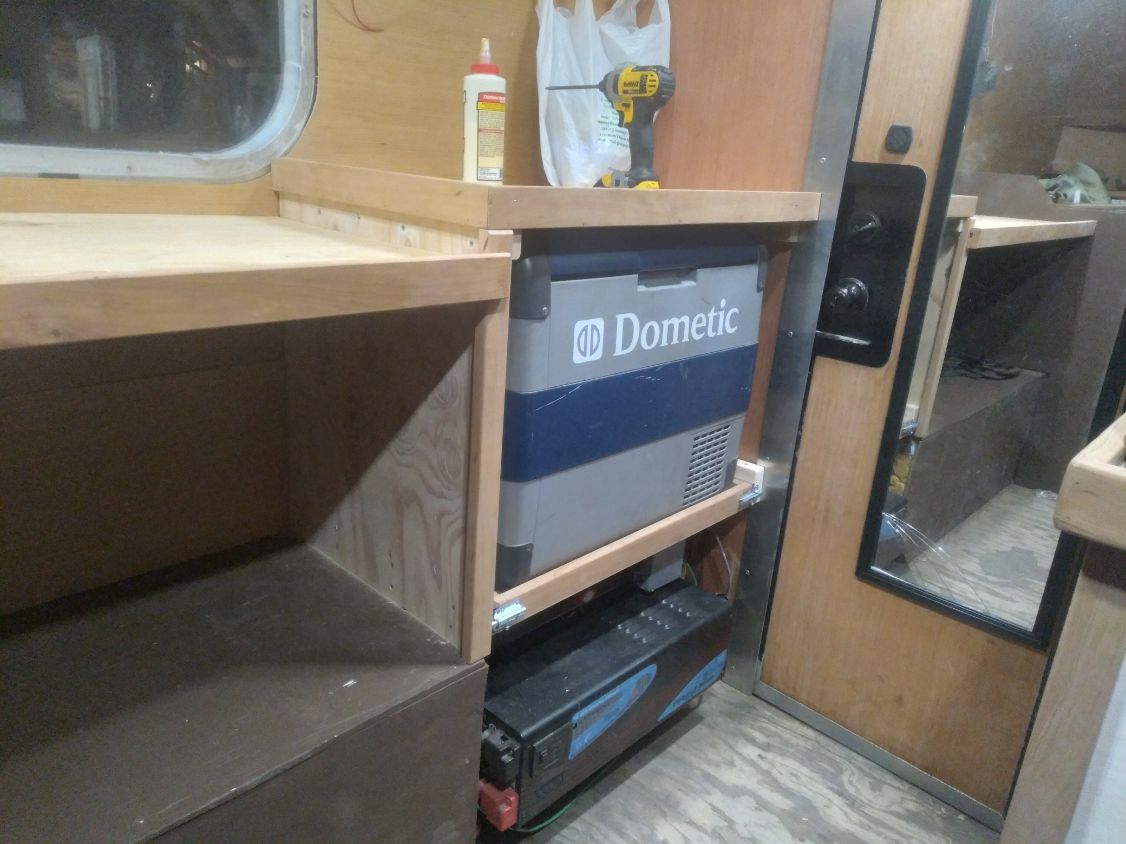
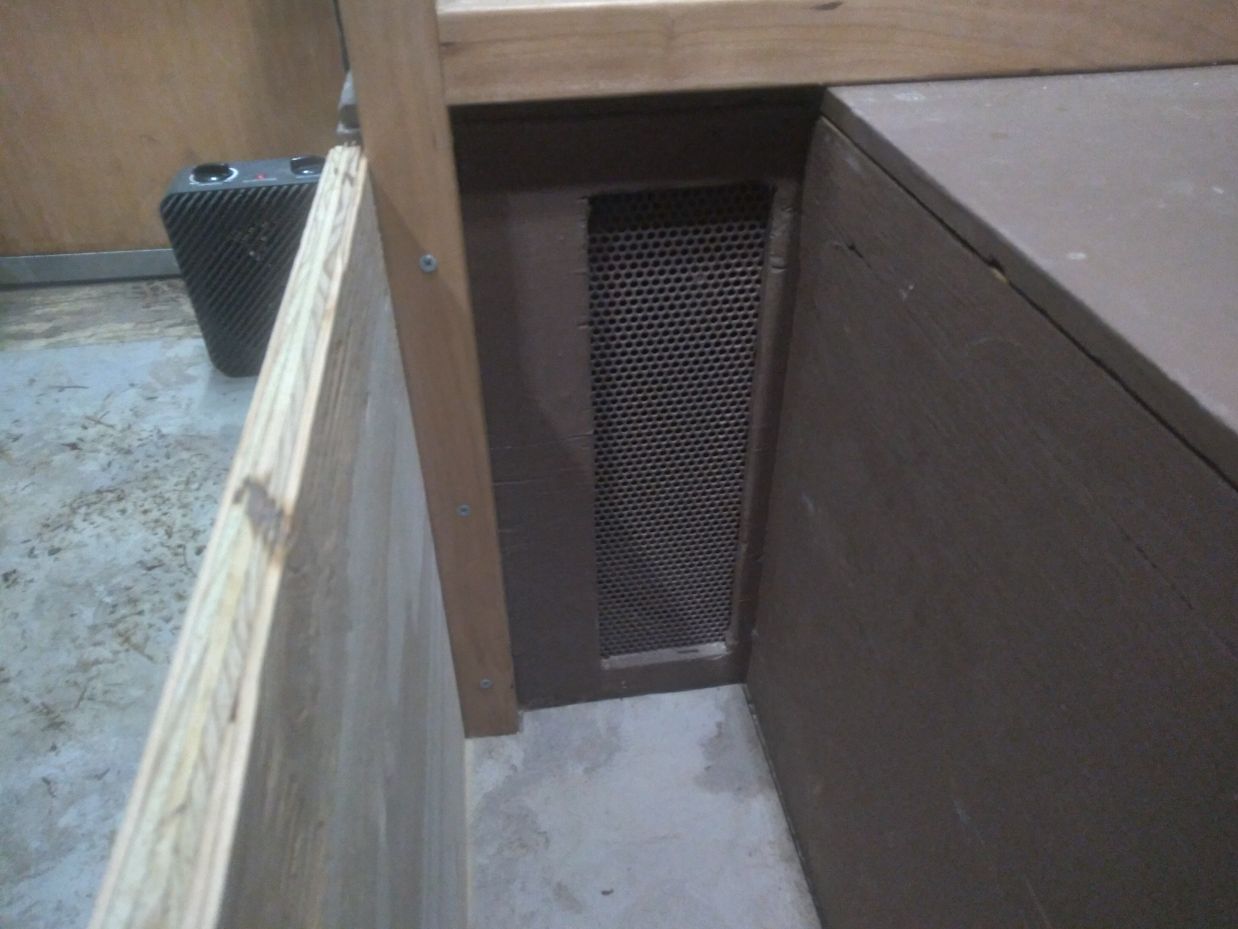
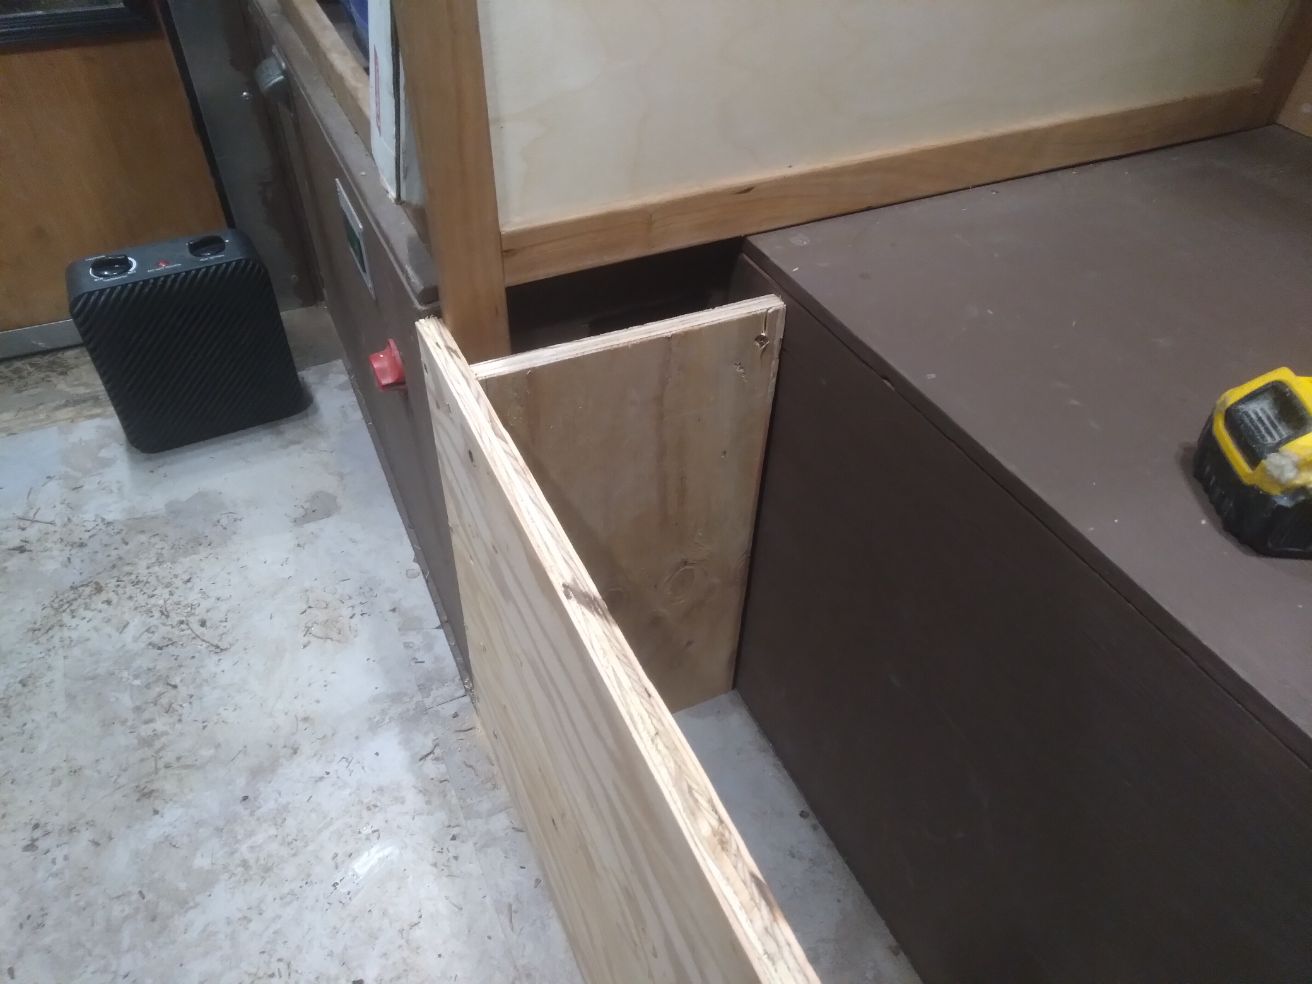
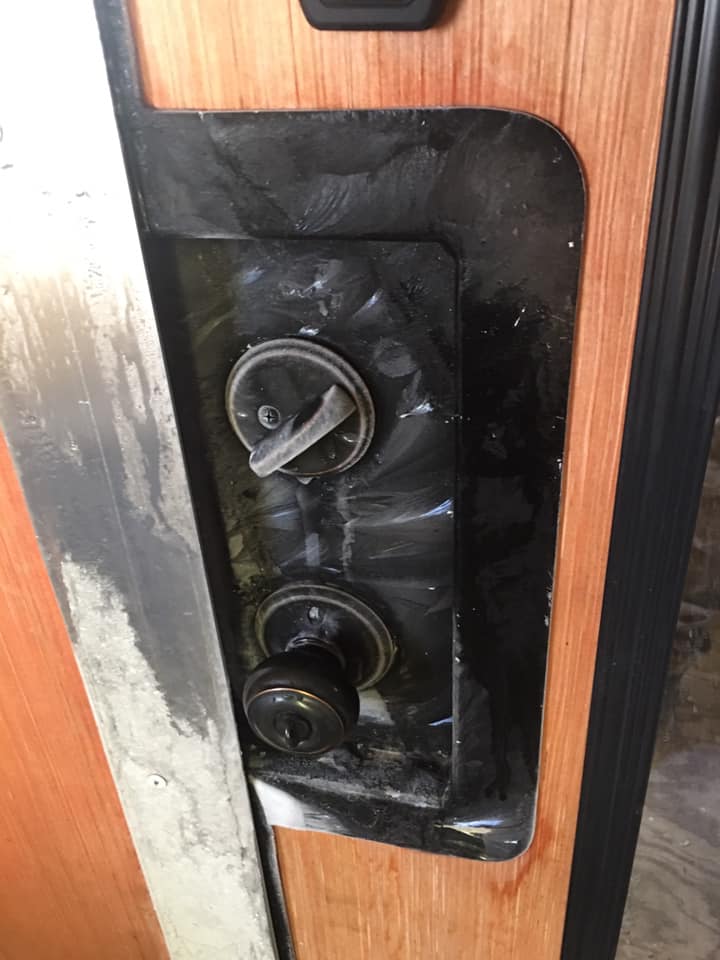
I started in the back driver side corner around the battery box. I made an aluminum door to the outside before leaving LA and mounted it in this back corner. This is my access door for the propane bottle, I built a box out of 1/2″ plywood around the door. I then made a counter top out of half inch plywood. From here I built a frame out of the milled cherry wood and on the side panel used 1/8″ Baltic birch. I haven’t decided if I’m going to put a door on the front of this opening yet, I may just put a certain. Under the hatch that is painted white in the first picture is my battery bank with all of my 12v fuses and breakers so I don’t wan to cover it more than I have to. I painted the lower part of the interior with a heavy duty exterior paint that my buddy was throwing out, I’m not a big fan of the color but, you know, free. My buddy also had random rolls of laminate that I glued to the counter top for a nice finished look.
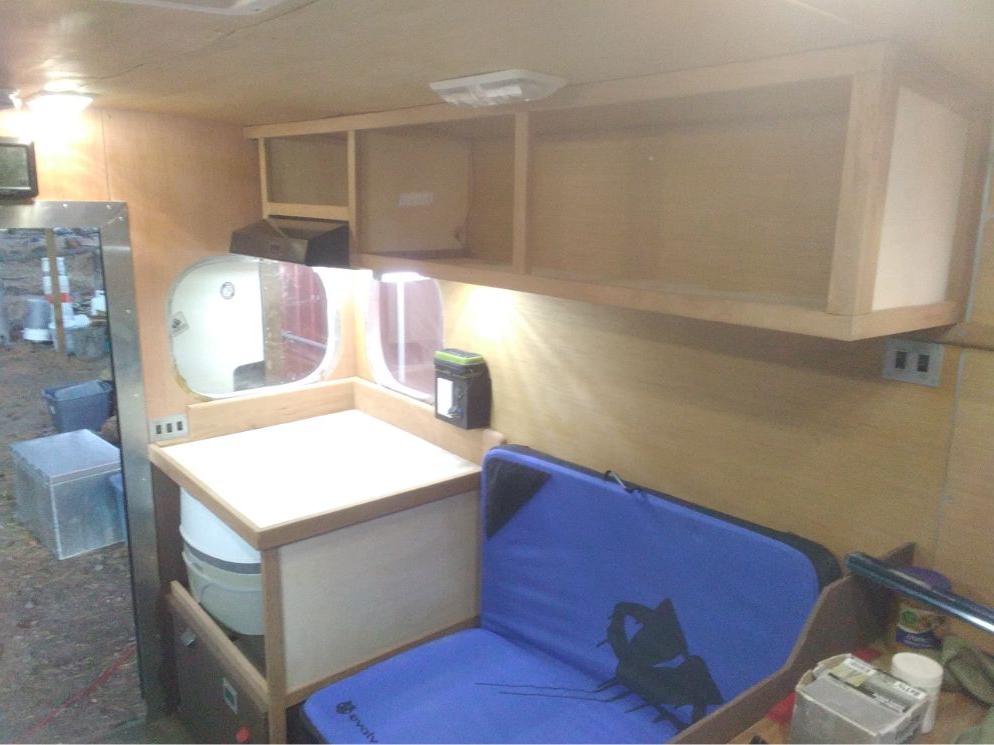
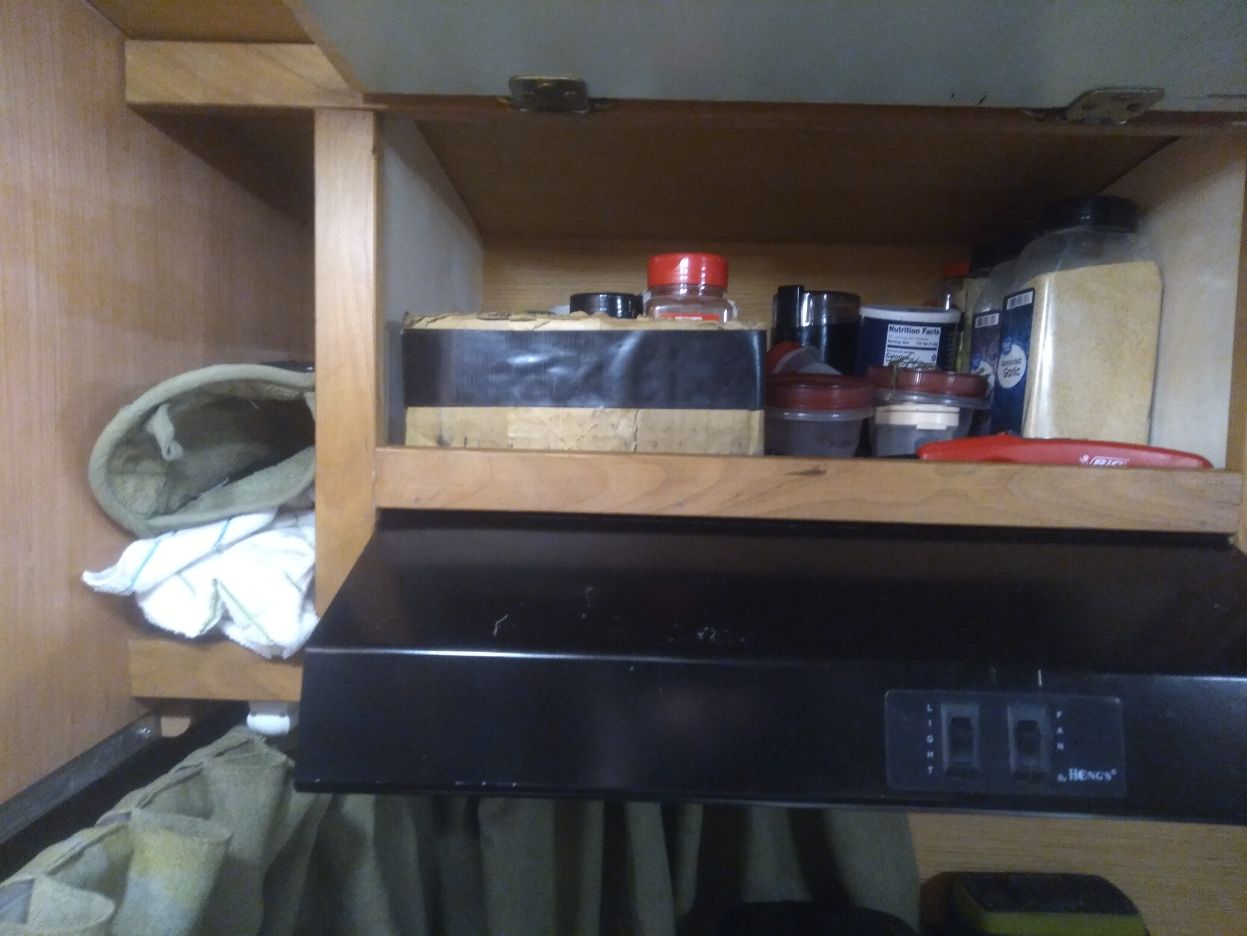
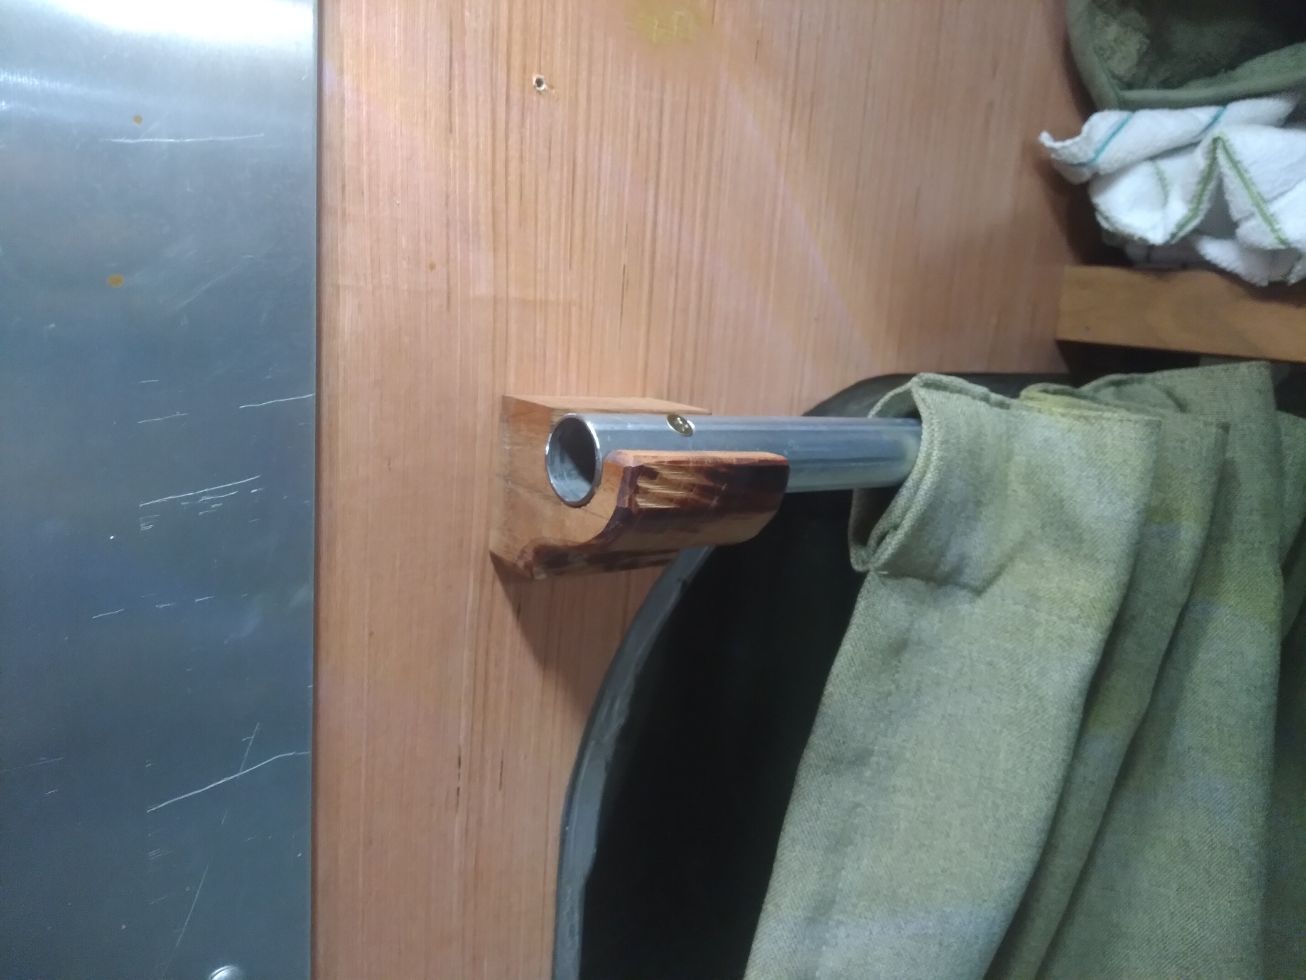
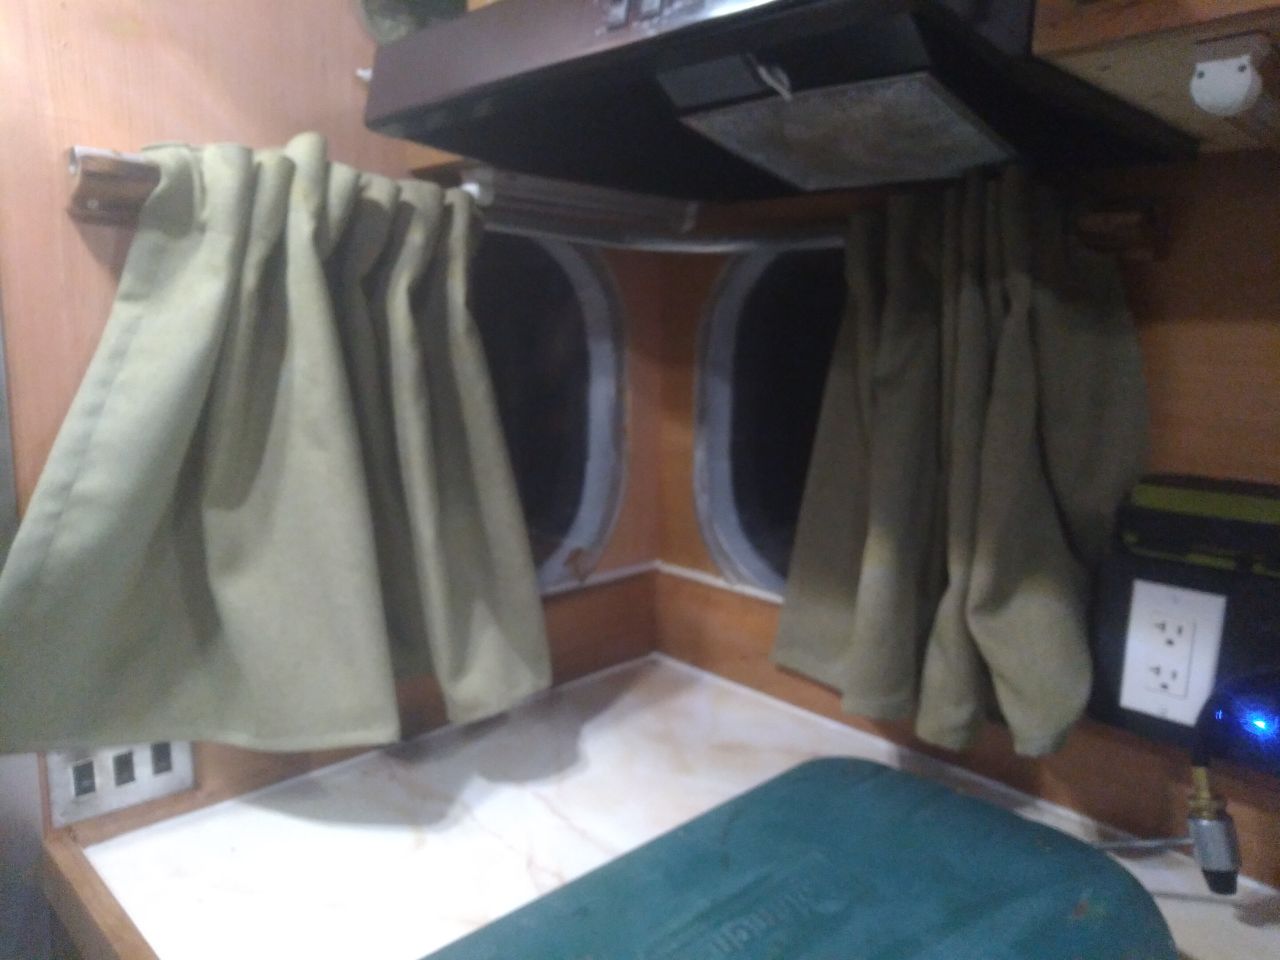
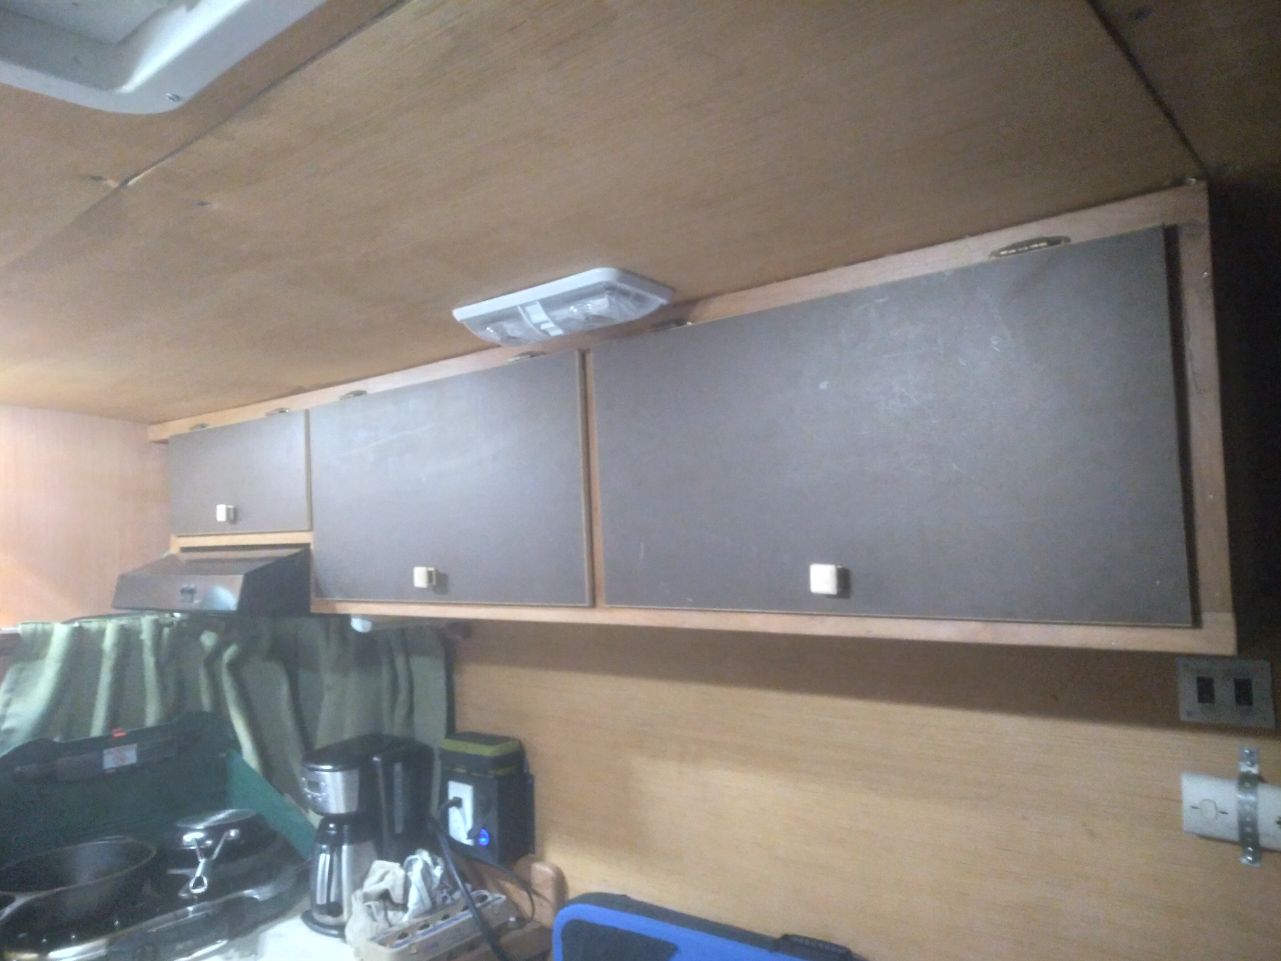
With the bottom cabinet done, I started in on the top which would become my pantry. I use the counter top in that corner for my stove so I installed a hood vent in the upper cabinet that vents to the outside. There was an awkward space above and to the left of the hood that worked out great for spice storage above and a space for dish towels and pot holders to the left. With the two windows in the corner I made a custom rod out of 3/4 electrical conduit and made some beefy blocks on both ends strong enough to not need a center support. The built in hood fan is super loud but I have a plan to swap it out with a 6″ computer fan.
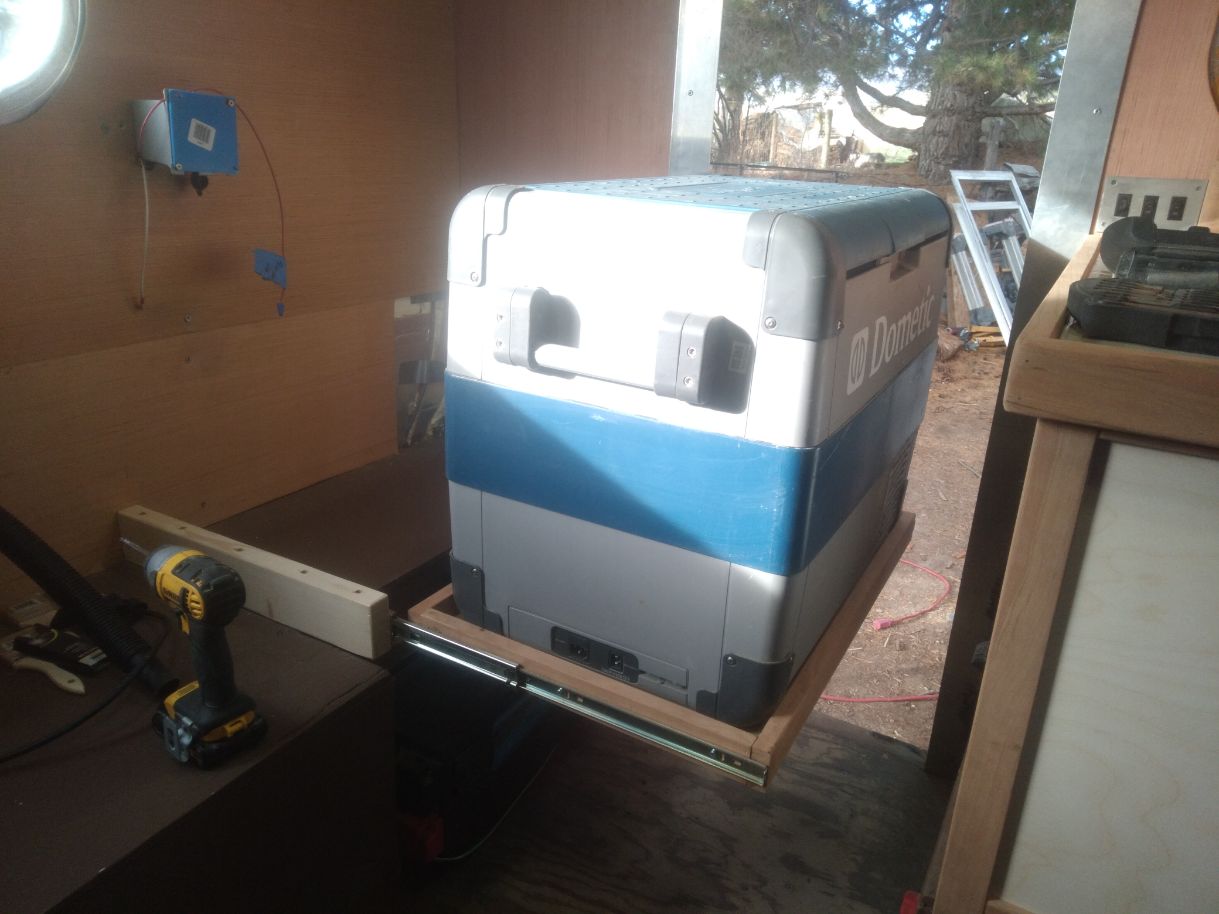
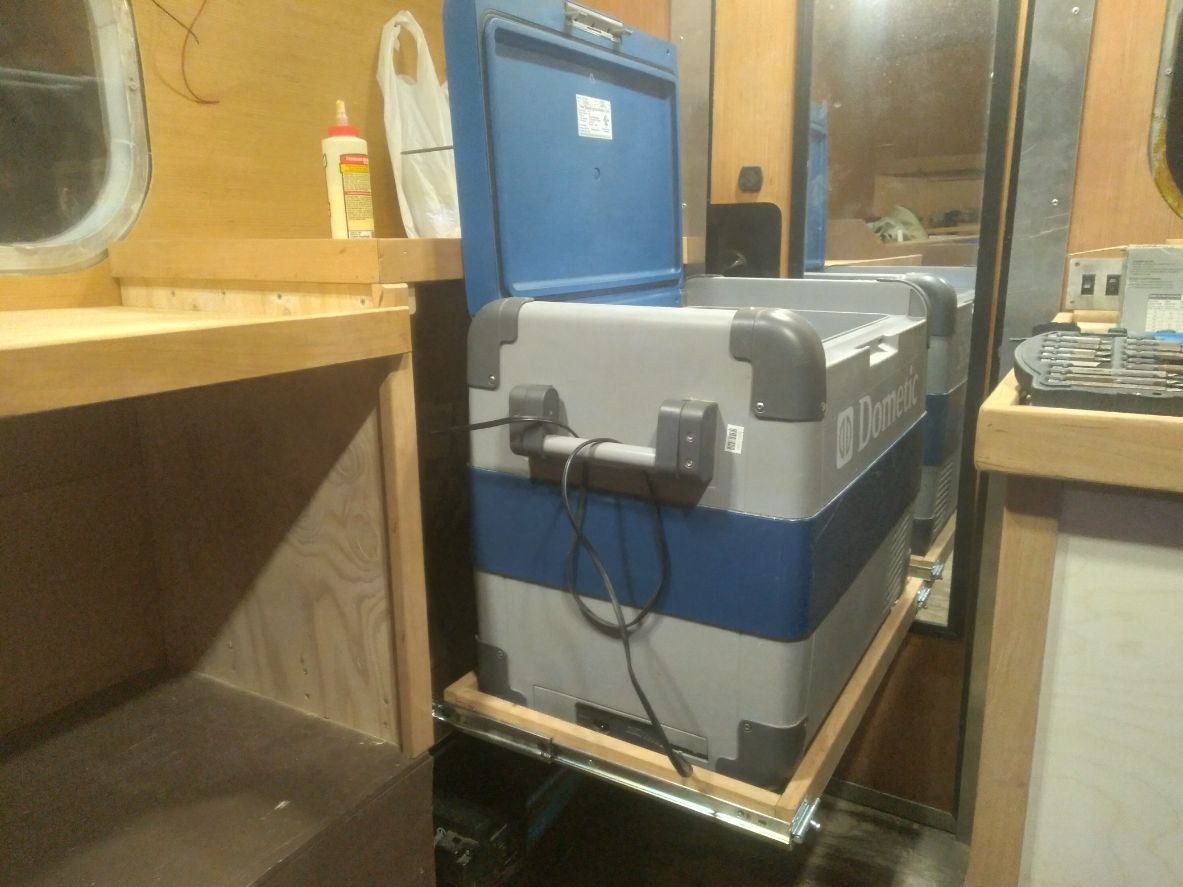
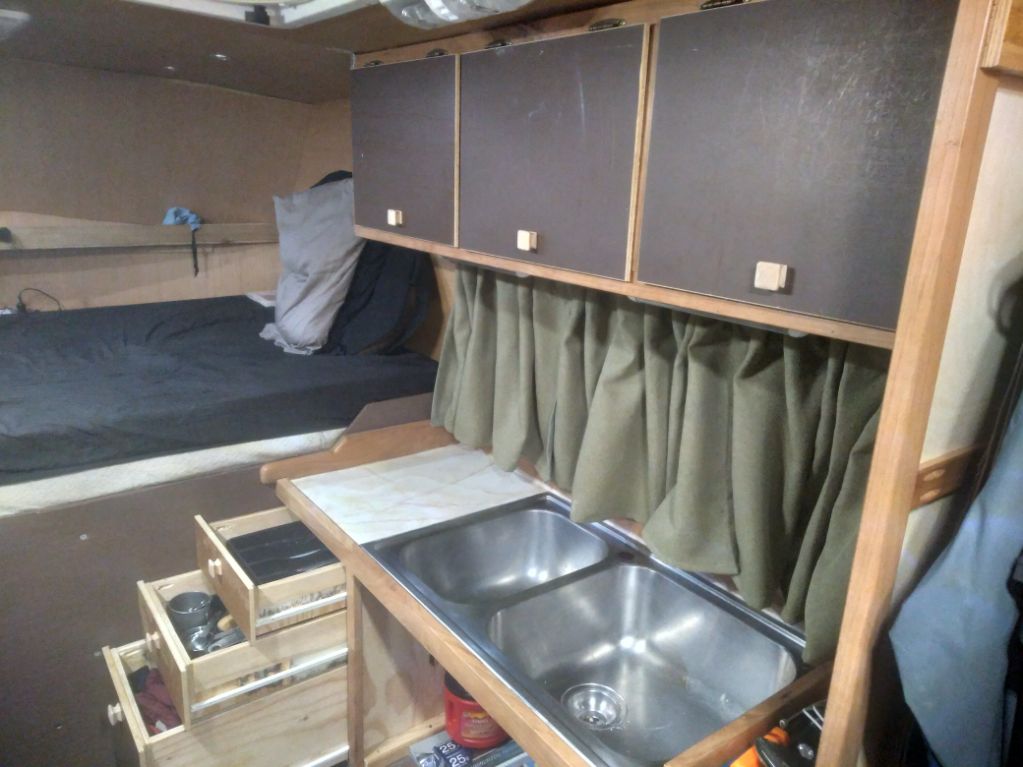
This is one of the most exciting parts of the inside build. The fridge opens upward which holds in the cold but made it to where I had to have the ability to slide it out to open. I used soft-close ball bearing drawer slides and built a drawer to mount the fridge to. I then made a counter top extending to the bed to mount the sink in. To keep the drawer from sliding out while I’m driving I put a slide bolt on either side. I also strapped the fridge down to the drawer with NRS Loop Straps.
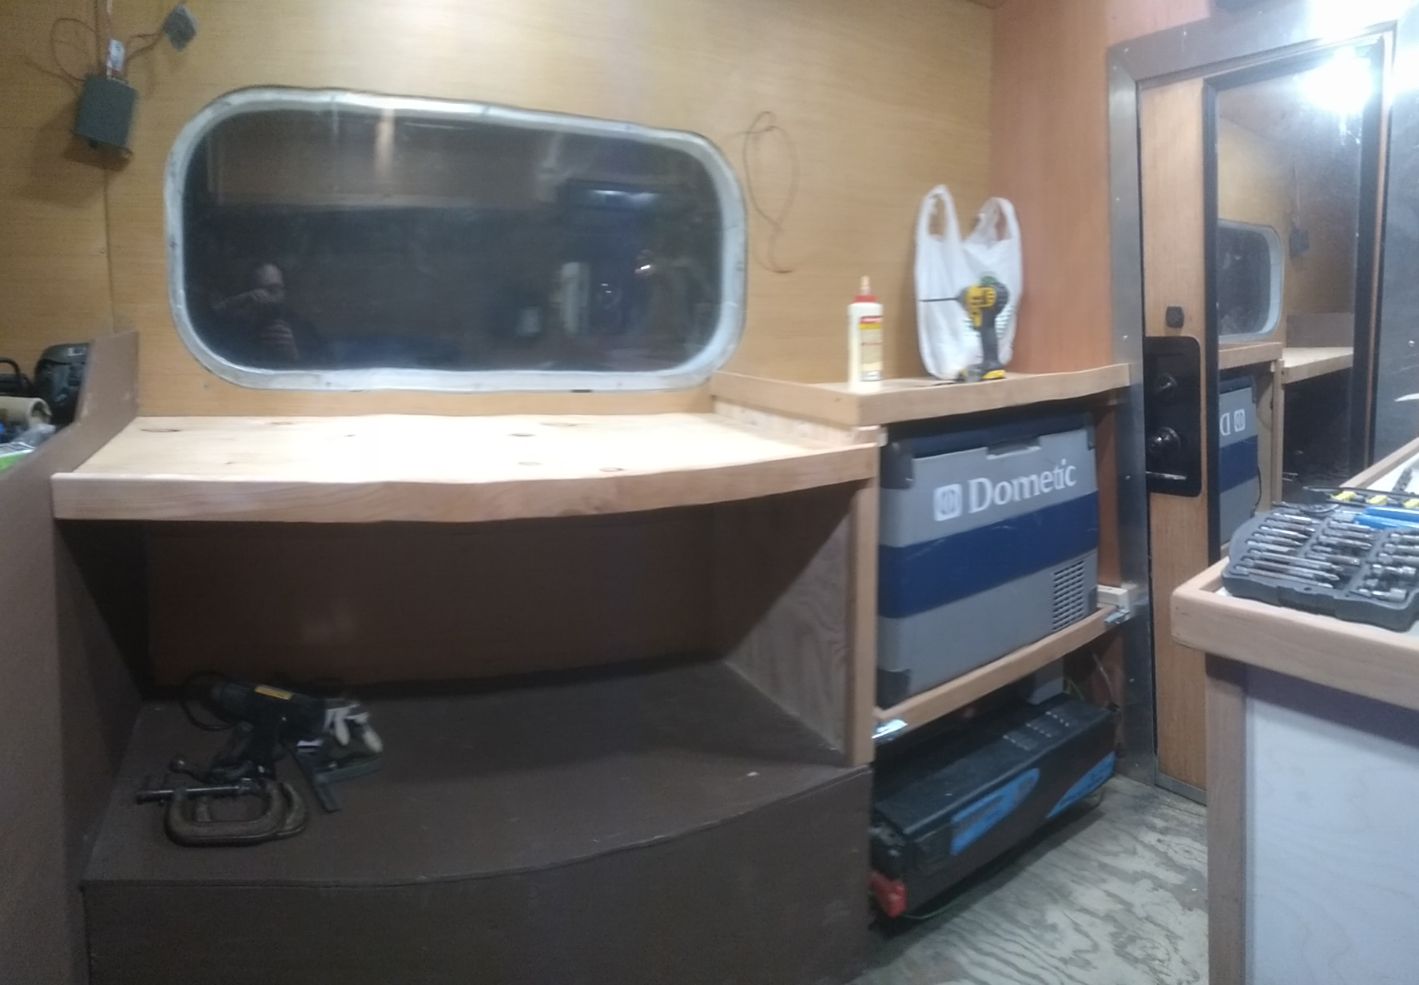
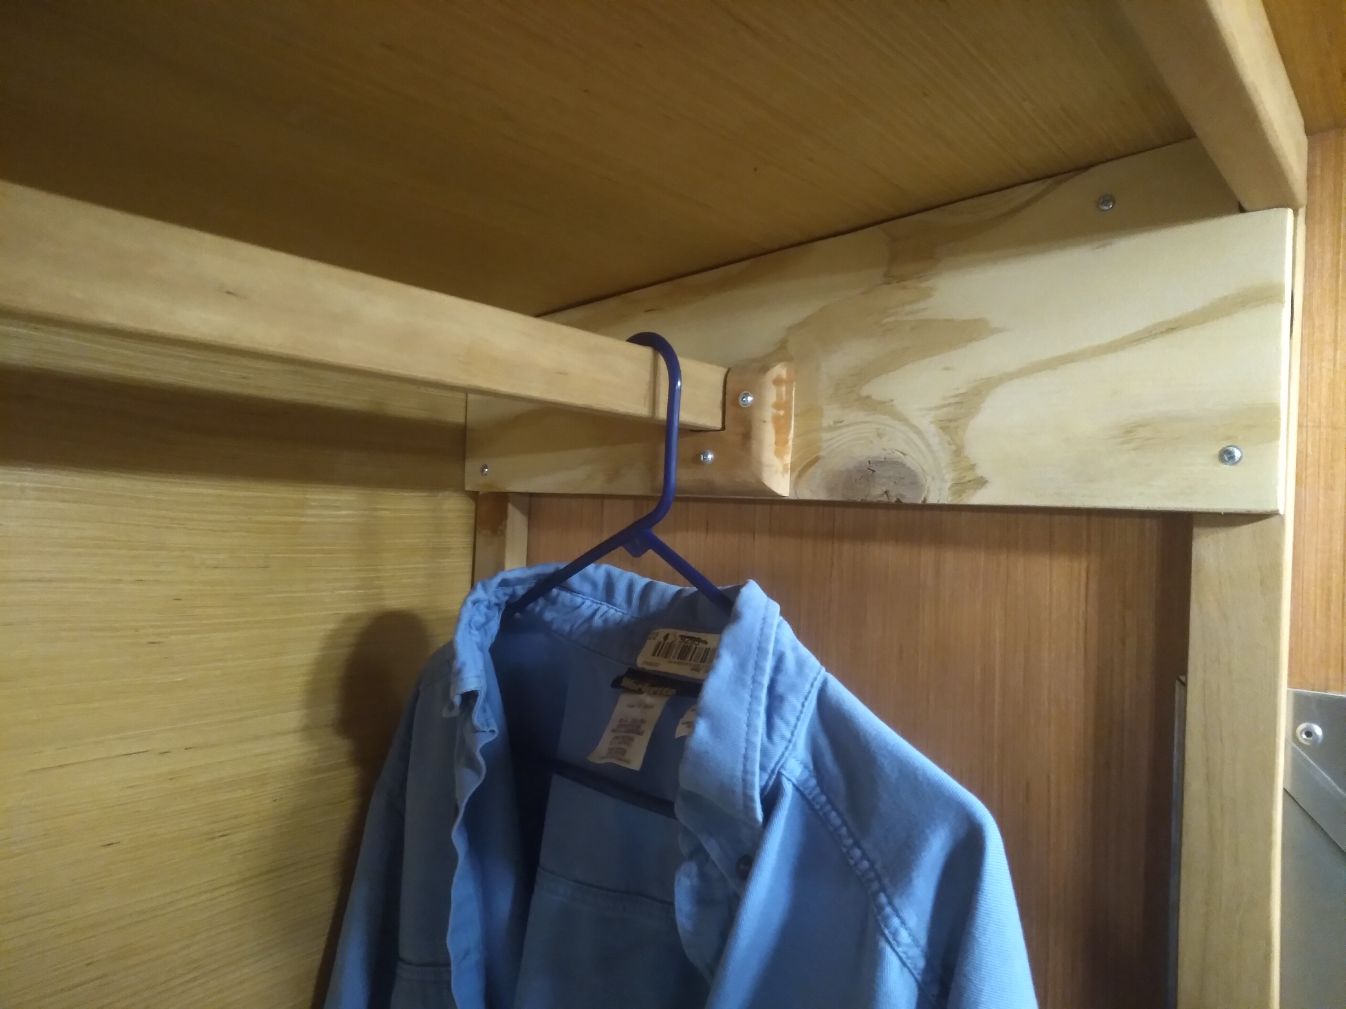
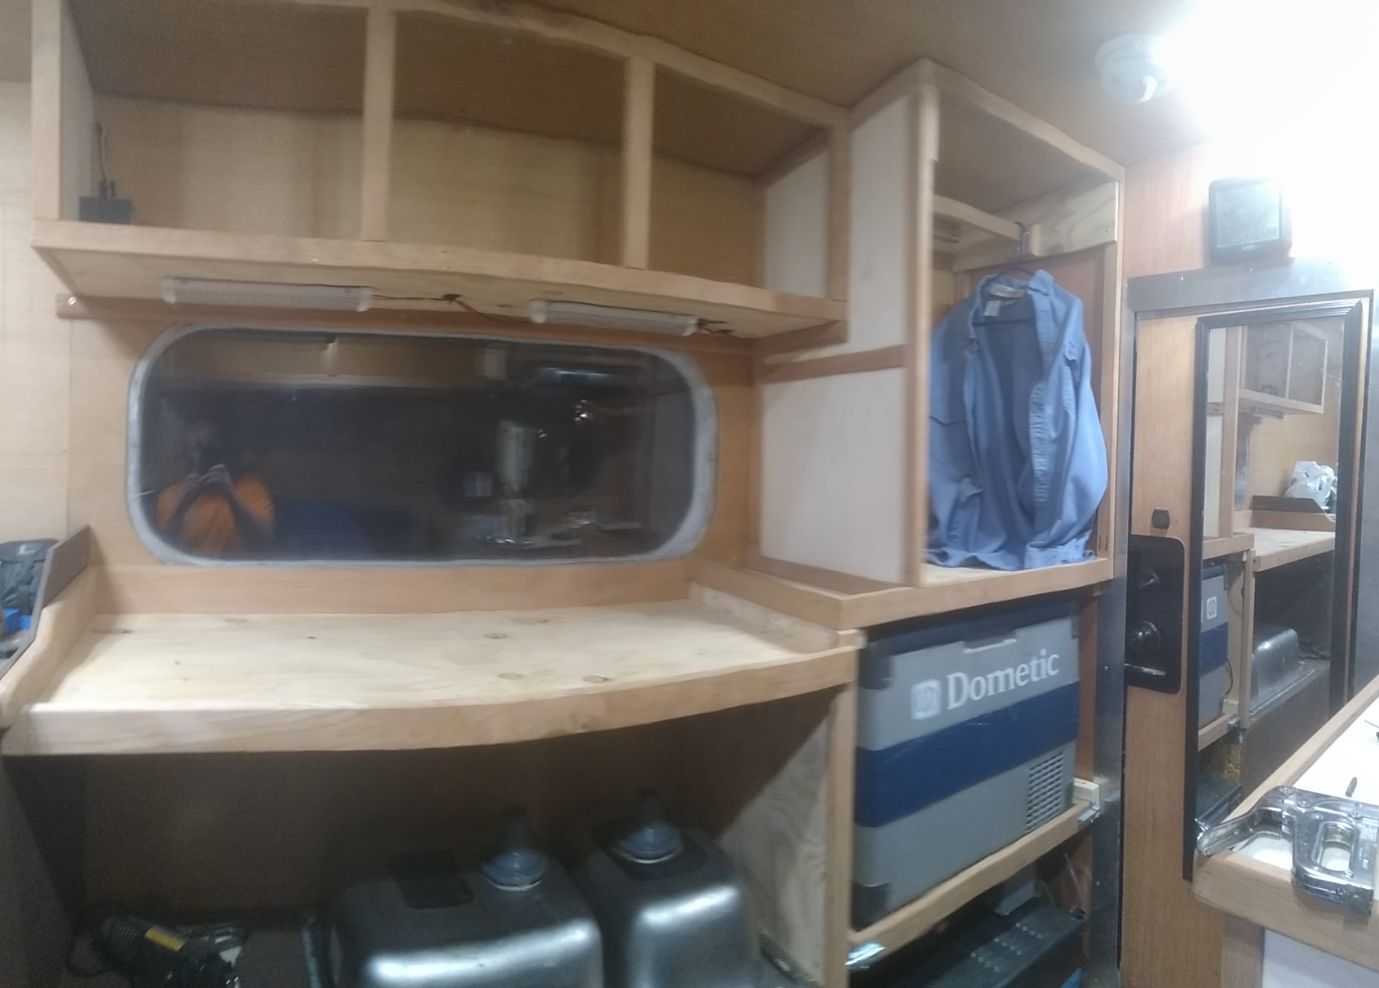
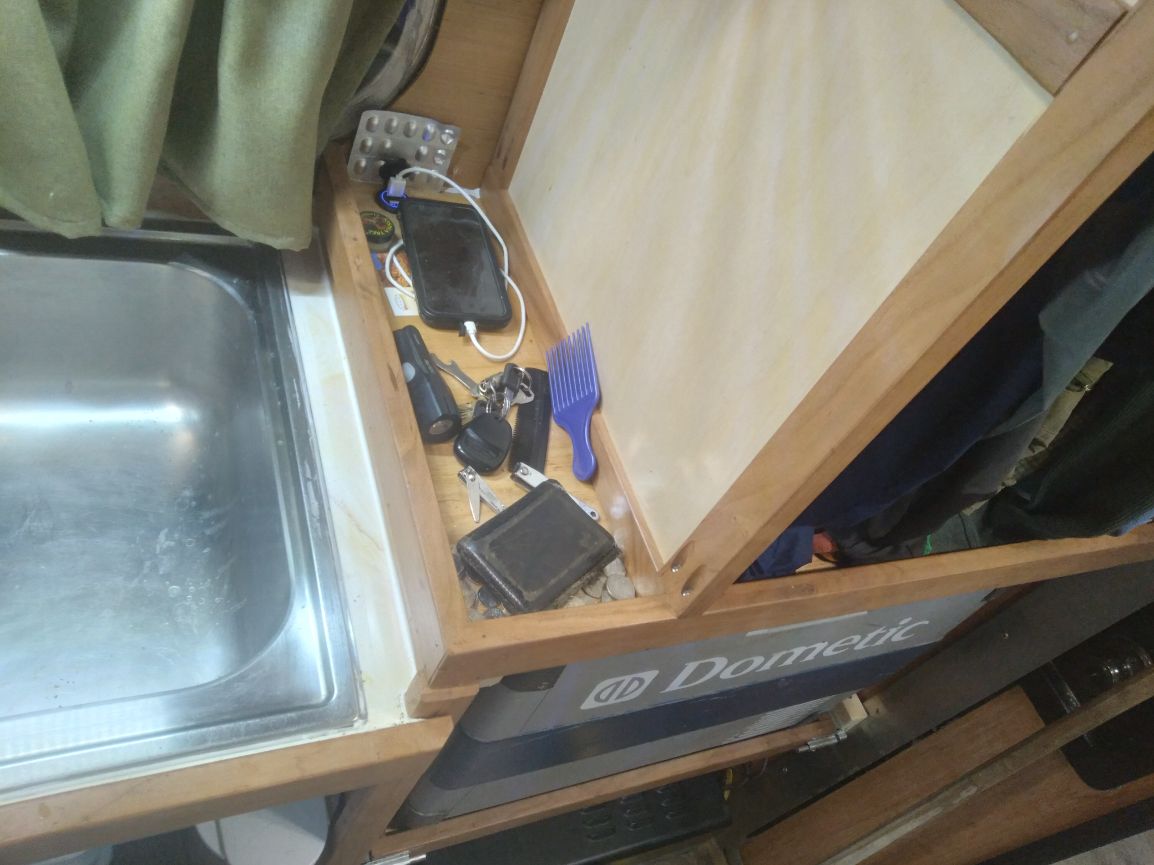
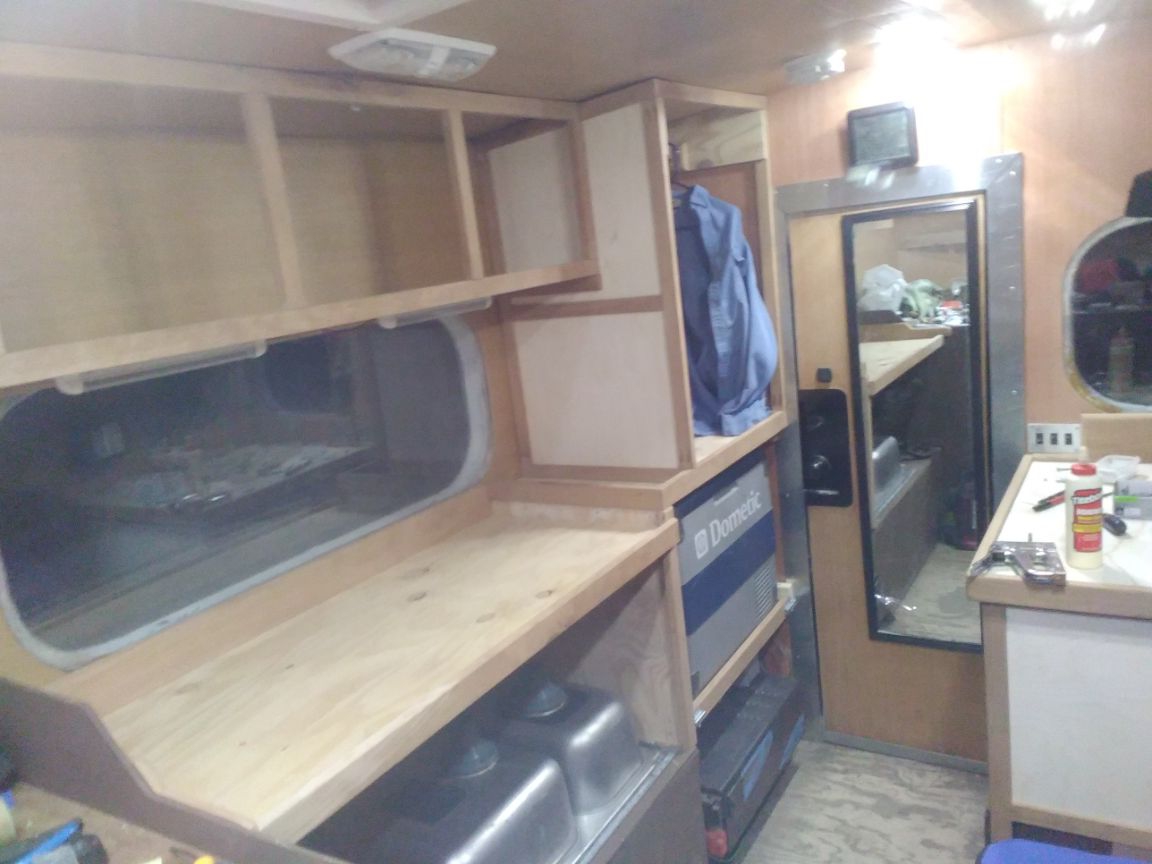
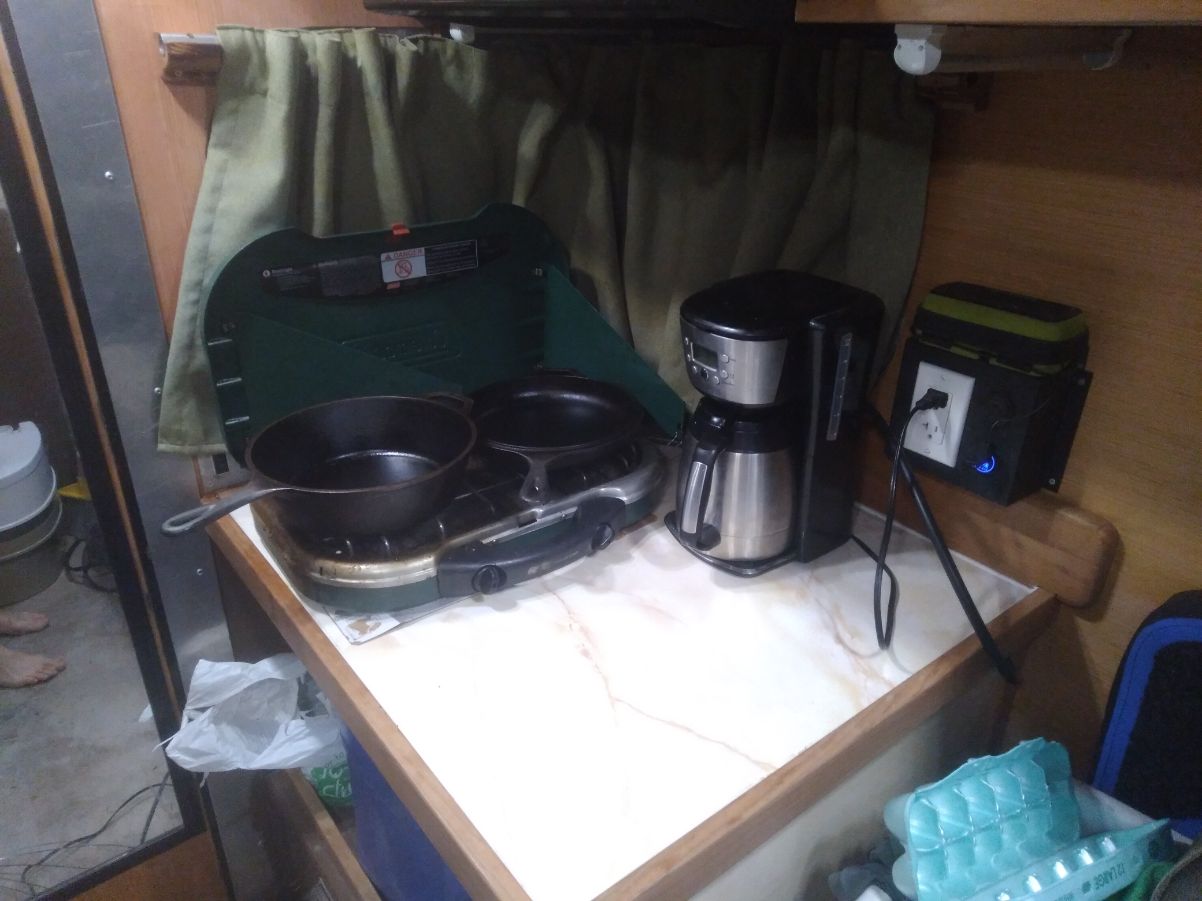
Above the fridge I made a closet to hang all of my shirts, pants, and jackets. I also built an upper cabinet that stores all of my dishes. On the side of the closet I left a catchall space to drop my keys, loose change and other random stuff. I added a USB charging port in this catchall to charge my cell phone or other devices. I faced all of the countertops with some of that milled cherry wood and left it 1/2″ or more above the top so things wouldn’t roll off. I have mixed feelings on this, I think it helps keep stuff on the counter but makes it more of a p.i.t.a. to clean.
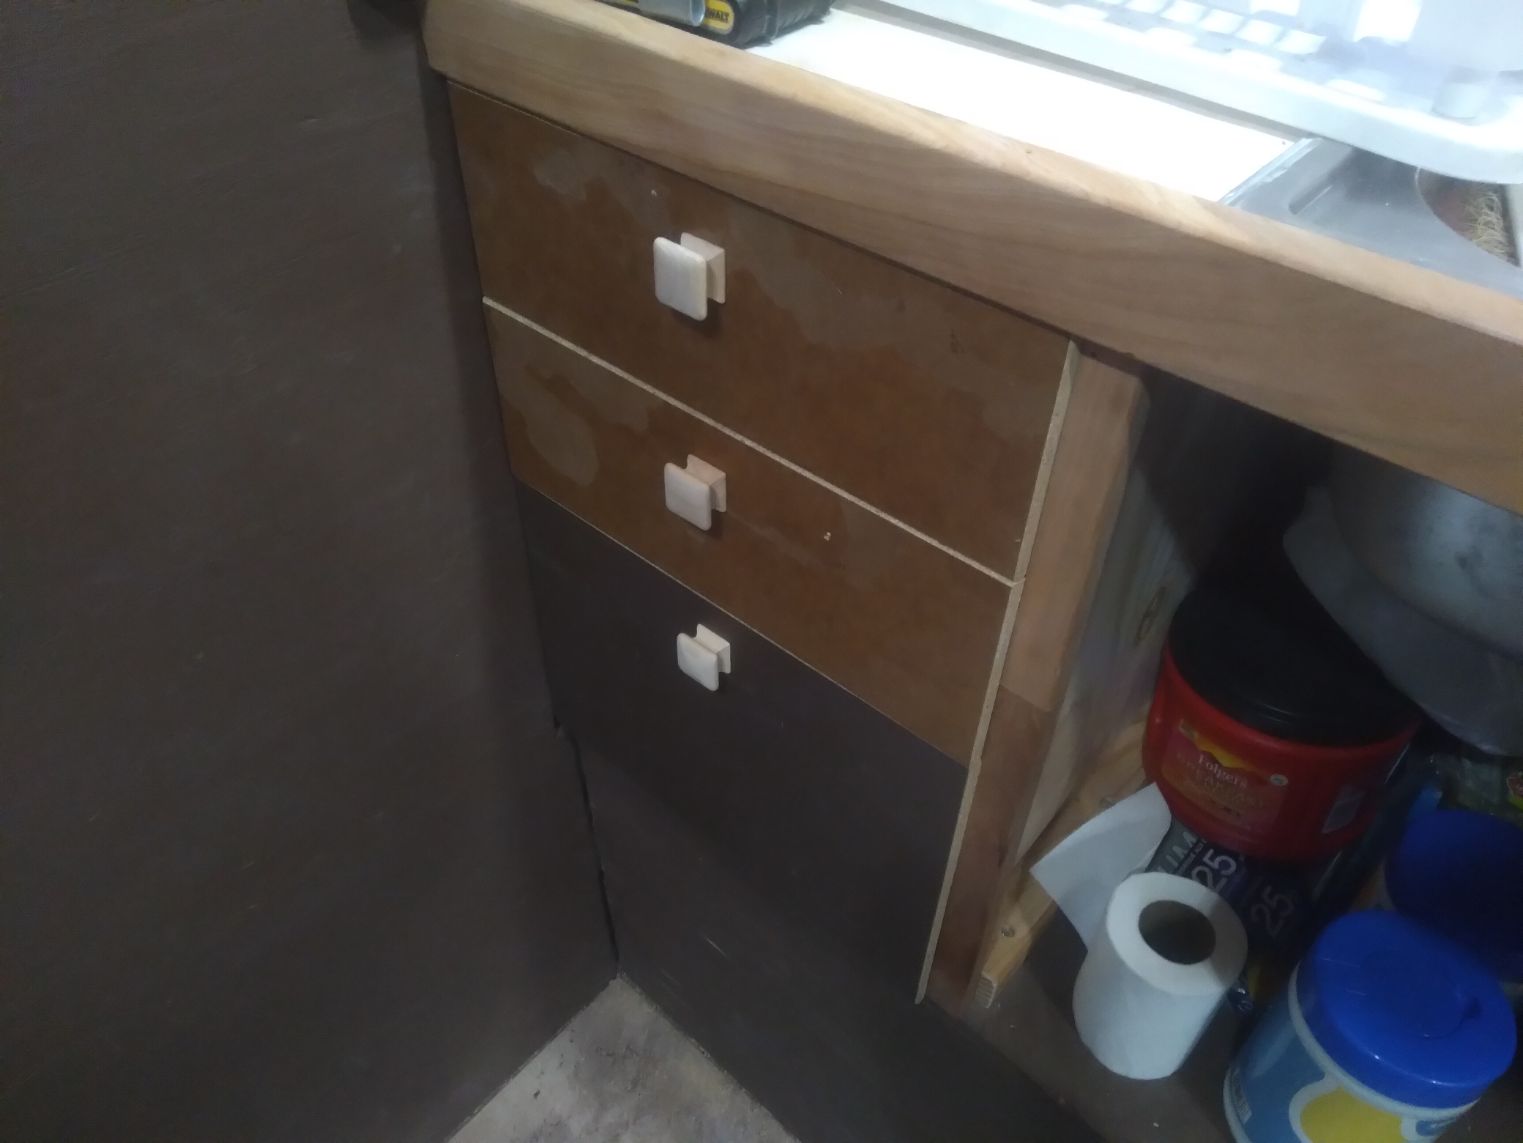
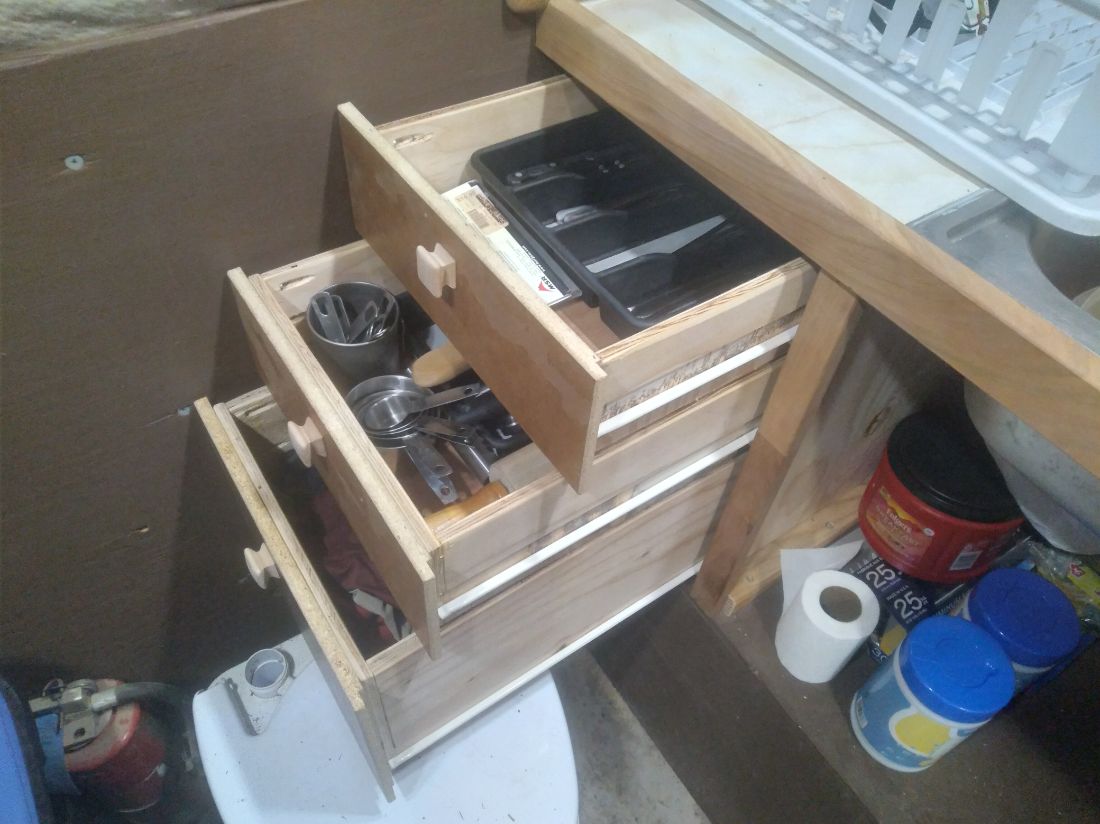
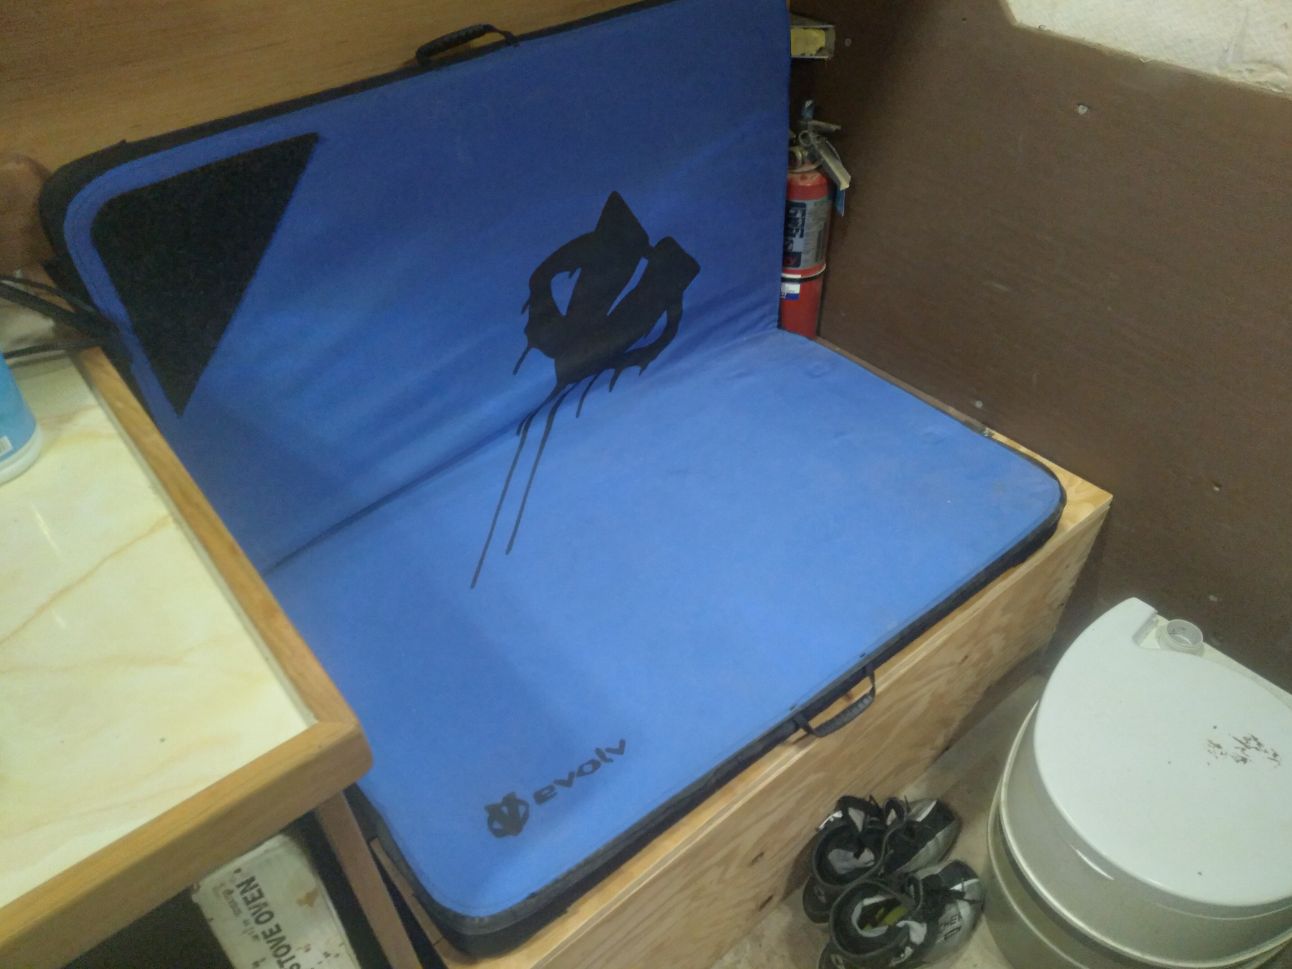
I built three drawers in the lower cabinet for silverware and other stuff. I also found a sink at Habitat for $22, I kept going in waiting for a smaller sink but finally settled on this big one. I’m kind of glad I got the bigger sink, washing dishes in it will be nice. I’ll be making a cutting board that covers the sink so I don’t loose the counter space. I still need to figure out my water storage and plumbing. I made some temporary doors and drawer fronts for now. I did a reface on my buddies kitchen and used the old cabinet doors to make these. They are made from particle board so I don’t expect them to hold up. I’ll make some nicer ones when I can get a hold of the right material.
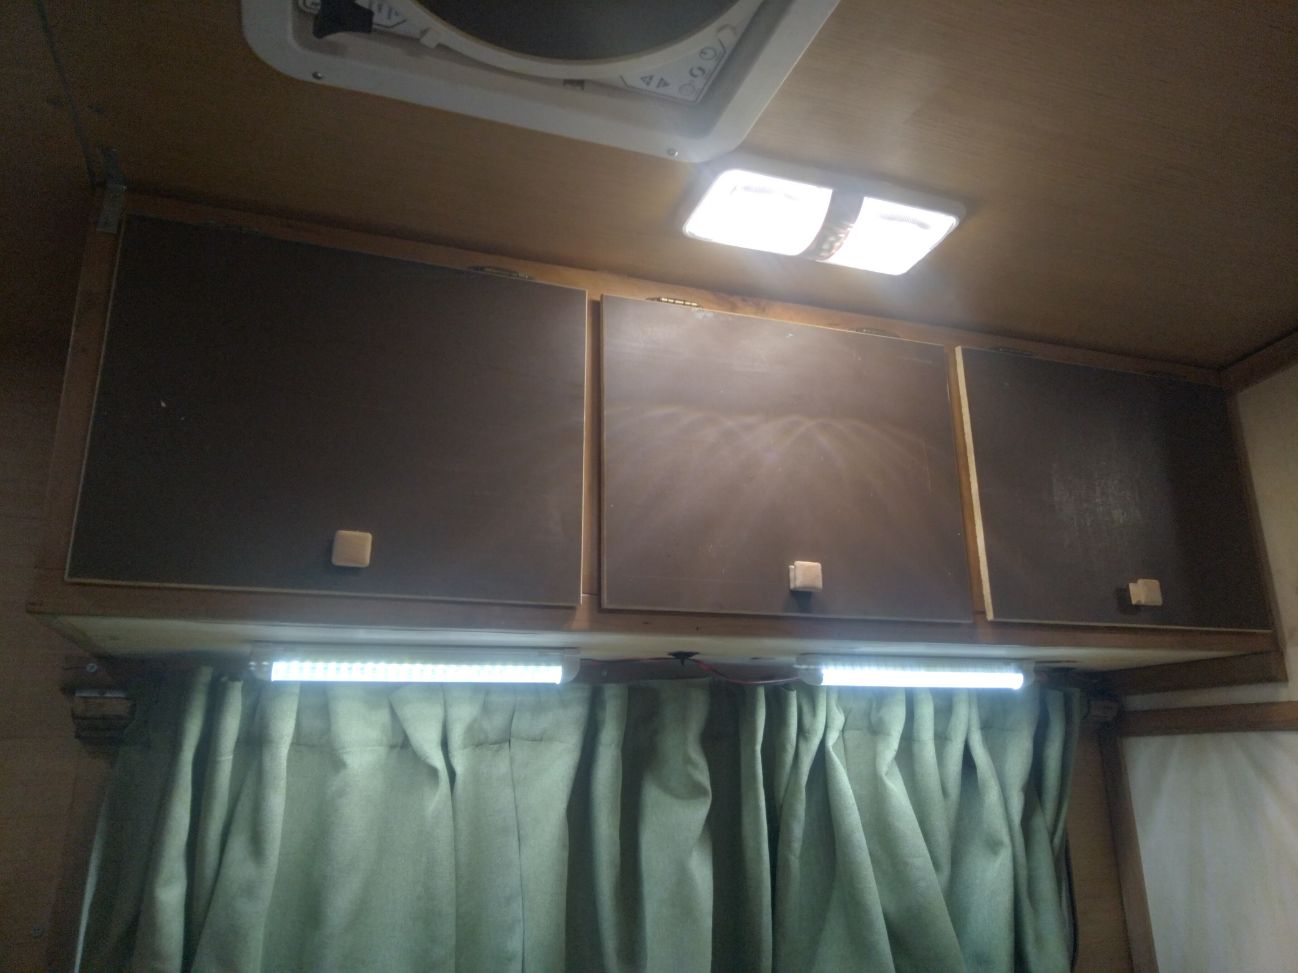
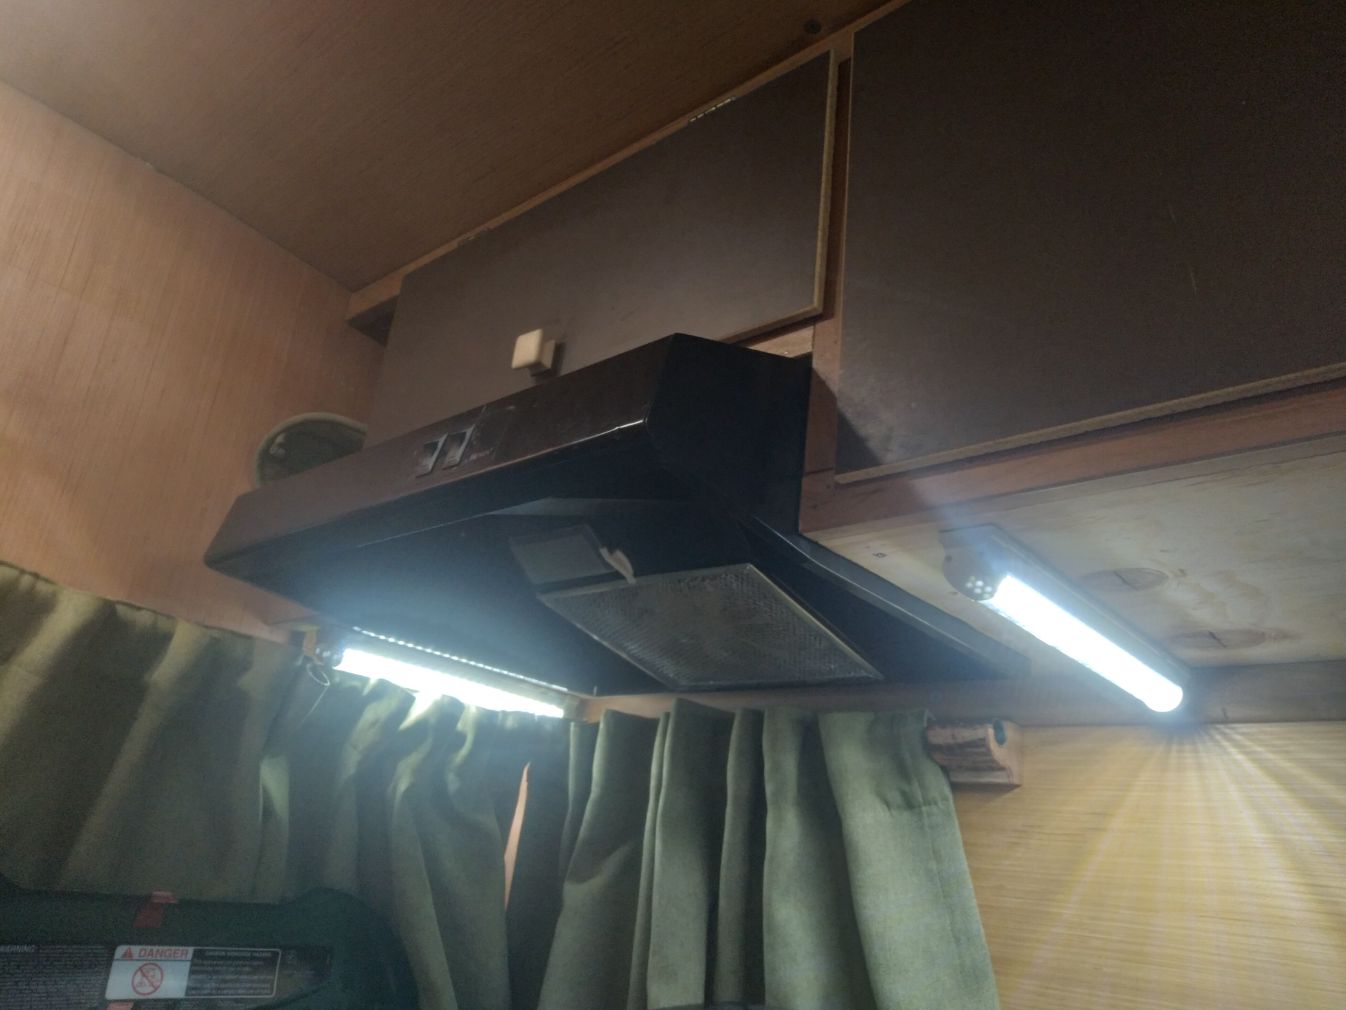
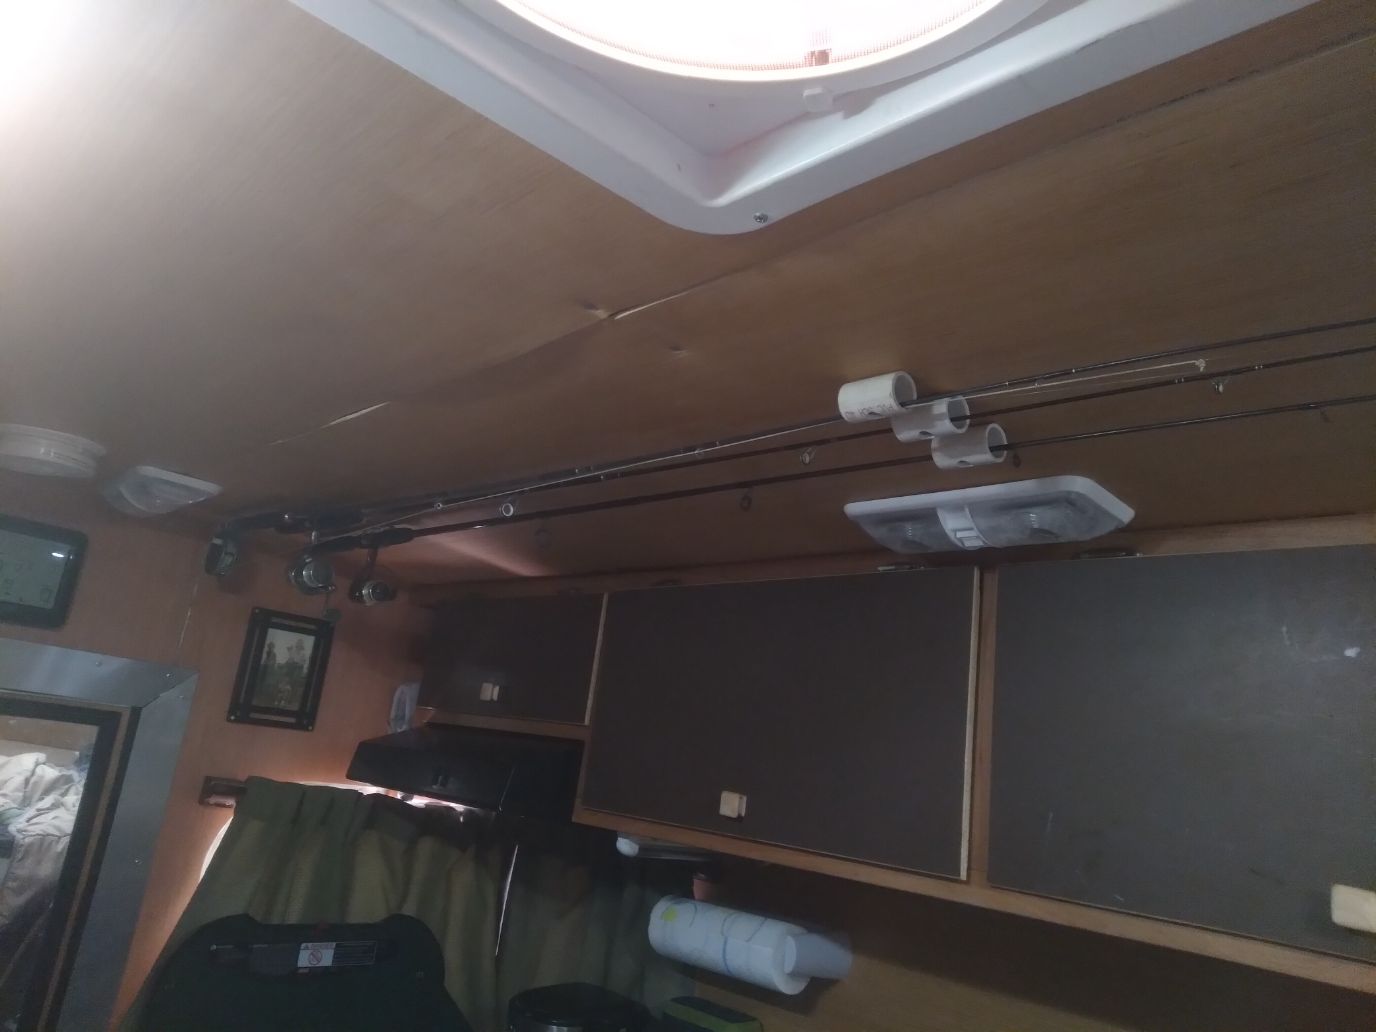
I like to be able to see so I added some under cabinet lights above the stove and sink. I wired them all together with their own switch. If I turn all the lights on in the camper it’s like daytime in here, it’s great. I have little interest in fishing but the state of Colorado said we had to have a fishing or hunting license to use certain boat launches so now I fish. I have two poles from back when I used to fish with my brother 20 years ago and a friend gave me a fly rod a little while back. I made a mount on the ceiling of the camper to hold my rods.
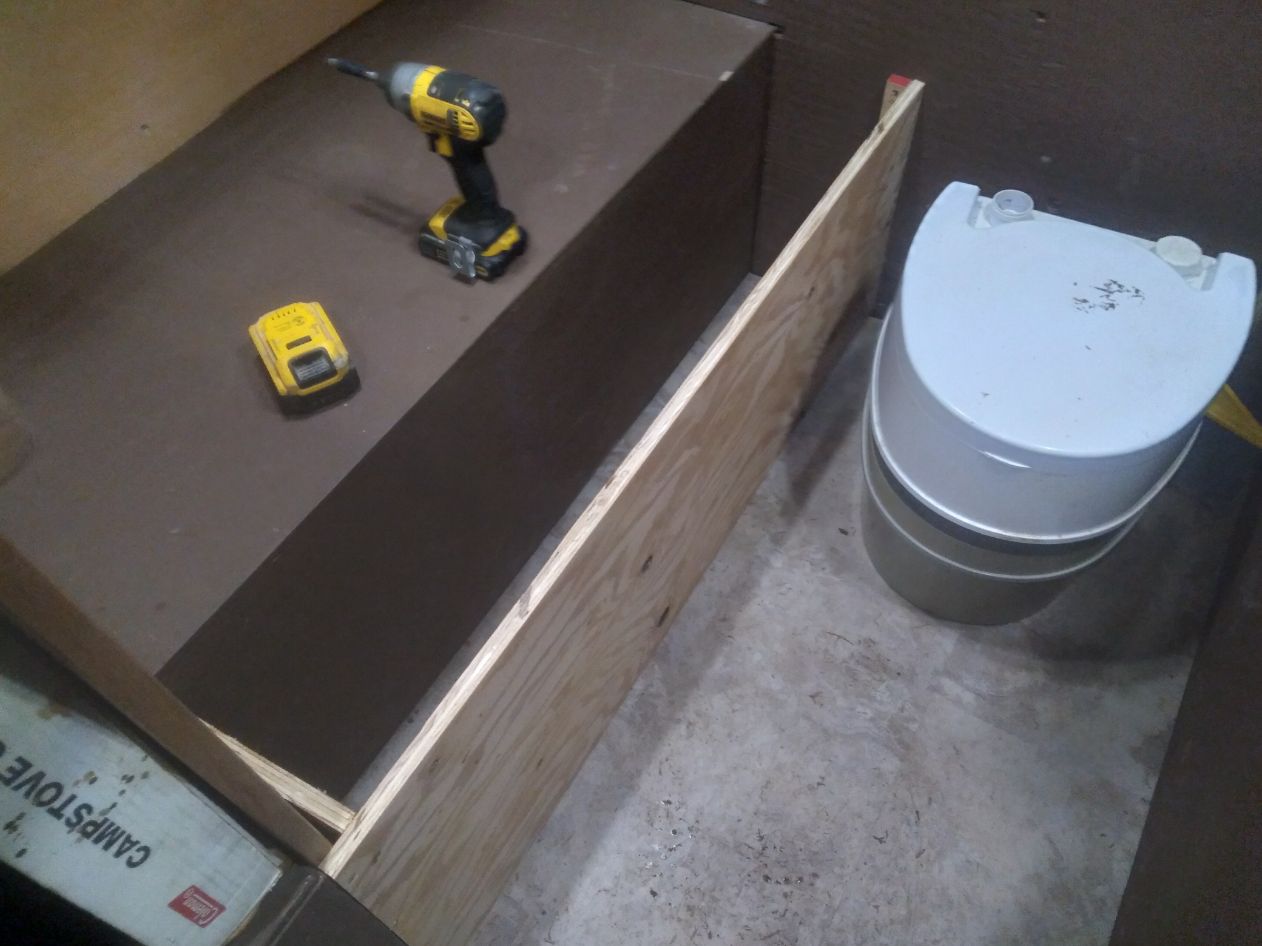
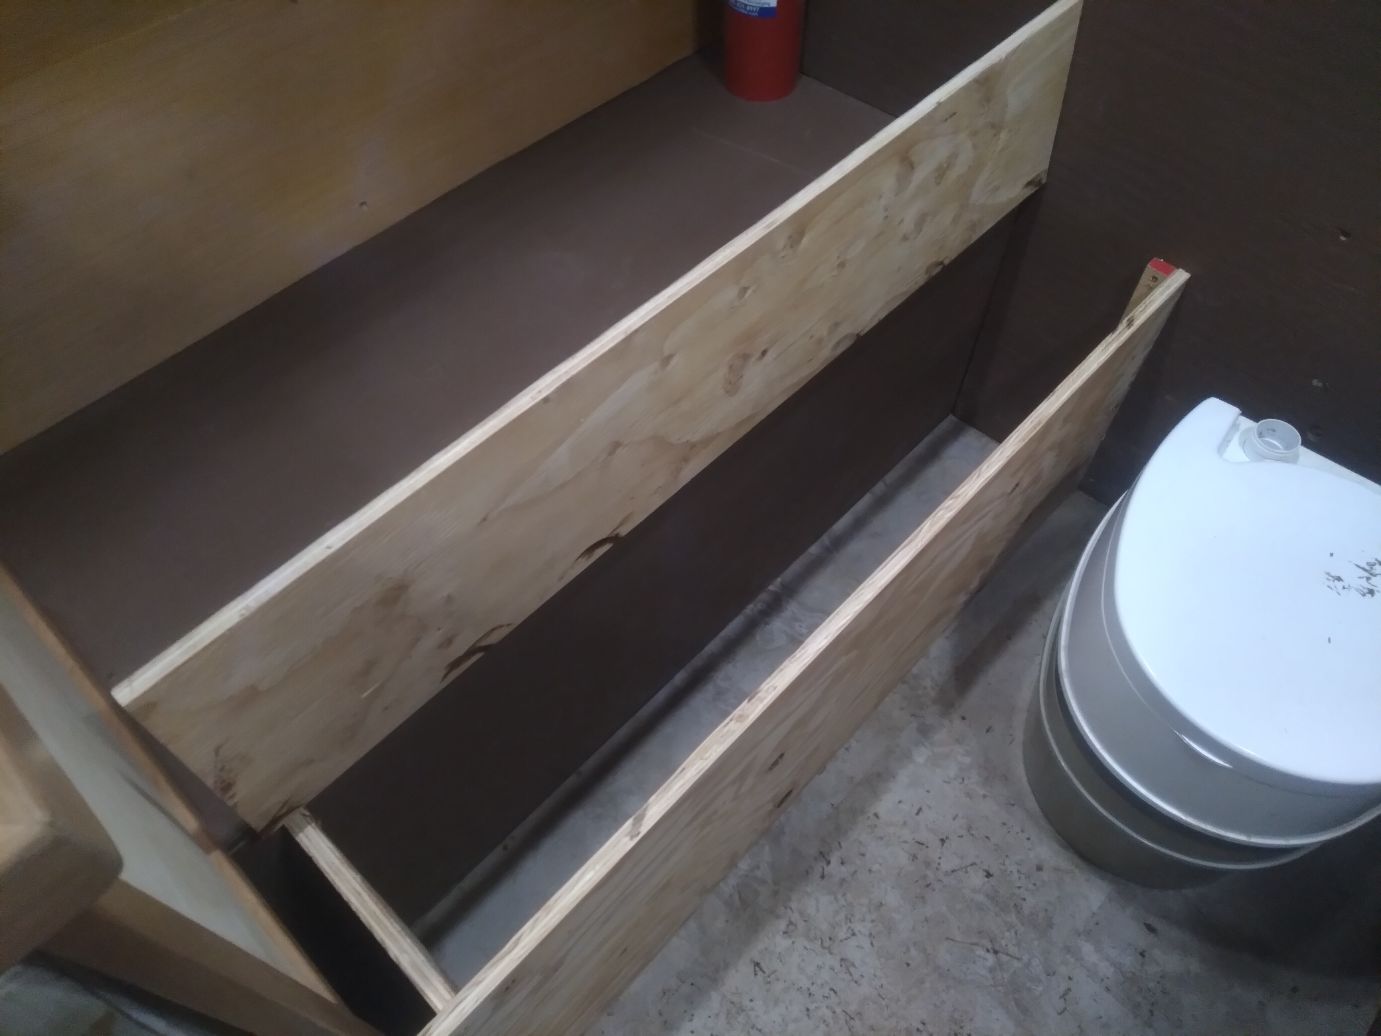
I had a dead space under the bench that worked for a place to put my shoes but I decided to add some storage instead. Up until now I’ve had a laundry basket sitting on top of the bench that I had to move to sit down. I decided to turn the space under into a hamper.
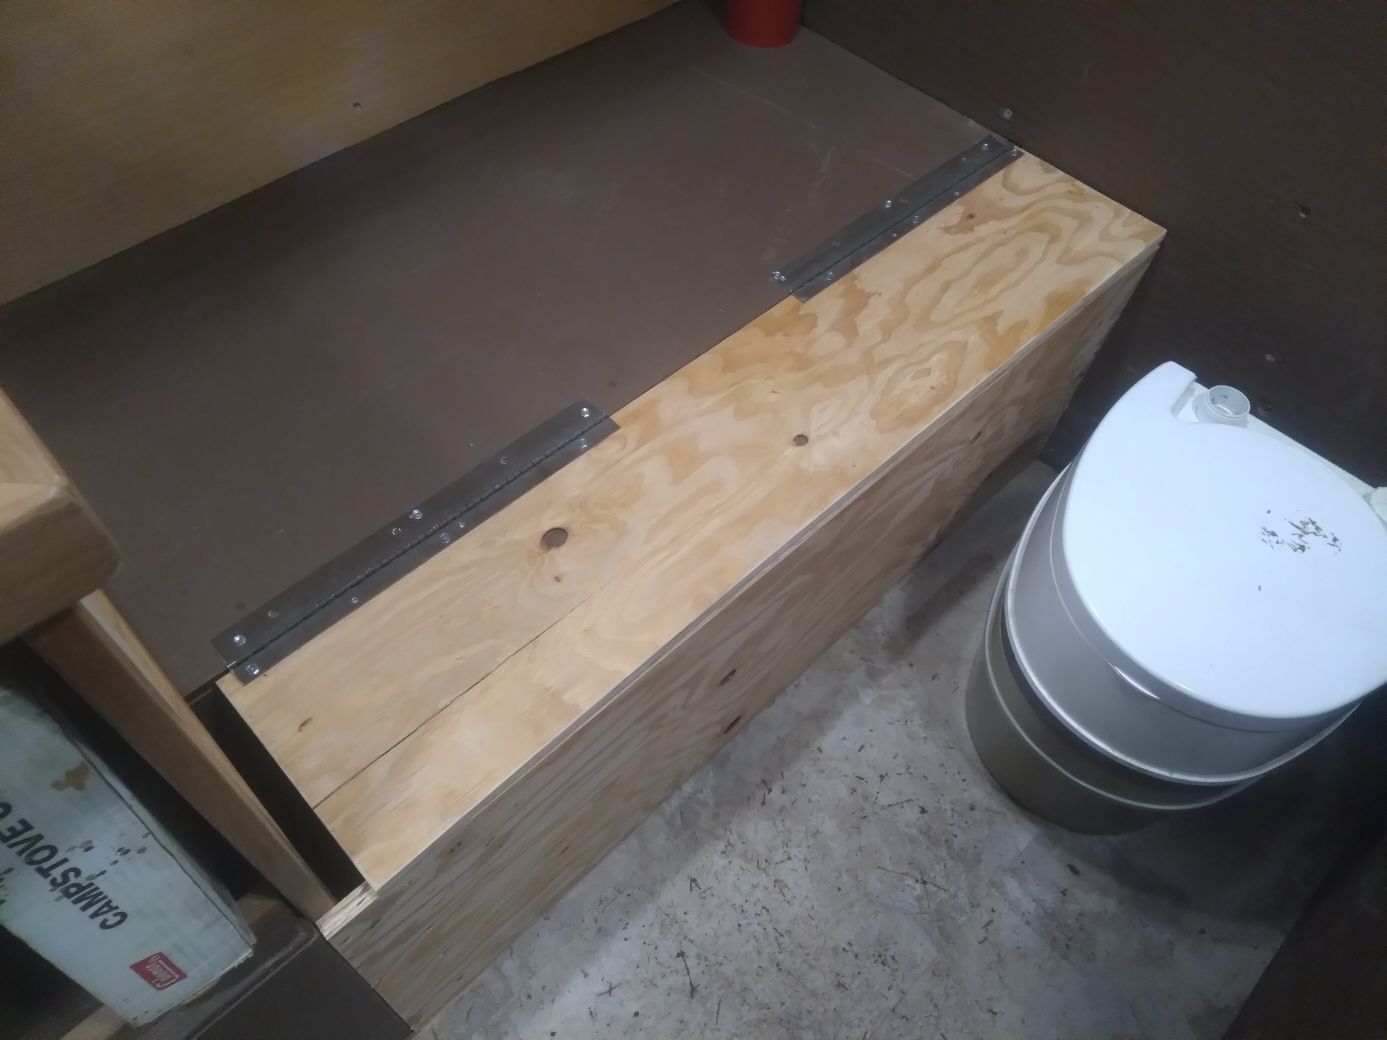
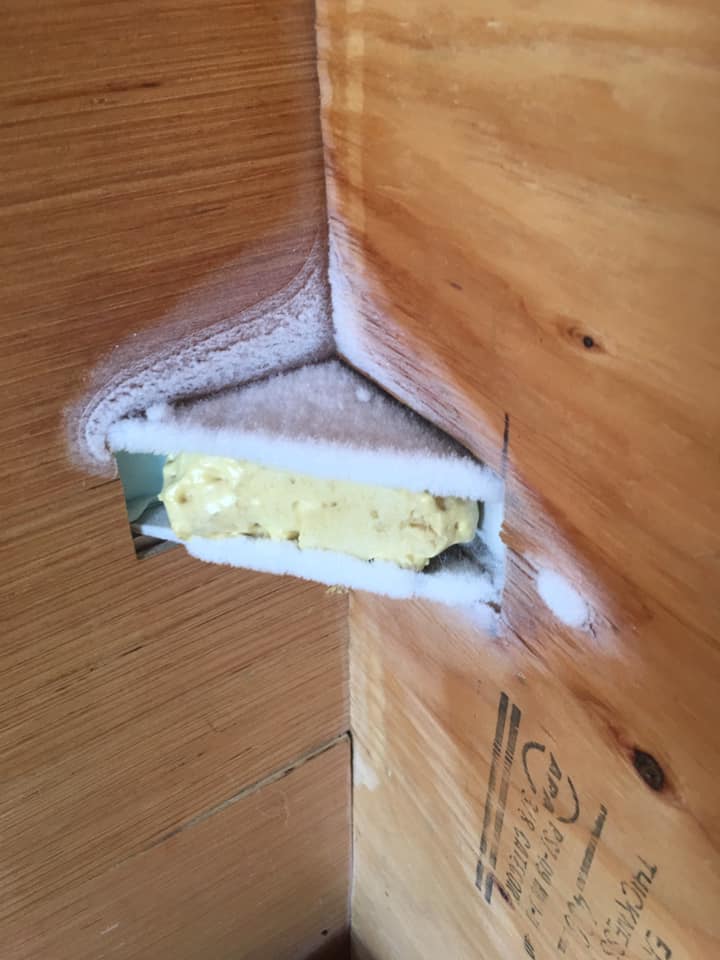
When I built the battery box, I cut a hole for ventilation. I wanted to keep that open to continue venting so I added a board to block it off leaving a few inches to breath, I left a gap in the lid as well. I have plans to make an arm rest on the right side that has a place to store the fire extinguisher that is easily accessible.
Electrical Update
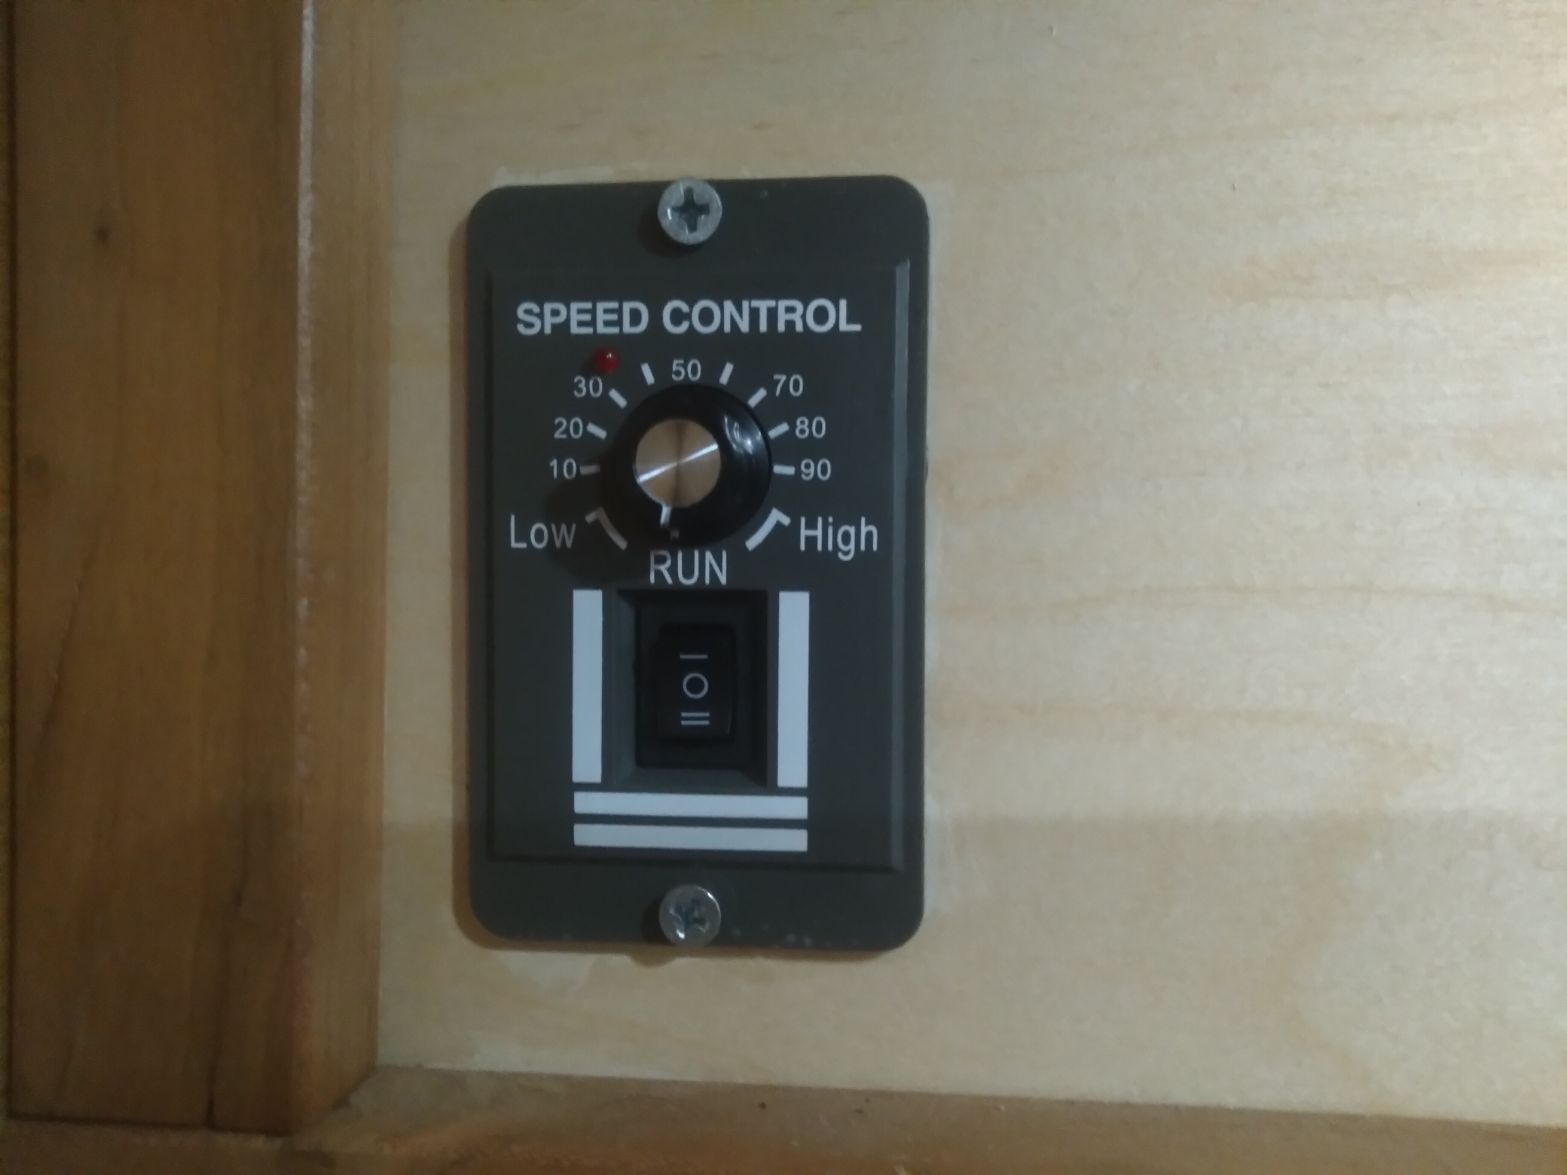
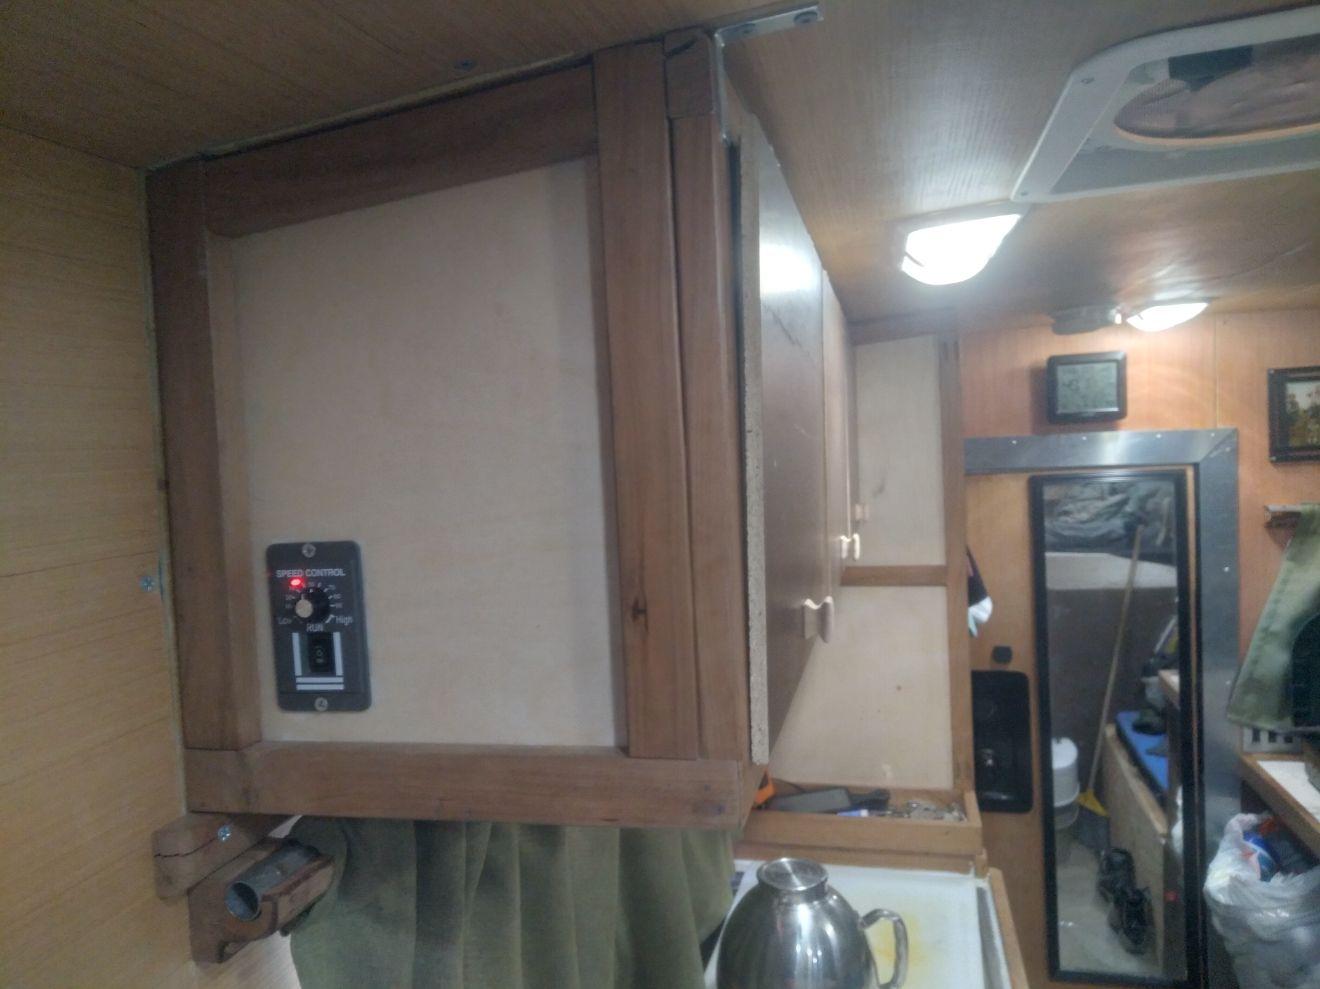
I also made a few changes to the electrical. The roof fan that I installed had a circuit board built into it that did not like the condensation over the winter. It fried the board and the fan stopped working. I looked into replacing the board but they were around $80 and it was likely that it would burn out again next winter. I found this switch and dial set up on amazon and rewired the fan to it, deleting the internal circuit board. This is mounted down and away from anywhere condensation would be an issue and it was only $20. The switch is a three way so that flipping it up blows out and down blows in. The speed control works great, I’m pretty happy with it.
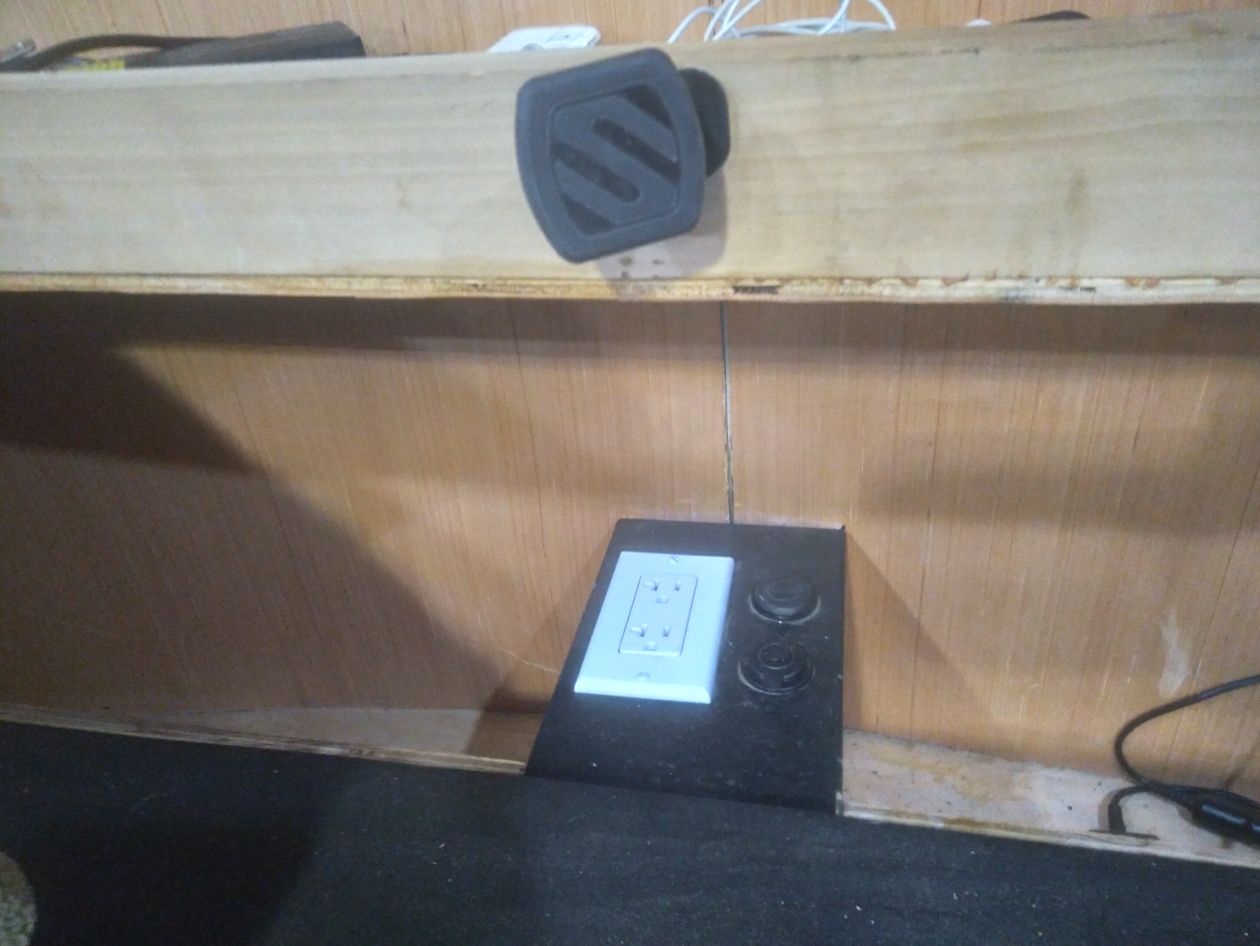
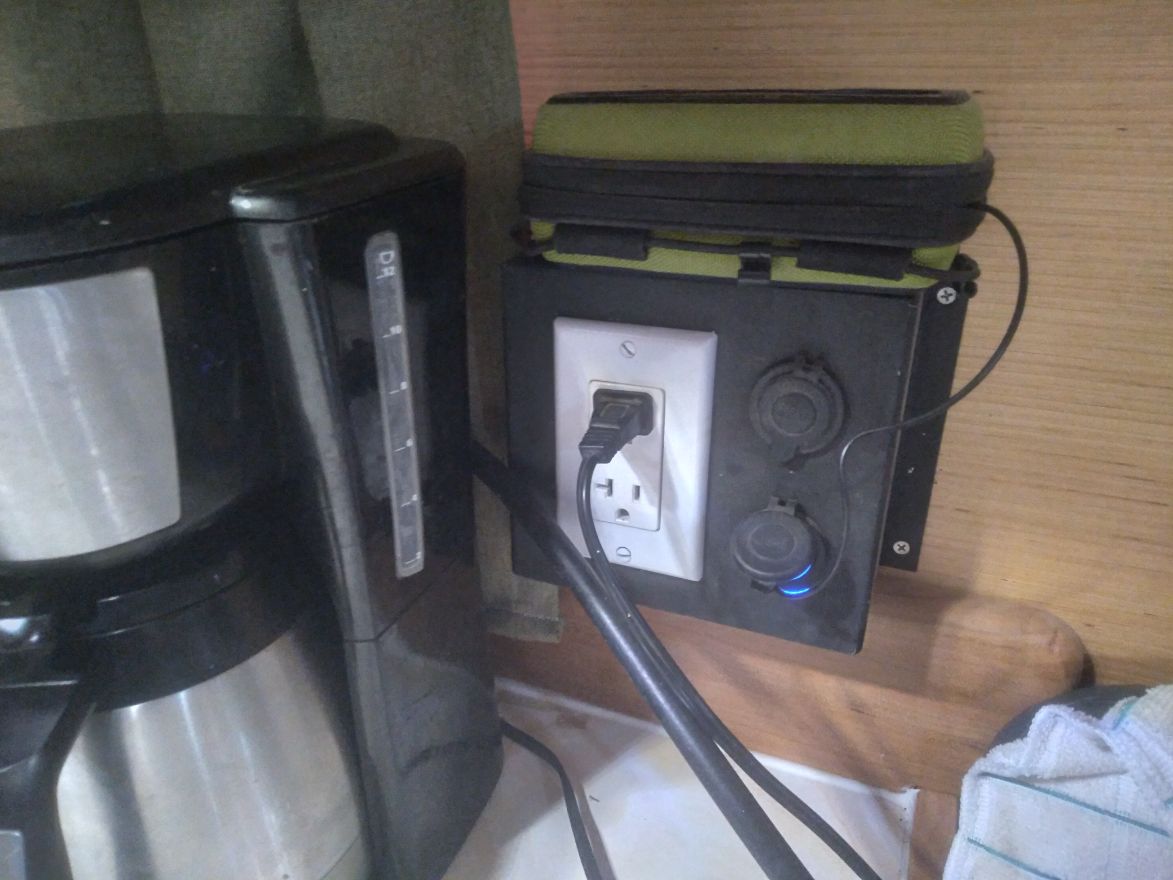


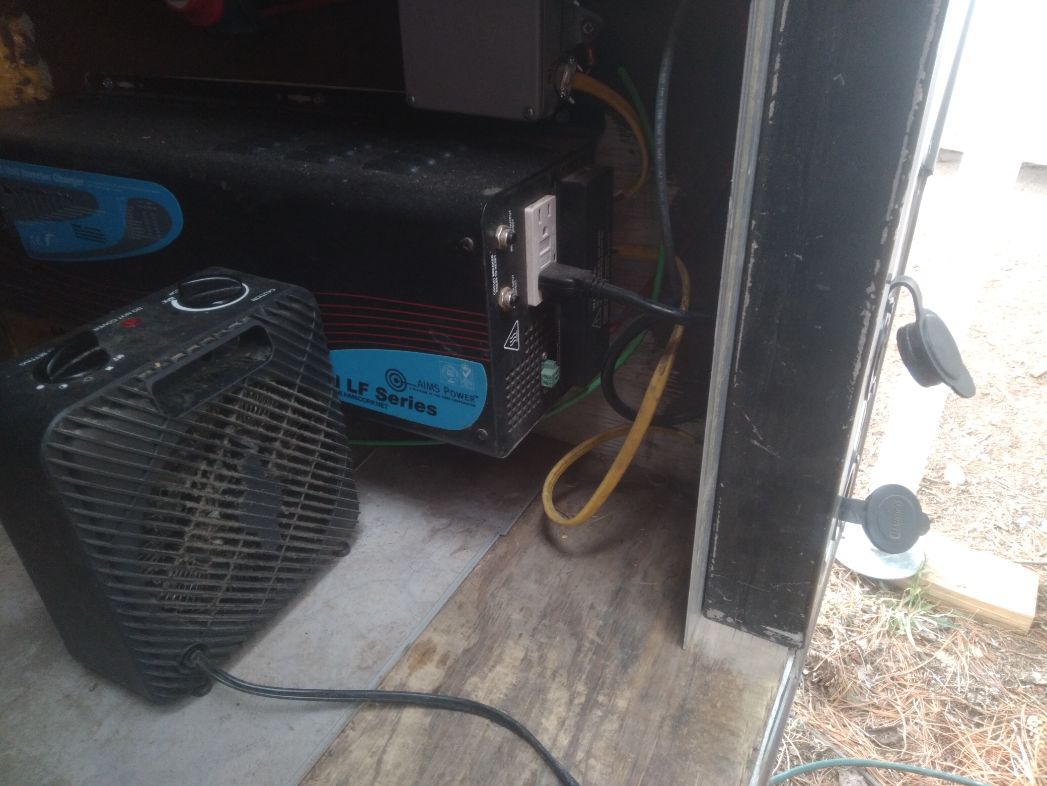
With the install of the cabinets I also got the 110v outlets near the stove and in the bed area wired in. I had run all the wiring and built outlet boxes before leaving LA but never hooked them up to the inverter. Up until now I’ve been using the plug on the back side of the inverter to make coffee. I added a box with two 20amp ac breakers and grounded it to the inverter and frame. I also finally installed an exterior outlet. I was going to go through and wire a GFI into the breaker box but I decided to just install a bulkhead outlet that plugs into the back of the inverter that is already GFI protected. On the back of the camper there is now an inlet for plugging into shore power with a regular 20amp extension cord and a single outlet run off the inverter.
I had originally wired the 110v to have an outlet by the fridge but with the redesign that added a sink and counter top where a bench was going to be it took away a convenient place to put an outlet. I have an open breaker in the new breaker box that I plan to add a GFI protected outlet in this area in the future. I haven’t decided how I want this area to look yet so for now it’s on hold till I figure out how I want it.
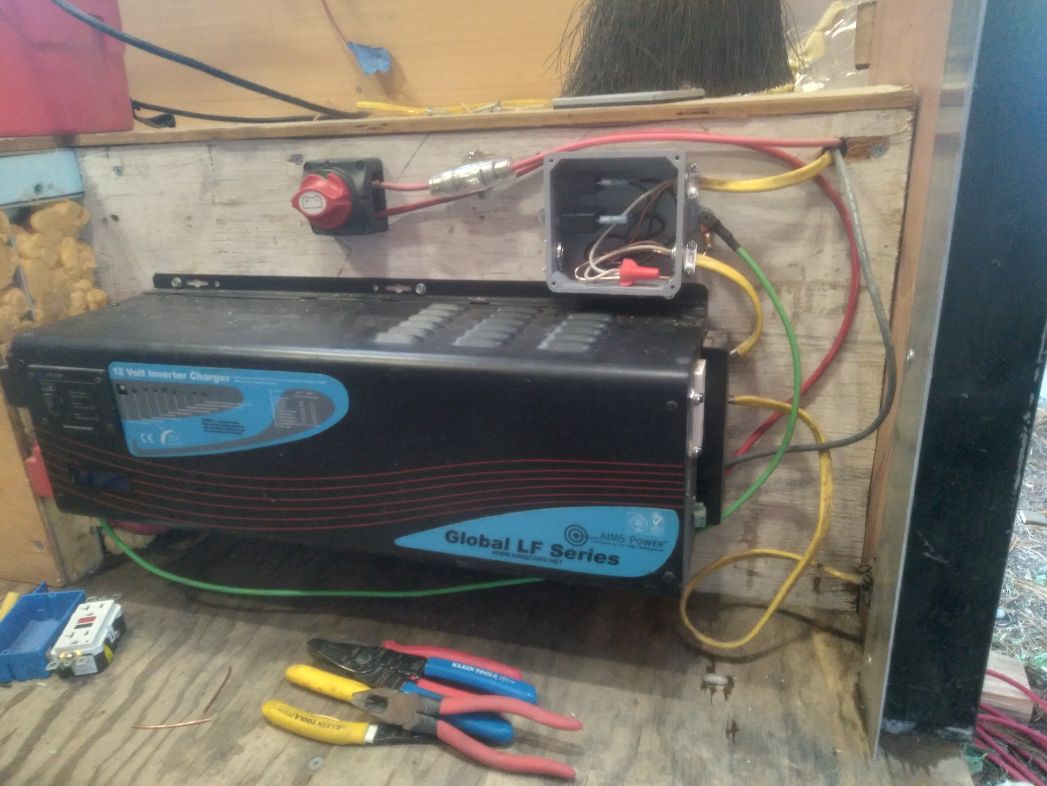
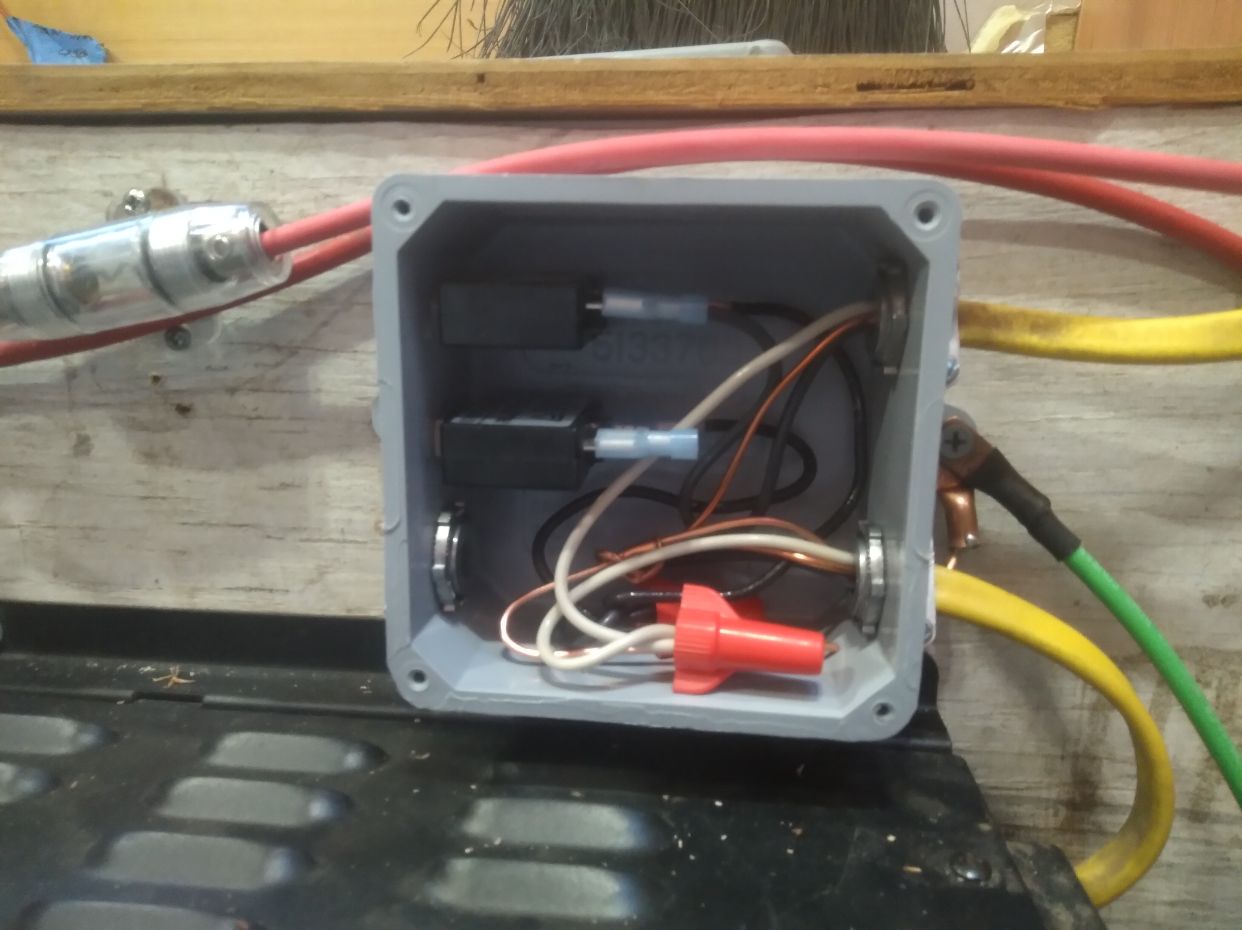
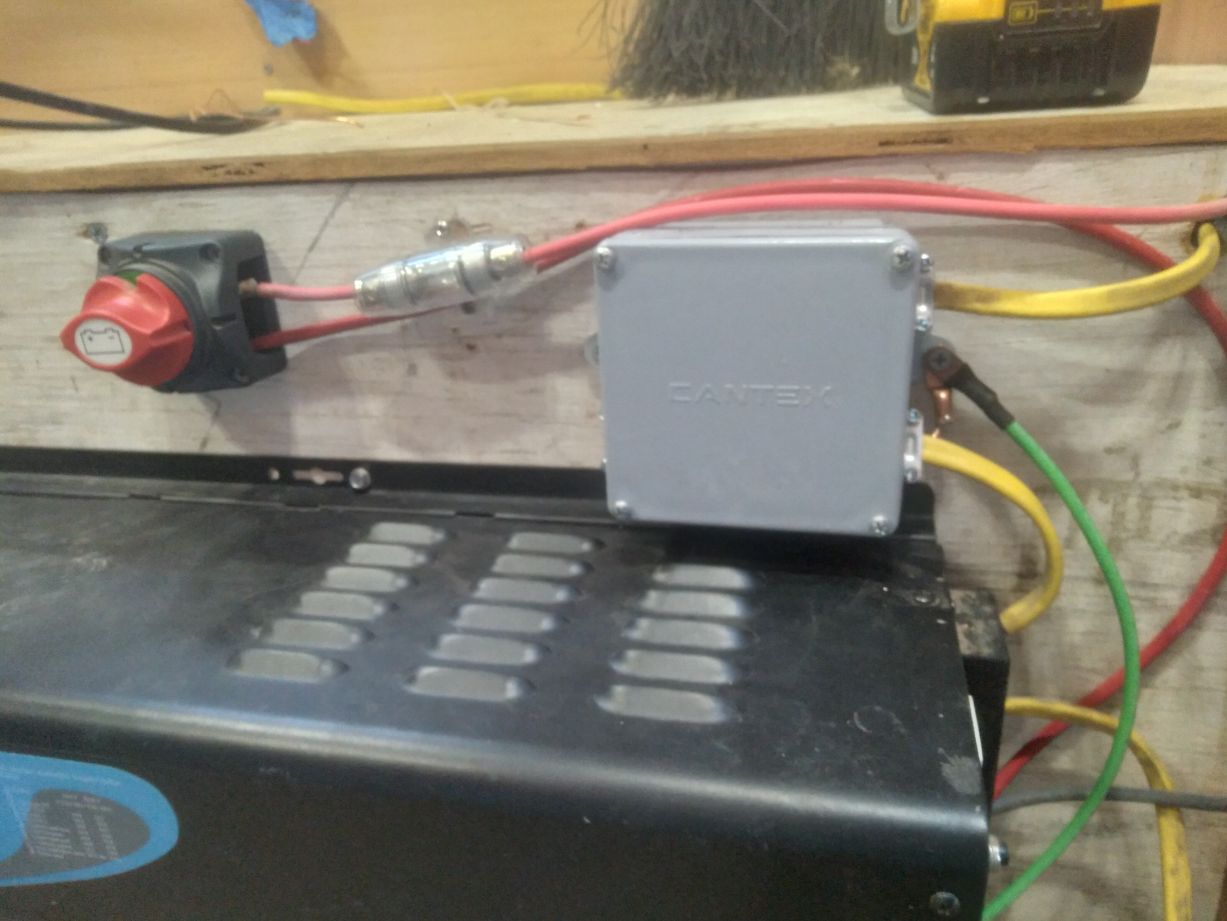
I’ve been having some issues with the solar, it turned out the housing around the fuse I put up on the roof fried and I wasn’t getting a charge to the batteries. I had the camper stored while I worked on that house figuring the panels were keeping the batteries topped off. I’m not sure if that is the issue but the batteries aren’t holding a charge very well and I’m going to have to replace them soon. I ran new wire down from the panels to the inverter/charger and put the fuse inside the cabin just before the cutoff switch. The fuse housing was rated for exterior use but it is what it is.
I’ve been rethinking some of my electrical system lately and plan to do some upgrades soon. I’ll post about it as I start to get it all installed.
0 Comments